• When you click on links to various merchants on this site and make a purchase, this can result in this site earning a commission. Affiliate programs and affiliations include, but are not limited to, the eBay Partner Network.

Don's 1969 Charger Restoration

Your cruising right along Don! Do I see more pieces on the charger in the background a well?
 
Your cruising right along Don! Do I see more pieces on the charger in the background a well?
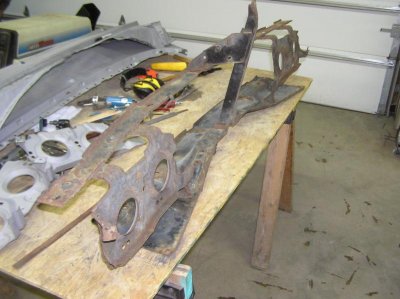
Yes sir you may see a piece here and there. When you tear a car apart like I did, it seems like they are everywhere!
Sometimes it's hard to keep track of them!
 
I noticed you have the inner structure, rockers and wheel tubs all in place. Are the in temporary or welded for good?
 
You weren't suppose to notice that! (man I get get ANYTHING past these guys LOL )
Yeah, I'm a bit out of sequence..... To answer your question, everything is held together by screws! Nothing permanent yet!
 
Haha I am observant lol. Probably a good idea to screw it until it's all fit together. I need to et my a@* in gear and get some quarters, drop offs, tail pan and outer wheel tubs so I can fit it all back together when the rails go in.
 
2nd grill support

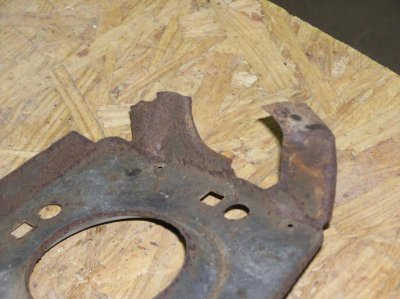
Ok so I figured I may as well fix this 2nd grill support.
P2140001.jpg

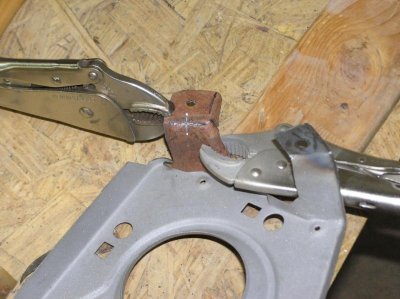
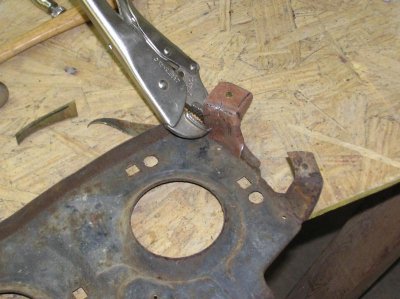
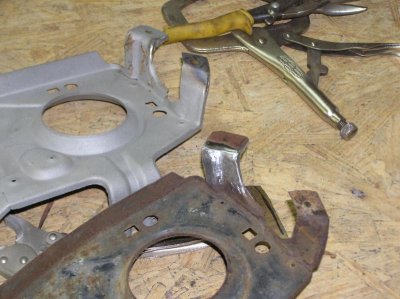
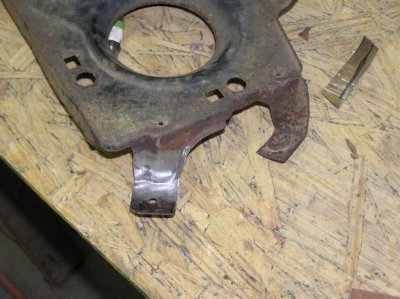
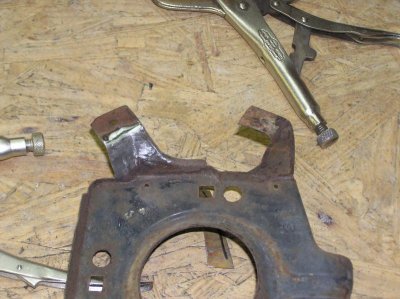
The head light buckets have the same issues with the tabs... actually there worse, they're rusted away
P2140017.jpg

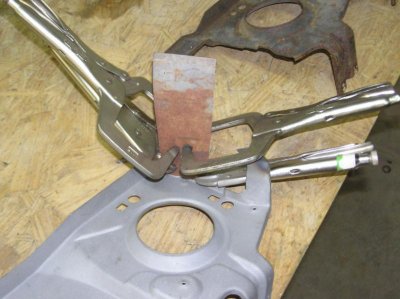
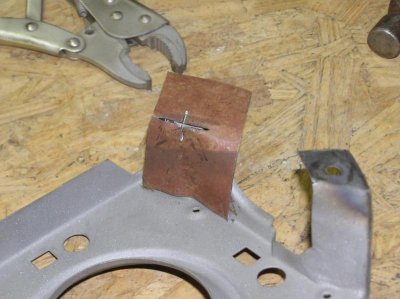
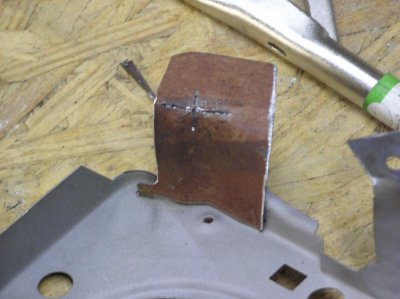
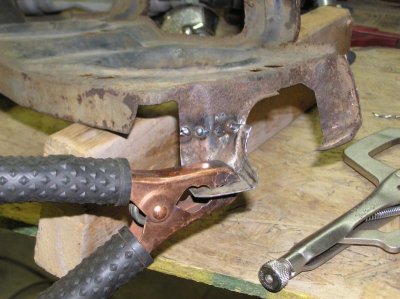
So I used the first bucket (media blasted grey) for a template and bent some metal around it
P2140018.jpg

P2140019.jpg

P2140020.jpg

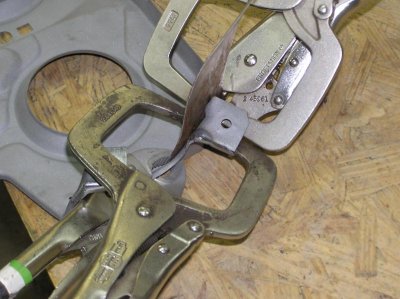
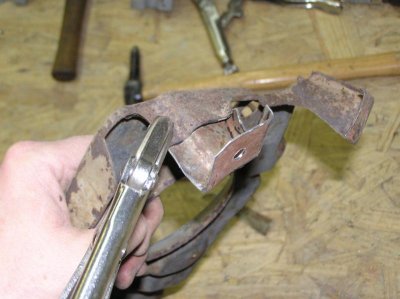
Put a relief cut in cause it need to bend in two different directions
P2140022.jpg

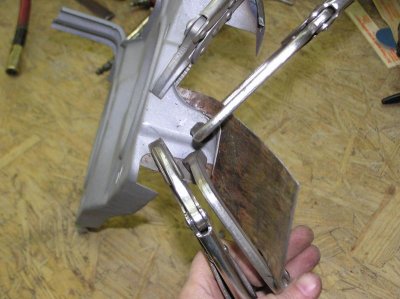
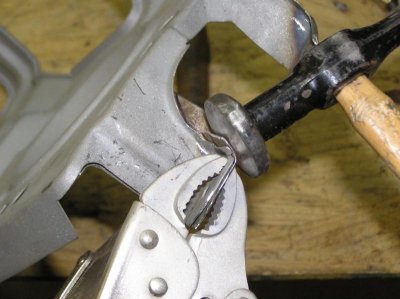
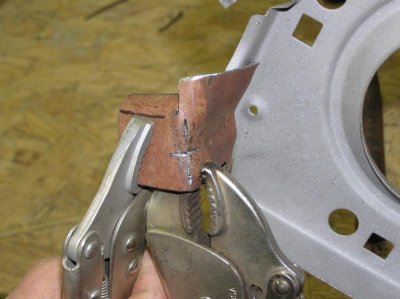
did some trimming and bending and hammering,
P2140023.jpg

P2140025.jpg

P2140026.jpg

P2140027.jpg

P2140028.jpg

P2140029.jpg

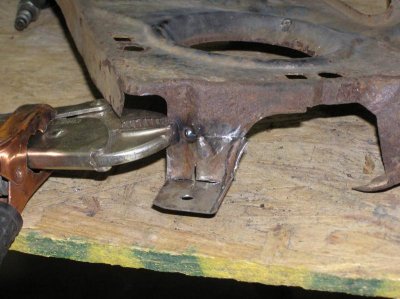
Then welded it up
P2140030.jpg

P2140031.jpg

Some final trimming and grinding and blending.......
Not to bad
P2140032.jpg

P2140033.jpg

P2140034.jpg
 
Don, Thats some good work there, you are becoming a great teacher in fabrication work...
 
Don, Thats some good work there, you are becoming a great teacher in fabrication work...

Thanks Ron,
Every time I start a "fix" I have no idea how to go about it.
It usually happens as I work through it! Just keep working through the problem and eventually you will get it! some fixes take a bit longer than others!
 
"some fixes take a bit longer than others!"

Don, I truly think a book could be written on this! :)
 
cars looking & coming along nicely
daunting task when they are taken apart to the level you've done...

keep it up, good read, fab & detailed restoration photos too
 
Thanks Ron,
Every time I start a "fix" I have no idea how to go about it.
It usually happens as I work through it! Just keep working through the problem and eventually you will get it! some fixes take a bit longer than others!

Yes indeed Don . . . so true . . . BUT, you never stop, you never give up, and you keep tackling the "fixes" one after another ! !

Budnicks referred to "the level" you've taken apart the car - that is an understatement, But it's so cool to watch you rebuilding it one step at at time!

Keep at it Don - your masterpiece is moving along nicely ! ! Thanks for the updates . . .
 
Don, I was just looking at my new floor pan and took notice the park brake cable bracket and the bucket seat blocks are all there prewelded. I know I have seen a lot of people having to add their old ones to the amd floors. My floors are goodmark. Seems though goodmark adds a lot of little brackets that amd doesn't such as inner bracing in rockers and park brake cable bracket on rear frame rail etc. Just wanted to mention it I know your using a floor from the coronet but may help others following your thread.
 
Great work again Don, I have a feeling we'll be seeing something that resembles a Charger again in the not so distant future?
 
Awesome work Don!

In the future, all of the "I Want to Learn How to Weld and Fabricate" questions will be directed to your restoration thread.
 
Don, you are doing a great job. I am always checking your thread and learning from your progress and using that information to rebuild my charger. Keep up the great work.
I had to fix most of my grill support tabs also. One thing that I noticed when most grill supports are removed it will almost always twist the tabs some. The correct position for the tabs is straight out or perpendicular from the end of the support. They are easily straightened, especially compared to the complicated work that you have done on refabricating the tabs.
 
Yes indeed Don . . . so true . . . BUT, you never stop, you never give up, and you keep tackling the "fixes" one after another ! !

Budnicks referred to "the level" you've taken apart the car - that is an understatement, But it's so cool to watch you rebuilding it one step at at time!

Keep at it Don - your masterpiece is moving along nicely ! ! Thanks for the updates . . .

Thanks for the kind words Kahn, I think its a long way away from being a masterpiece.
More along the lines of a big ol puzzle! like Propwash found.
Looking good Don! I think the next '69 Dodge Charger puzzle you do should look like this:

View attachment 240807

Think you earned the right to dial it down a notch or two in the puzzle department.
I would really like to get this pic scaled up to poster size and put it up over the full sized Charger puzzle. That would be cool!


Don, I was just looking at my new floor pan and took notice the park brake cable bracket and the bucket seat blocks are all there prewelded. I know I have seen a lot of people having to add their old ones to the amd floors. My floors are goodmark. Seems though goodmark adds a lot of little brackets that amd doesn't such as inner bracing in rockers and park brake cable bracket on rear frame rail etc. Just wanted to mention it I know your using a floor from the coronet but may help others following your thread.
Thanks for that info Pat,
I recently found out that the bracing supports are in the rockers from Goodmark. I did not know all of the brackets were on there floors. If I decide to buy a full floor I will definatly look at Goodmark's! I really think AMD should have these included. Especially when you look at what your paying!

Great work again Don, I have a feeling we'll be seeing something that resembles a Charger again in the not so distant future?
I have already put the quarters on for a test fit..... But could not go further because the rear of my car is against the overhead door, which means I have to have the door open to work on the car. Seeing how it's been a nasty winter that has delayed doing that.

Awesome work Don!

In the future, all of the "I Want to Learn How to Weld and Fabricate" questions will be directed to your restoration thread.

Here is a thread that I learned a LOT about welding. THIS guy is truly an AMAZING fabricator! I HIGHLY recommend his thread!
http://www.garagejournal.com/forum/showthread.php?t=182565

Don, you are doing a great job. I am always checking your thread and learning from your progress and using that information to rebuild my charger. Keep up the great work.
I had to fix most of my grill support tabs also. One thing that I noticed when most grill supports are removed it will almost always twist the tabs some. The correct position for the tabs is straight out or perpendicular from the end of the support. They are easily straightened, especially compared to the complicated work that you have done on fabricating the tabs.
Thanks showard, I am subscribed to your thread as well. That is the great thing about this forum, we all are helping each other! Would you (or anyone) have some pics showing the true orientation of these tabs?
 
Don, here are some pictures of straight aligned tabs. Hopefully these are clear enough to help.
IMG_0615.jpg

IMG_0616.jpg

IMG_0618.jpg
 
Just to be clear, these headlight buckets are from a 69 Charger?
 
The grill supports for a 68 and 69 are identical. I bought a 69 grill for parts and the supports are the same (interchangeable). These buckets pictured are still spot welded to the rest of the grill support.
 
Auto Transport Service
Back
Top