• When you click on links to various merchants on this site and make a purchase, this can result in this site earning a commission. Affiliate programs and affiliations include, but are not limited to, the eBay Partner Network.

Don's 1969 Charger Restoration

I agree. Don has the patience of Job. Well done.
Thanks, but I wish that were true!

Nice work Don!
Thanks Paul.
Say when your done with some of your clamps let me know, they can be put to good use on my charger.

- - - Updated - - -

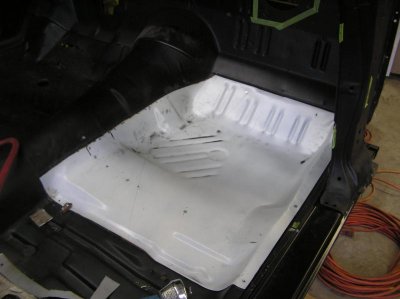
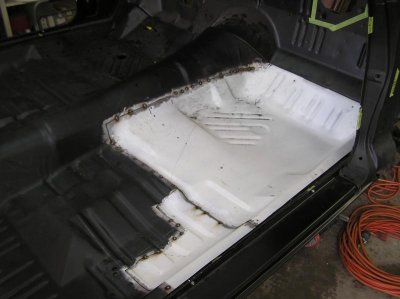
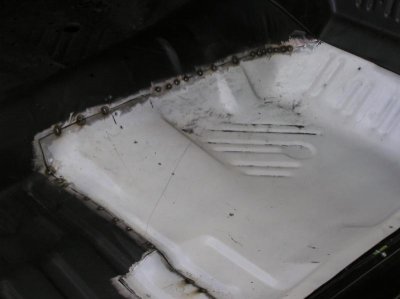
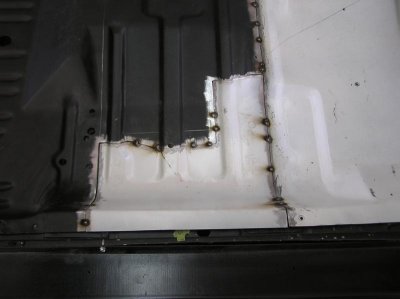
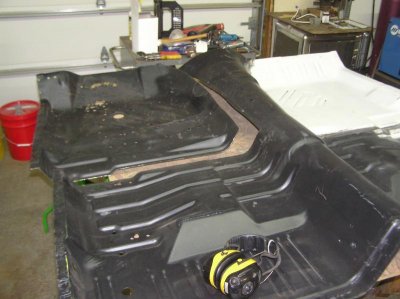
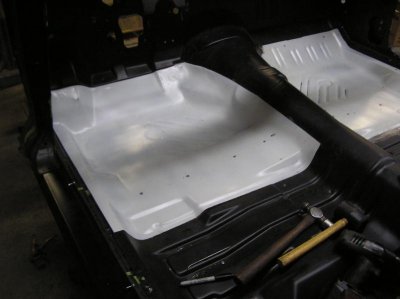
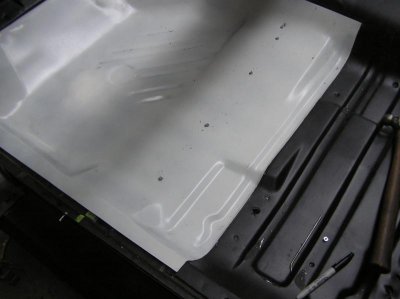
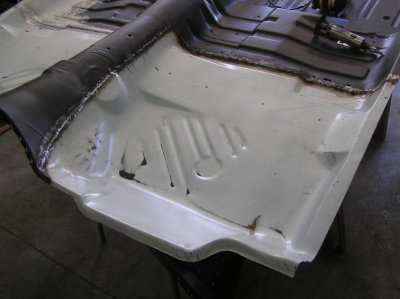
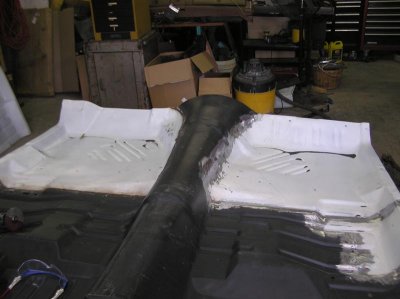
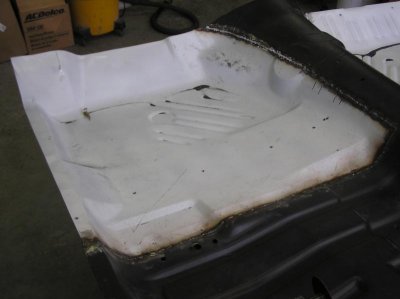
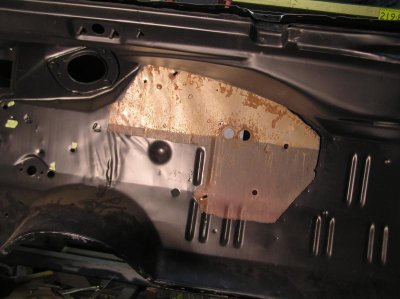
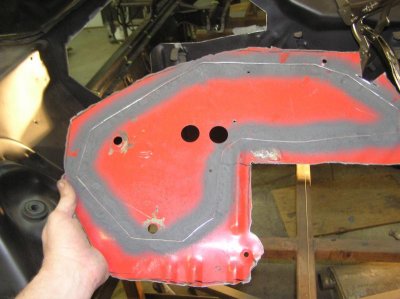
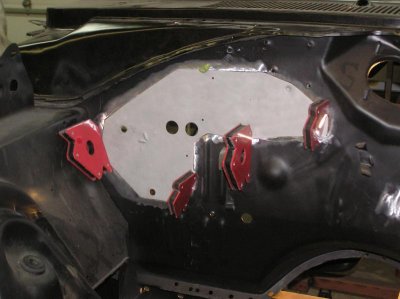
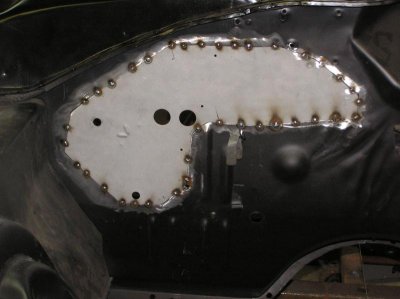
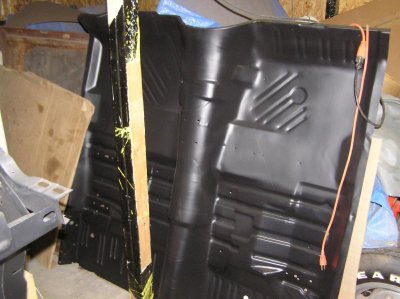
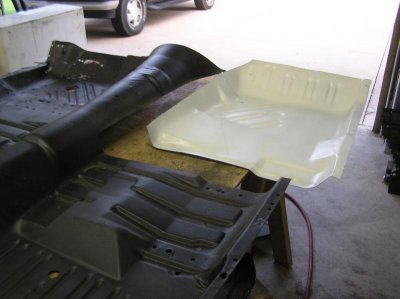
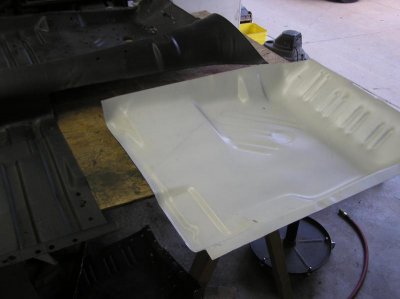
Here are a few pics showing how I sectioned in new metal for the floor. (Look familiar Hunt?)

Basically how I did this Is I layed the original in and screwed it down with some self tapping screws.
Then I over layed the white pan and traced around it.
Then I took the black pan back out and cut out the bad leaving a 1/2 for adjustment
Then back in went the black floor, making sure it was screwed down tight. Then I fit in the white pan and trimmed were I needed until I was satisfied it fit, then I scribed around it again. Removed it all, trimmed it to the new line then back in it went, had to to a little trimming here and there. Once I was satisfied with it I tack welded, pulled it out then welded er up!
P8100021.jpg

P8100022.jpg

P8120023.jpg

P8140024.jpg

P8140025.jpg

P8140026.jpg

P9010027.jpg

P9010028.jpg

P9010029.jpg

P9130034.jpg

P9130035.jpg

P9130036.jpg
 
Great looking fab work ( as always ) on the car there Don . . . Sure enjoy following along on your build and seeing your progress . . .

Keep at it and keep us posted ! ! !
 
Don't know that I've ever seen someone replace a floor with the floor not even in the car??? I keep hoping I'll click on this thread and see something that resembles a Charger haha.... you'll get there. Nice work as usual Don.
 
Looking good Don. I'm glad you were able to use a couple of my parts on your build. Almost makes me feel like I am a part of the resurrection now LOL.
 
AC firewall 2 non AC firewall

I have been putting this off,

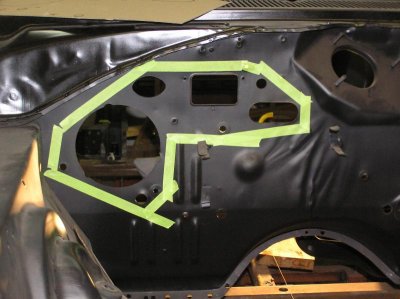
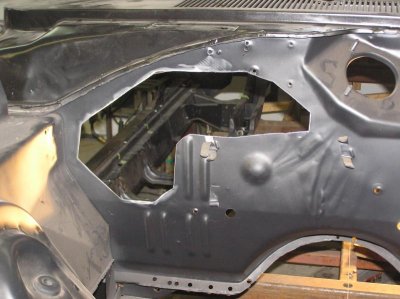
I need to section out my firewall to bring it back to a non AC car!
For those that don't remember the front clip I am using came from a 69 4 door Coronet with AC.
I decided not to change over to AC, this way it would be like original. (OK, and cheaper)

This took a lot of thought. (need to be sure that I remove some holes, and add others)
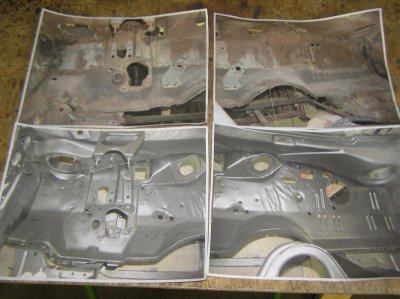
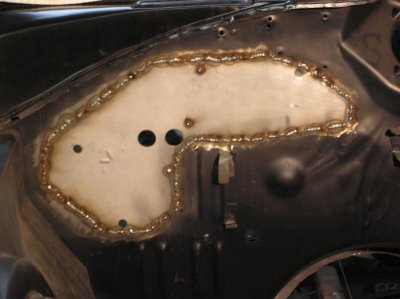
So what I did was take pics of an AC firewall and non AC firewall compare the two and fill the small holes and drill out the others.

PC090002.jpg

Then it came time to section out and fill the large holes.
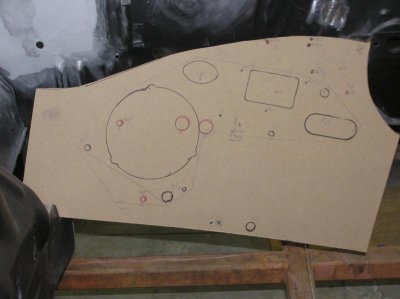
What I did was I made a template and traced out both firewalls
(using 2 holes common between the firewalls as an alignment)

PB280036.jpg

Next I layed out were I wanted to cut

PB130003.jpg

Then cut it out.

PB130012.jpg

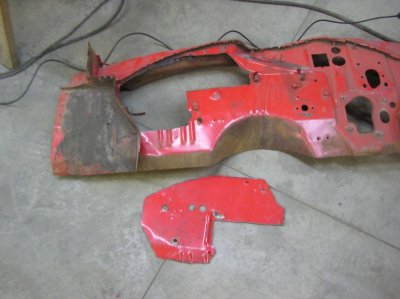
I then transferred the hole to the template and marked the donor.
Note: the donor section is larger and I included the alignment holes

PB130005.jpg

I think you can see the 1/4 drills I used to align the panel in these two pics.

PB130009.jpg

PB130010.jpg

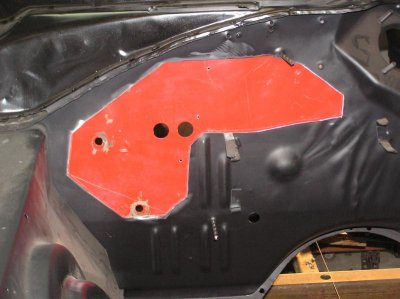
At this point I traced the opening onto the donor, cut and fit, and welded her in!

PB130014.jpg

PB140017.jpg

PB140019.jpg

PB160020.jpg

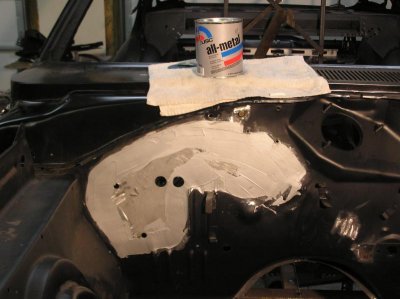
Used some All Metal to smooth out the imperfections
PB190023.jpg

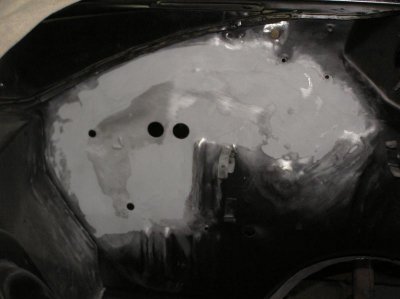
All done. Just needs some primer.
PC090001 (2).jpg

PC090002 (2).jpg

- - - Updated - - -

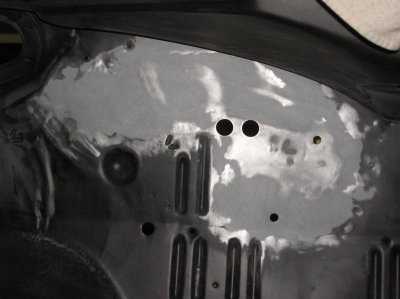
Here is a pic of the floor after primer

PC090001.jpg
 
Crazy, just crazy! I hope a magazine gets ahold of this thread when it's done cause I've never seen anybody go to this length.... Insane amount of determination!
 
Thanks for the compliments guys...
It's kinda weird how much I dread fixing certain areas of the car (mostly because I have NO idea how to fix it)
but I'll work through it, get it done, and it didn't seem all that bad!
 
Seams to be the case more often than not..... but then there's the ones that look easy and end up being a nightmare.
 
I have a feeling I will see that in the drive line or wiring!
 
Looking great Don! I am getting ansy to get back at mine! Nice to see your back at it! I'm on the other side and looking forward to the mechanical and electrical side of the restoration. That's probably the mechanic in me.
 
I don't think anyone could or would say this is anything beside an awesome build Don.. It truly is some great work you've been dong! :) Looks awesome!
 
Looking great Don! I am getting ansy to get back at mine! Nice to see your back at it! I'm on the other side and looking forward to the mechanical and electrical side of the restoration. That's probably the mechanic in me.
Thanks Pat, I know what you mean about antsy. I am still not at it as much as I want to be. After the holidays, in the dead of winter, that's when I'll get back at it!

I don't think anyone could or would say this is anything beside an awesome build Don.. It truly is some great work you've been dong! :) Looks awesome!
Thanks Ron, I enjoy watching your build too!
 
That All-Metal is good stuff, I used a lot of it. Superb work/welding/fabing Don! I know what you mean about dreading certain areas. I felt/feel the same way, nervous about some parts of the process because I've never done it. Apparently you have got the brains/skills to figure it out, and make it look great too!
 
Last edited:
Thanks for the compliments guys...
It's kinda weird how much I dread fixing certain areas of the car (mostly because I have NO idea how to fix it)
but I'll work through it, get it done, and it didn't seem all that bad!

I know exactly what you mean about that Don . . . I would have to agree with you on your statement ( for the most part . . . ) . . .

Keep at it Don - love to follow along on your build ! !
 
Great build. Very enjoyable to watch you bring this beast back to life. Cheers from Canada!
 
I had to stroll through all the pics again and realized that you are the craziest sumbitch in ALL of mopar land and the pics made my head hurt.
I do not understand what would possess a person to go to these extremes. You certainly fill some mighty big shoes.
 
Auto Transport Service
Back
Top