• When you click on links to various merchants on this site and make a purchase, this can result in this site earning a commission. Affiliate programs and affiliations include, but are not limited to, the eBay Partner Network.

Don's 1969 Charger Restoration

Thanks chargervert

So right now I am prepping the back half of the car. Getting it ready for the single stage T7 that will be sprayed from the door jams back. Hopefully this weekend I will have a temporary makeshift spray booth setup in my garage.
 
So here is the temporary spray booth I setup
20210621_175740.jpg


Here are some before pics

20210621_175850.jpg

20210621_175905.jpg

20210621_175927.jpg


20210621_175943.jpg
 
And now some pics of the color on

20210621_191257.jpg


This is what it looks like with NO ventilation
Yeah I snapped this photo and had to get out! And yes I did have a respirator on

20210621_191529.jpg


20210621_191525.jpg
 
Here he is giving me the all done signal with a thumbs up

20210621_202825.jpg


Here are some after pics

20210621_211041.jpg


20210621_211100.jpg

20210621_211118.jpg

20210621_211206.jpg

20210621_211326.jpg

20210621_211344.jpg

20210621_211358.jpg

Turned out AWESOME!
I love the color. (T7 Dark Bronze)
My thanks to Rafael, he really had to work hard especially when he could hardly see!
 
The next things to do will be installation of the quarter panels, deck filler, tail panel, rear valance, and rear corners. Lord willing, and with Kolly's help, it will be done this Sat
 
Wow Don that look awesome! Your car has come so far since I started following about 7-8 years ago. It’s looking great and has to feel really good for you to think back to how far apart it was mid 2014. Keep up the great work, maybe someday I will join you with mine !
 
Well It took a bit longer than I thought. But we did get it.
Everything is welded in at the top and along the trunk.
I still need to weld in the quarters along the door and bottom.

Here are a few pics

20210626_151048.jpg

20210717_190645.jpg


20210717_190656.jpg


20210717_190704.jpg

20210717_190725.jpg

Now I have lots of grinding to do..
 
Wow, seems like forever since I first started watching this build.. finally on the home stretch! It may not feel like it but from where you started.. I'm thinking it's at least at the 3/4 stage. Looking great:thumbsup:


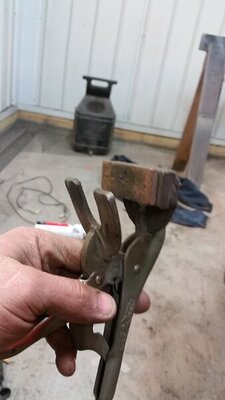
You need to make yourself a set of these, they kick *** for plug welding the panels back on. I just modified these adding the mounting pad for a piece of 1/4" thick copper. Not only does it clamp it tight but it allows you to crank the amps up for great penetration and a flat weld without any risk of blowing through.

20160123_215425.jpg
 
Wow, seems like forever since I first started watching this build.. finally on the home stretch! It may not feel like it but from where you started.. I'm thinking it's at least at the 3/4 stage. Looking great:thumbsup:


You need to make yourself a set of these, they kick *** for plug welding the panels back on. I just modified these adding the mounting pad for a piece of 1/4" thick copper. Not only does it clamp it tight but it allows you to crank the amps up for great penetration and a flat weld without any risk of blowing through.
Thanks Devin,
maybe at the 3/4 stage with body work, and 1/8 - 1/4 over all? It's hard to say.
I just keep at it when I can.
You know I think I have something like that copper backed clamp you made.
I will look for them. Thanks for suggestion!
 
All I can say is wow! It took me a few days to read it all with my wife asking what's so compelling on your phone? I've restored quite a few cars and I have to say, for your first one, you have surpassed what most would think is possible to do in a resto. I chuckle when I hear guys say, oh that's way to rusty to save. I see the car done in my head, just have to put metal where it's missing. I have 2 I'm getting ready to do for myself, then I'm going to be looking for one that's "to far gone" lol and save it. Like you have.
Hats off to you. Keep on, keepin on. I'll be following.
 
Last edited:
You are coming along great.
Thank you

All I can say is wow! It took me a few days to read it all with my wife asking what's so compelling on your phone? I've restored quite a few cars and I have to say, for your first one, you have surpassed what most would think is possible to do in a resto. I chuckle when I hear guys say, oh that's way to rusty to save. I see the car done in my head, just have to put metal where it's missing. I have 2 I'm getting ready to do for myself, then I'm going to be looking for one that's "to far gone" lol and save it. Like you have.
Hats off to you. Keep on, keepin on. I'll be following.
I have to say when I got the car I did not think it would evolve into this,
but hey it keeps out of trouble!

Looking really good Don!
Thanks Paul

Very nice!
It's a work in progress
 
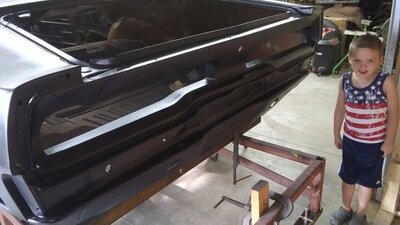
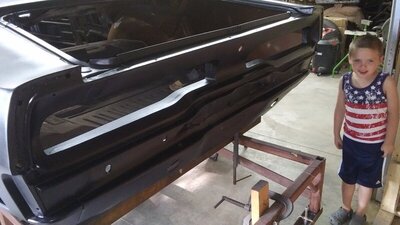
So I put some epoxy over the welded up areas. Back window lip, trunk lip perimeter, and rear tail panel and valance
20210801_183344.jpg

20210801_183425.jpg


20210801_183416.jpg

My grandson approves! 20210801_183310.jpg 20210801_183310.jpg
 
Last edited:
Auto Transport Service
Back
Top