• When you click on links to various merchants on this site and make a purchase, this can result in this site earning a commission. Affiliate programs and affiliations include, but are not limited to, the eBay Partner Network.

Hawk-Rod: The Restoration

As eldubb440 mentioned, some of the bolts will need minor touch up. As the car is assembled, there may be other bolts that will need cleanup or "sins" put in the paint from other assembly steps. So I will (hopefully with Mark's help) come back with a little touch up paint when it is mostly assembled to clean up any issues.

Sorry about the overall lack up additional updates, work has again been crazy, and family has arrived for Christmas, so things are pretty busy. I hope to get back on it this weekend some...
 
OK, so back on the car some, although I have been out Christmas shopping too. :Santa2:
We are also hosting Christmas this year for the family, so preparations are in full swing to get ready for that... :Santa3:

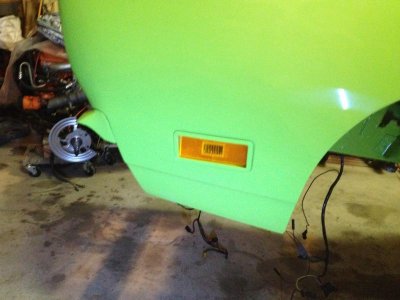
I figured I would get many of the painted pieces back on the car - this is probably the best way to protect them. I started with the side marker lights. You would think these would be easy, but it required some parts be painted. Also, both front and rear are specific to the side of the car - you can't mix and match them. Here is the front:
IMG_3504.jpg

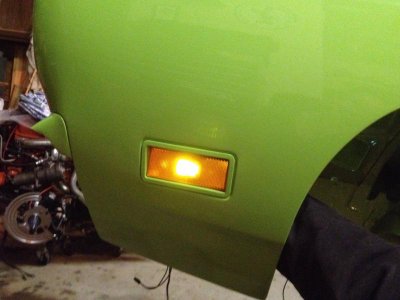
I couldn't resist putting a work light behind the lense to see what it looked like!
IMG_3507.jpg

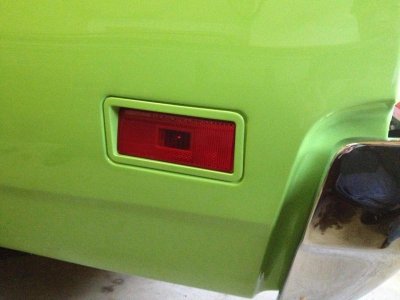
Here is the back. Again, be careful if you are going to install these - as even the backing plates that hold them in are specific to the side of the car.
IMG_3510.jpg

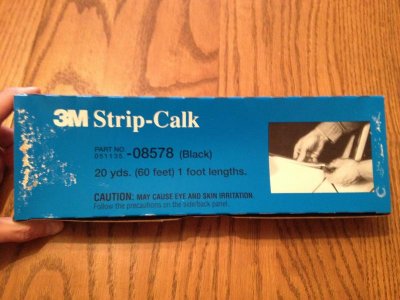
Then I moved on to the quarter panel extensions and tail lights. Since these items penetrate the body, they need to be sealed. Mark hooked me up with the proper stuff to use - It is 3M Strip-Calk. It is like sticky silly putty...
IMG_3513.jpg

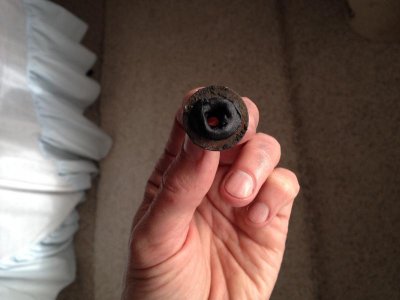
I wrapped some around each nut.
IMG_3515.jpg

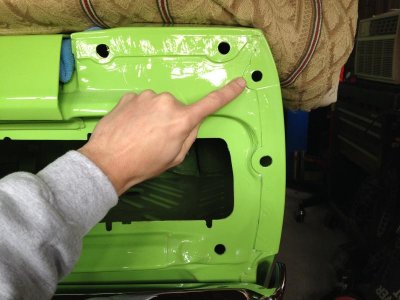
This hole has nothing that goes through it, so this needs to be sealed. I used a glob of the Strip-Calk from both the front and the rear to do this.
IMG_3517.jpg

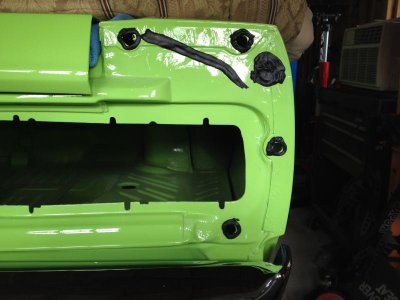
I also wrapped some around each hole where the quarter panel extension stud goes through. That angled piece of Strip-Calk is my idea to try and shed any water that may get in there - I have no idea if it will work or not (or if it even matters)...
IMG_3519.jpg

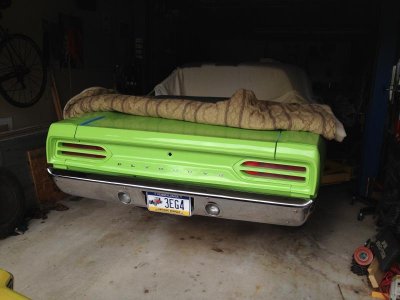
I don't have pictures of the tail lights - these are pretty straight forward. Here is a picture of the rear of the car as it looks right now. I am not thrilled with the fit of the quarter panel extensions, especially the driver side. Chrysler's fit and finish wasn't too great, and there was no way to get all sides to fit perfectly to the quarter panel. All in all though, I think the back of the car is starting to look quite respectable!
IMG_3524.jpg
 
Then I moved on to the quarter panel extensions and tail lights. Since these items penetrate the body, they need to be sealed. Mark hooked me up with the proper stuff to use - It is 3M Strip-Calk. It is like sticky silly putty...
I wrapped some around each nut.
This hole has nothing that goes through it, so this needs to be sealed. I used a glob of the Strip-Calk from both the front and the rear to do this.
I also wrapped some around each hole where the quarter panel extension stud goes through. That angled piece of Strip-Calk is my idea to try and shed any water that may get in there - I have no idea if it will work or not (or if it even matters)...
I don't have pictures of the tail lights - these are pretty straight forward. Here is a picture of the rear of the car as it looks right now. I am not thrilled with the fit of the quarter panel extensions, especially the driver side. Chrysler's fit and finish wasn't too great, and there was no way to get all sides to fit perfectly to the quarter panel. All in all though, I think the back of the car is starting to look quite respectable!
I know what you mean by the fit of the qtr panel extensions, mine were the same. At the time I thought maybe it was just mine but now I see that it was a factory thing. Wish I had known about the caulk stripping. I filled that hole with the sticky black stuff in a tube. The strip stuff would have been a lot neater. I also put a gasket in between as well, Even though I know they didn't come with one I thought it better than the messy black sealer. Again the caulk strip would have been good for this. Keep up the good work Hawk.
 
i had those fitting pretty nice during mockup, i bet we can tweek em a bit next time i come up....... i kinda wanted to have them on last weekend, but we just didnt get to em
 
i had those fitting pretty nice during mockup, i bet we can tweek em a bit next time i come up....... i kinda wanted to have them on last weekend, but we just didnt get to em

Your eye and skills may be able to improve the quarter panel extensions a bit, but some of the "issues" are just with the way they are built. For example, the one side does not blend in well with the crease on quarter panel. Don't get me wrong, they look nice, but Plymouth probably could have cast them better...

Maybe when you come up next time to fix all the stuff I screwed up you can check them out! :iamwithstupid:
 
She is looking good and it is cool when you can sneak in some Mopar stuff with the other things going on, i pray you and your family have a very Merry CHRISTMAS Hawk!!! And to all out there!
 
Looking really good hawk. You and your "restoration team" have got it together.

LOL, the restoration team is now moving down to one! Mark has done his job so now it is my turn to do the rest! My friend Barry (who is going on the trip with me next year) will help out some, so that will be great. Besides that, I need to crack the whip on myself!

- - - Updated - - -

She is looking good and it is cool when you can sneak in some Mopar stuff with the other things going on, i pray you and your family have a very Merry CHRISTMAS Hawk!!! And to all out there!

Thank you! I wish you and all the FBBO family a great Christmas, Hanukah, or whatever you may celebrate! Thank you for all the advice, encouragement and just plain fun checking out the posts!

Hawk
 
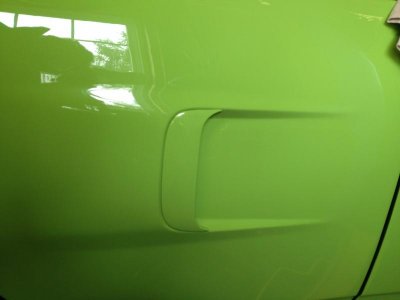
So I bolted on the side scoops today. These are a bit like the quarter panel extensions - they fit like they fit, but nobody would ever claim they are perfect...
IMG_3551.jpg

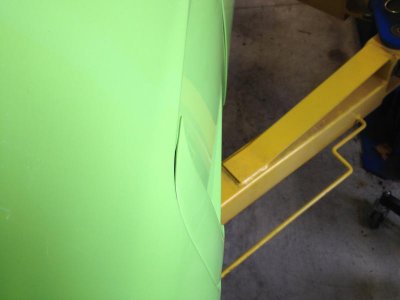
Here you can see how the passenger side angles out towards the front a little bit. I tried working on it a bit to change the angle, but had no luck. I probably need to bend the studs, but I am afraid they will just break instead. For now - I left them alone...
IMG_3552.jpg

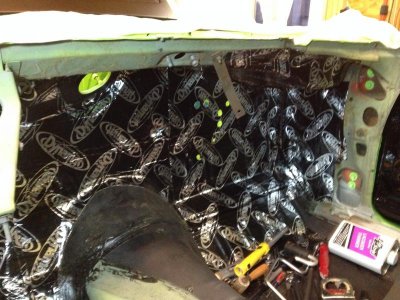
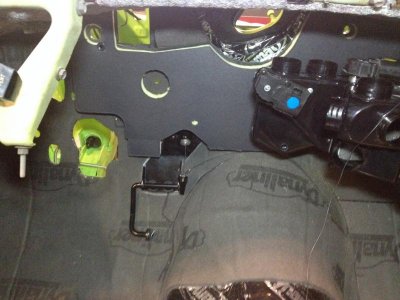
Most of the day I worked on putting Dynamat and Dynaliner in the firewall area. This is not a hard job, per se, but it is a tedious pain in the arse - especially with all angles, bends, holes, etc. that you have to work around. I am hoping that the floors will be much faster.
IMG_3556.jpg

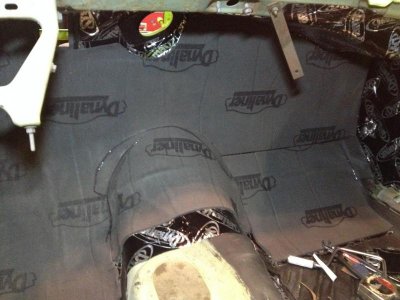
The Dynaliner is an insulating layer. I will still add the stock Mopar fiberglass insulation, but I figured this might help a bit too with the heat from the headers.
IMG_3564.jpg
 
Most of the day I worked on putting Dynamat and Dynaliner in the firewall area. This is not a hard job, per se, but it is a tedious pain in the arse - especially with all angles, bends, holes, etc. that you have to work around. I am hoping that the floors will be much faster.
View attachment 228513

The Dynaliner is an insulating layer. I will still add the stock Mopar fiberglass insulation, but I figured this might help a bit too with the heat from the headers.
View attachment 228514

Again with the excellent detail photos Hawk ... bravo.

You ain't gonna be feeling any heat at all I'm predictin
 
Man is that coming along nicely! I think all of us have dealt with the lack luster fitting parts with these Mopars. I elongating some holes, filed some material off and then added All Metal before my extensions fit nicely so I know what you mean. One thing you have to keep in mind is your critiquing everything as you go, the car as a whole will almost certainly be top notch and allot of those little things will fade away.
 
Man is that coming along nicely! I think all of us have dealt with the lack luster fitting parts with these Mopars. I elongating some holes, filed some material off and then added All Metal before my extensions fit nicely so I know what you mean. One thing you have to keep in mind is your critiquing everything as you go, the car as a whole will almost certainly be top notch and allot of those little things will fade away.

Very true - a lot of this stuff will 'fade away' as the car becomes a complete car. The car was originally intended to just be 'driver quality', but it has gotten out of hand a little bit! Either way, it will be driving across the USA in 2015 so I want MOPAR to be well represented! Hopefully it will turn out nice...

Thanks for all the support - I am really looking forward to getting this thing on the road!!!

Hawk
 
Its always fun checking in, getting envious but yet enjoy what were doing, Kind of a contradiction of things but you were where i am, and now here, ill be there someday.... i think! :)
 
Its always fun checking in, getting envious but yet enjoy what were doing, Kind of a contradiction of things but you were where i am, and now here, ill be there someday.... i think! :)

Yes you WILL be where I am one day!!! :VB toast:

You are making great progress on your '69 - just take it little by little, and solve one problem/issue one at a time. As much as I write these words to you, I know I will need the same support/advice/encouragement as I hit the inevitable snags I will hit with my car. I remember as I tore my car apart I was thinking what a long road it is to get the car back together - but you can't look at the whole project or it gets too daunting. Little by little and before you know it the project will be far along!
 
I worked most of the day on the car, and I guess I don't have all that much to show for it. The ^%$#! heater box went in and came out probably 4 times before I had everything the way I wanted it. The good news is that it is fully installed, so another firewall installation element is now done.

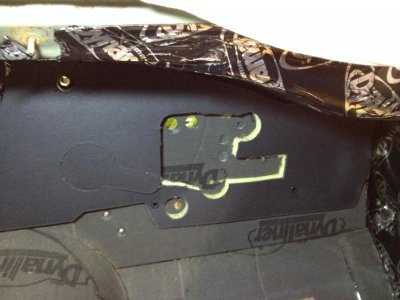
One of the things that I had to do was cut out some of the stock insulation. The A/C heater pipes were getting jammed by the insulation and didn't fit well until I cut out a larger hole to give them room...
IMG_3603.jpg

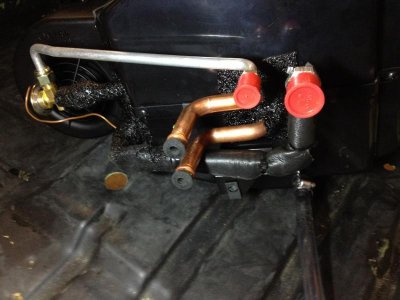
This is what needed the space!
IMG_3604.jpg

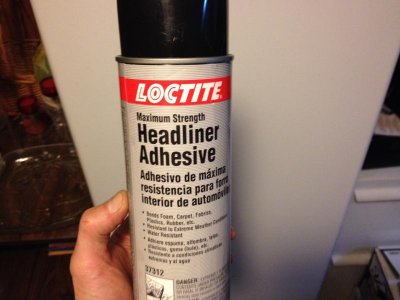
Then I had to glue the under dash insulation on as well. Here is the glue I used.
IMG_3607.jpg

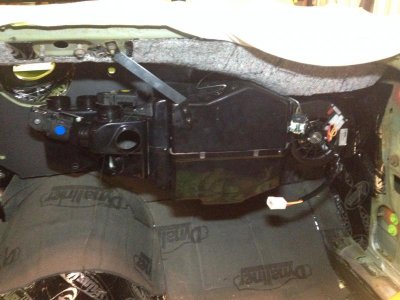
Here is the installed heater box. The gray padding above it is the insulation that I glued in.
IMG_3611.jpg

I also installed a couple of other minor pieces like the accelerator cable.
IMG_3614.jpg

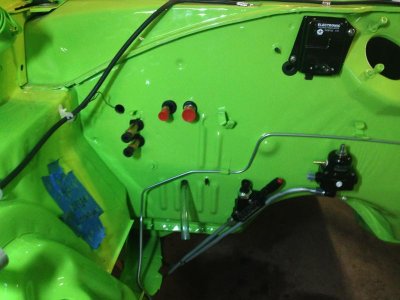
Here are the heater box connections from the firewall side. The red capped lines are for the A/C, while the black capped lines are for the heater. The small black line coming through the hole is a wire I set in there temporarily so I can pull a control wire through the hole once the dashboard is installed. It will eventually get a nice plug to protect the wire/hole. Finally, the clear line is a condensate drain.
IMG_3608.jpg

Progress may be slow, but inch by inch, we'll get there!!!
 
Looking good, excellent work you are doing. Look forward to seeing in completed.
 
I worked most of the day on the car, and I guess I don't have all that much to show for it. The ^%$#! heater box went in and came out probably 4 times before I had everything the way I wanted it. The good news is that it is fully installed, so another firewall installation element is now done.

One of the things that I had to do was cut out some of the stock insulation. The A/C heater pipes were getting jammed by the insulation and didn't fit well until I cut out a larger hole to give them room...
View attachment 229658

This is what needed the space!
View attachment 229659

Then I had to glue the under dash insulation on as well. Here is the glue I used.
View attachment 229660

Here is the installed heater box. The gray padding above it is the insulation that I glued in.
View attachment 229661

I also installed a couple of other minor pieces like the accelerator cable.
View attachment 229662

Here are the heater box connections from the firewall side. The red capped lines are for the A/C, while the black capped lines are for the heater. The small black line coming through the hole is a wire I set in there temporarily so I can pull a control wire through the hole once the dashboard is installed. It will eventually get a nice plug to protect the wire/hole. Finally, the clear line is a condensate drain.
View attachment 229663

Progress may be slow, but inch by inch, we'll get there!!!


Sweetness! Looking good... I'm still envying the AC unit... Have I mentioned it's hot in Florida? Who knew?
 
A couple of questions:

I turned my attention to the wipers. I have two questions here:
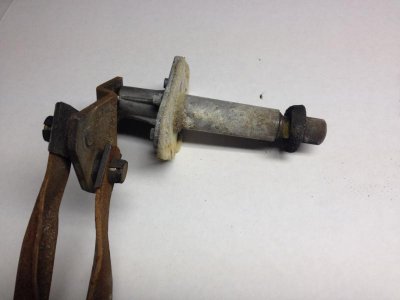
Question 1) Not sure what these are called, but I would like to clean up my wiper linkage transmission arms. They work fine, but they could use some fresh grease as they are a bit stiff. Do these come apart easily? Since they work OK, I would rather not destroy anything trying to "fix" them. I would appreciate any advice on how to clean these up...
IMG_3616.jpg

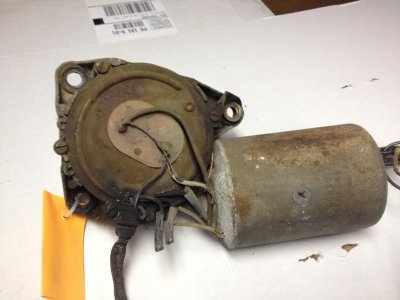
Question 2) My wiper motor worked fine when I took it off the car, but it would really be a shame to bolt this abomination on the nice, clean firewall of my car. I am not sure I have the time or money for a complete restoration, but do the members have any suggestions for cleaning this up? Maybe a cosmetic cleanup for now?
IMG_3617.jpg

As always, thanks!
 
Auto Transport Service
Back
Top