You are using an out of date browser. It may not display this or other websites correctly.
You should upgrade or use an alternative browser.
You should upgrade or use an alternative browser.
Hawk-Rod: The Restoration
- Thread starter HawkRod
- Start date
- Local time
- 12:17 AM
- Joined
- Jul 17, 2008
- Messages
- 23,908
- Reaction score
- 71,088
- Location
- South Jersey USA
and the pile of unpainted parts shrinks yet again........ damn, that's a nice set of fenders!


- Local time
- 11:17 PM
- Joined
- Jan 1, 2013
- Messages
- 8,050
- Reaction score
- 3,465
- Location
- Mascoutah, Illinois
Then, to the BIG NEWS!!! I bolted on my first official parts on to the Road Runner: My new upper control arms from PST.
...One small step for Hawk, one giant leap for my Mopar!
View attachment 224865
The bezel repair looks good from here ... great handiwork Hawk
and Congrats on hanging your first parts
- - - Updated - - -
and the pile of unpainted parts shrinks yet again........ damn, that's a nice set of fenders!


Yes they are !
I love that color Hawk !!
The color looks great, and it looks even better in natural light.
You may recall that when I took the car apart and pulled the stainless off of the B pillar post, it revealed pristine original Limelight paint from when the car was built. Mark mixed up the paint and perfectly matched it to the post. He dribbled a drop or two on the post and made sure the paint matched EXACTLY! So the cool thing is that this car is truly EXACTLY the color it rolled off the assembly line.
Nice work on the fenders too Mark! You get to realize how many &^%$@ parts are on these cars - it never seems to end!!!
I have had very limited time to work on the car since I brought it home. Tonight I had to work all night until just now. Tomorrow will suck too, so I am really chomping at the bit to get to the weekend where I plan to BUILD THE WHOLE FRIGGEN CAR! Actual results may vary... :grin:

Work, Work, Work!
Of course, I didn't get as much work on the car as I had hoped, but I still did make good progress.
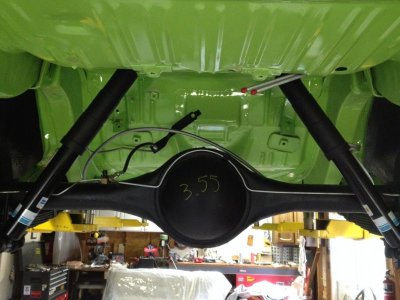
First, I installed the rear shocks - Bilstein's from PST! Nice easy and quick! I also hooked up the brake line
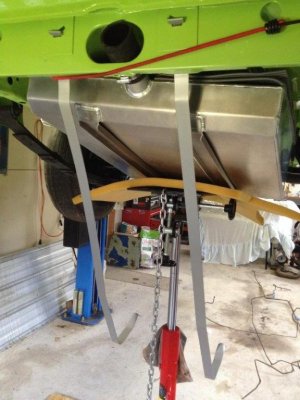
Then I installed the tank - I wasn't sure how it would fit since it is a custom fuel injection tank. They recommend a thick pad to reduce any vibration from the fuel pump. I ended up using a work mat - it was nice and spongy and I cut it down to fit the top of the tank. Picture shows two, but I ended up using one only.
Damn rotation got switched again :angry4:
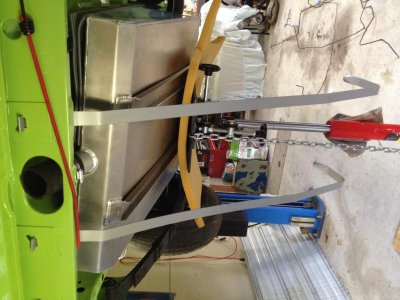
Installed tank from the rear. The filler still needs to be cleaned and cut down, but I won't do that until I have the rear bumper on.
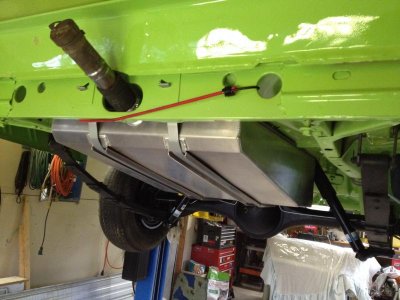
Installed tank from the front. The lower left blue tape is a drain plug - nice!
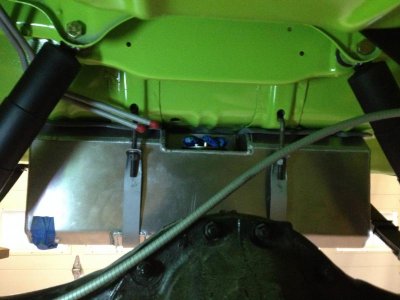
I then painted the interior floor boards with Eastwood rust Encapsulator to ensure no rust takes hold - no pictures of that - not real exciting. What is more exciting is the first test fit on the engine/K-Member.
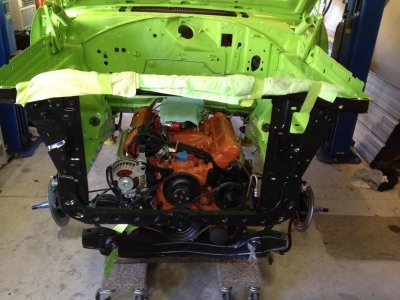
Engine basically in place. This so I could fit fuel injection parts and A/C components as neatly and hidden as possible.
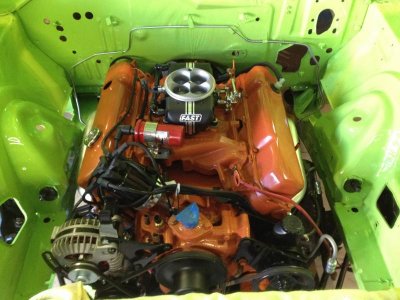
I installed the washers to help me understand the placement of some parts.
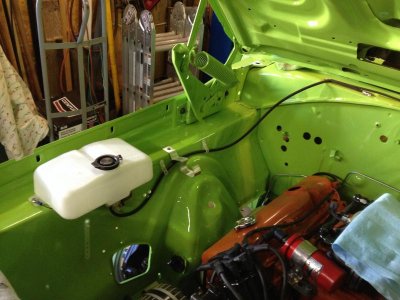
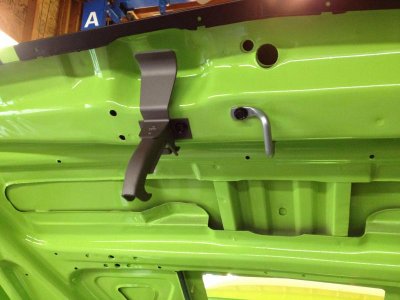
I KNOW the back of my head will regret installing this!
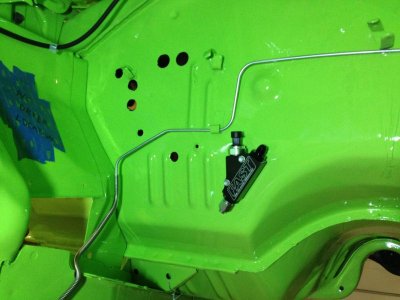
This is the fuel pressure sensor for the Fuel injection. This location sits behind the passenger side head. There is enough room, and it will be mostly hidden from view.
Of course, I didn't get as much work on the car as I had hoped, but I still did make good progress.
First, I installed the rear shocks - Bilstein's from PST! Nice easy and quick! I also hooked up the brake line

Then I installed the tank - I wasn't sure how it would fit since it is a custom fuel injection tank. They recommend a thick pad to reduce any vibration from the fuel pump. I ended up using a work mat - it was nice and spongy and I cut it down to fit the top of the tank. Picture shows two, but I ended up using one only.
Damn rotation got switched again :angry4:

Installed tank from the rear. The filler still needs to be cleaned and cut down, but I won't do that until I have the rear bumper on.

Installed tank from the front. The lower left blue tape is a drain plug - nice!

I then painted the interior floor boards with Eastwood rust Encapsulator to ensure no rust takes hold - no pictures of that - not real exciting. What is more exciting is the first test fit on the engine/K-Member.

Engine basically in place. This so I could fit fuel injection parts and A/C components as neatly and hidden as possible.

I installed the washers to help me understand the placement of some parts.

I KNOW the back of my head will regret installing this!

This is the fuel pressure sensor for the Fuel injection. This location sits behind the passenger side head. There is enough room, and it will be mostly hidden from view.

Well, I had some issues with my pressure regulator. The old line "measure twice, cut once" comes into play here. I installed the regulator and then worked to bend the line. I couldn't end up bending the line enough to clear the transmission, so I have an interference issue. I ordered a 90* AN fitting and will have the metal line come in to that fitting directly - we will see how that works. Damn I have been spending a lot of time to mess with this firewall stuff for what looks like really limited progress! In other "fun" stuff, I got the rear bumper and "PLYMOUTH" lettering installed on the back of the car. I like it when large components are installed on the car!
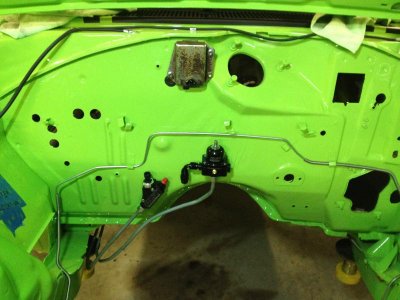
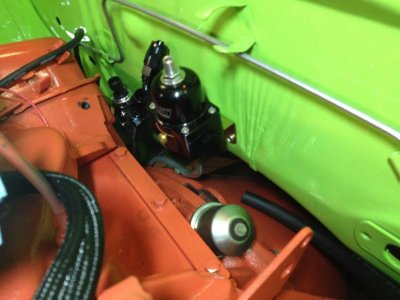
Not the greatest picture - this is at night in a cramped garage...
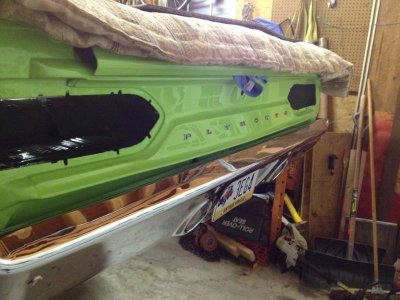


Not the greatest picture - this is at night in a cramped garage...

Redhorse719
Well-Known Member
It's looking better with every picture. Keep'em coming.
- Local time
- 12:17 AM
- Joined
- Jul 17, 2008
- Messages
- 23,908
- Reaction score
- 71,088
- Location
- South Jersey USA
ok........ not as glamorous as previous pics, but Hawk cant finish his car without them


- Local time
- 11:17 PM
- Joined
- Jan 1, 2013
- Messages
- 8,050
- Reaction score
- 3,465
- Location
- Mascoutah, Illinois
Great team you guys Hawk and Eldubb !
This car is so clean it must be so damn fun hanging the parts and putting it back together .. I've got some friendly envy going on brother !!!
Matter of fact this thread is starting to remind me of 71 RoadRunners build threads which means in a good way ... must say it again excellent job with the documentation HawK
Great team you guys Hawk and Eldubb !
This car is so clean it must be so damn fun hanging the parts and putting it back together .. I've got some friendly envy going on brother !!!
Matter of fact this thread is starting to remind me of 71 RoadRunners build threads which means in a good way ... must say it again excellent job with the documentation HawK View attachment 226527
Thanks Tall. It is quite nice to work on the car and not have my hands get all dirty! The down side is I am deathly afraid of screwing up the nice paint job. I know as much as I try, some chips and scratches are likely, but I will try to avoid them!
I just got a new fuel injection fitting today that will hopefully solve my fuel line interference issue. I hope to work on that tomorrow night. On Saturday, Mark is coming up to my place the hang the fenders - sweet!
More construction pictures should be on the way shortly!
Ron 73
Deceased, But not forgotton
Wow Hawk, I am feeling lousy right now, i do try to keep my eyes open to all the projects and especially the ones closer to heart, I keep screwing myself with this one, i had no idea you were this far advanced in your Runner, It is looking fantastic! I have found out one thing about this stuff, its so much easier and at least i feel more in my comfort zone posting with everyone else s cars then having to post on my own, this is harder work then the work sometimes, and be advised, i have you now book marked right where i cant miss it.... My apologies to myself and you to.. I hate to miss inspiration bud!!! Looking real good Hawk!!!
Ron 73
Deceased, But not forgotton
MT_Mopar
Well-Known Member
Love the color Hawk, that custom gas tank is sweet. Amazing work. More pics please!
Wow Hawk, I am feeling lousy right now, i do try to keep my eyes open to all the projects and especially the ones closer to heart, I keep screwing myself with this one, i had no idea you were this far advanced in your Runner, It is looking fantastic! I have found out one thing about this stuff, its so much easier and at least i feel more in my comfort zone posting with everyone else s cars then having to post on my own, this is harder work then the work sometimes, and be advised, i have you now book marked right where i cant miss it.... My apologies to myself and you to.. I hate to miss inspiration bud!!! Looking real good Hawk!!!
Hi Ron,
Glad you checked in! I try to also keep up with great threads on the site, but there are a lot, and I find myself "lurking" a lot. It is nice to have turned the corner and to now be assembling. I have a decent number of parts that are ready to go back on the car, so now it is just a matter of assembly....
- - - Updated - - -
Hawk i had to look at this picture a little closer so i fixed it, i cant see you getting out of sorts with it but do hope you don't mind... It is different then mine will be on my car, i like the way your setting the straps up on this.. ideas, im always looking for new and good ones
Don't mind at all - thanks for fixing the picture! I love my transmission jack, and use it for lots of things. From here, what I did was put the straps in their channels and then used the jack to put the tank into position enough so I could start the nuts. The tank is just a tiny bit bigger than a stock tank (and a gallon more capacity too), so the jack really helped push it into position.
- - - Updated - - -
Love the color Hawk, that custom gas tank is sweet. Amazing work. More pics please!
Thanks! More pictures coming this weekend! I try to please!
- Local time
- 12:17 AM
- Joined
- Jul 17, 2008
- Messages
- 23,908
- Reaction score
- 71,088
- Location
- South Jersey USA
got my sleigh all packed up...... HO HO HO!


We will be hanging fenders when 'Santa' shows up today - should be a busy but productive day!
MoparMitch
Well-Known Member
- Local time
- 12:17 AM
- Joined
- Apr 12, 2011
- Messages
- 3,826
- Reaction score
- 2,895
- Location
- Friendship, Maryland
Hey Hawk, At this rate of progress, you'll be driving it by New Years ??
Hey Hawk, At this rate of progress, you'll be driving it by New Years ??
Ha - I wish! The car has to be ready by around March in order to be ready for my drive across country in 2015, so as long as that happens, I am in good shape.
We all know it takes 10% of the time to do 90% of the work and 90% of the time to do the final 10%. For a short time, I will be (hopefully) making very large progress by bolting in the parts and assemblies that I have worked on over the summer. But then things will slow down as I start working on the stuff that is NOT ready to go.
Either way, I am having a blast right now. Reassembly is exciting!!! :blob1:
Similar threads
- Replies
- 62
- Views
- 3K
- Replies
- 107
- Views
- 6K
- Replies
- 173
- Views
- 14K

