• When you click on links to various merchants on this site and make a purchase, this can result in this site earning a commission. Affiliate programs and affiliations include, but are not limited to, the eBay Partner Network.

Hawk-Rod: The Restoration

its not that bad..
i took out a 2 piece trunk floor to put a one piece in its place
and i had to grind all the welds to get it out.
drilling would of been a big waste of my time.

Hi Flypaper,

I think what he meant was that although those LOOK like welds, they are not. So drilling them out won't get the floor out!!!
 
Hi Flypaper,

I think what he meant was that although those LOOK like welds, they are not. So drilling them out won't get the floor out!!!

hey Hawk
i know exactly what he meant..lol
i'm a ex body guy (except for myself),i was just commenting on taking it all back apart after it has been plug welded up
which i have done before by changing out trunk floors
you have to grind the welds,drilling is useless
 
hey Hawk
i know exactly what he meant..lol
i'm a ex body guy (except for myself),i was just commenting on taking it all back apart after it has been plug welded up
which i have done before by changing out trunk floors
you have to grind the welds,drilling is useless

LOL. Shows how much I know - THAT'S why I had others do the bodywork, since I don't have a clue!!! :drunken_smilie:

- - - Updated - - -

hey Hawk
i know exactly what he meant..lol
i'm a ex body guy (except for myself),i was just commenting on taking it all back apart after it has been plug welded up
which i have done before by changing out trunk floors
you have to grind the welds,drilling is useless

LOL, proof that I don't have a clue! THAT'S why I had someone else do the bodywork!!! :drunken_smilie:
 
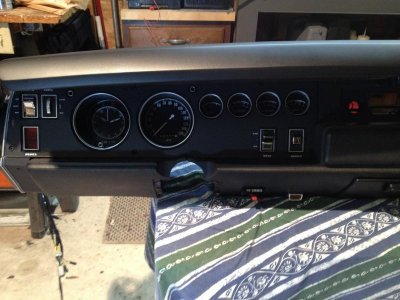
Pretty much completed my dash. I still have a new secondary fuse panel to add for non-stock accessories, but the stock dash is done except for the 'hockey stick' dash bezel over top of the glove compartment. My repair for that failed when I put it on, so I need to fix it again. I might to try and hold it on with Velcro instead - we'll see...

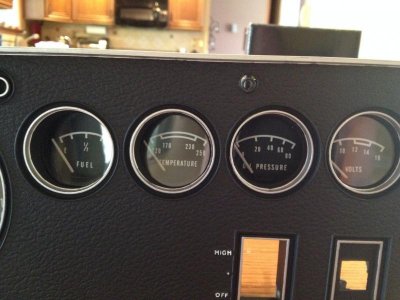
My refurbished gauges came back.
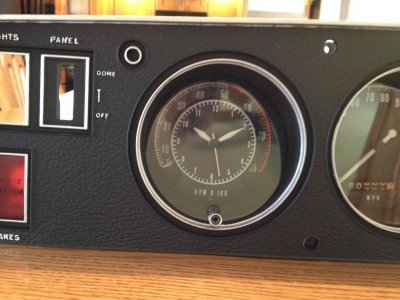
IMG_3348.jpg

My odometer was not cleaned up, so the numbers are a bit yellowed - Oh well, I guess that maintains some of the car's patina!!!
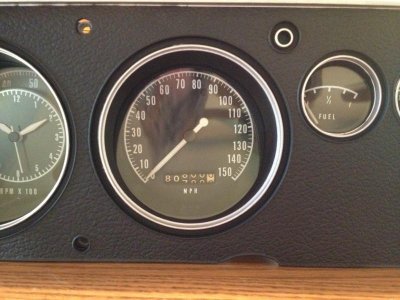
IMG_3349.jpg

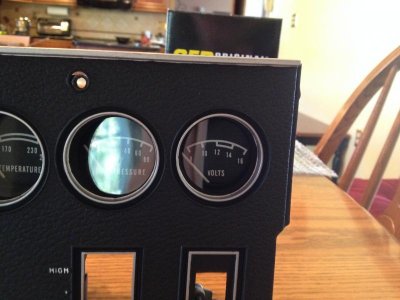
Note the far right gauge - no longer an alternator - it has now been converted to a voltmeter.
IMG_3350.jpg

IMG_3351.jpg

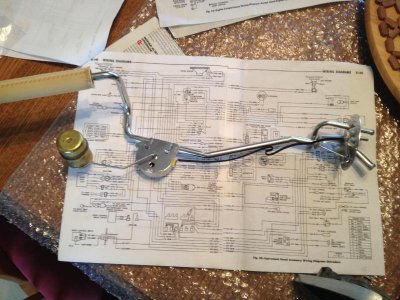
I bench tested as many gauges as possible, including the voltmeter and the fuel gauges. Here is an original fuel sender. This one, like many replacement units, only read about 7/8 at most.
IMG_3354.jpg

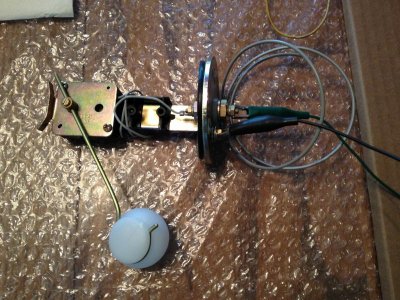
Here is the sender from my Fuel Injection tank.
IMG_3355.jpg

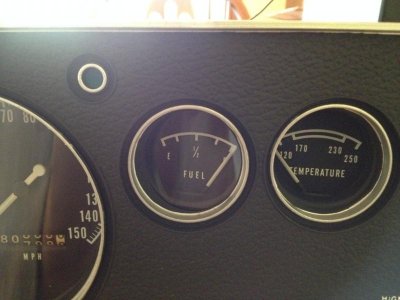
This one made the gauge work perfectly, so no extra work!
IMG_3357.jpg

Here it is in mounted in the dash.
IMG_3364.jpg
 
Thanks guys.

Hopefully soon I won't be tripping over all this crap in the garage, and those pieces will be attached to the car where they belong!!!

I have been surprised at the amount of time I have spent figuring out wiring. I have most of it figured out by now, but there is nothing (at least in pictures) to show for that. Hopefully the payment for that time will come in installation time, and most importantly, no headaches trying to get it all working.

Hawk
 
Phew. Just finished the whole thread Hawk. Marvellous work and well documented. :headbang: I broke the same screw stud on my glovebox lid as well. Bloody annoying when you have to wait another day for glue to dry. :eusa_doh: Got a great product called Rapid Fix which I've used on a couple of trim pieces. Sets harder than the original piece itself. Look forward to you putting it back together. The sands a runnin now. :clock:

Glenn.
 
Dash work looks great Hawk. Real slick! How much did that sending unit set you back, if you don't mind me asking?
 
cut and buffed out the rest of the shell....... man that roof is a lot of real estate! it was much easier on the spinner........that was yesterday

today it's a partial roller... lol, not used to seeing it this low to the ground....... doors and trunk lid ready for paint, but cant get to them till next week...... will be prepping hood and fenders in the mean time

hawkdown3_zps4996bdda.jpg


hawkdown4_zps9b1c709f.jpg


hawkdown1_zpsfd6900b3.jpg
 
Phew. Just finished the whole thread Hawk. Marvellous work and well documented. :headbang: I broke the same screw stud on my glovebox lid as well. Bloody annoying when you have to wait another day for glue to dry. :eusa_doh: Got a great product called Rapid Fix which I've used on a couple of trim pieces. Sets harder than the original piece itself. Look forward to you putting it back together. The sands a runnin now. :clock:

Glenn.

Thanks for the kind words Glenn. I ended up using Testor's Model cement, in that it seems to almost melt the plastic together a bit. I hope that's the case, but we will see how it holds. Thanks for the tip with the Rapid Fix. I'll see about getting some for the other things I will invariably need to glue.

- - - Updated - - -

Dash work looks great Hawk. Real slick! How much did that sending unit set you back, if you don't mind me asking?

Hi Prop,

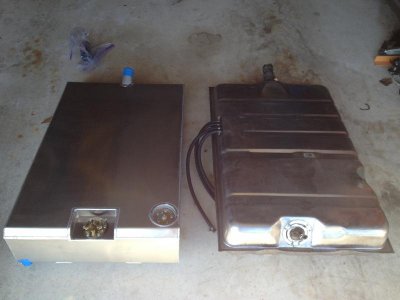
I don't mind you asking at all, but I can't give you an answer though. I ordered a custom made aluminum fuel tank from Hot Rod City in CA. It is a 19 gallon tank (1 gallon more than stock) custom made for my Road Runner. It came with an internal mounted fuel pump/baffles and a sender - basically it is a drop-in replacement fuel tank set up for fuel injection. I bit the bullet for this to make sure that I had no problems with the FI system. This is the ideal way to go to avoid fuel pump priming problems. It was not cheap though, it was $925 delivered to PA.

In this shot you can see the sender on the right hand corner of the tank...
IMG_2122.jpg

- - - Updated - - -

cut and buffed out the rest of the shell....... man that roof is a lot of real estate! it was much easier on the spinner........that was yesterday

today it's a partial roller... lol, not used to seeing it this low to the ground....... doors and trunk lid ready for paint, but cant get to them till next week...... will be prepping hood and fenders in the mean time

LOL, it is a BIG car, especially the roof. It looks fantastic sitting on the lift. Quite shiny!!!

It is nice that it has the rear suspension back on! As a fun little note: The 14" road wheels that are on the it are the original rims from my 1973 Road Runner. When I had my cool slotted aluminum mags in high school and college, my buddy used them on his Dodge Dart. They look TINY on the big Road Runner now! But they will do as temporary wheels to roll the car around...
 
Spent a lot of time this weekend with what seems like pretty limited results - and they probably are...

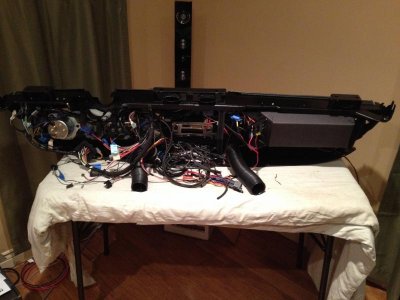
While the stock elements of my dash were done, I needed to add in more wiring and accessories. First, I had to install the under dash vents. I wanted to measure and ensure they sat evenly, did not interfere with any components, but also did not want to drill new holes through the dash. I did have to end up drilling one new hole for the passenger vent, but all in all I am pretty satisfied with the placement.

I then added my fuse "subpanel". This is a secondary fusible link circuit. I described this setup in the thread link below in case you are interested.
http://www.forbbodiesonly.com/moparforum/showthread.php?82326-How-To-Upgrading-Wiring-and-Alternator

I also added the air conditioning power and partial wiring, as well as a few odds and ends like my vent duct hoses. Along the way, I added an extra 12 volt power port in the glove compartment.

Here are a couple of pictures. It looks like a total train wreck, but it is a heck of a lot easier to work on it on the table then when it is installed!

IMG_3369.jpg

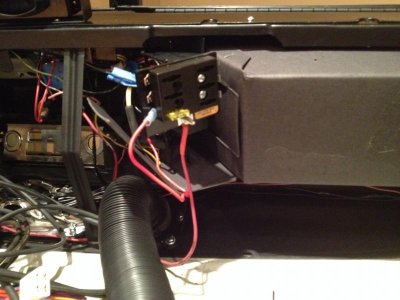
Close up of the secondary fuse panel. Only one circuit is there at the moment, but there will be two more (one for the fuel injection and another for the MSD box). Still need to dress a few wires too...
IMG_3370.jpg
 
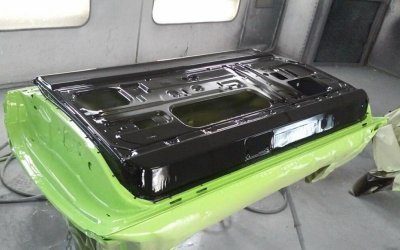
you jumped the gun just a bit........ that was yesterday...... this is today........piece by piece!

ddoor_zps95c61599.jpg


pdoor_zpsa75b5398.jpg


lid_zps7931802b.jpg
 
Sorry, got a bit ahead of myself (or you!).

OK, NOW it looks like the doors are about done - looks like the trunk is well on its way too!
 
Hawk.......here's wishing you and your family a great Thanksgiving ......... enjoy!

hawklid_zpse29144dd.jpg


hawklid3_zps28b553ae.jpg


hawklid2_zpsecf64ec2.jpg


hawklid4_zpse5748051.jpg


hawklid5_zps22e3bf65.jpg
 
I was showing my wife but not able to speak properly - I was too excited!!!! (Crap, now I keep making errors typing too ;-) :pink banana:

WOW - now I have extra to be thankful for at Thanksgiving tomorrow. Mark, as usual, you have done a fantastic job. Pictures don't do your work justice but I have had my paws and eyeballs on my car earlier, and the work is top notch. THANKS!!! :icon_pray::VB toast::yourock:

This is going to be one super nice car! :70s_rule:

Mark: I wish you and yours a fantastic Thanksgiving, especially since you just made mine great!!!

And a Happy Thanksgiving to all FBBO members as well!

Hawk
 
thanks for the kind words Hawk........ all in a days work my friend ......... Mom and Dad taught me do do my very best 100% of the time, I certainly try.

looks like you will be having fun over the holidays...... take your time, and it will almost put itself together...... i should have the fenders and other odds and ends done in the very near future...... and remember, help is only a phone call away...... cant wait to go for a ride!
 
There we go!!!! Those bright colors need those little details like a stripe to contrast and really make them look great, nice job.
 
Auto Transport Service
Back
Top