• When you click on links to various merchants on this site and make a purchase, this can result in this site earning a commission. Affiliate programs and affiliations include, but are not limited to, the eBay Partner Network.

Hawk-Rod: The Restoration

HawkRod

Formerly hsorman
Staff member
FBBO Gold Member
Local time
4:15 AM
Joined
Aug 8, 2011
Messages
7,061
Reaction score
15,978
Location
Lansdale, PA
Hi Folks!

I have a 1970 Road Runner with the following original options: Air Grabber, 383, 4 Speed, Hemi Suspension, 3.55 Sure Grip 8 3/4 rear, heavy duty cooling, light group. It came with manual steering and manual drum brakes. Original colors were Limelight with a black bench seat interior, although it is currently painted yellow. The car did not have a radio when built.

If you want to check out some of the history of the car and my work to get it back on the road, check here:
http://www.forbbodiesonly.com/moparforum/showthread.php?51773-Hawk-Rod-Part-1-Get-Back-on-the-Road

Now that I have my title and the car is legal to drive on the roads, it is time to begin the restoration. I wanted a running, working car as a starting point, but the restoration is starting a bit sooner than I expected. This is because I plan to drive this car on a cross country vacation in the spring of 2015. So the work needs to begin NOW!!!

Plans:
Body will be restored to original, with original Limelight paint. I will add the blackout hood treatment and stripe on the trunk that the car originally did not have. I also plan to add air conditioning, power brakes with front disks, power steering, frame stiffening components and an overdrive transmission. I plan to stick with the stock 383 for now, since I won't have the funds to upgrade or change that too much yet. The engine has 80,000 original miles and runs great, so for now I plan just to clean the outside and paint it.

I will try to add a lot of pictures to this thread. In some cases, it might be more than people want to see, but maybe they can help as a reference for some people.

I will farm out the body work due to limited time, and I have asked the body guys to post pictures of my car as it progresses on this thread as well. We will see how it all works out. It's a big adventure!!! :blob1:

Some pictures of the beginning of the tear down:

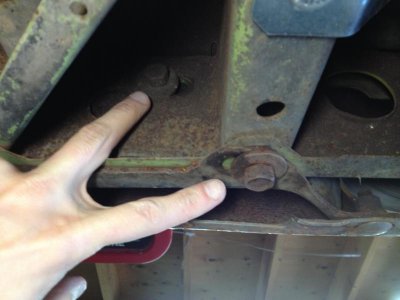
Mounting locations for the rear bumper assembly
IMG_1497.jpg

IMG_1496.jpg

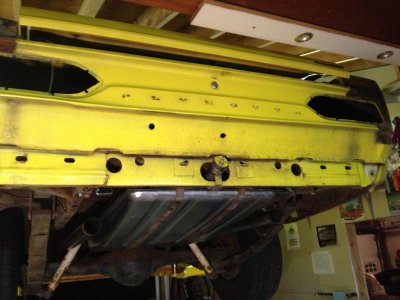
Rear cross member. I am surprised how good a shape it is in. I expected it to be quite rusty. (The car does need quarters, a trunk floor and extensions for sure, however)
IMG_1500.jpg

IMG_1501.jpg

IMG_1505.jpg

IMG_1506.jpg

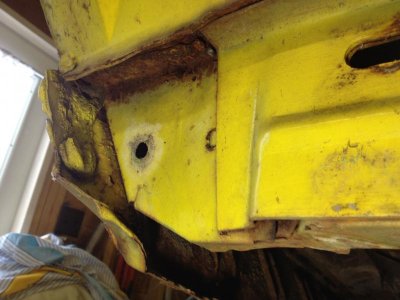
Looks Like the driver side tail light surround pot metal piece has had some body work done to it :-(
IMG_1514.jpg

IMG_1566.jpg

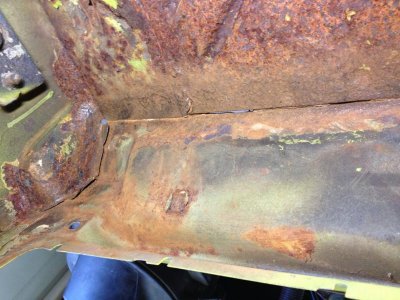
Inner seam. I think the tail panel looks OK. It has a dent/old body work, but from a rust perspective, I think it looks pretty good.
IMG_1522.jpg

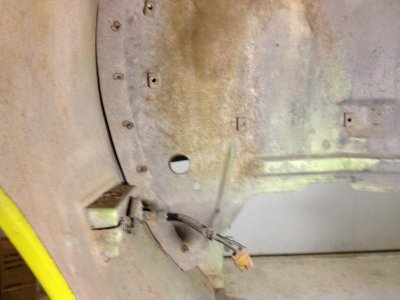
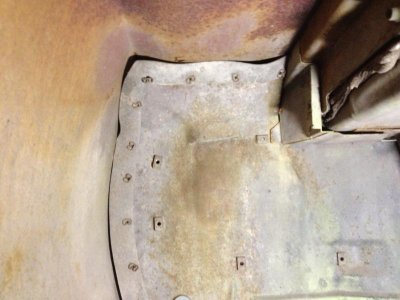
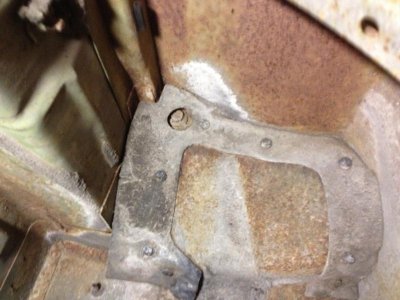
Front Fender Removal: A couple of shots underneath to show what some of the splash guards looked like.
IMG_1555.jpg

IMG_1560.jpg

IMG_1559.jpg

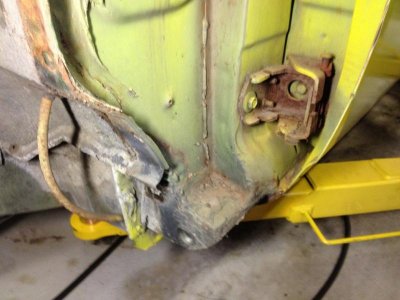
Cowl area looks to be in good shape from a rust perspective.
IMG_1563.jpg

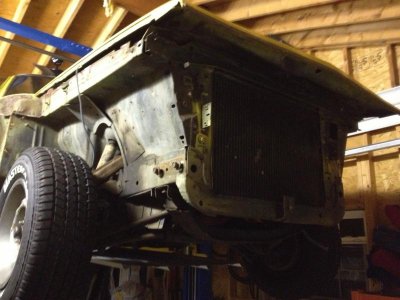
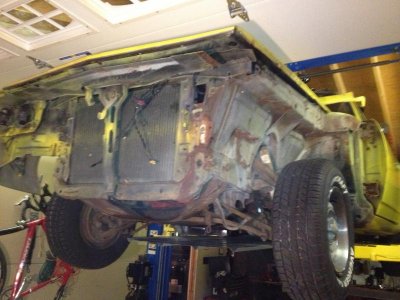
The front end after a today. Progress is being made - too bad I need to go to work tomorrow!
IMG_1564.jpg
 
and so it begins.......... very much looking forward to being a part of this....... gonna be a cool thread!
 
I've been looking forward to this for a long time Hawk ... best wishes as you engage
 
...brings back a load of memories :headbang: Looking forward to this project. :glasses10:
 
Can't wait until more photos are posted. Have you decided if you will paint it the original color?

Don
 
Can't wait until more photos are posted. Have you decided if you will paint it the original color?

Don

Yes, it will go back to its original color (which is NOT yellow) - it was originally Limelight.

- - - Updated - - -

and so it begins.......... very much looking forward to being a part of this....... gonna be a cool thread!

...And I am looking forward to your help! Now I just need to get my butt in gear and get the car dismantled!!! It always takes longer than I think, especially when I am taking pictures as well as bagging and tagging everything.
 
I've been looking forward to this for a long time Hawk ... best wishes as you engage
&
...brings back a load of memories :headbang: Looking forward to this project. :glasses10:

Thanks for the well wishes. I am really excited about this project. Getting a 1970 Road Runner has been my dream for 30 years. Now to get going on the restoration is really cool. I know it will be a lot of work, but I have to push through it and try to juggle this along with my demanding job. :BangHead:

The biggest pain for the next couple of weeks will be the cold! I am very fortunate to have a decent garage with a lift, but it is not insulated or heated. When it gets really cold, holding tools and cold metal parts becomes very difficult. I need the ^%$! weather to warm up so I can make some progress!!!! :frozen tongue:
 
&


The biggest pain for the next couple of weeks will be the cold! I am very fortunate to have a decent garage with a lift, but it is not insulated or heated. When it gets really cold, holding tools and cold metal parts becomes very difficult. I need the ^%$! weather to warm up so I can make some progress!!!! :frozen tongue:

working on the car Hawk? its Saturday and it is warm...... :thumbsup:
 
More Tear Down

You bet I am out there working on the tear down!

I had to spend some time increasing my storage of parts, so I bought three additional sturdy shelving units, set them up and reorganized my parts area in my basement. No pictures of that, but it took WAY longer than I expected.

Tearing parts off the car can sometimes go quickly, but taking pictures and labelling them so I can be organized when I put the car back together takes a long time too. Damn, this is a lot like work!!! :thinker:

I only had a few hours out in the garage today, and I have to bring my son back to State College tomorrow, but made some progress still. The Mopar rust gods giveth, and they taketh away. On my first tear down day, they gave me some nice, solid rear cross member pieces...

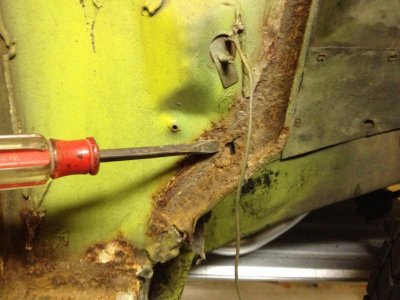
...today they gave me a rotten cowl area under the fender... :cry:
IMG_1605.jpg

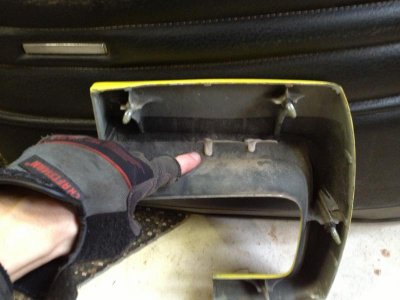
Air Grabber prior to dis-assembly
IMG_1593.jpg

IMG_1595.jpg

IMG_1596.jpg

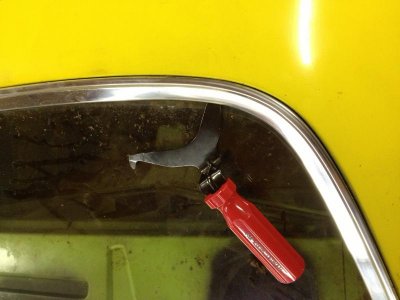
Even with the proper tool, the trim is a pain to remove. It took me a long time to get it off...
IMG_1585.jpg

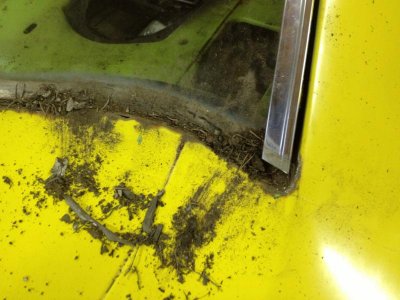
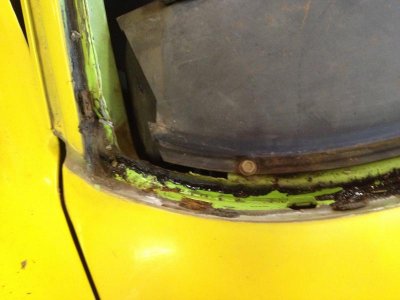
No wonder these cars rust out down here - look at all the crud!!!
IMG_1586.jpg

I also pulled out the trunk light, hood trim, air grabber air box, front and rear wiring harnesses, the hood mounted turn signals, trunk mounted batter tray, and the rest of the hood latch. Now she looks like this...
IMG_1607.jpg
 
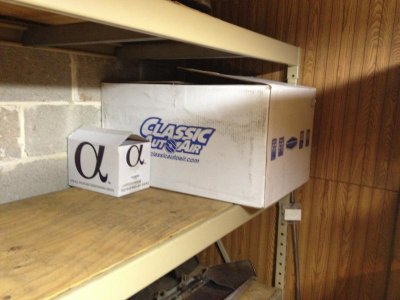
Classic Auto Air Parts Arrived Today

Late Christmas today! :hello2:

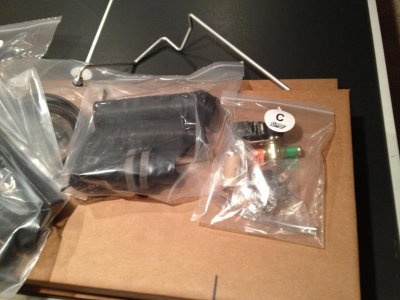
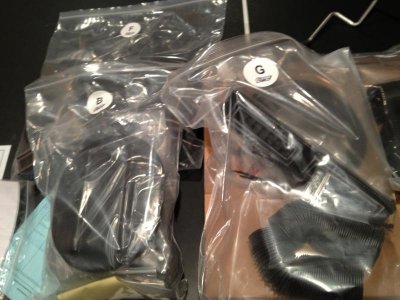
My Classic Auto Air system arrived. Based on the packaging, instructions, neatly labeled and bagged parts, etc., I am impressed.

The system I bought is one of their "Perfect Fit Elite" systems that is specifically made to install in a 68-70 B-Body. I also bought their DER controls that match the fit and function of the original heater controls but incorporate the air conditioning control too.

Finally, I bought a hidden compressor mounting bracket that hides the compressor under the alternator. Of course, you will still be able to see that A/C has been added, but it won't sit right in front and spoil the cool Air Grabber stuff on top of the engine. I do know that my vacuum storage tank for the air grabber that normally mounts to the firewall near the heater hoses will need to be moved out a bit. I think most everything else should be able to stay in place as original.

I won't be able to install this until the bodywork gets done, but I now can drill the two new holes needed in the firewall before it all gets painted.

Some pictures of the kit:

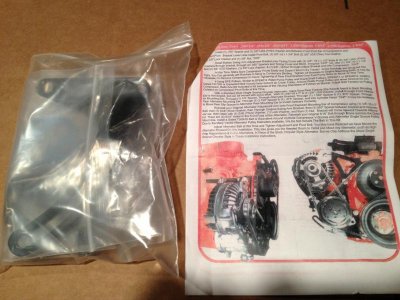
The brackets for the compressor mounting - might be hard to see, but hopefully you can see the picture of how it mounts...
IMG_1613.jpg

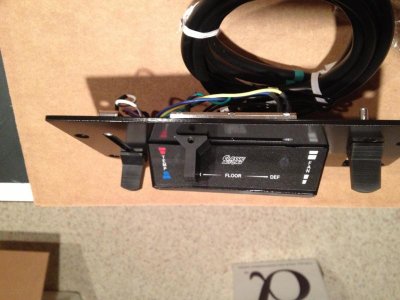
The direct replacement controls for my 70 Road Runner
IMG_1609.jpg

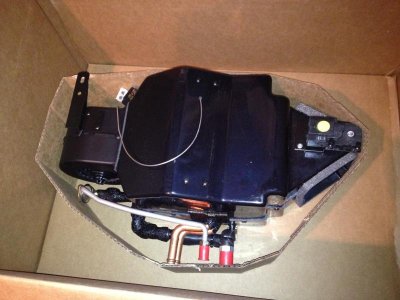
The new heater box that replaces the old one
IMG_1612.jpg

Here are a couple of pictures of the bags of parts. There are many more, but this gives you an idea...
IMG_1610.jpg
IMG_1611.jpg

But, for now, it needs to sit on a shelf until I am ready to drill holes in the firewall, then restore and rebuild the car!
IMG_1614.jpg
 
the hidden compressor is the sell! ........ my birthday is next month and I want one :yes:
 
More Teardown

Not so many pictures to post; many of them boring pictures of clips, screw locations, etc.

I did get the back window out - I had a friend help me and we cut it out using one of my Son's old guitar strings, with each end wrapped around a small piece of wood. He was on the inside and I was on the outside. We "sawed" the cable back and forth at a sharp angle in the direction we wanted it to cut. It actually cut out the old window sealer quite easily. The hardest part was getting through all the silicone that people had gooped in the window to try and seal the leaks...

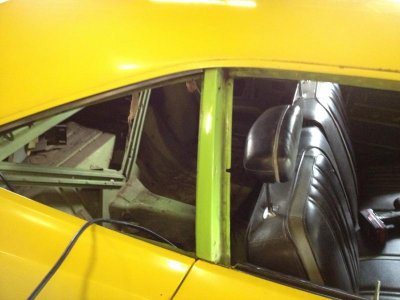
I got most of the exterior gutted except the headliner bows and dome light. Except for that, everything in the interior is out except for the dash. I also got the quarter glass out and the passenger window. The driver's window had a rusted bolt, so I am giving it some time with some penetrating oil.

I also took out the old heater box and wiper motor. Probably some other stuff too, but I can't remember at this point.

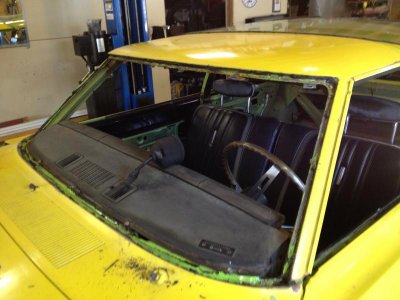
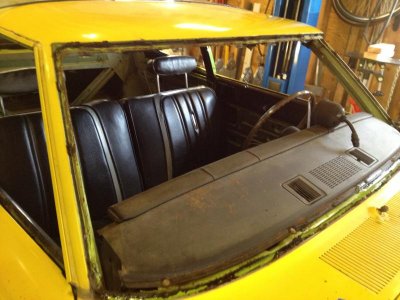
Next major piece to take out is the front window. After that, I have to start on pieces that will no longer allow the car to drive under its own power - but that's good! It means I am making progress!!!:grin:

A couple of pictures:

More of the original color peeking through!
IMG_1657.jpg

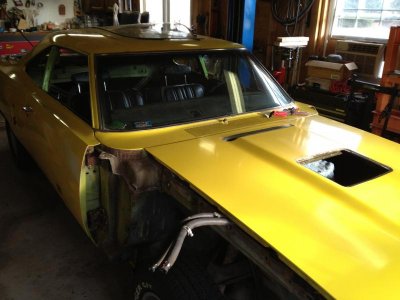
The front end after removal of all air grabber pieces:
IMG_1655.jpg

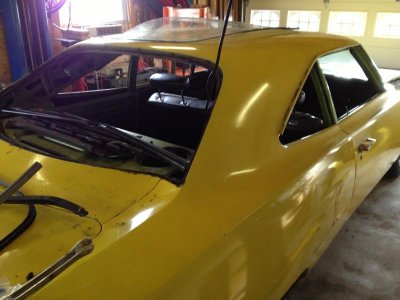
The back end after removal of most of the glass...
IMG_1654.jpg

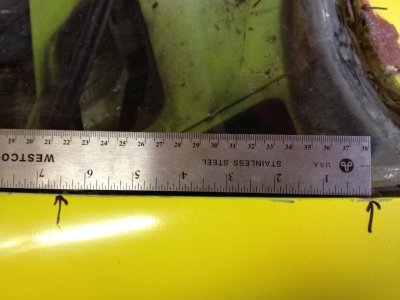
An example of the back window where I marked the locations of the screws and clips for the stainless molding with a marker. I then took pictures with a ruler around the window so I can get them back in their proper locations after much of the sheet metal is replaced. Let me know if these measurements would be useful - I'd be glad to share...
IMG_1630.jpg
 
Looking good Hawk. Keep posting pictures of the restoration even the ones that you might think are unimportant.
 
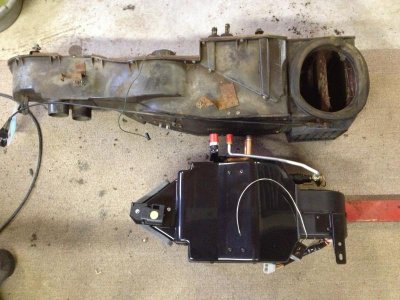
Heater boxes old and new

Just for comparison, I laid the old and new heater boxes next to each other. They are set in the approximate spot where the lines connect through the firewall.

On the left hand side adapters hook to the front and back. One adapts to the defrost hoses to route the defrost. The other adapts to hook up the A/C vents.

The unit always pulls interior air. I don't mind that so much, but the one bummer is that the passenger vent gets closed off. Those vents rock, and I would prefer to keep them active if I can.

IMG_1668.jpg
 
Great build, great work documenting everything it will pay off. When I did mine I think I took about a 10 to 12 pics from beginning to end, lots of headaches putting things back together.
 
I had some trouble with the window trim, but finally got that figured out with the help of this forum - Thanks! Link is here in case someone is interested. http://www.forbbodiesonly.com/moparforum/showthread.php?65938-Windshield-Trim-Removal-Help

As I stated before, I am working through the tear down in two phases: Phase 1 is to take off all items I can while maintaining the ability of the car to move under its own power. This is needed since my garage is on a hill. Once the car is no longer functional it will tie up my lift and the garage spot.
The second phase will be to tear off all remaining items. Hopefully I can take major "sections" off so I can free up the body to go get worked on.

The only items left for Phase 1 are the door handles and latches and the windshield. For phase 2, I plan to drop the K-member with engine and trans attached. I will also drop the rear while still connected to leaf springs.

Only bummer now is I need to travel, and will be gone for a week, so no more work on the car until 1 weekend in February...:angry1:
 
I'm also considering classic air. What kind of price did you pay for it? As well does the smaller heater box they provide completely replace the original one?

looks like you have a nice project.

thanks
 
I'm also considering classic air. What kind of price did you pay for it? As well does the smaller heater box they provide completely replace the original one?

looks like you have a nice project.

thanks

The whole system was around $1650, but I added some bells and whistles to my system. I started with their "perfect fit elite" system, which is specifically tailored to the car. I then added a hidden AC bracket that added some cost (I forget maybe $60 or $80). I also added their controls replacement (I think it is called DER for Direct Electronic Replacement). This control completely replaces the original heater controls, so if yours are beat up it is a good choice. I forget the adder for that too, maybe $100 or so.

Finally, yes, the new smaller heater box does completely replace the original one. That was another good point for me, because my car sat for many years and mice had made the heater box their home. It was filled with fuzz, had gotten wet, and in turn rusted some of the control doors that divert air. It also smells really strongly of mice pi$$ so now I don't need to spend any time restoring it. I cleaned it out a bit, but now I will just store it in case I ever want to return the car to stock.

Hope this helps...

Hawk
 
Thanks that really helps, you answered all my questions and made up my mind. I will go with the same system. Thanks so much
 
First Goal Met!

I was away for a week traveling, so I wasn't able to work on the car until today. I met my first goal which was to take off all parts that were not needed to move the car around under its own power.

I can now start of removing all the stuff that will allow the car to run and drive, but this means it will be stranded on my lift until it gets picked up for the bodywork. PROGRESS!!!

I include some pictures below of my door disassembly for those that are interested.

IMG_1651.jpg

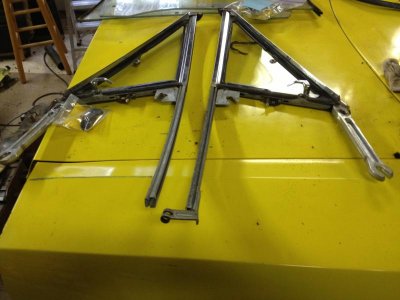
Note one side is missing the anchor piece that holds the wind wing assembly in place. Need to find that since someone drilled it out and never replaced it. Why would you do that???:angryfire:
IMG_1665.jpg

IMG_1752.jpg

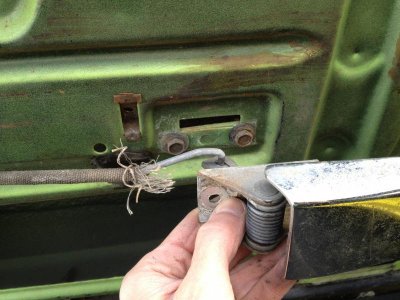
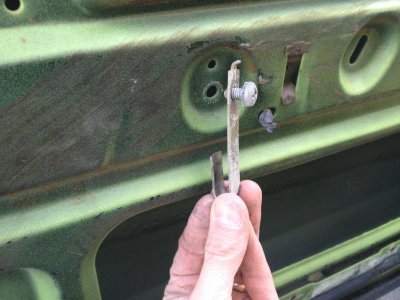
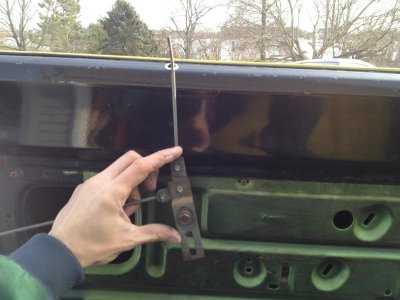
This is a J happed clip that helps guide the rod from the inner door handle to the latch.
IMG_1753.jpg

IMG_1754.jpg

There are two of these clips per side. They are what the arm rest gets bolted in to
IMG_1756.jpg

IMG_1757.jpg

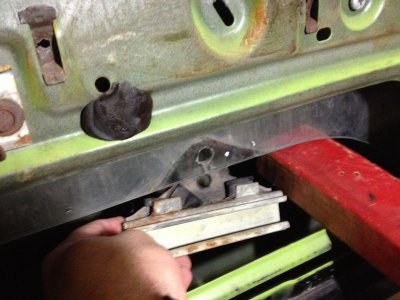
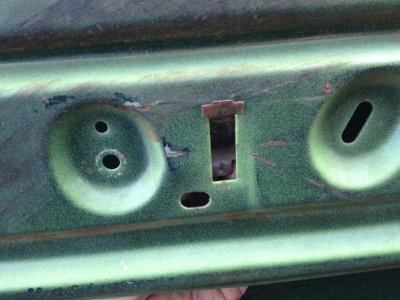
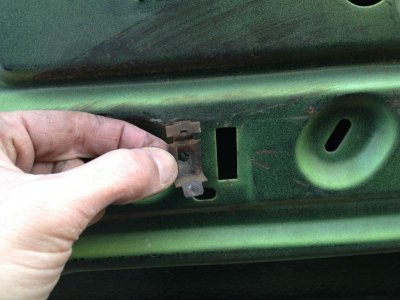
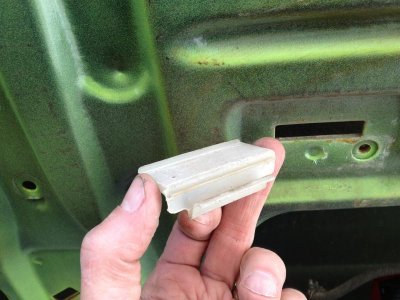
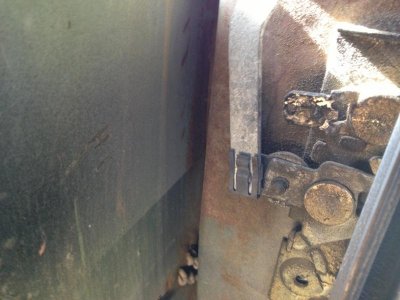
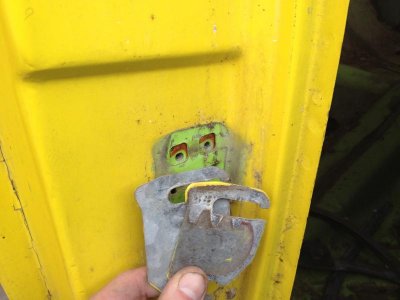
This plastic piece belongs in the slot where the door latch goes through the inner part of the door. My guess it is to reduce rattles.
IMG_1769.jpg

IMG_1765.jpg

IMG_1764.jpg

IMG_1763.jpg

I think the back piece is a shim. The driver side did not have this.
IMG_1774.jpg

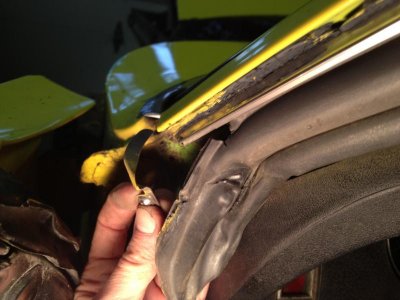
This is the small piece that holds the side of the Windshield molding down.
IMG_1649.jpg

IMG_1750.jpg

IMG_1748.jpg

Channel looks in good shape. No rust!!!
IMG_1749.jpg
 
Auto Transport Service
Back
Top