• When you click on links to various merchants on this site and make a purchase, this can result in this site earning a commission. Affiliate programs and affiliations include, but are not limited to, the eBay Partner Network.

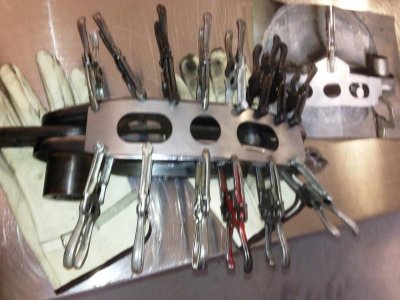
Here is what's on my table

Boise68

Well-Known Member
Local time
3:52 AM
Joined
Oct 19, 2012
Messages
290
Reaction score
147
Location
Boise, ID
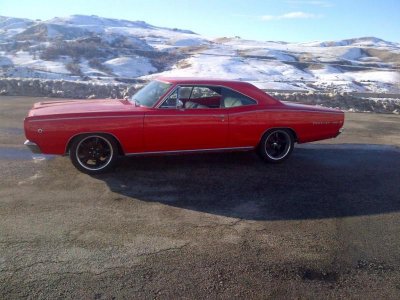
Beginning the build of my 68 Coronet cruiser project that may see time at the Silver State Challenge 2014. I am determined to accomplish some upgrades while keeping it on the road.

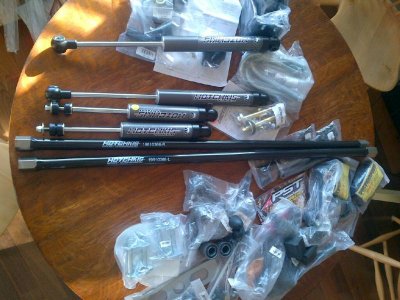
Starting with suspension upgrade, to date is Hotchkis rear leaf and fox shocks. Up front Helwig 1 1/8 tubular stabilizer. Now I am ready to tackle a complete rebuild of the front suspension: Polygraphite® Performance Super Front End Kit, Hotchkis Torsion Bars 1.1", Hotchkis
Fox shocks and upper control arms.

Oh, I have little experience with suspension rebuild.

1.) Looking at the Universal Front Suspension Pro Tool Kit from Mancini, http://chucker54.stores.yahoo.net/unfrsuprotok.html

2.) To finish all the new PST parts, woud paint be appropriate or protective clear coat?

3.) A recommend for caster camber guage.

I have shop manual, Hotchkis install video, and have surfed the entire internet for info. Any heads-ups, before-you-begins, would be appreciated.

Did I mention new disc brakes up front? Thanks up front. Michael
Xmas2012.jpgHotchkisRearLeafs.jpg

Xmas2012.jpg HotchkisRearLeafs.jpg
 
sorry i can't offer any do's and don't but the car looks great in the pic with the mountains as your backdrop. good luck boise68. Looking forward to feedback on how it goes for you.
 
:eusa_think:sure is very nice looking ,thanks for sharing your car with us keep on posting your updates with us :icon_thumright::headbang::headbang:
 
with that big of a modification from stock you will need to play with some differnt caster anges for sure to get what you like.i would try to zero the toe and camber to start.
 
Beautiful car, can't help though because I'll be asking the same question in the near future. Best of luck
 
Nice car. Paint, wheels, and the full length body side moulding really helps set it off.
 
finally started the front end rebuild

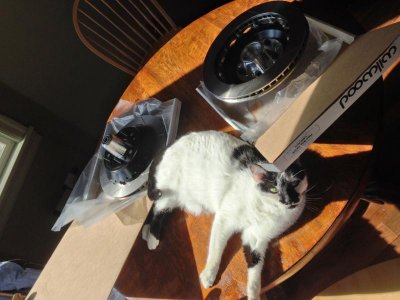
With Wilwoods arrived, and better weather I finally started the front end rebuild.
WilwoodAdvisor.jpg

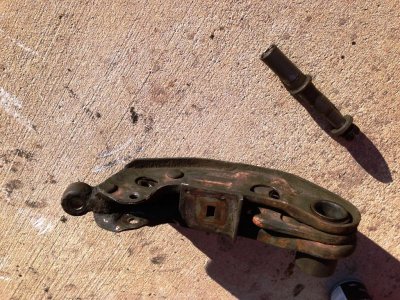
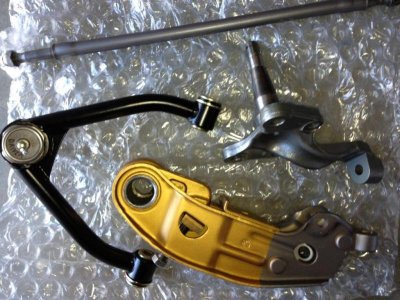
Surprised how easy the torsion bar (.92) removed once the strut rod was detached from the control arm. Used a wood clamp and light tap, pop, done. Honorable mention to PB blaster, no difficulty removing the control arm pivot pin. The pivot pin was easily removed with a press, as well as the rubber bushing which seemed in fair condition.
L_lower1.jpg

Referencing Jim Lusk's http://www.youtube.com/watch?v=Nwes-SP8u4w the control arm checked ok for end-play of the adjuster arm. More on endplay later...

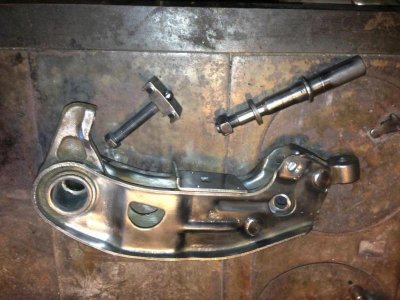
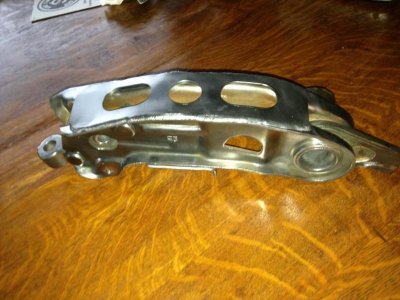
Soaked the lower control arm overnight in an electrolyte bath to remove rust, now ready for the stiffening plate.
ElectroliteBath.jpg

Weld prep.
WeldPrep.jpg

The fella welding the plate (semi-conductor equipment fabricator) thought the sitffening plate was too thin to accomplish anything but assured me the weld would hold it in place.

L-lower2.jpg

I am leaning towards the poly bushing for pivot pin, though some favor the rubber bushing.

**Note, the end-play of the adjuster arm opened up a little during the weld of the stiffening plate. At the risk of insulting the fabricator I didn't mention this but it is something to watch.

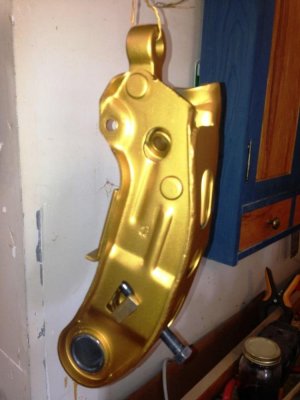
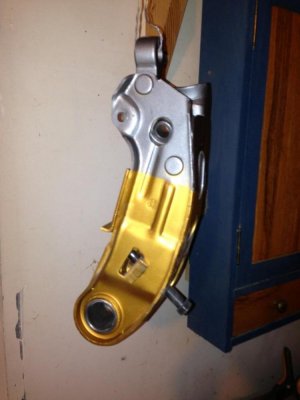
I have seen where some paint the lower control arm a 'gold' to imitate cosmoline, etc. I have POR-15 Metal Mask for use on the spindle, any thoughts on the gold lower control arm treatment?
 
Last edited:
Painting grey over the gold isn't quite the same as Troy's over on moparts but I'll see what the passenger side turns out.

lcpaint2.jpg
 
Upgraded the control arms to Firm Feel, and upgraded tie rods to the 11/16 ends. Ready for assembly.
Any preference for grease on the ball joints, perhaps Mobile 1 synthetic?

FirmFeel.jpg
 
synthetic grease is a good choice.better crush resistance.what sort of bushings in the tubular arms?i went with sphereical end links on mine.
 
synthetic grease is a good choice.better crush resistance.what sort of bushings in the tubular arms?i went with sphereical end links on mine.

The uppers are Firm Feel, and I hope I got the urethane bushings. Thanks for the nod on synthetic grease.

- - - Updated - - -

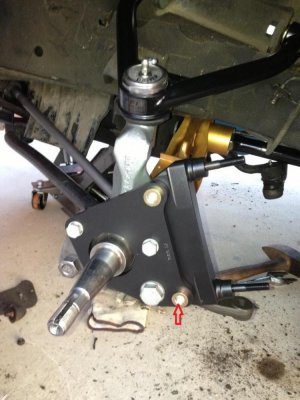
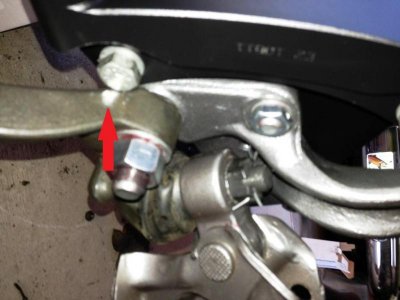
Got the Wilwood brackets mounted, for the Front Brake Kit No.: 140-10815-R. There was a little difficult with the radial bracket lower bolt/steering knuckle clearance?
Wilwood Bracket.jpgRadialBracketLowerMountBolt.jpg
 
Great work on the suspension...thinking of doing something along that line to my 70RR...when you said you gave the LCA's an electrolyte bath what did that mean?Can you further explain that method?...thanks

Dave
 
Great work on the suspension...thinking of doing something along that line to my 70RR...when you said you gave the LCA's an electrolyte bath what did that mean?Can you further explain that method?...thanks

Dave

Dave, thanks for the cheers, the electrolyte bath is something I have used with wood working antique tool restoration and an entire Straight 8 engine block.
http://www.rickswoodshopcreations.co...st_removal.htm

I get the washing soda--Sodium carbonate--from Fred Meyers, though not sure what you have in BC. Washingsoda is better than baking soda--sodium bicarbonate. For the LC arm I just used a 5 gallon plastic paint bucket, fill with water, 5 tlbs of washing soda using a L-shaped piece of rebar as the anode--hooked to positive of battery charger. The LCA is then suspended but fully immersed into the water, NOT TOUCHING the rebar. The negative is clamped to the LCA.

I did degrease the LCA first. The positive clamp should never touch the water it will corrode, the negative can be wet---rust travels from negative to positive. If your connections are good you should see a little bubbling within 10 minutes, and rust will pool at water level around the rebar. It should only take overnight. Pull it out of the water and work it over with a drill and wire brush attachments, ten minutes. The cool thing is that it doesn't alter the metal surface like some rust removal processes. I did my spindles and strut rods as well. All for the price of running a battery charger-on 12 volt and high amps.
 
suspension work looks great...
 
Auto Transport Service
Back
Top