• When you click on links to various merchants on this site and make a purchase, this can result in this site earning a commission. Affiliate programs and affiliations include, but are not limited to, the eBay Partner Network.

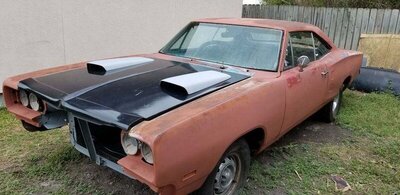
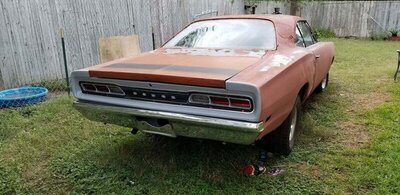
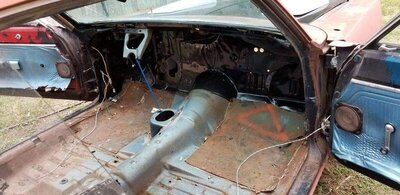
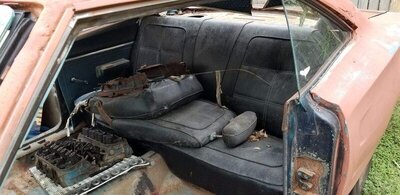
Lookie what $5000 buys you....

Back at it.
With the new spotweld cutter, I drilled out the remaining welds then peeled back the rest of the metal.

Trunk 52.jpg

Trunk 53.jpg

Trunk 55.jpg

Trunk 56.jpg

Trunk 57.jpg

Trunk 58.jpg

Trunk 59.jpg
 
The right side was rusty a bit wider than just the middle of the pan. It actually needed to be replaced past the outer flange of the rail so I cut it out.
Trunk 60.jpg


All bare metal areas were cleaned with a wire wheel. I took multiple measurements as to where the original pan ended, then took the AMD pan and marked a center line with soapstone. I then marked the edges to size then added an inch to each side to allow me to slip the pan in through the trunk opening.

Trunk 61.jpg

I was quite impressed with the appearance and fit of the AMD pan. I expected to have to make accommodations for an unforeseen flaw in the stamping but everything seems fine except the two holes at the axle hump.

Trunk 62.jpg

Trunk 63.jpg

Trunk 64.jpg

Trunk 65.jpg
 
The measurements of the original metal (Actually the measurements of the metal that was cut away) were written down on the trunk floor with a Sharpe for reference. Then with the pan in place, I measured and marked with soapstone and cut the edges in place. This made more sense than trying to cut it out of the car and hope that the cut was right.

Trunk 67.jpg

Trunk 68.jpg


Trunk 69.jpg

Trunk 70.jpg

Trunk 71.jpg
 
This job ate up a LOT of grinder cutting discs !
This method of cutting in place worked out nicely. I've done patch work before but this is the biggest trunk pan replacement that I have done. The red car was repaired in late 2001 and for it, I used a Belvedere section that I cut from a junker at a self serve yard.
The measurements I made here and the cutting in place was not only a time saver but it helped me NOT make any mistakes. There were no edges cut too short or anything cut out of square.

Trunk 72.jpg

Trunk 73.jpg


Trunk 74.jpg


Trunk 75.jpg


The trunk latch bracket was left in place, yeah....I just knocked the welds loose from the middle and left the top attached. This allowed me to swing it up enough to slide the pan under it.
 
With the edges cut to size, I pulled it back out to drill for plug welds. For those that do not know, a "Plug Weld" is similar to a spot weld. A hole is made in the top section and the panels are joined together. Then the operator fills the hole with weld to solidly fuse the panels together.
The holes for the middle floor pan brace were drilled. The edges were made with a hole punch.

Trunk 78.jpg

Trunk 79.jpg

Trunk 80.jpg
 
The gas tank strap brackets were welded in place after verifying the placement.
Trunk 83.jpg


Then, the pan was placed back in and secured in a few places with self tapping screws. Again, the fitment of this pan has been impressive. This is the first AMD part that I have bought. Chargervert has mentioned how they used a valance of his to study to make a new 1970 Charger valance. If they are as nice as this pan is, I may pony up the cash for one!
 
Now, the pan is in and the welding has begun.

Trunk 84.jpg

Trunk 85.jpg

Trunk 86.jpg

Trunk 87.jpg

TRunk 88.jpg

Trunk 89.jpg


The front and rear edges get a thick coating of seam sealer. The sides will get primed and eventually painted.
Welding is about 3/4 done.
 
... The edges were made with a hole punch.

Nice work and good progress!

Thanks for the detailed pictures and descriptions. I have not previously done bodywork but I plan to do it in the future so I'm slowly trying to improve my welding and metalworking skills - I'm fabbing up some custom baffles in my valve covers as "practice"!

You mention a hole punch. Do you mind posting a picture of this? Does it look similar to the below picture? Any recommendations or thoughts on these would be appreciated.

Thanks,

Hawk

41BxW7IiMdL._AC_SX466_.jpg
 
The right side was rusty a bit wider than just the middle of the pan. It actually needed to be replaced past the outer flange of the rail so I cut it out.
View attachment 957358

All bare metal areas were cleaned with a wire wheel. I took multiple measurements as to where the original pan ended, then took the AMD pan and marked a center line with soapstone. I then marked the edges to size then added an inch to each side to allow me to slip the pan in through the trunk opening.

View attachment 957359
I was quite impressed with the appearance and fit of the AMD pan. I expected to have to make accommodations for an unforeseen flaw in the stamping but everything seems fine except the two holes at the axle hump.

View attachment 957360
View attachment 957361
View attachment 957362
View attachment 957363

These hoses are still in good condition??
Screenshot_20200531-085222~2.png
 
Nice work and good progress!

Thanks for the detailed pictures and descriptions. I have not previously done bodywork but I plan to do it in the future so I'm slowly trying to improve my welding and metalworking skills - I'm fabbing up some custom baffles in my valve covers as "practice"!

You mention a hole punch. Do you mind posting a picture of this? Does it look similar to the below picture? Any recommendations or thoughts on these would be appreciated.

Thanks,

Hawk

41BxW7IiMdL._AC_SX466_.jpg

The hole punch is an air powered tool. One side makes a recess flange, the other punches a hole. I'll take pictures and post up later.
 
These hoses are still in good condition??
View attachment 957430
Those are for the CA emissions gas tank ventilation. They run through the rail and to the pipe behind the right wheel tub.
Yeah, they are original and it decent shape. They were cut when the tank was removed some time ago.
 
I did a similar trunk floor pan repair to my 70 Charger R / T V code car. I had a trunk floor section that I had cut out of a Charger parts car back in the mid eighties, back before reproduction trunk floor pans were even available. I used that section to repair the trunk floor in the white Charger. It seems that cars from outside the rust belt don't always need the full trunk floor pan replaced. The white car ame from California like your car. The New England cars that I am used to fixing, always need the whole thing replaced.
20190728_172038.jpg
 
I did a similar trunk floor pan repair to my 70 Charger R / T V code car. I had a trunk floor section that I had cut out of a Charger parts car back in the mid eighties, back before reproduction trunk floor pans were even available. I used that section to repair the trunk floor in the white Charger. It seems that cars from outside the rust belt don't always need the full trunk floor pan replaced. The white car ame from California like your car. The New England cars that I am used to fixing, always need the whole thing replaced. View attachment 957955
That looks like the same degree of repair that I did to my red car back in 2001 or 2002.
Looking at the area below the speaker deck, the two body plugs are spaced like mine and different from the AMD panel. Delta V had a '70 with the same spacing as ours.
I'm curious about that.
 
My guess is that Chrysler must have changed the location of those plugs in 1970. Most likely the 68 and 69 Chargers had the plugs in the same position as the pan they make. I doubt that AMD would retool their stampings to make a minor change in an obscure location to make a 100 percent accurate pan just for 70 Chargers.
 
A buddy got this for 2k a few weeks ago....383 4 speed car.

-1136569906354742203.jpg -5927208820830297655.jpg 5976552964327881709.jpg -5629323771821748492.jpg
 
The flange feature makes a small recess to allow a lap joint instead of a butt joint. I have used that in the past for lower quarter patches.
 
Auto Transport Service
Back
Top