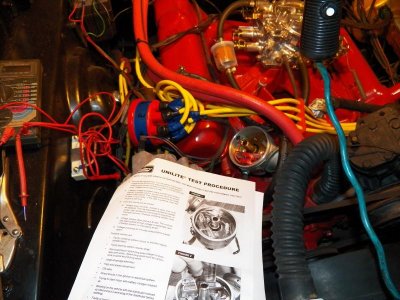
My 68 Charger R/T "Bullitt" re-creation
- Thread starter ChargerRTguy
- Start date
ChargerRTguy
Well-Known Member
Awesome project and looking good! I'll be following your progress, keep up the good work and let's see some rubber laid down the street soon :icon_thumleft:
- - - Updated - - -
Cool to see another Charger with one! Mine still has its original one and the previous owner was saying it was a somewhat rare option ?
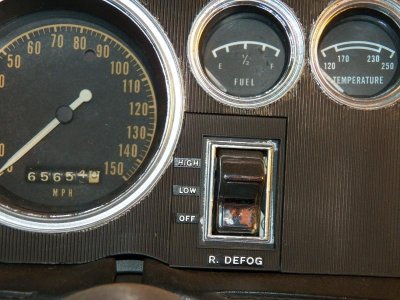
Thanks for the compliments, I know the defroster was an option and not standard. How rare, not sure. Mine had the hole in the dash for it, so I pickup up a used one, bought a def switch, and a repo dash plate. The defroster tested ok, I ran new wire, hope it all works. My car was pretty loaded with options, like air, rear seat speaker, 8-track, power brakes, power steering etc.
Mr.SpeedFreak
Well-Known Member
No problem you're doing some great work. And that's awesome, sounds a lot like my car minus the AC. Power brakes and steering, front discs, performance axle package with the 3.55 suregrip, hood mounted turn signals, rear defroster one of these days I'll have to decode the whole fender tag
And you would be the guy to ask then, is this hole just to the left of the heater control the one for the defroster? I thought it was but no one around here had seen one before
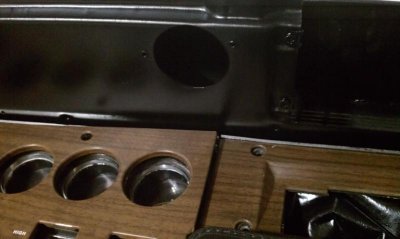
Also the switch itself only has a rod sticking out of it so I'm assuming I'm missing some kind of knob or something?

And you would be the guy to ask then, is this hole just to the left of the heater control the one for the defroster? I thought it was but no one around here had seen one before

Also the switch itself only has a rod sticking out of it so I'm assuming I'm missing some kind of knob or something?

ChargerRTguy
Well-Known Member
Defroster
My defroster has only a black wire coming out. If I connect it to
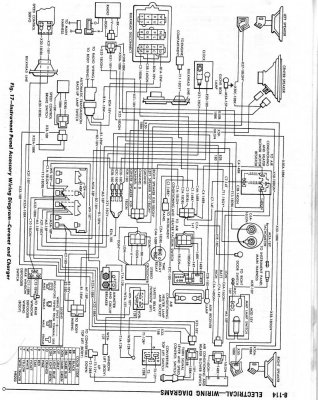
12V it works fine. The original wire is gone for the rear def. I had to run a new wire, I picked orange. The defroster switch you are showing is similar to mine which came with the unit, it looks like a 2 speed, but mine is rusted. I picked up a nice one on Ebay a while back. It goes to the right of the speedo, and under the fuel gauge. It also shows that location in my service manual, not sure what goes into that hole left of the heater control. My car has none. The switch I purchased was a 2 speed also, but the way I wired it the defroster will only have one speed, and I'm ok with it. I attached a wiring diagram showing the original wiring of the defroster, hope this helps.
Attachments
Mr.SpeedFreak
Well-Known Member
Huh that's really interesting.. but my switch that I'm assuming is for the defroster is really different looking from the standard dash switches like the one you have in that picture. Is that switch you have in the picture the same as what was originally in your dash for the defroster?
ChargerRTguy
Well-Known Member
- Local time
- 2:21 AM
- Joined
- Jan 16, 2011
- Messages
- 75,463
- Reaction score
- 117,659
- Location
- NorCal Sierras
cool 68 Charger project, great thread too, nice car & progress...
ChargerRTguy
Well-Known Member
console
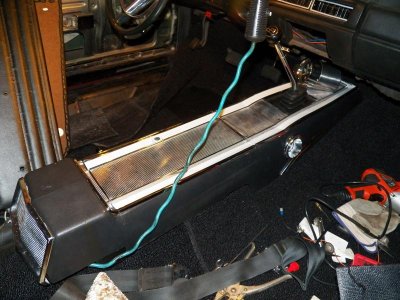
I did a "mock up" of my console before I install it into the car.
I did a "mock up" of my console before I install it into the car.
Mr.SpeedFreak
Well-Known Member
Looking good! Are you going to do the carpet pieces that go underneath the side trim on the console?
ChargerRTguy
Well-Known Member
Thanks, a bit of polishing, some new paint, looks good for a driver. I have not decided what to do, I've seen carpet for around 60 bucks $ for four pieces, so might wait, I don't need it right now, I might think of making my own.
Mr.SpeedFreak
Well-Known Member
Definitely, looks brand new! yeah I would think you could do it yourself for cheaper than that. I kept my original pieces to make templates off of, could make a couple extra if you end up needing some
ChargerRTguy
Well-Known Member
It has a few hairline cracks, some chips inside, you can't see, but with a hot glue gun, it takes care of most of the problems. All the parts are original, not repo, I tried took keep it that way. I might take you up on that pattern idea. I have the carpet that I took out and it's not bad, would work for making console carpet trim.
Mr.SpeedFreak
Well-Known Member
Ah well it definitely still looks the part of being new, nice work :icon_thumleft: I'm also trying to use as little of the Chinesium repop parts as I have to.
Yeah that would definitely work if the carpet is still in decent condition, might as well save the 60 bucks for something else if you can
Yeah that would definitely work if the carpet is still in decent condition, might as well save the 60 bucks for something else if you can
ChargerRTguy
Well-Known Member
Carpet Install
Started to install the carpet.
Started to install the carpet.
ChargerRTguy
Well-Known Member
ChargerRTguy
Well-Known Member
ChargerRTguy
Well-Known Member
Basket case
Well-Known Member
fresh paint, more than likely it's the ground. But it could be the module. In owning Mopars since 1983, I've only ever had one bad Ballast, and that was in 1983. still keep a spare with me though.
ChargerRTguy
Well-Known Member
I checked the coil and the secondary resistance was fine but the primary circuit was bad, hopefully that is the problem and I had to order one.
ChargerRTguy
Well-Known Member
I replaced the coil, getting spark at the plug with a tester, but she still will not fire. Sounds like want to fire but nothing. Looks like the fuel filter is not getting much gas, have to check the fuel pump.
Similar threads
- Replies
- 15
- Views
- 1K
- Replies
- 14
- Views
- 858
- Locked
- Replies
- 4
- Views
- 3K
- Replies
- 2
- Views
- 2K

