You are using an out of date browser. It may not display this or other websites correctly.
You should upgrade or use an alternative browser.
You should upgrade or use an alternative browser.
My 69 Coronet project
- Thread starter CoronetDarter
- Start date
CoronetDarter
Well-Known Member
Hey Dennis, you skipped ahead to the end!
- - - Updated - - -
- - - Updated - - -
The coupe looks like the twin separated at birth! So it has R/T scoops and emblem and 500 trim on the sides. Cool! Are the scoops functional?View attachment 196991you are doing it the justice it deserves.
I have a near clone to yours. but a WI car!! LOL!
1969 Hemi RTs
Well-Known Member
No, scoops are real but no air boxes.
CoronetDarter
Well-Known Member
Moving forward
Now that the hemming and hawing are over and the decision to restore has been made, it's kind of a relief. This site has given me the inspiration to take on a project I never would have done before. Its intimidating too because I have no-where near the madd skilz that so many other's on this site possess. I've read through pretty much all the resto threads posted in the last year and I'm amazed at the craftsmanship displayed by FBBO members. You guys rock!
At that's the reason why my thread is a few months behind the build. After reading through everyone else's I didn't think I had anything to add. The resto is a non-rostisserie rebuild with the main goal of getting the car as rust free as possible while enhancing the safety, reliability, comfort, and of course - Performance. In fact a lot of what I plan to do has been lifted off this site. So while reading if you see some technique that looks familiar - it was probably yours. :sSig_thanks: And thanks to Dennis H and 68 Sport Satellite (Dennis and Dwayne) for getting me off my arse.
So here goes:
Despite the surface rust in places the car is overall in good shape. The interior floor pans still have the original Chrysler red primer; no rust. Same for the frame rails and cross members. Sandblasting will reveal the soft spots.
After the front end, off came the doors and the interior was gutted. Next was the dash. It wasn't that bad really, if the windshield is out. Because I still have no idea how I'm putting this all back together again I'm being real **** documenting everything. Every bracket or main part has it's own labelled baggy for nuts and bolts. And then they're stored in individual jars labelled for each main part of the car - front fenders, interior/dash, engine compartment, etc. For each connector on the dash harness I wrapped tape around the wire and labelled with a number. Each number is written down in a note pad as to where it goes. I took a lot of notes, and so far hundreds of pictures.
 A lot of the usual rot in the window channel.
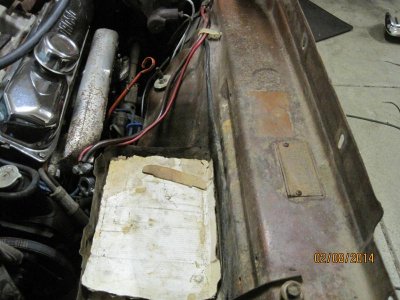
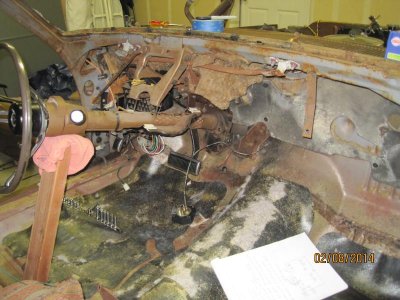
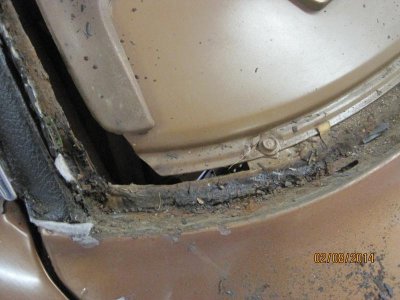
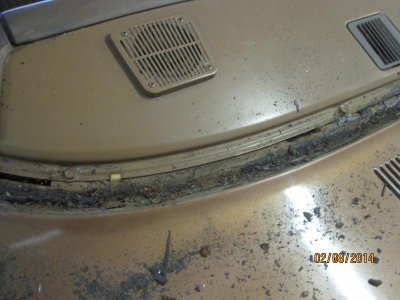
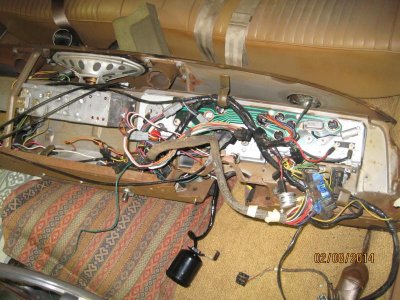
Maria helped me take out the dash - she grabbed the passenger side, I had the drivers side, and we lifted and placed on the pillows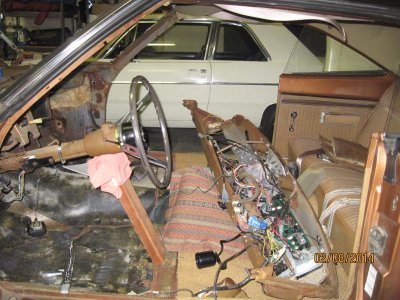
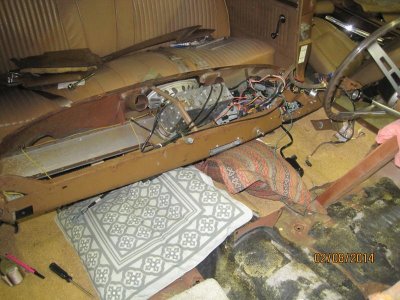
Next was the rear seat, carpet, seat belts and headliner.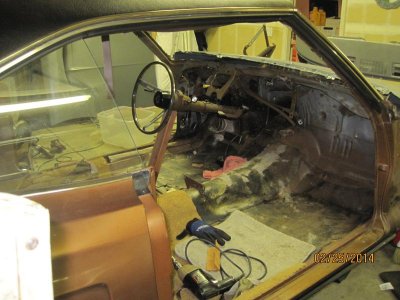
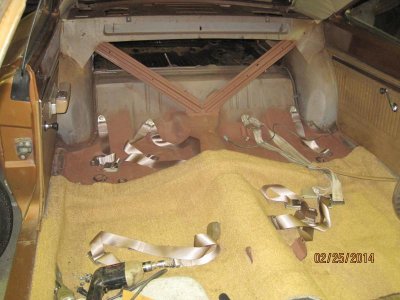 For those of you who have never taken out a back seat, it's unique. The rear cushion lifts up off of metal brackets. The bottom cushion is held on by two latches on the front edge of the seat frame, one on each side of the hump. You take the heel of your hands and push down hard on the leading edge of the seat and it pops 'em out. Don't push down towards the middle of the cushion - how do I know? Because I did it at first and punched a hole in the vinyl.:nono:
Well, thats enough damage for one day.


Now that the hemming and hawing are over and the decision to restore has been made, it's kind of a relief. This site has given me the inspiration to take on a project I never would have done before. Its intimidating too because I have no-where near the madd skilz that so many other's on this site possess. I've read through pretty much all the resto threads posted in the last year and I'm amazed at the craftsmanship displayed by FBBO members. You guys rock!
At that's the reason why my thread is a few months behind the build. After reading through everyone else's I didn't think I had anything to add. The resto is a non-rostisserie rebuild with the main goal of getting the car as rust free as possible while enhancing the safety, reliability, comfort, and of course - Performance. In fact a lot of what I plan to do has been lifted off this site. So while reading if you see some technique that looks familiar - it was probably yours. :sSig_thanks: And thanks to Dennis H and 68 Sport Satellite (Dennis and Dwayne) for getting me off my arse.
So here goes:
Despite the surface rust in places the car is overall in good shape. The interior floor pans still have the original Chrysler red primer; no rust. Same for the frame rails and cross members. Sandblasting will reveal the soft spots.
After the front end, off came the doors and the interior was gutted. Next was the dash. It wasn't that bad really, if the windshield is out. Because I still have no idea how I'm putting this all back together again I'm being real **** documenting everything. Every bracket or main part has it's own labelled baggy for nuts and bolts. And then they're stored in individual jars labelled for each main part of the car - front fenders, interior/dash, engine compartment, etc. For each connector on the dash harness I wrapped tape around the wire and labelled with a number. Each number is written down in a note pad as to where it goes. I took a lot of notes, and so far hundreds of pictures.
 A lot of the usual rot in the window channel.


Maria helped me take out the dash - she grabbed the passenger side, I had the drivers side, and we lifted and placed on the pillows


Next was the rear seat, carpet, seat belts and headliner.

 For those of you who have never taken out a back seat, it's unique. The rear cushion lifts up off of metal brackets. The bottom cushion is held on by two latches on the front edge of the seat frame, one on each side of the hump. You take the heel of your hands and push down hard on the leading edge of the seat and it pops 'em out. Don't push down towards the middle of the cushion - how do I know? Because I did it at first and punched a hole in the vinyl.:nono:
Well, thats enough damage for one day.


451Mopar
Well-Known Member
Nice car, I like the T7 Bonze with tan interior.
CoronetDarter
Well-Known Member
Thanks 451. I like it too, different from most of the cars you see at shows. Even as I say that it's probably not staying that way.Nice car, I like the T7 Bonze with tan interior.
Basket case
Well-Known Member
great project!
Looks like you have started a bundle of the work, but i agree on a nice project and you'll have a great ride when done! Enjoy it....
I sure wish Ma Mopar would have done a better job on the B Body windshield gaskets!!!!! Everyone I've seen look that bad or worse and they can be a bitch to seal just remember that when your reinstalling it and put plenty of butyl in there. Car looks great other than that, very nice starting point.
MT_Mopar
Well-Known Member
Looks like you've got a great start on a solid project. That will be one very nice car when done! I like it!
BigBlock61
Well-Known Member
Nice work so far, and it sounds like you have come up with a plan. My Coronet was in much worse shape than yours and I had never done anything like this before, so if I can do it anyone can. It's easy to get overwhelmed but remember it's just one piece at a time.
451Mopar
Well-Known Member
What color are you thinking of going with?Thanks 451. I like it too, different from most of the cars you see at shows. Even as I say that it's probably not staying that way.
I have a '69 Coronet 500 in T7 Bronze, but it had a white top. It is a 318 car , 904 trans, 8-1/4" rear with A/C bucket seats and center console. I originally bought it for the interior for my '69 R/T hard top, but it is in too good a condition to tear up for parts. The body is pretty straight (a small dent in the passenger side fender), with only a small amount of rust. The drivers side lower rear quarter has rust through, the passenger side is showing rust bubbles, and there is a bit of rust in the trunk, I have about a 4" hole in the trunk floor after cutting the rusted metal out. The rear window channel had some rust too, because the previous owner took the roof material off, but not under the window trim. I already fixed that. The rest of the floor, fenders doors look great. I got the seats redone in the stock tan color, stock pattern, but with cloth centers. I still have to fix the rust, but I haven't decided if I should just cut a patch for the trunk, or replace the entire trunk floor. I did buy patch panels for the lower rear quarters and the inner part that goes upto the trunk floor (I think trunk extentions?)
For power, I have a built 360 that was in a RamCharger that I rolled and scraped after the accident, and I have a 518 non-lockup transmission I plan to install, even though I know i will have to cut into the torsen bar crossmember in the trans tunnel area to make it fit. The rear end is getting replaced with the 8-3/4" from the R/T hardtop (it will get a dana60.)
I just need to quit breaking stuff on the other cars so I have time (and money) to work on the coronet 500.
CoronetDarter
Well-Known Member
I agree, and the rear window sealing isn't much better. After sandblasting there was swiss cheese in both the front and rear window channels. Some of the holes got patch panels and the smaller holes were filled with All-Metal.I sure wish Ma Mopar would have done a better job on the B Body windshield gaskets!!!!! Everyone I've seen look that bad or worse and they can be a bitch to seal just remember that when your reinstalling it and put plenty of butyl in there. Car looks great other than that, very nice starting point.
- - - Updated - - -
What color are you thinking of going with?
Great question 451 because I'm undecided at this time, but narrowing it down. Two colors I know it won't be are black or red. Reading through H2E's Charger resto I got hooked on the Dupont Copper Sunset. http://www.forbbodiesonly.com/moparforum/showthread.php?45279-1969-Charger-R-T-resurrection/page16
And then there's Dupont Harvest Flame:
http://www.moparmusclemagazine.com/...mopp_1108_1970_plymouth_gtx_exclusive_photos/
Since then I've noticed killer copper tones on Dodge Ram, Toyota Tundra, even Kia. And then I saw Mechanic's thread of his T5 Coronet and it looks awesome.
On the other side of the color wheel I really like some of the silver tones out there. The silver looks really good against the black vinyl top. In other words, I don't know what color yet. :icon_eyes: But choosing the right color is half the fun.
The interior is set though - it's going from saddle tan to black. The dash pad was cracked anyway and the rear of the dash was rust infested and I had it sandblasted, so a color change wasn't a big deal. I'll post some pictures later.
And it sounds like you have more work cut out for you than I do. So far no major rot has turned up.
- - - Updated - - -
Looks like you've got a great start on a solid project. That will be one very nice car when done! I like it!
And the same to you. I've been following your thread - awesome build.
- - - Updated - - -
Nice work so far, and it sounds like you have come up with a plan. My Coronet was in much worse shape than yours and I had never done anything like this before, so if I can do it anyone can. It's easy to get overwhelmed but remember it's just one piece at a time.
Thanks BB. The Big Boys on this site, the ones who have done this before and have created masterpieces, they give me the inspiration. And it's members like you who haven't done this before and made it to the end that give me the confidence that maybe, just maybe, I can pull this off. One small step at a time...
CoronetDarter
Well-Known Member
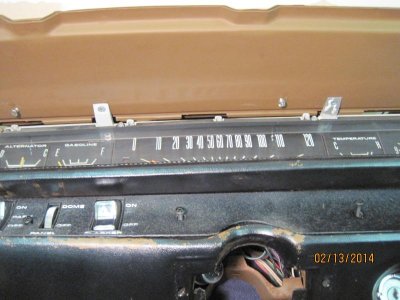
Next up, took a closer look at the dash. The back of the dash is also rust infested. Took it apart. The gauges and trim don't look bad. All the gauges worked at the time of the accident so it's more cosmetic cleanup. I'm so paranoid about being able to get the wiring back together again so I labelled every connector with a number as it was disconnected. I have a notepad that I use and created a numbered legend to help with reassembly. That notepad has at least 10 pages of notes; can't lose it! Hard to see, but there's masking tape with numbers taped to each connector
 Also hard to see, but I have containers for each main component: Front fenders/grille; Interior/dash; Engine/tranny; Chassis; etc. Each container is stuffed with labelled baggies with nuts, bolts, screws, etc., etc.
  There's probably a better way to keep track of everything, but this is what I came up with.
Here's closeups of the dash:
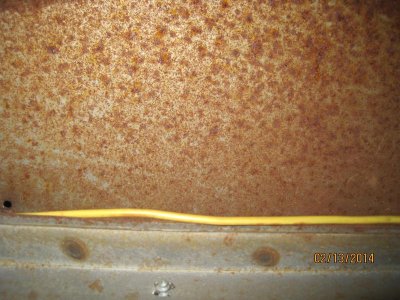
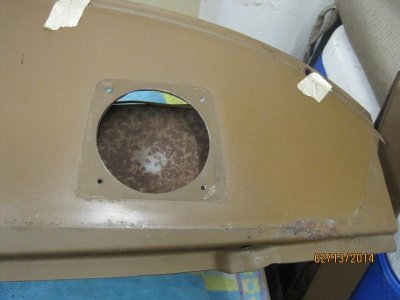
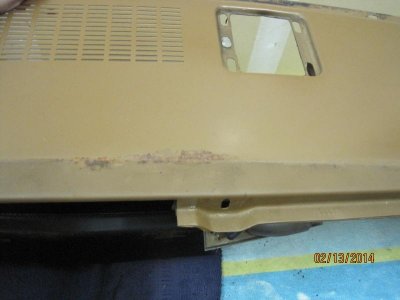 There's a snail trail of rust where the dash pad ended.
The front doesn't look bad at all:
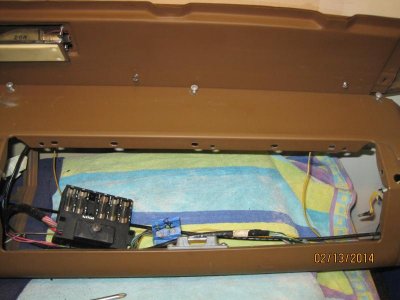
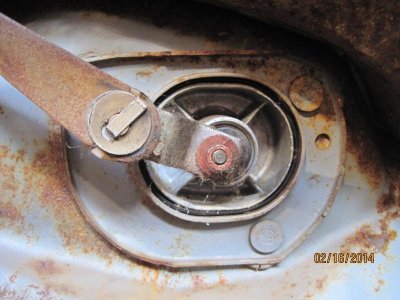
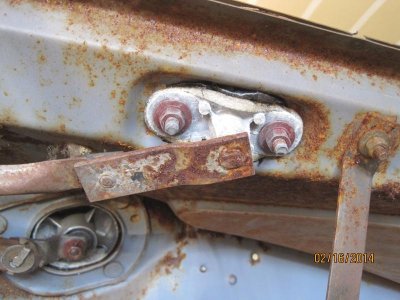
Now that the dash is disassembled, time to look underneath the inside of the firewall:
 View attachment 198085
Surprise; there's rust! The heater core must have been leaking or maybe a lot of condensation because the driver's side wasn't nearly as bad.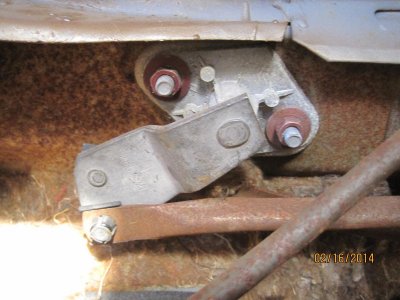
With the rust showing up underneath and the vanes on the upper cowl showing bubbling under the paint it was time to remove the cowl and see what we got. Had to drill out all the factory welds. I realize for most of you resto guys tackling welds is no big deal, but to a newbie like me I was s**ting a brick. lol It's one thing to take off a door or fender, but when you start drilling out welds that's a whole 'nother level. Popped them out though - with an electric hand drill no less!
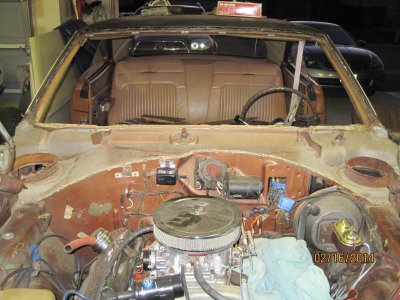
Doesn't look that bad actually. Don't know if I should be disappointed or not.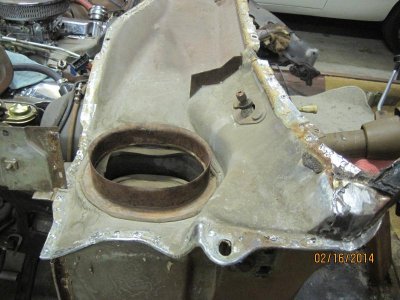
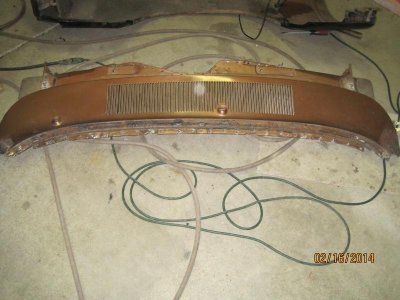
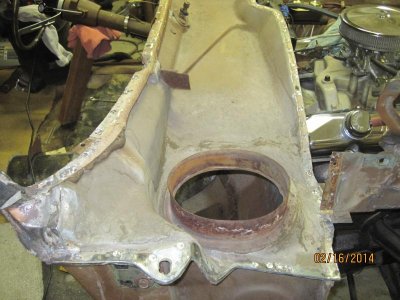
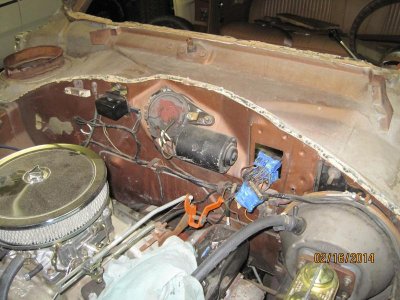
So now it's off to the blasters with the front end pieces and dash.


 Hard to see, but there's masking tape with numbers taped to each connector
 Also hard to see, but I have containers for each main component: Front fenders/grille; Interior/dash; Engine/tranny; Chassis; etc. Each container is stuffed with labelled baggies with nuts, bolts, screws, etc., etc.
  There's probably a better way to keep track of everything, but this is what I came up with.
Here's closeups of the dash:


 There's a snail trail of rust where the dash pad ended.
The front doesn't look bad at all:


Now that the dash is disassembled, time to look underneath the inside of the firewall:

 View attachment 198085
Surprise; there's rust! The heater core must have been leaking or maybe a lot of condensation because the driver's side wasn't nearly as bad.

With the rust showing up underneath and the vanes on the upper cowl showing bubbling under the paint it was time to remove the cowl and see what we got. Had to drill out all the factory welds. I realize for most of you resto guys tackling welds is no big deal, but to a newbie like me I was s**ting a brick. lol It's one thing to take off a door or fender, but when you start drilling out welds that's a whole 'nother level. Popped them out though - with an electric hand drill no less!

Doesn't look that bad actually. Don't know if I should be disappointed or not.


So now it's off to the blasters with the front end pieces and dash.


Doing a great job! Thank you for the detailing an showing us, it looks pretty good for the age of the car... Good luck!
CoronetDarter
Well-Known Member
Thanks Ron. I mentioned before that I've taken hundreds of photos and written pages of notes, not sure if I'm giving too much info in these postings. I appreciate the kind words.
Propwash
Well-Known Member
- Local time
- 3:03 PM
- Joined
- Oct 29, 2009
- Messages
- 9,695
- Reaction score
- 4,338
- Location
- Island of Misfit Toys
All the info/pictures you're posting here i'm sure will be helping someone else down the road. Thanks for taking the time to do so. Nice job on the cowl removal. A lot of the times the air plenums are rotted apart (thus water leaks right into the car), but yours is pretty dang nice. Good news is those are pretty ease to get aligned back on there straight, because of all the different angles that need to match up. Kind of align themselves.
Grumpy
Well-Known Member
- Local time
- 3:03 PM
- Joined
- Sep 29, 2011
- Messages
- 69
- Reaction score
- 9
- Location
- Mundelein, IL & Friendship, WI
Looking good, thanks for posting. I've done a lot of these 2nd gen B's, just love to do them. If you need anything let me know. I have so many parts I should probably start selling them here.
I do the same thing, tag everything and take a pic of it while disassembling. Have a flat screen in the shop and refer back to the pix when I'm putting everything back together.
Dave
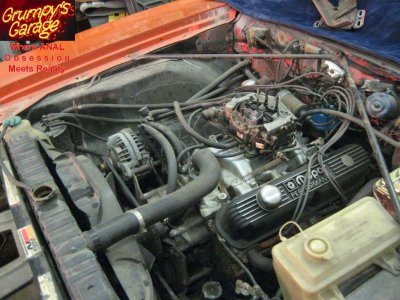
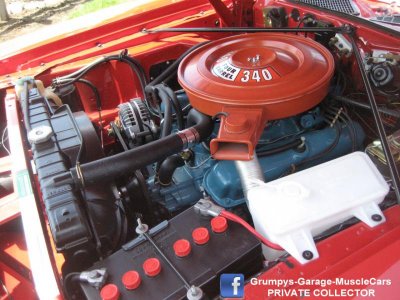
I do the same thing, tag everything and take a pic of it while disassembling. Have a flat screen in the shop and refer back to the pix when I'm putting everything back together.
Dave


Thanks Ron. I mentioned before that I've taken hundreds of photos and written pages of notes, not sure if I'm giving too much info in these postings. I appreciate the kind words.
CoronetDarter
Well-Known Member
Thanks for the encouragement Prop. I was surprised how clean it was underneath the cowl. The air plenums had their share of leaves and debris collected inside but they will restore nicely.All the info/pictures you're posting here i'm sure will be helping someone else down the road. Thanks for taking the time to do so. Nice job on the cowl removal. A lot of the times the air plenums are rotted apart (thus water leaks right into the car), but yours is pretty dang nice. Good news is those are pretty ease to get aligned back on there straight, because of all the different angles that need to match up. Kind of align themselves.
- - - Updated - - -
Looking good, thanks for posting. I've done a lot of these 2nd gen B's, just love to do them. If you need anything let me know. I have so many parts I should probably start selling them here.
I do the same thing, tag everything and take a pic of it while disassembling. Have a flat screen in the shop and refer back to the pix when I'm putting everything back together.
Dave
Hey Dave, the FP in the garage is a great idea. I took apart the e-brake assy and brake pedal assy to clean 'em up and paint. First I took about 10 pictures from every angle and boy, am I glad I did. I wound up rebuilding the units in my home office in front of the computer monitor, scrolling through the pics. Still took me about 45 min to put the brake assy back together - without pics I would have been in a world of hurt.
And I'll keep your name handy - even bagging and tagging I'm sure something is going to go missing before I'm done.
- Local time
- 1:03 PM
- Joined
- Nov 22, 2010
- Messages
- 17,434
- Reaction score
- 21,932
- Location
- Muroc Dry Lake Bed
This has truly been a magnificant "THREAD"
You have 2 fantastic cars!
The Dodge Coronets are my one of my Favorite cars!
Your's being 500s..? The icing on the cake!
And, technical points: I rate it: AAA+
Visual presentation: AAA+
Thanks for an outstanding POST!
"Super-bee_ski"
"I LOVE Coronets"
You have 2 fantastic cars!
The Dodge Coronets are my one of my Favorite cars!
Your's being 500s..? The icing on the cake!
And, technical points: I rate it: AAA+
Visual presentation: AAA+
Thanks for an outstanding POST!
"Super-bee_ski"
"I LOVE Coronets"
Similar threads
- Replies
- 7
- Views
- 459
- Replies
- 35
- Views
- 4K
- Replies
- 0
- Views
- 210

![1968 440 001 [800x600].jpg 1968 440 001 [800x600].jpg](https://www.forbbodiesonly.com/moparforum/data/attachments/152/152425-f67626001652619c40aa40b060e2b1c5.jpg?hash=9nYmABZSYZ)


