• When you click on links to various merchants on this site and make a purchase, this can result in this site earning a commission. Affiliate programs and affiliations include, but are not limited to, the eBay Partner Network.

My 69 Coronet project

Well that sucks to hear about losing a spot in the booth. Hopefully something comes together for you soon. All the work you put in I'd sure be pretty hesitant to spray in a barn as well.
 
Well that sucks to hear about losing a spot in the booth. Hopefully something comes together for you soon. All the work you put in I'd sure be pretty hesitant to spray in a barn as well.
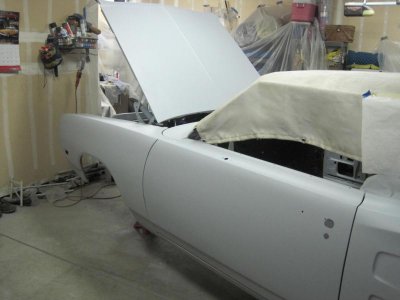
I talked to Mike about it again tonight and maybe there's a chance to resurrect the booth plan. I see a glimmer of hope….

- - - Updated - - -

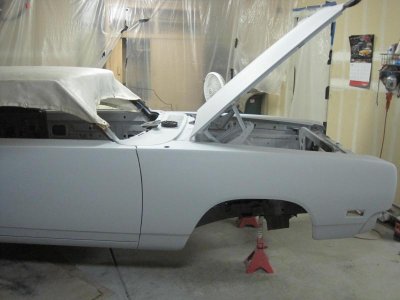
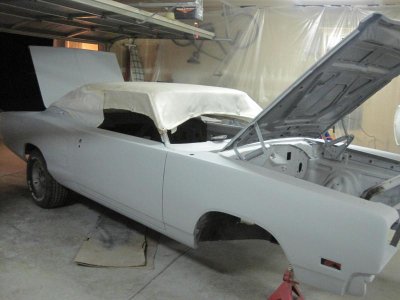
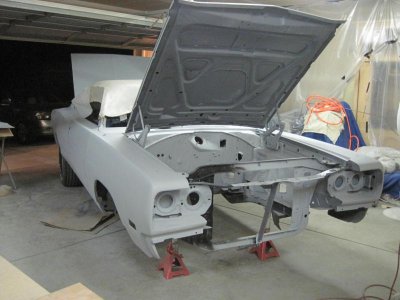
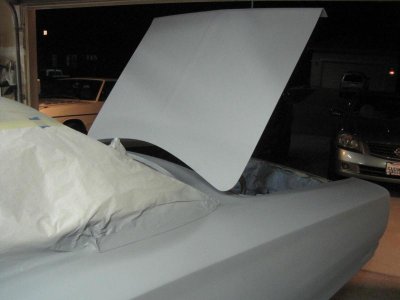
Got the panels on. It looks like a Coronet again.
IMG_2178.jpgIMG_2182.jpgIMG_2181.jpgIMG_2180.jpgIMG_2183.jpgIMG_2179.jpg
 
Wow, I missed a bunch of updates! Looks great. Waiting to see the A/C install. I did the Vintage Air A/C on my convertible last year.
Any interest in selling the 500 trim? I need a good driver side door trim, mine has a huge ding in it like someone door poped it.
 
Wow, I missed a bunch of updates! Looks great. Waiting to see the A/C install. I did the Vintage Air A/C on my convertible last year.
Any interest in selling the 500 trim? I need a good driver side door trim, mine has a huge ding in it like someone door poped it.

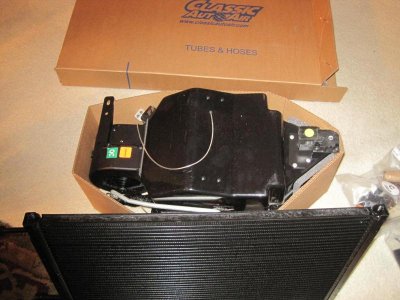
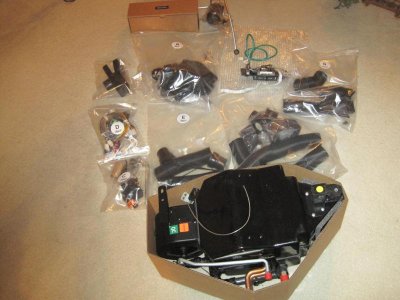
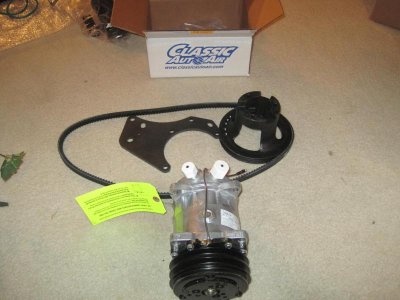
Funny you should mention A/C 451, lookee what showed up on my doorstep a couple of days ago. Classic Air Perfect Fit system. I'm very impressed with the initial inspection, everything is there down to nuts, bolts and tie wraps. Everything is clearly labeled and the directions are outstanding - they not only explain what to do but what not to do.

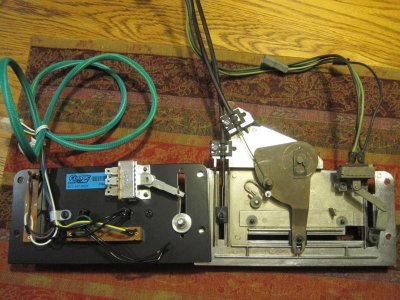
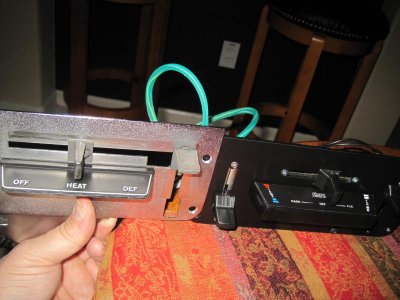
I recommend spending the extra $100 for the DER (Direct Electronic Replacement) switch. As its name implies it bolts up directly to the factory location on the dash and is plug n play with the a/c unit. And it's good looking. If you choose to keep the original control panel then you have to convert it over to electronic activation, again all parts are included and the detailed instructions are excellent. Either way you go the factory cables are gone.
IMG_2160.jpgIMG_2162.jpg

IMG_2158.jpgIMG_2157.jpgIMG_2159.jpg
 
hey man, that car is gonna come out awesome! here's a site I just found today that has all the paint codes, cross referenced to different paint manufacturers, for all makes and years of cars, and they show full size images of the paint on the cars
 
Thanks Clarence that would be a great help, but the link didn't show up on your post.
 
yea I'm too dumb to figure out how to do that lol, that color we were talking about the other day is called toxic orange
 
You will love that Classic Auto Air. It has been flawless and ice cold for 8 years in mine. 31 degrees at the vent. The improved control box was not available when purchased. May upgrade. Thanks for the pics, now I know what the back looks like.
 
You will love that Classic Auto Air. It has been flawless and ice cold for 8 years in mine. 31 degrees at the vent. The improved control box was not available when purchased. May upgrade. Thanks for the pics, now I know what the back looks like.

I remember how well it worked.
 
Sounds like the way to go, and it REALLY sounds like your satisfied! There is so many things available for us now its unreal, AND cool as it can get... :)
 
Sounds like the way to go, and it REALLY sounds like your satisfied! There is so many things available for us now its unreal, AND cool as it can get... :)

Hey Ron, you're right. Over the years the aftermarket has made it possible for amateurs like me to rebuild a classic car. I remember back in the 80's going from junkyard to junkyard looking for parts.
 
I did not know Classic air had the electronic controls? That looks more stock that the control unit that comes with the vintage air unit. I just used the under dash outlets for now. When I get around to doing body work, and removing the dash I will put vents in the dash too, but I haven't decided if I want to go with an original type vents, or some of the billet aftermarket types?
 
I did not know Classic air had the electronic controls? That looks more stock that the control unit that comes with the vintage air unit. I just used the under dash outlets for now. When I get around to doing body work, and removing the dash I will put vents in the dash too, but I haven't decided if I want to go with an original type vents, or some of the billet aftermarket types?

The DER looks stock, but modern at the same time. To get another perspective, check out Hawk's RR resto thread, he's done an outstanding job of documenting his a/c install. Billet vents would look SWEET! I t al depends what look you're after.
 
Tinkering around with the a/c

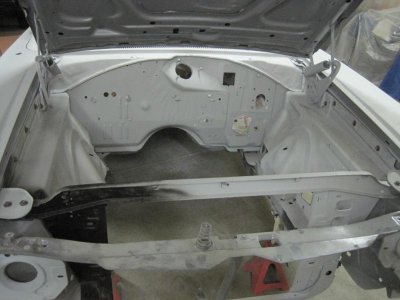
Getting ready to final sand before paint so I thought this would be a good time to drill into the firewall. Being a non-a/c car there's three more openings needed for the a/c system. Classic Air's template makes the process almost foolproof; just line up the original heater hose openings, tape the template to the firewall and start drilling. Looking at the firewall from the engine compartment you can see the circular scribes where the factory punched out the holes for a/c - everything lined up.

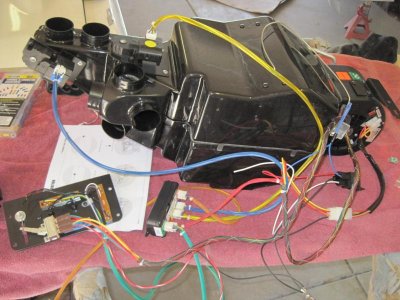
I used plumbers tape on the step drill to gauge the depth. The unit has to be bench calibrated before installation using a 12V source. I dug out the Coronet's battery, still pumping out 12V after a year on the garage floor. I hooked up alligator clips to the jumper cables and attached them to the wiring harness. At this point I have to give a shout out to Dwight at Classic Air; he originally helped me with my purchase and then before calibrating I called him back with a question. His answer was spot on. Plus the instructions are incredibly detailed. It took 20 minutes to calibrate - 5 for the actual calibrating and 15 more playing around with it because it was so cool. lol… Everything is back in the box waiting for the final install….
 

Attachments

  • IMG_2184.jpg
    IMG_2184.jpg
    50.6 KB · Views: 373
  • IMG_2195.jpg
    IMG_2195.jpg
    73.2 KB · Views: 382
  • IMG_2193.jpg
    IMG_2193.jpg
    77.6 KB · Views: 366
Thnaks for posting about the A/C. I don't understand what needs to be calibrated before installation?
 
Thnaks for posting about the A/C. I don't understand what needs to be calibrated before installation?

It's more of a bench test to make sure the various circuits work. The different wiring harnesses plug into an ECU and for the testing only you plug in an ECU card with an LED light. As you run the DER through it's paces the LED lights up, confirming operation. Simultaneously, as the Mode lever is moved from Floor to Dash to Defrost you can see the trap doors inside the unit move and feel the air being re-directed. That's where my 15 minutes of fun factor came from - changing fan speeds, redirecting airflow. Hey, it's the little things in life...:pink banana:
 
How do they handle the hole in the cowl?

They provide an insulated lid to seal up the passenger side fresh air vent from underneath. Hawk is a few steps ahead of me on his '70 RR restoration and he ran into the same thing. There's no room to keep the factory plenum box.
 
I miss the vent fresh air. But I just use the wing to compensate since I don't drive in the rain.
 
I miss the vent fresh air. But I just use the wing to compensate since I don't drive in the rain.

I'm with you on using the wing vent when the weathers nice. When it's 100+ in August I'll be living for the a/c!
 
Auto Transport Service
Back
Top