• When you click on links to various merchants on this site and make a purchase, this can result in this site earning a commission. Affiliate programs and affiliations include, but are not limited to, the eBay Partner Network.

My charger restoration dream car

I read somewhere (maybe on this forum but I can't remember) that if you have some scrap parts of an old grille that you can put shavings of it into a small amount of acetone.
Keep adding plastic until you end up with a thick plastic paste and seal in a suitable jar or container.

You can then use this to repair your damaged grille by veeing out the cracks and filling with the paste you have made. Once set, file, sand and fill if necessary then paint. You can even make new parts with it apparently.

I should say I haven't done this myself yet but I'm going to give it a try on my charger grille soon.
 
That is a tuff one repairing the grill, The one on my 73 is not nothing like yours, its a little more simple and i went out and got a plastic grill and cut and used JB-weld to attach them, i have to say its been about 7 year now and still holding, yours is a bit more intricate and i know it will turn out good in what ever way you go, i would keep and eye out on Amazon and Ebay and you never know, you may find one that doesn't want your first born to buy it...
 
Thank all of you for your ideas. I am trying every one of your ideas (acetone, super glue and baking powder, JB weld, add fiberglass, plastic welding internet for better parts, etc.). I think that I will use a combination of all of them depending on the part area. I have been reading what others have done on this site also and have several good ideas. I am still open for all suggestions and ideas.
 
Great work on your car! I know how hard it is. one thing I noticed in looking at your thread, is the alternator you rebuilt out of the wagon? if so how many amps is it? just want to make sure you don't have any electrical fires! back in the day mopars had 35 amp alternators that one looked a lot like a 100 amp alternator not sure what your set up will be but you will need to be sure your system is up to that.
 
Great work on your car! I know how hard it is. one thing I noticed in looking at your thread, is the alternator you rebuilt out of the wagon? if so how many amps is it? just want to make sure you don't have any electrical fires! back in the day mopars had 35 amp alternators that one looked a lot like a 100 amp alternator not sure what your set up will be but you will need to be sure your system is up to that.
Thank you for pointing that out. When I had it rebuilt the shop told me that they have not seen that type of alternator for some time. That is about the extent of my knowledge about it. I am still learning as I go. That is why I am on this site, to pull off the knowledge of all of you. I will get it back out and make sure that it is what I need.
 
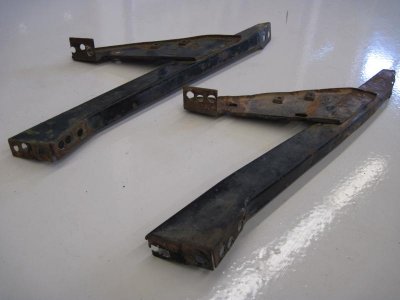
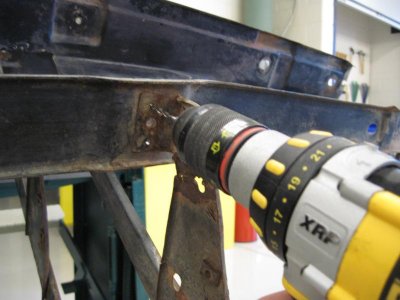
My grill support frame had a messed up lower support arm. I removed the bent and ripped lower brace and replaced it with a straighter arm from my parts grill.

Grill support 006.jpg

Grill support 008.jpg
 
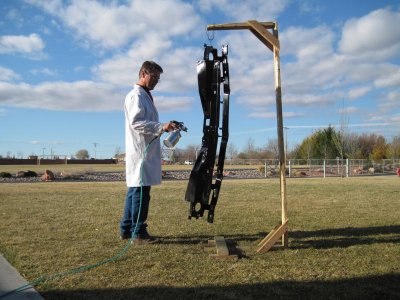
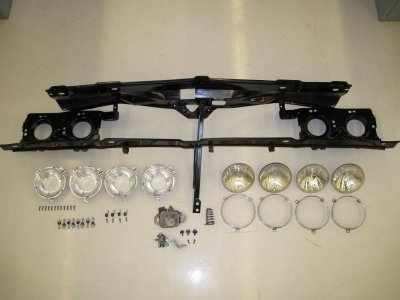
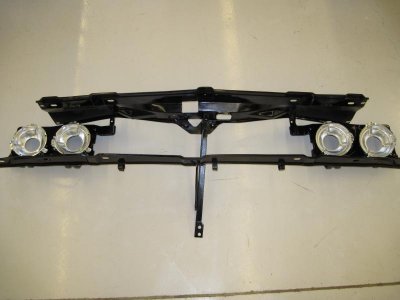
I sand blasted my grill support and repainted is. I also blasted the other parts and cleaned everything up and buffed the headlight rings.

painting grille support 002.jpg

painting grille support 004.jpg

painting grille support 007.jpg
 
Looking great!!! That is a good day to look back on there...
 
I read somewhere (maybe on this forum but I can't remember) that if you have some scrap parts of an old grille that you can put shavings of it into a small amount of acetone.
Keep adding plastic until you end up with a thick plastic paste and seal in a suitable jar or container.

You can then use this to repair your damaged grille by veeing out the cracks and filling with the paste you have made. Once set, file, sand and fill if necessary then paint. You can even make new parts with it apparently.

I should say I haven't done this myself yet but I'm going to give it a try on my charger grille soon.

That would have been Charlies build (CDR), he used acetone and ABS shavings, I used plastic weld (2 part epoxy) and Huntelk used some cool plastic welding sticks. Charlie is a pretty cool and helpful guy so just shoot him a P.M.

- - - Updated - - -

Looks like Christmas over there, nice new pretty motor, new AMD metal and all kinds of cool stuff! The Charger is looking great along with all of the other things you got going on (love the looks of the motor).:headbang:
 
Just went through your thread and I think you're doing an awesome job. I kinda like that yellow too, I think it will look real cool. I'm no expert on plastic but I've found, after a few disappointments, that if you can add something in for added strength the plastic stays together better. Things like fine wire mesh or thin wire to act like rebar go well. Just have to get them in far enough to add sufficient plastic over them. Probably not very professional but as long as it works why not.
 
showard,
Nice job on the grill support!
What color did you paint the headlight buckets? Grey, or silver? Did you just rattle can these.
Also did you buy new hardware? If so where did you get them?
 
showard,
Nice job on the grill support!
What color did you paint the headlight buckets? Grey, or silver? Did you just rattle can these.
Also did you buy new hardware? If so where did you get them?
The headlight buckets I sand blasted them and then I did paint them with a satin aluminium rattle can paint.
Some of the hardware I cleaned with a wire wheel. I did get new headlight adjustment screw inserts. I ordered those from Classic Industries. Many of the other parts like the grill mounting hardware I have ordered from Jeff at 521 Restorations. Jeff had been great to work with.

- - - Updated - - -

Just went through your thread and I think you're doing an awesome job. I kinda like that yellow too, I think it will look real cool. I'm no expert on plastic but I've found, after a few disappointments, that if you can add something in for added strength the plastic stays together better. Things like fine wire mesh or thin wire to act like rebar go well. Just have to get them in far enough to add sufficient plastic over them. Probably not very professional but as long as it works why not.
That is a great idea. I do agree that I need to add strength to the joint. Many of the ideas work but the joint seems to be brittle and can re-brake easily. I have been trying some heavy duty fiberglass and that seems to be working well.
 
A little tip to fixing the plastic parts regarding strength (and this can be applied to just about anything) is to feather the cracks out. Don't just glue or fuse breaks together but sand both sides of the cracks to a point where they meat so that your repair once sanded smooth is still the full depth just like V'ing out your metal for a full penetration weld.
 
A little tip to fixing the plastic parts regarding strength (and this can be applied to just about anything) is to feather the cracks out. Don't just glue or fuse breaks together but sand both sides of the cracks to a point where they meat so that your repair once sanded smooth is still the full depth just like V'ing out your metal for a full penetration weld.
I will use this tip also. Thank you.
 
Dr. Showard ,looking very good there :headbang:
 
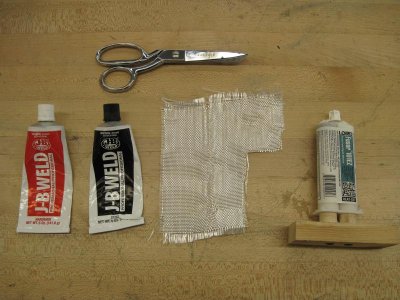
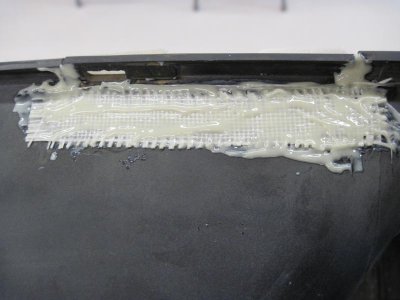
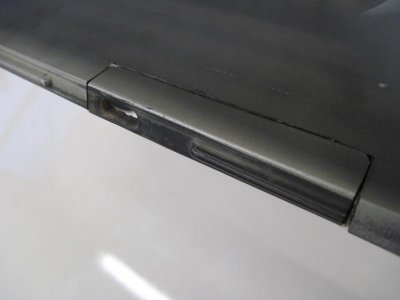
After trying all of the different tips and ways to fix my plastic grill, I came up with two that I like the best. I'm not saying that these are the best ways; they are just the two ways that work for me and my experience. I talked with an auto restoration supply store and got a 2 part plastic panel repair adhesive called Fusor 101EZ. This sets hard and if I rough up the plastic and imbed fiberglass it adheres solid. The only drawback is that it seems to be quite toxic and I use latex gloves and a mask when I am working with it.
The second way is to use JB Weld. This seems to work well with fiberglass also. JB weld seems to be a little more brittle but with the fiberglass it is strong.
IMG_0612.jpg

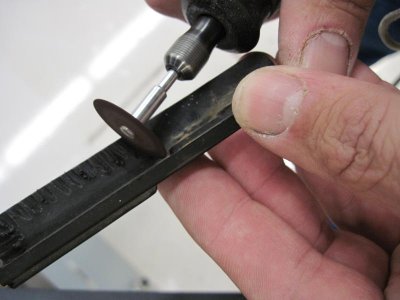
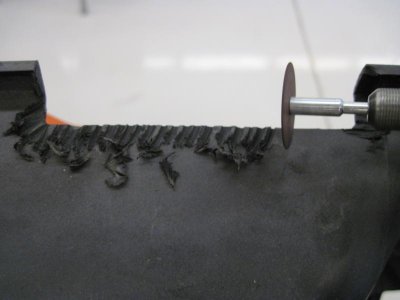
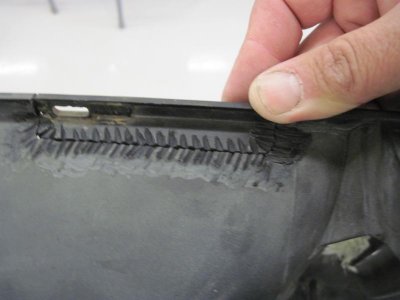
I put grooves on all of the mating edges to help ensure that I have a good strong adhesion.
IMG_0578.jpg

IMG_0579.jpg

IMG_0580.jpg

Fiberglass is pushed into the glue.
IMG_0581.jpg

IMG_0582.jpg

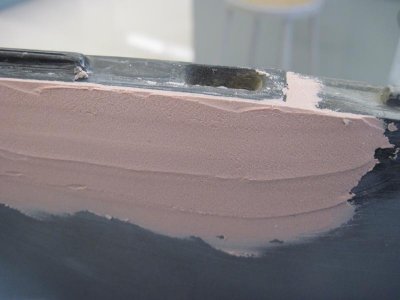
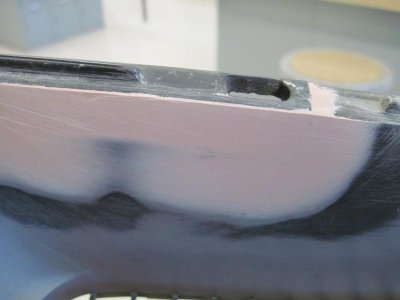
I put bondo over the joint and sand it smooth.
IMG_0594.jpg

IMG_0596.jpg

IMG_0612.jpg IMG_0578.jpg IMG_0579.jpg IMG_0581.jpg IMG_0580.jpg IMG_0582.jpg IMG_0594.jpg IMG_0596.jpg
 
Auto Transport Service
Back
Top