• When you click on links to various merchants on this site and make a purchase, this can result in this site earning a commission. Affiliate programs and affiliations include, but are not limited to, the eBay Partner Network.

My GY8 '71 Road Runner

For shits and jiggles (and having issues finding a good donor) I attempted to fix my trunk lid. I removed the skin from the frame. I then went to work on the skin. There was a large oil can area that a PO filled in with bondo (see previous pics) and an area of dents/oil canning on the top. The front area (where the lock is) had a large crease and a ton of holes from a slide hammer. I was able to remove most of the dents and a lot of the oil canning on the top and I was also able to remove the crease in the front part. Unfortunately there is still some oil canning and high spots that I can’t get out. I’ve already done a few heat shrinks but am afraid to go further and cause more damage.

Damage to top:
2FD4C85C-E3B7-446E-8CFA-AA9504E15C3C.jpeg


Damage to front:
39115BC6-CD20-4D9C-8658-740F07CF2B1A.jpeg


Oil canning red circles, high spots black circles:
61B43942-C319-4F73-ACDC-2A36B22F8A1B.jpeg


Front crease out:
F9EB30D2-4C62-4063-B8FB-FB02EA85B2CD.jpeg


Taking a break from the skin, I moved on to the frame. The left side (when looking at if flipped over) took a good hit. The raised portion near the back was crushed together and the flat area this part sits on had a good crease in it. The trough near the end of the trunk was also crushed (and filled with about 1/4” of bondo). The two cutouts were also all banged up to the point that I thought they were cut-in by a PO and not factory. I was able to fix much of this damage but, in my opinion, it’s far from perfect.

Damaged area:
B2BCD4FC-B95B-4208-A4E0-E6FF357D77AE.jpeg


Blue arrow is crease, red arrow is crushed raised area, yellow arrow is trough;
AE37E120-9CA2-40B4-8D67-89A75CA0EA8F.jpeg


What it’s supposed to look like:
82592A4B-ADDA-4E82-AFF2-0D9603A3A681.jpeg

Right side, good part:
A68A933E-626C-4C50-9F6B-2AD7CD1998F0.jpeg


Left side after working on it:
B0071D76-8135-4E22-999D-776594EA941D.jpeg


Cutouts fixed:
C3C91908-69B5-4396-91D2-03289FBD8BFB.jpeg


Both parts still need a lot of work. If anyone has a line on a good 1971 lid, please let me know!!
 
I also started leading in my quarters. Having never done this before, I thought it wasn’t that bad.

Before:
4876DA9B-0922-4F11-B0AD-5E0EC772471E.jpeg


Left side top:
86179AD9-F8E9-4D3B-9916-53FD080F5D21.jpeg


Right side top:
1926E75D-6BAE-49FB-B847-2D04E2465ABA.jpeg


Left side bottom before:
7AF64E18-764F-4D34-ACA9-7822662E654C.jpeg


Left side bottom after:
6981E63A-CED5-4A3B-9830-F908B5D3B65E.jpeg


And, of course, I ran out of lead.

Thanks for looking!
 
I used the Eastwood kit. Sand area with 80 grit, make sure it’s super clean - no rust, EDP, etc. I also used wire wheel on grinder. Wipe down with water based wax & grease remover. Apply tinning butter with acid brushes (or copper dish pad), heat the butter evenly with torch until it turns yellowish. Neutralize and scrub residue off with baking soda and water. Area should look like there’s kind of a chrome coating. Heat up area a bit with torch. Melt tip of lead stick and press into tin coating. Press globs of lead into entire area -overfill a bit. Go back and heat up globs and spread with wood paddle covered in paddle lube. Heat the lube up with torch to melt a bit before dipping paddle in. Wipe off excess on scrap piece of old jeans. Knock high spots of lead off with file from kit. Sand smooth with DA with 80 grit. Neutralize entire area again with baking soda and water. The tinning butter is very acidic and will cause all kinds of problems with top coatings of primers/paints.

Eastwood Lead Free Body Solder - Basic Kit

There’s a really good video of Gene Winfield demonstrating how to do it on YouTube.
- there are other too.

I also used 3m respirator and eye protection the entire time with fan blowing behind me and out open garage door.
 
Hello all, I received more lead earlier this week and was able to get the right side bottom area done.

4FF8B546-4DAE-4FDA-9024-424D18FFC691.jpeg


Before separating my shoulder, the plan was to get everything sanded and in epoxy. I got pretty much everything sanded as planned. This was back in August. Now, I have to go back and cleanup all the surface rust that formed. Super! I have some time I have to burn so, my plan is to clean everything up and get it in epoxy.

Surface rust:
0CCD0A9B-31E3-4B0C-966D-3FFF421991A7.jpeg


7BB492AE-9D7E-474B-AF73-131FBF160DC5.jpeg


282497BF-9594-4CBD-B812-A62F3ABCEC1D.jpeg


Thanks for looking!
 
It’s a cool color. It can look different depending on the lighting. I am very partial to toxic orange - not sure I could do it though :)
 
I was able to score a really nice deck lid from QuickBpBp (Brett) - Thank you Brett - on this forum so, a road trip was in order. I drove to PA from MA this Saturday. I left at 5:00am and made it there in under 5hrs. I didn’t hit any traffic to speak of. The trip home was an entirely different story. I hit ****-tons of traffic starting on the NJ Turnpike, was almost killed multiple times on the GWB in NY, hit even more traffic on the Wilbur Cross Parkway in CT and then there was a bad crash near the off ramp to the Mass Pike. It took me 7hrs to get home, terrible!!

The trunk lid is 1000% better than the one I have. I will have to fix a few small dents and the lock hole. A PO drilled the hole out larger for a different year lock. I did find some holes and bondo on the front face after stripping it. Not bad at all and way better than the one I have. I stripped the paint with Aircraft Stripper Ultra. I did two coats on the top - removed about 99% of the paint and one coat on the underside - took about 95% off. Looks like GY8 under the black paint and primer - what are the odds? I then wirewheeled the remaining paint. I did find some surface rust on the inside of the skin. I’m thinking I’m going to remove the skin, fix the dents and address the rust. Then I’ll epoxy everything before putting it back together.

Road trip!”
DD42CB18-1BEF-4E97-AE20-9A794B321C56.jpeg


New deck lid!!:
5AF59E27-06EC-4F94-BE8C-3611D3F400D1.jpeg


Cool graphic on it:
C499A452-DD5F-439D-9479-C21FFF6A40E3.jpeg


Looks really good, not crushed like my original!:
42B5EE88-F955-4CDA-9597-92CFEFE10EBB.jpeg


Lock hole drilled out:
210B40B7-E8FF-4E2A-B66E-E279AD0FDCD6.jpeg


Should look like this:
BDA522D7-FCA4-4DC4-A584-5C6C87B7E8D0.jpeg


Stripper doing its thing:
8E46BE54-30DF-4522-AC60-5598CD8191D6.jpeg


Gold!!
9F21F142-144D-4C50-B044-6345BE876B40.jpeg


After first coat of stripper:
28EC8CDF-DD94-4426-97BC-8FD5F900758D.jpeg


All cleaned up:
A20FFD08-7254-47AA-BD22-9462867E6BF6.jpeg
 
More..

No damage:
F0106ED8-C9B3-459C-A477-0AC272FA1234.jpeg


Small hole to fix:
2320367C-AE08-411A-A8DE-7A5AFBF884A8.jpeg


Some small dents:
5489EFE0-0086-41B6-B524-A7D8561879F6.jpeg


F584B0B6-6D8F-4ED2-A1AB-2EA763366BDA.jpeg


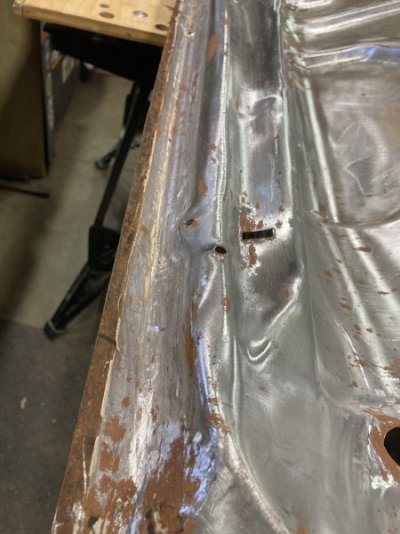
Holes, both sides:
73569565-D1B4-4AE1-8558-14B8EBF609CA.jpeg


DCF4872D-9688-41E4-B951-7273A5971FBF.jpeg


Rust:
EB7AB3C5-8EB3-4B52-978E-4FA6A3845D95.jpeg


I’m really happy with this deck lid. Should be pretty straightforward to fix. Thanks again Brett!!
 
We met up at the Classic Auto Mall in Morgantown. I had about an hour to kill, so I checked it out. It’s literally an old mall converted into a classic car dealership. They have about 800 cars & trucks stuffed in there ranging from the 1920’s to late 1990’s. It’s setup kind of like a cross, with a long hallway running north-south then another long hallway intersects it going east-west. Off of these hallways, there are what use to be the old stores that are stuffed with cars. You can see the glass fronts in the pics below. The place is huge!

Lookin north - south:
BDB13DE1-DA9A-4D19-9D8C-B31B71FA4097.jpeg


East-west:
824A647A-CCCF-41E8-A91F-11A9059F3B14.jpeg


They have a nice Challenger - I had a 2010 Classic Edition like it, minus the shaker:
98EE4B20-07CA-46F5-B4DE-24E8A236B845.jpeg


To the left of the black Challenger is a ‘70 Hemi Challenger in green, you can see the headlight to the left in the pic above. I thought I took a pic of it but didn’t.

8A995CE0-5F92-48CB-B6C7-1E0FA6494520.jpeg


And a ‘71 Road Runner:
DB7DB8F4-D9FF-4A8B-8249-039E8BB61DBA.jpeg


Very cool place but a bit pricey.
 
Looks good @ct71rr !!
GWB, Cross Bronx, TYPICAL!!! When I was stationed in Groton CT 1984-88, avoided them at all costs, still do!! Longer but faster using Palasades PW & Tappon Zee bridge.
 
I was able to separate the trunk skin from the frame. Pretty good amount of (mostly) surface rust. I used an angle grinder on the skin and blasted the frame. I also fixed (to the best of my limited ability) all of the dents and dings in both. I also welded up the slide hammer holes in the skin and, for now, welded a blank in the lock hole so I can cut in the right shape later.

Rust! Frame:
1ED3941D-2DF6-435E-8FE9-63E876809C48.jpeg


Skin:
23640867-F925-4606-90B1-ED772611AFF0.jpeg


Holes filled, dents fixed:
D40E2C14-D2A2-40C1-A675-AC7C1F9A925C.jpeg


C677055C-EE71-4C05-ADFD-01E54BCC66AD.jpeg


Lock hole plugged, for now:
1B34D59C-4708-4F5B-B1DE-5A534E372FB7.jpeg


Frame blasted:
21D9F716-71C8-40D8-9F84-051DCC07C150.jpeg


Frame primed with epoxy:
B48C8F10-CBEA-451E-8CB5-6941077A1292.jpeg


I’m hoping to get the skin primed later this week and then put them back together this weekend.

Thanks for looking!
 
Looking good man! Atleast you know nothing will come back through your paint later on! Welding up the lock hole like Foose and Kindig! Lol
 
Thanks Pete! I was thinking the same thing when I was doing it. It was the only way I could figure out fixing it without cutting the area out and welding a patch in. As long as I don't get carried away and start filling in door handles, everything's good!
 
Auto Transport Service
Back
Top