• When you click on links to various merchants on this site and make a purchase, this can result in this site earning a commission. Affiliate programs and affiliations include, but are not limited to, the eBay Partner Network.

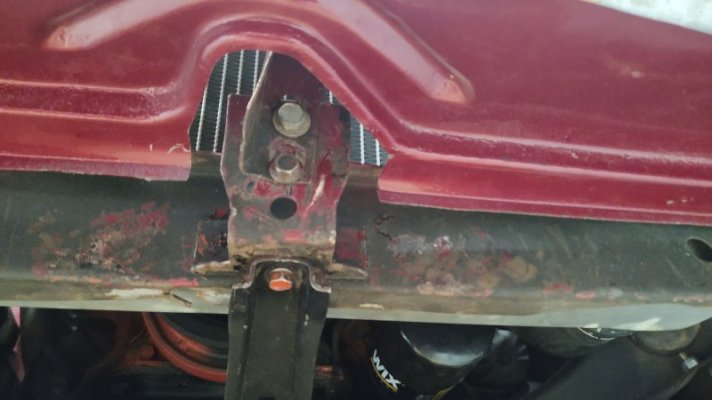
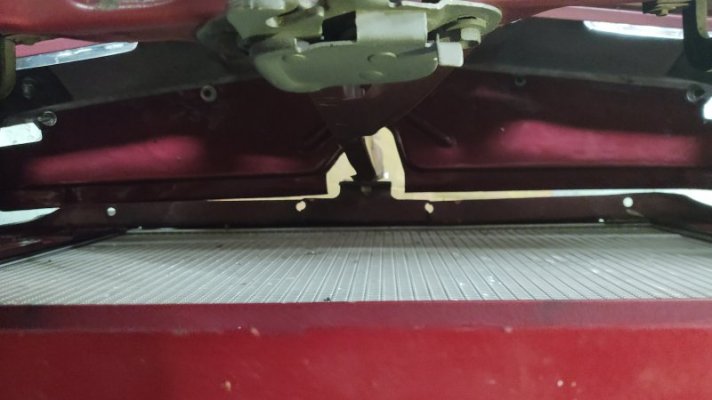
Need help with some pics on the radiator "air shield" please

Mancini Racing renamed them..... :lol:

1684113032831.png


I wouldn't say that in Australia. :rolleyes:
 
View attachment 1465058
Note the holes in the front edge for the back of the bumper, but a lipped smooth edge towards the radiator
side.... is there something that goes between this and the radiator support?
Don’t know much about 2nd gen’s, but 66-7 have a rubber? Shield also. I recommend checking out DMT. Hope this doesn’t get me into the SCAMMER group.
 
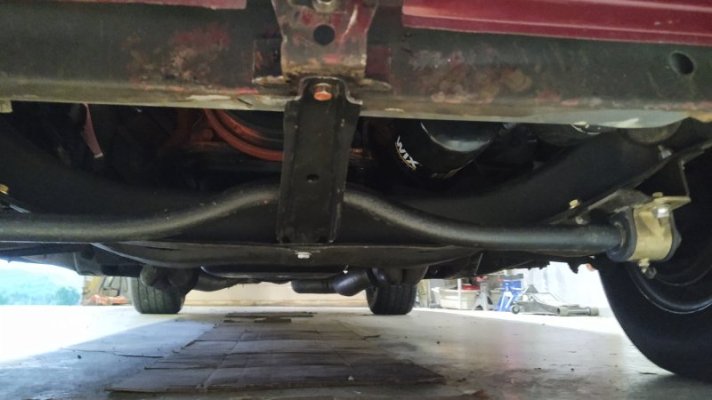
Well, that got done. The piece, as less than perfect as it is, is installed and all bolts tight.
I tweaked it overall so that it sits fairly level with the front lip of the radiator support.
I love these little quick popper mini-projects on the car! :thumbsup:
Instant gratification indeed.

Oh...
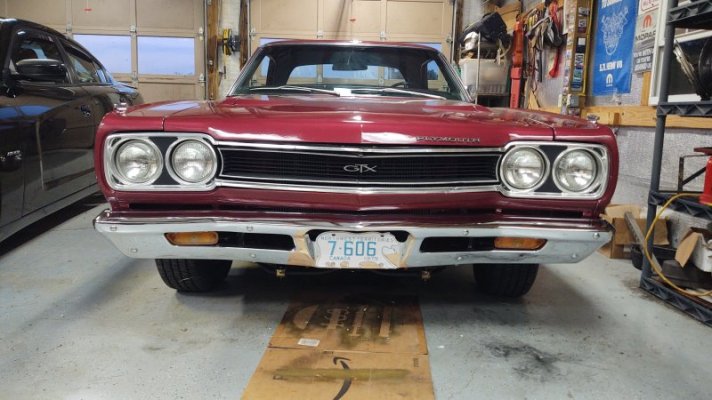
Next thing I noticed? Bumper is crooked. :rolleyes:
Sticks out a good half inch more forward on the passenger side than drivers side.
Are those bumper brackets adjustable?
 
Don’t know much about 2nd gen’s, but 66-7 have a rubber? Shield also. I recommend checking out DMT. Hope this doesn’t get me into the SCAMMER group.
Dunno - are you a scammer? :lol:
 
The bolts that bolt the bumper brackets to the frame rails are slotted... In & Out plus some up & down..
 
Don’t know much about 2nd gen’s, but 66-7 have a rubber? Shield also. I recommend checking out DMT. Hope this doesn’t get me into the SCAMMER group.
My friend Horatio has one....he told me last week when I was picking up some other parts. Contact him on 1800 555 1234 :lol:
 
I'd like to wrap up the exercise by doing the blackout behind the grille treatment, but I have that
darn Griffin aluminum radiator....and I'm not real sure about painting one of those.
Seems like it might interfere with the things' efficiency - and this particular 440 does tend to run
a bit toasty by nature.
All sorts of painting techniques dancing in my decrepit noggin now....including one involving those
little sponge paint brushes. :)
I painted my aluminum rad in my Charger mainly because hideaway headlights and aluminum radiators don't look good together. I didn't seem to loose any cooling abilities.
 
Next thing I noticed? Bumper is crooked. :rolleyes:
Sticks out a good half inch more forward on the passenger side than drivers side.
Are those bumper brackets adjustable?
Ed,

You didn't mention it, but please note that if your bumper if off side to side then it could (also) be the way your front fenders are mounted.

Let me explain my situation to help illustrate what I mean.
On my 70 Road Runner, the front end (minus a ding right by the headlight) was straight and perfect. The bumper fit perfect to the fenders, etc.
When I was putting it back together, the fenders were mounted before the front bumper, and it looked like this:
IMG_3496.JPG


Looked great, huh?

Well, when I went to put the bumper on, with the same bumper and same brackets that came off the car and fit perfect, it didn't fit right. The bumper was off to one side. Long story short: it wasn't the bumper that was off, but rather the way my fenders were mounted. There are bolts that bolt the fender to the radiator support and these have adjustment in them. They are located here...
IMG_4009.JPG


...and here.

IMG_4010.JPG


Bottom line is it turned out it wasn't my bumper that was off, but the way my fenders were mounted. We taped up the fenders to protect them near the bumpers and loosened them to adjust them.
IMG_4007.JPG


Bingo! Problem solved.

I figured I would post this for you or others who may have fitment issues.
 
Ed, get ready, this is gonna get deep... Science 101... On painting the radiator... In theory black has more surface area than any color, it's the surface area that causes black to absorb the colors of the light spectrum... That increased surface area translates more area to work as a heat exchanger... Hence the reason radiators are painted black... So paint your wagon, err fence, err Radiator.. Wait, what did Sam Kinison say to paint, Or was that something about a letter to Santa Claus....
 
Ed, get ready, this is gonna get deep... Science 101... On painting the radiator... In theory black has more surface area than any color, it's the surface area that causes black to absorb the colors of the light spectrum... That increased surface area translates more area to work as a heat exchanger... Hence the reason radiators are painted black... So paint your wagon, err fence, err Radiator.. Wait, what did Sam Kinison say to paint, Or was that something about a letter to Santa Claus....
Yes sir, thank you, I was aware of why they're black.
You may be right, I may be thinking too much here - but I wonder if certain fin densities/quantities in certain
radiator designs are actually intended not to be painted, in order to max out surface area?
Smoke now coming out of my ears....
Could it even be how radiator makers get that little extra cooling advantage over factory style ones?
One thing's for sure, paint viscosity matters here.
Best to use actual radiator paint, eh?

Oh, by the way - the bumper is now even side to side and vertically and the air shield now matches up to the rad support
better, but not perfect. Since all the mounting holes in it were torn open by the P.O., however, if I want to get things
just so....I reckon I could play with it a little more to make it look crispy. :)

Side note - the dang bumper bolts were damn near finger tight on both sides when I approached them - the result of being
some of the very few bolts I've never had my hands on in all the "Fred years". :rolleyes:
I get under there all hyped up to fight them, biggest socket tools in hand, brace myself and give the first one a mighty
heave - and damn near pull a muscle from the ease with which it gave it up. :rofl:
 
EPILOGUE:
I figured I owed some "after pics" of this exercise.
Caveats: Every piece of metal involved, short of the repro bumper, is old and apparently the victim of the
P.O.'s garage wall boo-boo; further, I'm no bodywork guy and lack even rudimentary body tools.

All that aside, this will mark the first time Fred has had the radiator support brace and the air shield in place:
IMG_20230519_203813981.jpg
(That radiator support took a LOT of "persuasion" in both torsional and horizontal planes to get the bolt in it).

IMG_20230519_203837754.jpg
Next step is obviously an attempt at getting some paint on some things...
poor grille support was some kind of mangled as well, too.

IMG_20230519_204043399.jpg
Not the optimal gap from side to side when seen from above. I know the bumper
is in the correct position (at least as judged off each fenders' side marker), so that leaves
the mangle factor of the air shield itself (a lot of pounding took place to make it "flat"
again for sure) as well as the poor radiator support.
At least the radiator appears equally parallel when used as a judge on it...

IMG_20230519_204947360.jpg
The bumper, not previously suspected of being crooked....now isn't.
Poor lightly damaged grille got a little attention, too - but honestly needs replaced someday.

Summary:
At first, I was genuinely embarassed that I hadn't even approached this old damage to Fred before
now - but to give myself some slack, up until now, there's always been more important mechanical
and functionality stuff to be handled as the years went on...
It's probably more a statement of how "finished" I (and the car, of course) are to being that I finally
decided to take these old parts out and figure out where they actually went on the car.
Kind of a fun little project in the end, with of course some help from you guys!

Lastly....
No polar bears were harmed in the performance of all this red-neckery @Sahara !
 
Auto Transport Service
Back
Top