• When you click on links to various merchants on this site and make a purchase, this can result in this site earning a commission. Affiliate programs and affiliations include, but are not limited to, the eBay Partner Network.

Project Larry - 62 Dart 440

Had some time today.
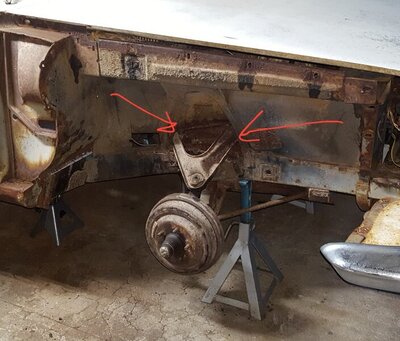
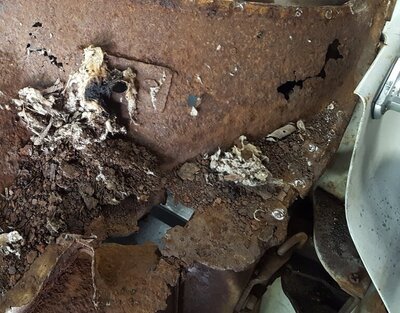
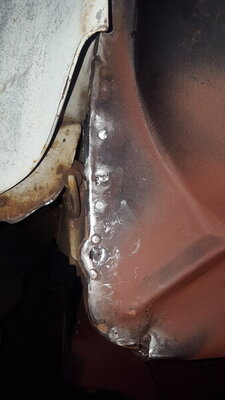
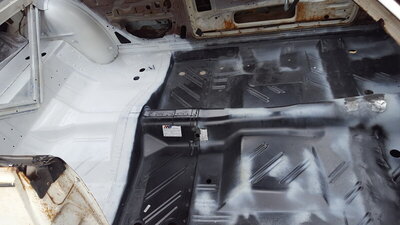
Left side seam had some rot and separated on it's own for a few inches.
Middle to right I just cut it close and will attempt to grind it free tomorrow.

The firewall doesn't have much material at that 90 degree bend to start, definitely less than the floorpan.

So I need to learn myself on making a few minor patches, one behind the e-brake pedal, one a little higher up, as well as the left side rocker at the crossmember.

The new crossmember I have has enough material on it to patch mine, but I might try to slide a patch on the inside as well.

I also cut the left splash guard out of a parts car with the end of the frame rail as both sections were in better shape than mine.

This is new territory for me, but hopefully I can make some progress tomorrow.

View attachment 842607 View attachment 842608 View attachment 842609 View attachment 842612 View attachment 842613
Do yourself a favor and watch Fitzees Fabrication on Youtube... He has been a HUGE help to me my own metal fabrication "journey"....He will definitely help you!
 
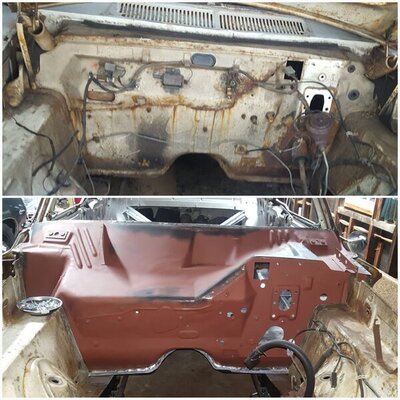
Floor done!

On to the firewall.

Upper control arm mounts are rusted out, but all around it is solid, frame rails are solid with no debris sitting in the top of the rails below the uca, inner fenders, even the inside of the uca mounts are solid.

What's up with that?
I see repop shock towers, anyone know the quality?

20210509_155823.jpg Resized_20210509_221110.jpeg
 
Firewall in, but not in, you dig?

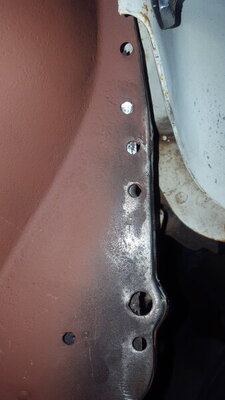
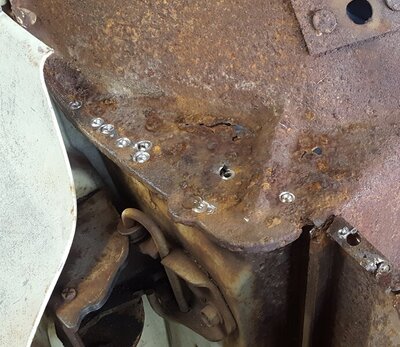
Screwing it in and it matches up very well, except-
The top horizontal left/right sides.

Right side needed some persuasion to get the lip over the edge, but the open hole matches up perfectly from the old firewall to the new. Can see that tiny hole dead center in both pics.

The left I can fit it fine at the door/window point, but it's not lining up perfectly at that one horizontal length.
Pushing the vertical part out only puts that piece out of wack.
Looking at the old pic vs new, it appears the old firewall hung over farther on the left, but still, only half of the horizontal panel shows through the holes.

I took a thousand measurements before, during, and after, and everything else lines up. I need a helper to push the bottom down/out to screw it to the floor, but it lines up perfectly.

After being drilled out, stored, shipped, me tossing it around, and no two cars are the same, I'm thinking it's a non issue.

Any input is appreciated.

20210607_132018.jpg 20210606_210242.jpg 20210607_131943.jpg 20210606_210301.jpg 20210607_015700.jpg
 
Yup! These were not Rolls Royce automobiles, they were not built to last 50 years. All we can do is our best job to make them pretty and last another 50 years.
Mike
 
It's a car again!
Found a cowl in a close enough color with the same shitty rust look.
Installing windshield was easy peasy.
Engine in, front end on, starting interior.
A ton of work to replace all that metal.

20210808_203947.jpg 20210808_203623.jpg 20210914_090412.jpg 20210726_215045.jpg 20210829_204058.jpg 20210829_011425.jpg 20210817_233654.jpg
 
Superior 'The 500' steering wheel!

Painted dash goes in tomorrow.

20210924_222733.jpg
 
I am digging this car in a big way right now.
I redid that dash pad, filled the holes with sprayfoam, sanded smooth, stretched leftover seat material over it. No too shabby.

20210926_180703.jpg 20210926_175553.jpg
 
Nice job on those floors. I am doing this right now on my 70' Road Runner.

20210807_203004.jpg 20210807_203010.jpg 20210811_195841.jpg 20210811_195848.jpg
 
DODGE letters and emblems back on.
The angled letters are so cool.
Put a Dodge in your garage!

IMG_20211006_195103_261.jpg
 
I know the engine is offset to one side, but should it be crooked?
It looks more forward on the driver's side.

All new engine/trans mounts.

I need a radiator, the one I have is too wide!

20211006_203344.jpg
 
3.55s, Espo springs, Cragars.
It seems the more you get done, somehow, the farther away you are from getting done.
And I'm not doing paint and body.

20220321_203227.jpg 20220321_214254.jpg
 
It will all come together before you know it. I thought I was never going to get out from under my '62. Then I thought the same when I was on the interior. I spent a lot of time in there. And boy were my legs sore when it was finally done. And I didn't do paint either.

Looking good Matt :thumbsup:
 
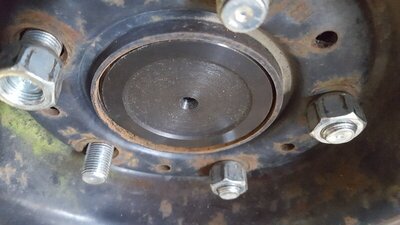
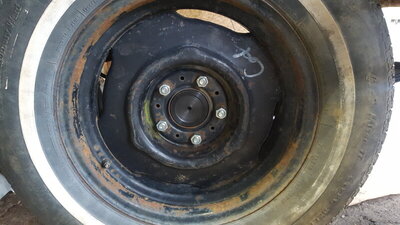
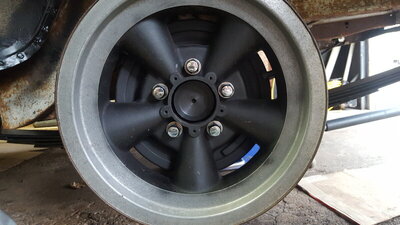
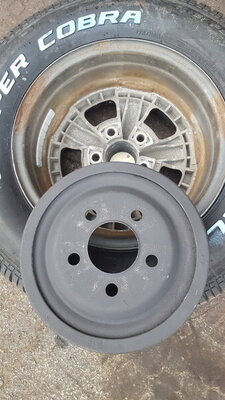
When I put the wheels on, any wheels, Cragar, steel, it locks up the brake drum.

Placed against the back of the wheel it sits flat with a minor wobble, very very minor, both drums on any wheel.

Put the wheel on and you can see, what looks like, the wheel twisting, or maybe the drum is flattening out?

One lug tight, it's extremely hard to turn the wheel, two, nearly impossible, three, not possible.

Pattern on drums from wheels looks normal, wheel centers clearing axle, drums fit over axles and studs with room to spare.

Right side in more than left in first pic.
Wth is going on here?

20220322_180758.jpg 20220322_180601.jpg 20220322_180058.jpg 20220322_175709.jpg
 
I'm betting the drum is being forced into the backing plate... The axle stub distance is short...

Try adding washers to the studs before installing the drums & see if the problem goes away....
 
As was pointed out in the other post, the axle has two bolt patterns, It may have the A body stub offset... if so those drums are I thinking 1/4" different offset... If thats the case you'd need to stack 2-3 washers to get things to turn... And no I'm not suggesting you drive it like that but it will at least help in diagnosing the problem..
 
Those floors look great. I'm doing the floors on my 65 Belvedere wagon now. Problem is I can't find the rear footwell and under rear seat pans. Are the 66 on up similar? I can find those. If it's a matter of some trimming and fabbing then I'm ok with that as long as they fit.
 
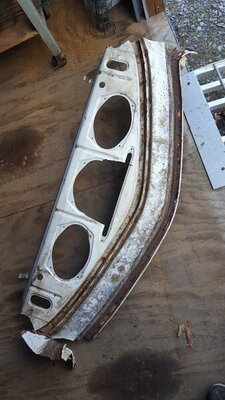
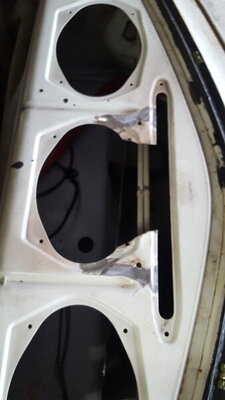
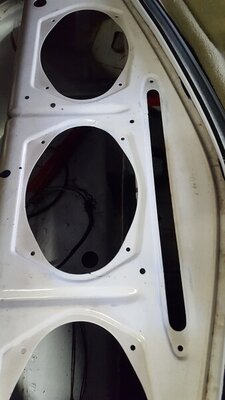
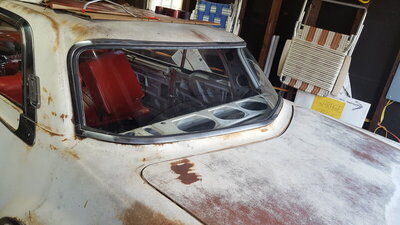
R&R the rear window, wire wheeled the window channel, Eastwood rust paint, new trim clips, painted the interior of the rubber window seal white, welded in a section of the package tray that was cut out, put it all back together.
Not going for welding perfection here as it will be covered, just strengthening it up as the two larger holes hold the clips that secure the package tray.

All side windows complete as well, new window track felt, which I made from felt and cut out from generic window felt, and new cat whiskers. All glass done.

Window and package tray section came from my old long gone parts car.
That car also donated a perfect uncut dash and many other parts and pieces.


20220417_165733_001.jpg 20220416_134156.jpg 20220416_164200.jpg 20220417_163540.jpg
 
Auto Transport Service
Back
Top