• When you click on links to various merchants on this site and make a purchase, this can result in this site earning a commission. Affiliate programs and affiliations include, but are not limited to, the eBay Partner Network.

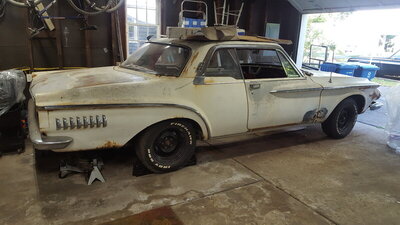
Project Larry - 62 Dart 440

There is NO WAY I'd blast with the partial interior, glass, or regulators still in the car. You will NEVER get all the sand out. Hell it's close to impossible to get it all out when its apart. Sandblast a drag car. Then make some hits. Sand will fall out of the pinch welds, frame, etc. More than a few passes. Been there , done it. NO NO NO.
Doug

I agree
it takes a good while to clean it all out
and it better be down to bones to even have the chance of cleaning it out at all
or it will come out at a later time..
nothing does beat up the rust better then blasting
but even if you do just the rusty parts the stuff gets into everything.
 
Yep. Quite a bit of rust, your having to deal with.
My 64 wasn't quite that bad, though floor pans were shot, and plenty of rust in the engine compartment. I did what I had to do, including cowl repair.
Took mine down to the basic shell. Had to sand blast using low pressure, the engine compartment, and half of the underside of the car. Loads of fun!

Good luck with it.
 
DVW was dead on with the tip about cutting thru the ruined floor pan and then removing the small scrap from the base of the firewall...That's exactly what I did on mine...

As far as the underside of everything else I removed it all and flipped it over and did all the work prior to putting it back in...It's not something everyone could do depending on what your building...but it's what I had to do...

7 rf cage support.jpg 3 under paint.jpg 14 drivers side floor.jpg
 
I have 2 sandblasters and neither worked.
Hose would clog immediately, I bought a new compressor but I think the cfm must be lower. I have that black medium stuff, and it worked great with my old compressor, but it's buried in the basement so I just moved on.
I might drag it out, I really want to blast the engine bay.

I wire wheeled the entire inner firewall, inner rockers, etc.

I bought some rust converter, primer, paint.
The plan is to dynamat over it so why not, also I won't be finishing the rest of the undercarriage, although I'd like to- back to reality.

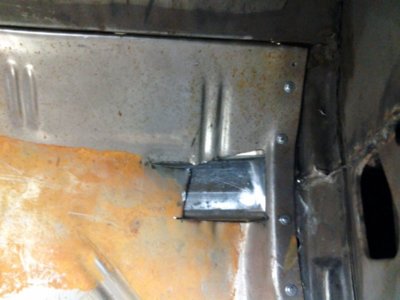
The front seam is a pain. The lip on the floorpan is bigger than the lip in the firewall, so it wants to take the firewall with it.

The strongest metal is at the spotwelds and they don't want to let go. I was folding the seam back towards me, and grinding the spotwelds off.

In the pick below I bent the remaining piece of floor up, but can't get at the spotwelds.

20190930_182958.jpg
 
Ok, after a long hiatus I'm back on this, and I am in a pickle.

I replaced the torsion bar crossmember and I took that piece of frame from my parts car and sectioned it in, not too shabby a job. I drilled holes in both parts, slid 4 pieces of metal inside the rail, plug welded and welded the seam.

I have other areas to address, but the firewall has got me wondering.

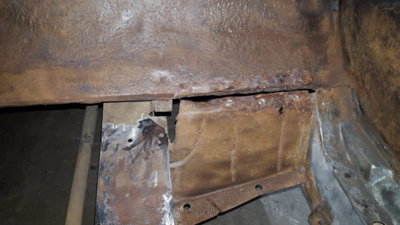
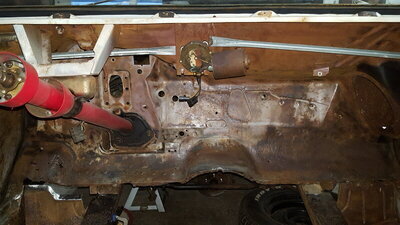
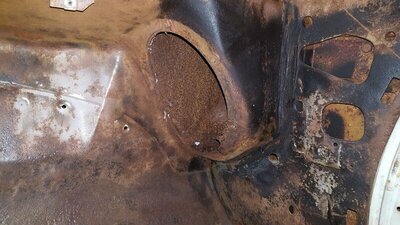
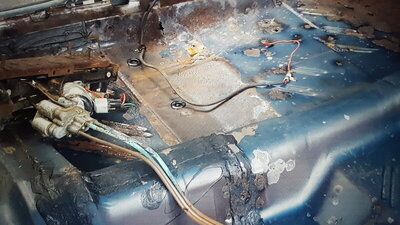
Firewall is in bad shape where it meets the floor, up to where it goes vertical.
The cowl has it's share of holes, of course, about 4 holes on the driver's side, the wiper pivot, and where the firewall/cowl dives down, water would just dump on your foot.
Passenger side has 2 small holes.
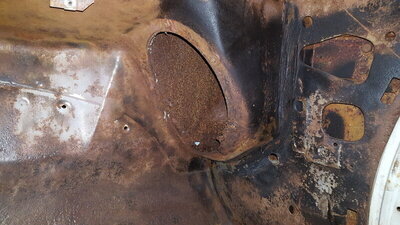
And the big oval where the heater bolts to it is rusted away on the bottom.

Not sure what to do.

Patch the bottom of the firewall, drill the upper cowl off to fix the inner cowl and/or upper firewall, fix the heater section - or replace the firewall?

That hurts my brain.

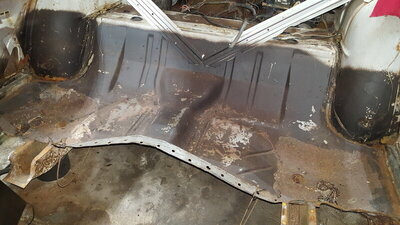
I was going to patch under the rear seat, but I got thinking it would be easier to drill out the spotwelds and replace the rear floor with a used piece. I drilled the hell out of my parts car before I junked it.

Just set in, but it's progress.

Not giving up, need input on rear floor and more so on firewall.

20200919_170719.jpg
 
I would recommend you definitely remove the cowl and repair (Kramer's had/has repair panels for those LEFT side areas). I lined the cowl bottom on my 65 with fiberglass cloth and resin to waterproof, filled the 2 drains up to their bottom lip with resin (so they would actually drain), and finished all with a heavy coat of Rust-O-Leum black. I did remove the vertical piece connecting the cowl top to the firewall and repaired that before reinstalling and fiber glassing. I fabbed 5 pieces to repair the right side of the cowl when it was off. Keep working a section of the car at a time and before long you will have it all done! Keep your chin up and weld. Good luck!
Mike
 
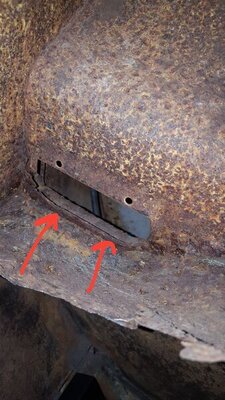
filled the 2 drains up to their bottom lip with resin (so they would actually drain)
May be difficult to see in pic, but the drain behind where the heater bolts has a raised lip, just before the rubber door flap.
I'll be removing what's left of it.
I'll also use the rust converter paint I bought from Eastwood once the cowl is fixed.

One rust hole in window channel so will remove windshield, drill out upper cowl, and just patch holes. I have an extra tinted windshield, so may install that instead.

Decided to get the lower section of the firewall used, as well as a complete used rear floor pan.
A few minor holes in the trunk as well.

Could be better, but could be much worse.

00000000000000bba525a8fd4dbf4.jpg 00000000000000bd8629f9bd4f2c2.jpg
 
The corners are tough between the frame and brace. I ended up leaving about 3/8 and but welded it

20171229_171347.jpg 20180106_162559.jpg
 
If by corners you mean the front, where there is a splash shield between the frame and rocker, there wasn't much firewall on mine.
The driver's side was full of holes in that part, plus when I sectioned the frame rail there I also used the splash shield from the used part.

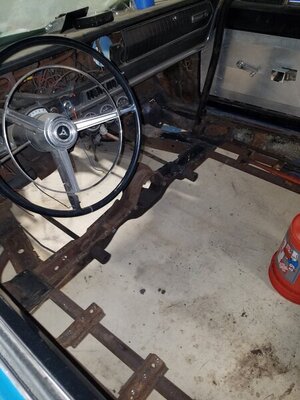
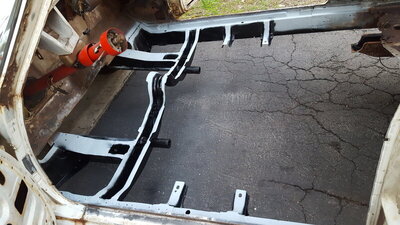
I wish I could've left part of the floor at the firewall. PO removed large sections of floor and riveted patches all over.
The driver's side firewall is riddled with holes and was cut into, passenger side isn't as bad but the metal is thin.

They used for sale signs to make the floor.
 
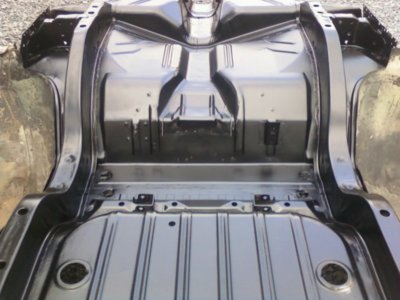
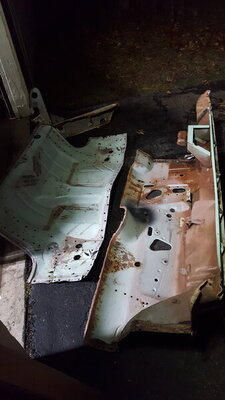
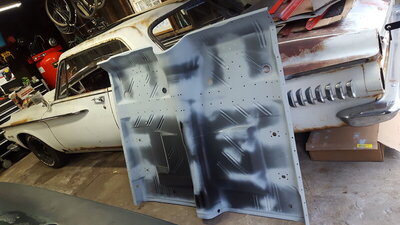
Today I picked up the shipment with the rear floorpan and a full firewall from a fbbo member.

Nice, rust free, metal, all drilled out correctly. I just have to drill out the rusted panels on my car.
Of course, I have yet to weld in the new floor sections.

So, the plan was to patch my firewall, but I'm having second thoughts. I need to pull the windshield anyway to address some rust in the channel, plus I have a tinted windshield I might use.

I take it I'll need to remove the fenders and drill out all the spot welds for the upper cowl.

After all that, how much farther do you have to go to swap a complete firewall?

20201201_183531.jpg
 
There is NO WAY I'd blast with the partial interior, glass, or regulators still in the car. You will NEVER get all the sand out. Hell it's close to impossible to get it all out when its apart. Sandblast a drag car. Then make some hits. Sand will fall out of the pinch welds, frame, etc. More than a few passes. Been there , done it. NO NO NO.
Doug

Truth! My car has been done 4 years and it will still leave piles of blast media on the driveway when I wash it. :eek:
 
Back at it. Floor was covered with packing tape residue and goo-gone didn't remove it even after sitting 24 hrs. Goo-gone took the undercoat off the rear pan after letting it sit!

Crappy drill bit gets you shards of metal sticking up so I ground them off, ground off the black coating on the edges, weld thru primer.

Going to weld the e-brake brackets on, paint the bottom, weld it in, then the rear pans, then the rear seat pan, then the firewall.

Not a restoration, just putting it back together to drive it dammit!

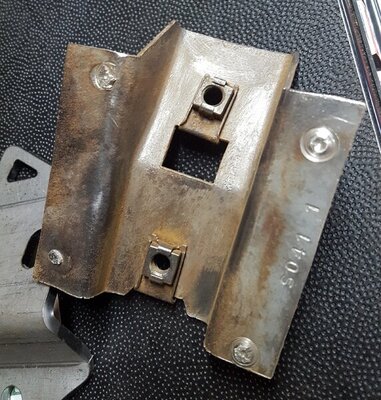
Car had no seatbelts but installing, floor came with 2 inner seatbelt nut/plates that weld to both front/rear floorpan, although the plate is not flush across both.

Based on pics of my 64, apparently the rocker just had a hole drilled and a nut welded flush?

20210420_184718.jpg 20210419_192133.jpg 20210420_182130.jpg
 
Looking good .I see you have a power front seat ,nice!
 
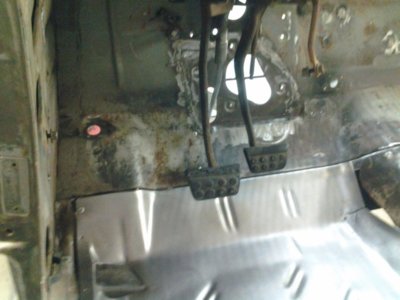
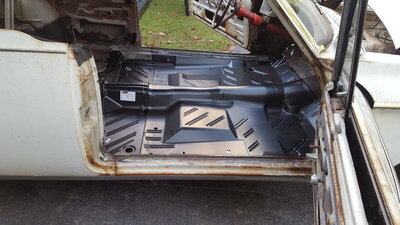
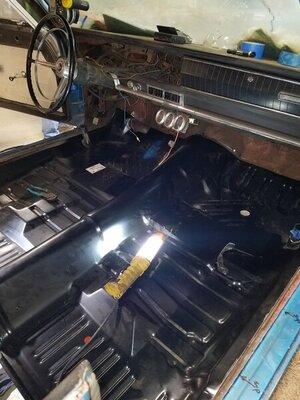
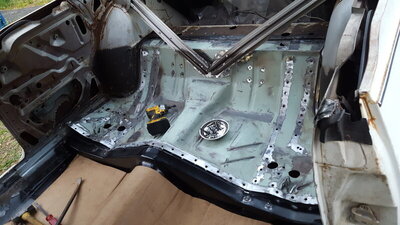
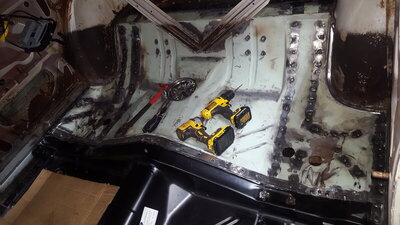
Front/rear floor installed.
I used Eastwood weld through primer, it's garbage.
All surfaces ground to metal and primed.

I couldn't get the welder set right, at all, gas, heat, speed, adjusted everything multiple times, checked the metal thickness, nothing would stop it from popping, no penatration, burning through the floor.
I welded the e-brake brackets on no problem, and other stuff.
I thought I forgot how to weld.

I read on the interwebs that weld through primer can cause these problems.

Stopped using primer, everything went smooth.

Installing the rear now, without primer, then on to the firewall.
Will primer, seam seal, paint, then fat mat or similar.

20210501_192655.jpg
 
The holes made when it was drilled out were big, I added smaller holes in a few spots. Some welds look messy but all are low and no grinding needed.

Removed exhaust hanger to use on replacement floor, but they are angled, who knew, so both sides would be angled the same direction. I think I have new exhaust mounts, and I know TTI comes with them.

Old one has part # on back, who knew.

20210502_195107.jpg 20210504_171024.jpg
 
Take an old drill bit the same size as your weld thru holes, grind it flat then put a very small back angle on the two flutes. Use this to remove the weld thru primer on the piece under the holes. You will have a clean hole, good weld, and still have the protection of the weld thru primer. I stole this plan from the MP&C thread on Garage Journal.com.
Mike
 
I just took a drill bit the same size as the hole and ran it quick side to side.
I get what you're saying though.
I wish I didn't pay extra for the fancy primer, for the headache it gave me.
It won't be a winter car, will be sealed up, not worried about rust.

Not sure if I posted pics here, but floor was cut out and made of cut up signs riveted down, so I'm so far ahead now, even with some crappy looking welds.

Also replaced the torsion bar crossmember and part of the driver's side framerail from the firewall to the crossmember.
 
Auto Transport Service
Back
Top