You are using an out of date browser. It may not display this or other websites correctly.
You should upgrade or use an alternative browser.
You should upgrade or use an alternative browser.
Project Larry - 62 Dart 440
- Thread starter matthon
- Start date
matthon
Well-Known Member
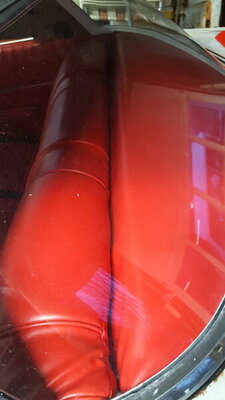
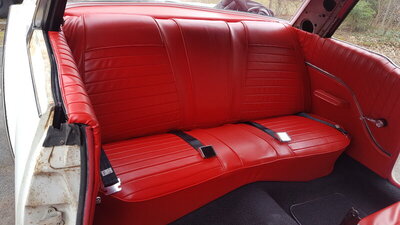
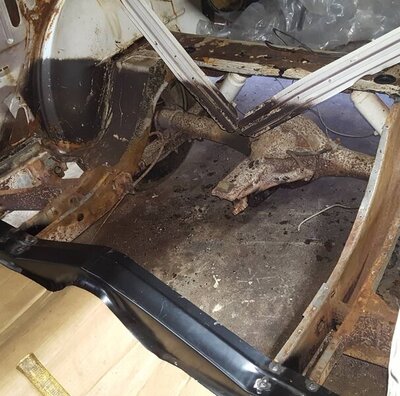
All side windows adjusted, all seat belts installed, all window fuzzies replaced, rear interior installed.
This includes me, after the upholstery was done, pulling the bottom seat apart and replacing the frame with a perfect one, pulling the upper cover off to fix the bottom where the hog rings were showing, and sewing all the edges of the side panels because I didn't like how they were done.
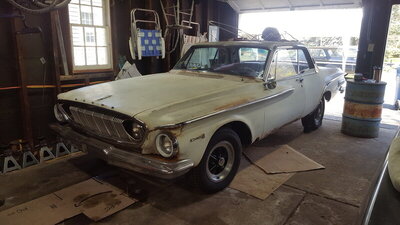
Exactly 1 year apart.


matthon
Well-Known Member
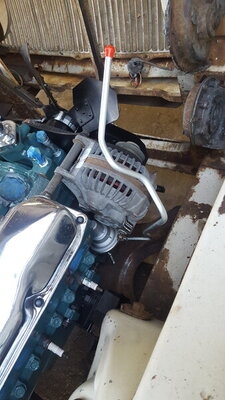
Fuel line I ordered for a 62 Dodge Dart with a 383, doesn't appear to be correct.
2 pieces, long and short in order to put a filter between.
I also tried it from the carb but the hose side ends up right on top of the fuel pump.
The short section placed on the fuel pump doesn't line up with anything, just turns right back against the fuel pump.
Making things easier isn't working out as planned.

matthon
Well-Known Member
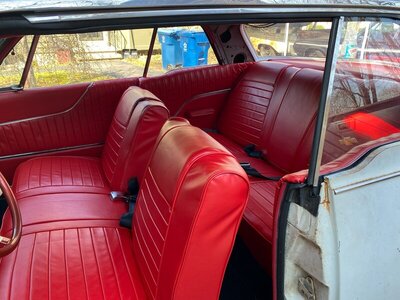
I went to put the door panels on today, fail.
Had to pull the material off the front edge, trim the padding as it was folded over making the panel longer, as well as trim the board at the front upper section an 1/8".
After a few more minor adjustments, realized the window crank/door handle holes in the board are off 1/2" and need to be up and over more towards the front.
Now that the panel sits perfect at the top and sides, it is definitely too long at the bottom.
Need to pull the material back along the entire bottom edge, mark the panel, trim it, and probably have to cut new holes for the clips along the bottom.
This was just the passenger side, didn't get to the other one.
Door panels will have to wait, too time consuming, I need to concentrate on everything and anything to make this a driver.
Kid snapped a pic while I was struggling, gives the appearance of being done.

matthon
Well-Known Member
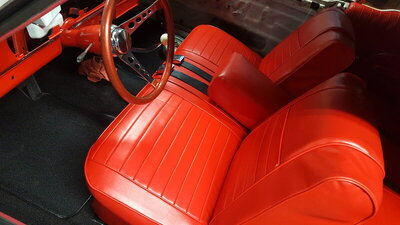
Center armrest fixed and installed.
Had to take apart as rear had a dozen staples, and rod was not put back in.
Rounded off some flat stock aluminum, drilled 2 holes, rolled it up in the fabric, screwed it in with stainless screws.
Front seat done except need to put on hinge covers, will do after I'm done getting in and out for various things.

matthon
Well-Known Member
Looking good!Had to cut a new longer piece of vinyle for the package tray, good thing I had extra.
Thanks to kryslerkid for his thread, I could see how long and how/where it's attached behind the seat.
I still need to paint and install the 2 clips up top.
View attachment 1275836
Mike
matthon
Well-Known Member
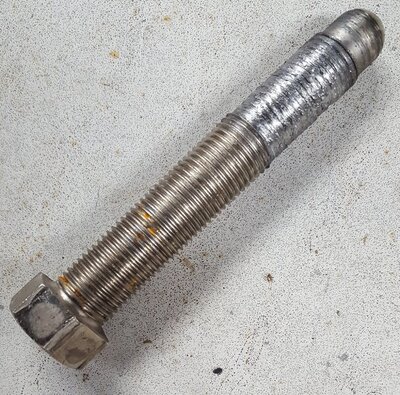
So, I put all new QA1 front suspension in using the stock k-frame. Not the first car where I've done this.
A few weeks ago, I cranked up the adjuster bolts by hand and both were difficult, at best, so I left it, car doesn't run yet, lots to do, etc.
Revisited today, car in the air, pulled the driver's side bolt out, all looked good, hit it with some more WD40 and put it back, cranked up fine.
Passenger side, pulled the bolt and block out of the LCA and the threads are toast.
I pulled out the originals, cleaned them up, painted, then took another look at the QA1 stuff.
The bolt was wasted, but the block was fine, threads and all, tested an original bolt in it and it was fine, so I put it all back and it cranked up no problemo.
Car sits fine now, and looks way more better. No radiator, exhaust, fluids, so it will come down a bit.
Strange.
 View attachment 1278791
A few weeks ago, I cranked up the adjuster bolts by hand and both were difficult, at best, so I left it, car doesn't run yet, lots to do, etc.
Revisited today, car in the air, pulled the driver's side bolt out, all looked good, hit it with some more WD40 and put it back, cranked up fine.
Passenger side, pulled the bolt and block out of the LCA and the threads are toast.
I pulled out the originals, cleaned them up, painted, then took another look at the QA1 stuff.
The bolt was wasted, but the block was fine, threads and all, tested an original bolt in it and it was fine, so I put it all back and it cranked up no problemo.
Car sits fine now, and looks way more better. No radiator, exhaust, fluids, so it will come down a bit.
Strange.
 View attachment 1278791
matthon
Well-Known Member
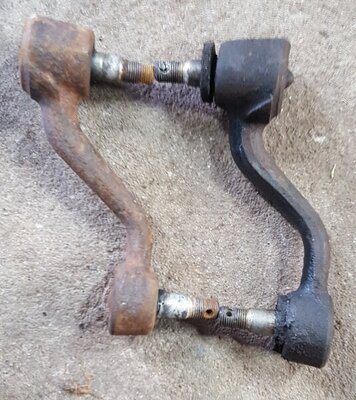
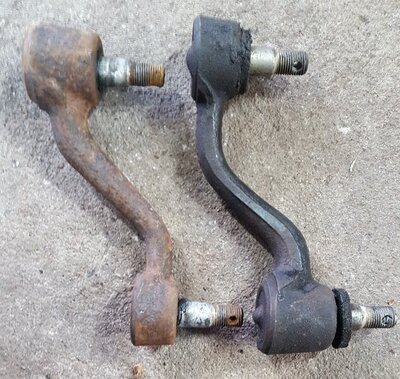
Swapped out the idler arm, my understanding is the replacement one can cause issues as it is a larger part, same dimensions, just bigger on the top.
It fit fine for me, but if it didn't I was going to see if the spare from my 67 Barracuda fit.
62 Dart on left, one of the studs is crooked in the arm.
Barracuda on the right, looks like a very close match, and it doesn't have the giant extended tops like the 62 replacement.
Only problem is the 67 Barracuda idler arm is just as difficult to find.


- Local time
- 3:31 AM
- Joined
- May 14, 2011
- Messages
- 18,740
- Reaction score
- 37,348
- Location
- On the Ridge, TN
Always a pleasure to "watch" someone doing quality work on a deserving ride!
matthon
Well-Known Member
I got a nice used Hurst boot with a new chrome baseplate, but it was too big.
Instead of spending stupid money for a smaller one that won't fit well, I cut a square out of some steel, then cut a square in that, painted it black, stuck it on the boot, trimmed the bottom of the boot off, self tapping screws, done.
I like it, don't miss the square chrome base.
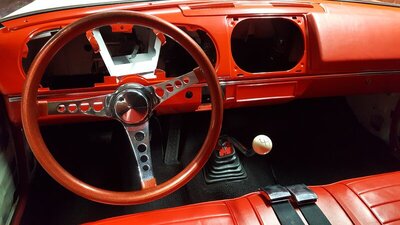
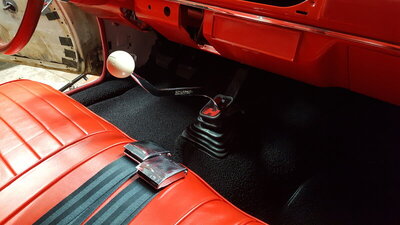
Instead of spending stupid money for a smaller one that won't fit well, I cut a square out of some steel, then cut a square in that, painted it black, stuck it on the boot, trimmed the bottom of the boot off, self tapping screws, done.
I like it, don't miss the square chrome base.


- Local time
- 3:31 AM
- Joined
- May 14, 2011
- Messages
- 18,740
- Reaction score
- 37,348
- Location
- On the Ridge, TN
'Tis a glorious day when you can say to others, earnestly:
"Well, I reckon it's a car again".
"Well, I reckon it's a car again".

matthon
Well-Known Member
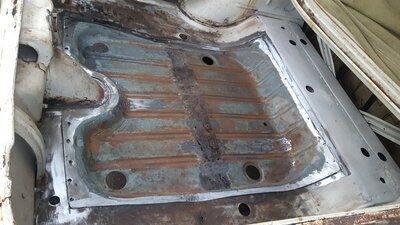
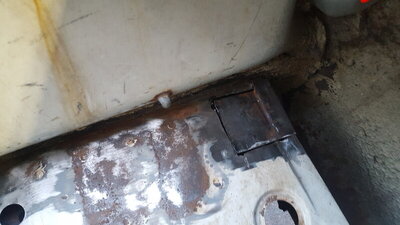
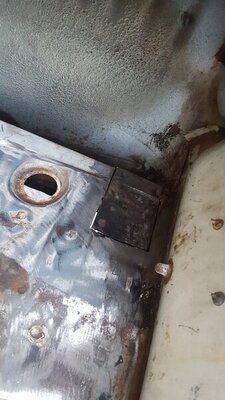
This is hopefully the last of the metal work. Patch panel fits darn good except in 2 short section, top left and right.
I also had cut out sections from my old parts car for the rear of the trunk floor. Patches could be better, but I'll make them work.
Ready for welding, sometime this week.
Then paint, install the gas tank and put the trunk mat/panels back.
I have a used passenger trunk dropdown, and need a driver side, but I don't think I'll be doing those, at least this year.


matthon
Well-Known Member
Moparmann
Well-Known Member
This pic makes me happy, keeps me motivated.
Larry: This was my first car; I often wished that it had been a two door, but w/ all the windows down, the hardtop looked cool! 318 poly 2 bbl.

matthon
Well-Known Member
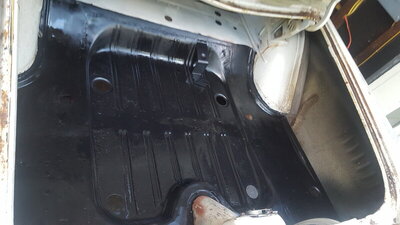
Not my best welding work, so I'll probably seam seal it before paint.
Bottom has been primed with rust primer and painted, top has been coated with Eastwood rust stuff, need to wait to topcoat. Probably just black paint as the original trunk mat will cover it.
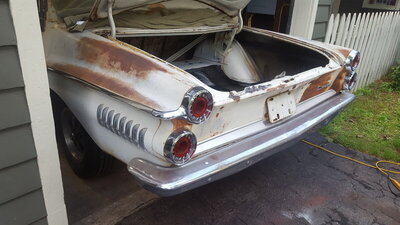
I'm not fixing the minor rust in the fenders and quarters, just 2 small spots where the trunk seal was need patches, which can wait.
So, the welding is done until it drives.
I don't believe it.
I've never welded before this, and I cut and tore out so much, and replaced, patched, and welded up too much.
Most of it is not too shabby, and yes, I was a grinder more than a welder at times.
Going to Musclepalooza tomorrow, taking Fry, need a break.
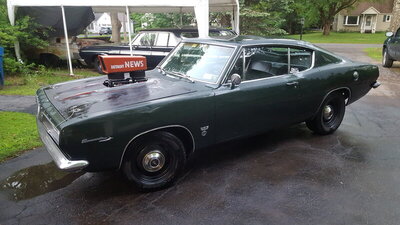


matthon
Well-Known Member
American Autowire Power Plus 20.
Bought from summit, way cheaper than direct.
Pros.
Could never gather all the wire/parts for that price, great deal.
All wires labelled the entire length.
Cons: Circuit bundles are correct but not realistic, a lot of pulling wire apart.
The few plastic connectors that are pre-assembled, just knock the wires out, it's much easier to run wires not connected.
The horn relay connects to 3 wires, one of which is hanging about 3" off the fusebox, so it will just hang there, why? I'll do something about it.
The floor highbeam switch needed a few washers behind it in order attach the plug, it's a gm piece so maybe there is a space in the floor on the gm cars.
I bought the correct Mopar terminals, so I used my tail light harness, it begins in the trunk, used the factory connectors.
I'll probably replace the flashers with napa solid state, and use part of the factory headlight harness.
I would buy again.
Looks like a mess, but actually about halfway done.
Get harness tape! It's not tape and is so easy to use/remove.
Last edited:
matthon
Well-Known Member
Trunk 'restored' to original.
Original jack, trunk mat, and side panels.
I have the original cardboard for behind the backseat, it's red on one side.
I didn't want to put it back in as I'm thinking any rodent looking for a rear seat home would be less likely if it's exposed.


Original jack, trunk mat, and side panels.
I have the original cardboard for behind the backseat, it's red on one side.
I didn't want to put it back in as I'm thinking any rodent looking for a rear seat home would be less likely if it's exposed.
matthon
Well-Known Member
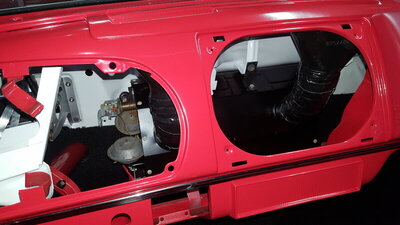
A thousand hours later.
Actually, not the same gauge pod, just a spare, my original was worse.
Gauges are mounted to the back pot metal so they are inset, instead of on top of the bezel in your face.


Actually, not the same gauge pod, just a spare, my original was worse.
Gauges are mounted to the back pot metal so they are inset, instead of on top of the bezel in your face.
Similar threads
- Replies
- 40
- Views
- 7K

