• When you click on links to various merchants on this site and make a purchase, this can result in this site earning a commission. Affiliate programs and affiliations include, but are not limited to, the eBay Partner Network.

project R/T

Thanks MT, I'm really enjoying the journey. I've always liked the body lines, I just want to make it shine again.
 
Today I took the door to work and cut the door skin off. It looks good and solid but I'm not real confident in my metal working skills. The floor pan is one thing but it is covered by a pretty carpet. The 4 door seem to sweep back at the top but the lower corner looks straight up and down. I will probably have to piece it together I'll have to do some more sanding to see how much I need from the donor. I've seen others work here and think that can't be that hard, with some patience but if I screw the door up it will mess with the body lines for sure. We'll see I guess. More to come.
 

Attachments

  • 1458958752642-205718135.jpg
    1458958752642-205718135.jpg
    35.1 KB · Views: 250
  • 14589589585342071971222.jpg
    14589589585342071971222.jpg
    38.7 KB · Views: 246
Door repair

Today I got the first of many patch panels cut and fit. Looks like the whole edge needs repair not just the lower corner as I suspected. It was said that there is always more than you think. More fun tomorrow.
 

Attachments

  • 1459565083082-205718135.jpg
    1459565083082-205718135.jpg
    59.8 KB · Views: 232
Top piece repair

I got the top section semi completed, still some welding to do. Down to the last cutoff wheel so one more trip to Harbor Freight.
 

Attachments

  • 1459618519954-205718135.jpg
    1459618519954-205718135.jpg
    46.3 KB · Views: 225
Door part 2

Got the middle section worked out, now for the big piece on the corner and the curved part. Looks like a crease in the curve so going to cut more than I thought again. After a little Jack n coke break. Maybe my weld will get better too if I'm not so tense. One can only hope.lol
 

Attachments

  • 14596272631752071971222.jpg
    14596272631752071971222.jpg
    52.8 KB · Views: 194
That's a lot of dedication, with some great results. Your ambition is to be commended.
 
No turning back now

Well I took the leap and cut the bottom corner out. I just hope I don't mess it up now. More fitting and cutting to come. It looks pretty close, just a little more trimming. Measure twice cut once.
 

Attachments

  • 1459731326250-2116291398.jpg
    1459731326250-2116291398.jpg
    76.3 KB · Views: 188
  • 1459731405794-557715496.jpg
    1459731405794-557715496.jpg
    48.5 KB · Views: 180
  • 1459731564995512471439.jpg
    1459731564995512471439.jpg
    40.9 KB · Views: 204
cut the patch smaller need space between but end s to weld. then use copper on back. Use air gun to control heat and warp, you can use thise little clips to hold steady.. sold at harbor freight..
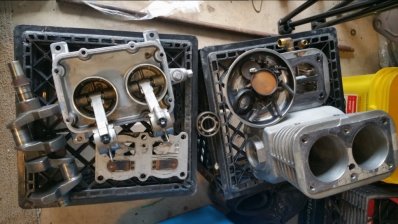
 
cut the patch smaller need space between but end s to weld. then use copper on back. Use air gun to control heat and warp, you can use thise little clips to hold steady.. sold at harbor freight..

Do you know what they look like, I'm worried about keeping it level
 
Lower door repair

I almost finished with the last section of the driver door. My welding hasn't gotten any better though. So more grinding to do to get it smooth.
 

Attachments

  • 1459911852135512471439.jpg
    1459911852135512471439.jpg
    50.5 KB · Views: 163
Getting close to acceptable, I started out just intending on a basic repaint but found as I've been told there's always more than you can see. I'm going to try to get as much rust as I can repair done with the donor parts I have available. The last time it was painted was 15 years ago and I don't want to go through this again.

1460345337869512471439.jpg
 
1460520924115-557715496.jpg
Put a couple of coats of primer and did some more block sanding. Sure glad I did that repair. Before you could see that the door wasn't quite right and now you have to look really good to see any imperfection. Well worth the extra effort.
1460520924115-557715496.jpg
1460521193343512471439.jpg
 
Getting old sucks. Everything takes longer to heal. About 2 weeks ago I woke up coughing so bad that my back spasmed and I pinched a nerve in my back so I haven't been able to work on the R/T. So I decided to order a repair kit for my compressor pump. It's an old craftsman 5hp gas unit. It's been starting to push oil into the lines and I'm getting close to being ready to prime and paint. Just need the end bearings and gaskets now.

14616286212241714430789.jpg
 
I got my compressor back together but it's too windy to shoot some primer.
1462054076147-596339851.jpg
 
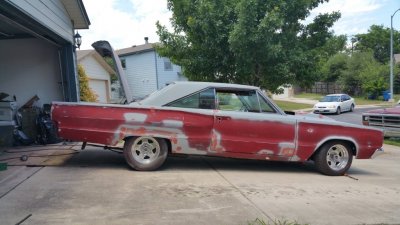
The bodywork is coming along nice now. :thumbsup:
 
The bodywork is coming along nice now. :thumbsup:
Thanks, I'm working on the lines as much as possible. That's what these cars are about, miles of cool lines down the Side panels of these cars. I didn't start out to fix the R / T to this level but I'm going to do all I can to make it better than ok. Thanks to the encouragement on the site from the many knowlegable members.
 
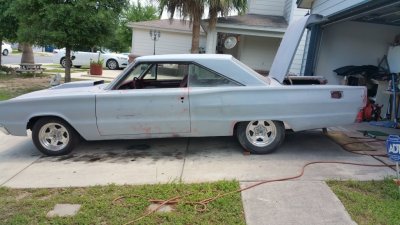
So my back has been feeling better this week an I decided to move the R/T out to sand the passenger side. But when I started down the drive way and hit the brakes my foot went to the floor. Holy S#@*$t I thought as I looked down at mine and my wife's trucks at the bottom of the drive way. Disaster averted as I quickly hit the parking brake and it held. Here are some pictures of my current status on the sanding and priming. Also working on the trunk sealing flange along the back, and need to graft in a section.

1462645132972-596339851.jpg 1462645309566-2984191.jpg
 
Auto Transport Service
Back
Top