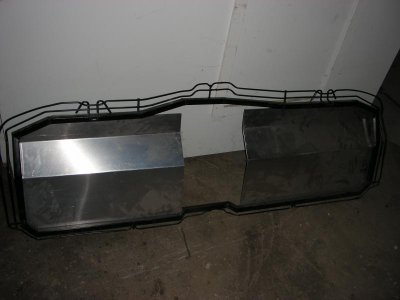
I can see the resemblence in the pics but in person the charger dash still has it's factory shape. I forgot to mention what the stainless canister was, it's the new vaccum can mounted under the fender. The plan is to run one vac hose from the motor to the can and from there to a solenoid operated vac valve (also mounted under the fender). From the valve it will go out to the vac headlight doors, all but one hose hidden under the fender. The valve will be tied into the high and low beams using diodes to prevent them from backfeading into each other "that's the plan anyhow". The other thing you see in the pic is the conduit that will carry all of the front end wiring. I have a question for you guys, anybody ever mount an ingnition box under the dash? I wondered about air flow but it definetly would be a less hostile enviroment then the engine compartment. Well it's that time, headed to the garage to play with my car.:icon_bounce:
You are using an out of date browser. It may not display this or other websites correctly.
You should upgrade or use an alternative browser.
You should upgrade or use an alternative browser.
Restomod charger pics
- Thread starter 747mopar
- Start date
more pics
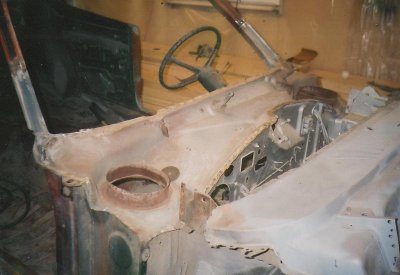
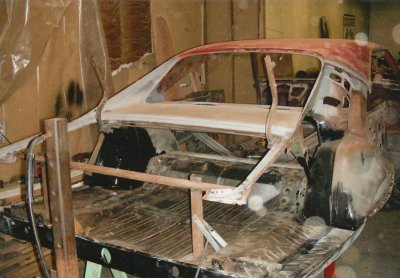
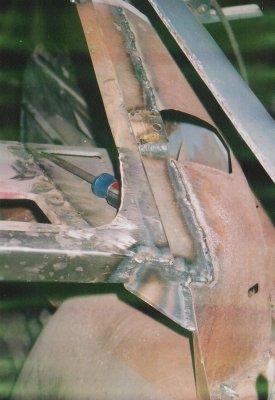
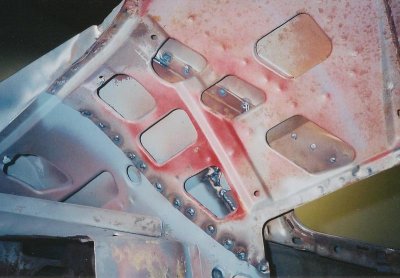
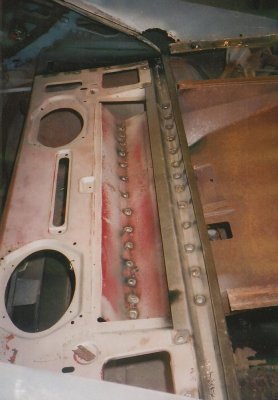
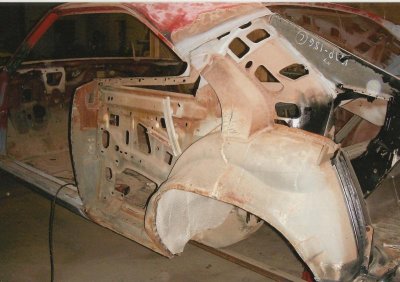
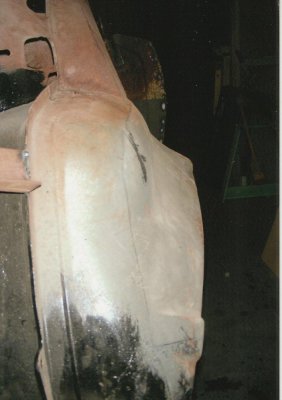
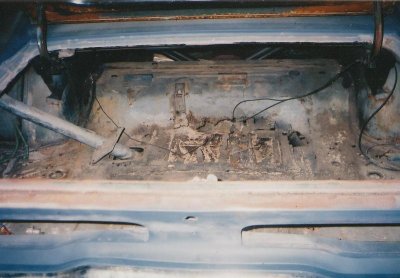
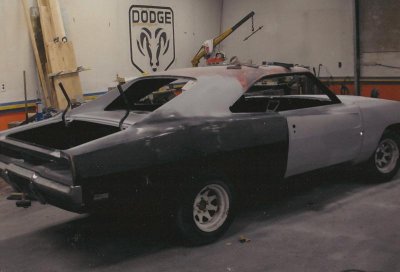
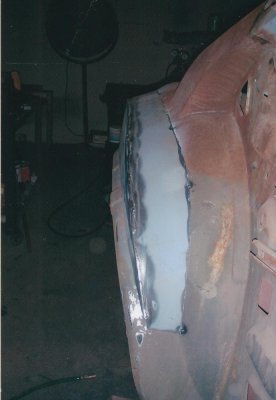
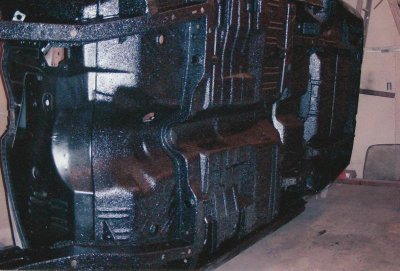 I know I'm doing it all backwards, these pics are the ones that you usually see at the beginning. Anyways, for the most part the car was pretty solid having most of the rust in the roof area and around the windows. At the time I started this you couldn't buy roof skins so I bought a really solid roof off a person and replaced it "ALL" the roof frame work and all. Of coarse if the rear window is rotted so is the trunk which also got replaced. There was alot of patching around the rear window and the whole package tray needed replaced. Like the rear, the front was the same, I had a 68 RR that I scrapped and was able to use the cowl off it. I was in the process of patching my quarters when AMD came out with they're full quarters, since most of the damage on mine was more towards the top (trunk opening, rear window, etc) it was a no brainer. While it was all opened up I had it media blasted, opened the fenderwells up a little and epoxy primed it all. I went ahead and sprayed the bottom of the car, trunk floor and floorboards with spray on beadliner. The car was nearly rust free from the doors foward, no rust repairs at all from doors forward except a couple pin holes in the floor and rust caused by the battery. When it was all said and done I replaced the roof, quarters, dutchmen panel, tailight panel, rear valence and the trunk floor. The very first thing I did was build a car rotisserie "I don't no what I would have done without it". The car was missing the motor, trans, most of the interior and other odds & ends making it the perfect starting point for what I wanted to do.
I have enjoyed every minute of it, well kind of.


 I know I'm doing it all backwards, these pics are the ones that you usually see at the beginning. Anyways, for the most part the car was pretty solid having most of the rust in the roof area and around the windows. At the time I started this you couldn't buy roof skins so I bought a really solid roof off a person and replaced it "ALL" the roof frame work and all. Of coarse if the rear window is rotted so is the trunk which also got replaced. There was alot of patching around the rear window and the whole package tray needed replaced. Like the rear, the front was the same, I had a 68 RR that I scrapped and was able to use the cowl off it. I was in the process of patching my quarters when AMD came out with they're full quarters, since most of the damage on mine was more towards the top (trunk opening, rear window, etc) it was a no brainer. While it was all opened up I had it media blasted, opened the fenderwells up a little and epoxy primed it all. I went ahead and sprayed the bottom of the car, trunk floor and floorboards with spray on beadliner. The car was nearly rust free from the doors foward, no rust repairs at all from doors forward except a couple pin holes in the floor and rust caused by the battery. When it was all said and done I replaced the roof, quarters, dutchmen panel, tailight panel, rear valence and the trunk floor. The very first thing I did was build a car rotisserie "I don't no what I would have done without it". The car was missing the motor, trans, most of the interior and other odds & ends making it the perfect starting point for what I wanted to do.
 I have enjoyed every minute of it, well kind of.
Resto car **** fits any ole way you post them, glad to see your gaining progress! Good luck..
With the intake now mounted I'm starting the scoop fitment which leads me to this question. I am going to make a 1" carb spacer that will have large ears at all four corners to mount the pan for the shaker, should it be an open spacer or not? I've seen most dyno test show the open spacer making more power but the split plenum performer rpm is better for throttle response. I just happened to have a 1"x 10"x10' plate of aluminun laying around and have it rough cut to shape, I'll be throwing it in the mill tommorow and hopefully be starting the pan this coming weakend.
- Local time
- 7:38 AM
- Joined
- Jan 16, 2011
- Messages
- 78,719
- Reaction score
- 126,889
- Location
- NorCal Sierras
747mopar so you think I was harsh on ya... sorry maybe I should filter my typing finger sometimes, I call em' as I see em', I said the rest of the car was great...LOL... your doing a fine job...
benno440
Well-Known Member
open plenum more top end 4 hole spacer more torque and throttle response, stay away from metal spacers as they hold heat you want wood fibre or plastic spacer.
dont worry about these number matching haters, custom is the way today.
dont worry about these number matching haters, custom is the way today.
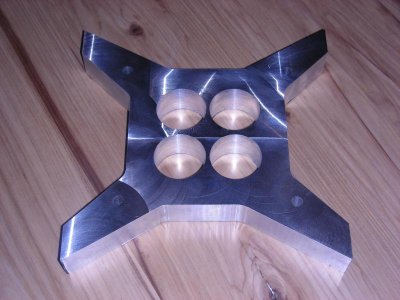 No need to filter Budnicks and I beleive I said criticle not harsh. I finished the spacer today, it's aluminum. I agree that phenolic is better for insulating the carb from the heat but that shouldn't be an issue. The mopar intakes are already of an air gap design and I used a valley pan that blocks off the heat trensfers to the intake. The shaker will mount to the ears sticking out, I still need to drill and tap them but that will come once I get the tray built.
One more day and it is vacation time 5 days, you no you work with rednecks when you get the first day of gun season off.:headbang:I'm hoping to finally fire the 451 on my break "hoping". It's also the last weakend for bow hunting before the gun hunters start driving the deer and messing everything up, so we'll see. Once again my wife is the obsticle, I took on some side jobs to pay for my habbit and somehow that money became christmas money. I can't win for loosing, I've done everything from building kitchens to selling cars and somehow I always end up empty handed. Alright I'm done bitchin, in all honesty she's awesome and I'm lucky to have her she just doesn't get the car thing and always says it's a retirement project:argue:. Anyways, in order to fire it I have to finish the harness, buy a fuel pump, fuel filter, trans pan, plug wires, install brake booster "I never fire a motor without brakes" and I'm sure something else will pop up. Next step will be paint, here we go again "money". Then it's rims "she supprised me on this one" I told her they would cost $3,000 waiting for her to freak out she said "if that's what you really want get them". I hope to find something cheaper but so far no luck, 19"x10" with zero offset and 18"x8"'s. Anybody got a suggestion. Hopefuuly I'll have something to report come Mon. Wish me luck
Lack of progress
Well, doesn't look like I'll get it fired. The brake booster I ordered still isn't here "go figure". On the bright side, when it does get here the fuel system will be done along with everything else. I had to make a few adjustments to the carburetor plate-shaker mount to clear the fuel inlet line plus I shaved it down a little for more filter clearance. After tonight I should have everything ready but the brakes. Disapointment, I pulled my brand new Holley fuel pump out of the box and take a quess where it was from "Korea". At least it wasn't from China because if it was it would have been returned. It's getting damn near impossible to buy American "Holley" for crying out loud what's next Harland Sharp. When talking to 440 source I asked them were they're heads were made "China" neadless to say I still have my 452's. I'm behond discusted not only with the quality of their junk but with their constant cheating on the trade agreements and screwing us.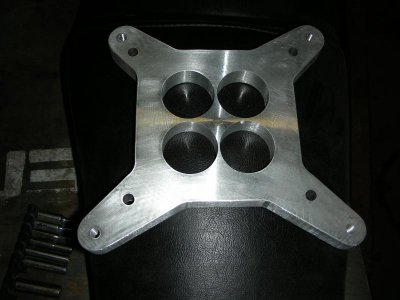
Well, doesn't look like I'll get it fired. The brake booster I ordered still isn't here "go figure". On the bright side, when it does get here the fuel system will be done along with everything else. I had to make a few adjustments to the carburetor plate-shaker mount to clear the fuel inlet line plus I shaved it down a little for more filter clearance. After tonight I should have everything ready but the brakes. Disapointment, I pulled my brand new Holley fuel pump out of the box and take a quess where it was from "Korea". At least it wasn't from China because if it was it would have been returned. It's getting damn near impossible to buy American "Holley" for crying out loud what's next Harland Sharp. When talking to 440 source I asked them were they're heads were made "China" neadless to say I still have my 452's. I'm behond discusted not only with the quality of their junk but with their constant cheating on the trade agreements and screwing us.

View attachment 90949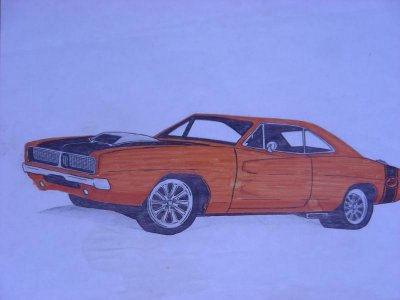
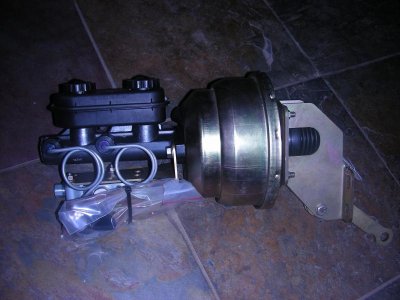
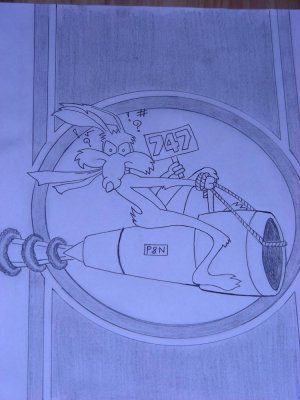 Parts came in to late for any real progress so I spent my vacation hunting and building a wood shop. I currently have a 32'x60' garage that serves double duty as car garage and wood shop "not a good mix" can't wait to move the wood shop out. Heres some pics of my renderings the coyote will be in the rump stripe "I know it's a charger" but I love the super ber stripe. The picture was actually drawn up to be painted on my helmet when I used to race motorcross, I thought it would look great on the car "the whole road runner - coyote mopar thing". The brake booster is the part I was waiting for "an ebay score" I was wondering if anybody has any experience with this finish. Will it hold up, or will it rust easily? I'm debating scuffing it up and painting it to match the other engine compartment parts. What do you think


 Parts came in to late for any real progress so I spent my vacation hunting and building a wood shop. I currently have a 32'x60' garage that serves double duty as car garage and wood shop "not a good mix" can't wait to move the wood shop out. Heres some pics of my renderings the coyote will be in the rump stripe "I know it's a charger" but I love the super ber stripe. The picture was actually drawn up to be painted on my helmet when I used to race motorcross, I thought it would look great on the car "the whole road runner - coyote mopar thing". The brake booster is the part I was waiting for "an ebay score" I was wondering if anybody has any experience with this finish. Will it hold up, or will it rust easily? I'm debating scuffing it up and painting it to match the other engine compartment parts. What do you think
Flys-Lo
Well-Known Member
Love the car - love the project and direction you're taking. The drawings are cool - I'm a constant doodler so I have a ton of them scattered around my office. It helps me work out the "look" and keeps me motivated.
Propwash
Well-Known Member
- Local time
- 9:38 AM
- Joined
- Oct 29, 2009
- Messages
- 9,695
- Reaction score
- 4,338
- Location
- Island of Misfit Toys
Cool sketches 747! Looks great. As far as your booster/MC, the booster with the zinc-cad plating should hold up fairly well. I would worry about the cast on the Master if anything at all. Few shots of Cast Blast and you'll be good to go!
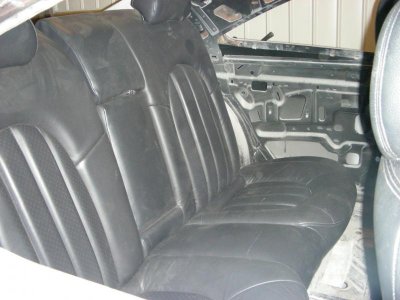
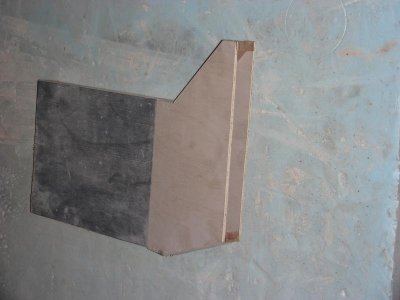
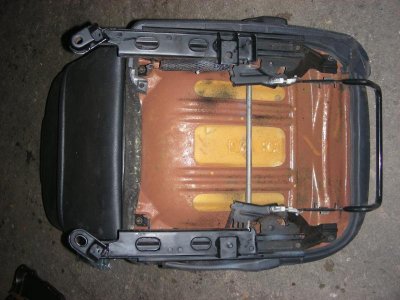
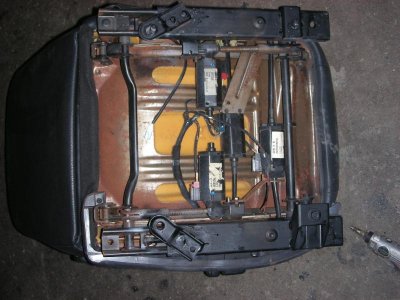
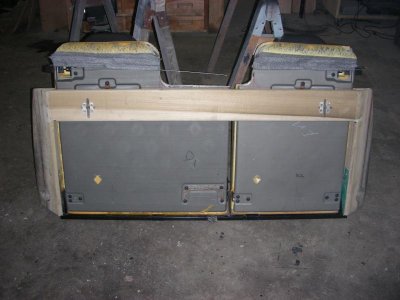
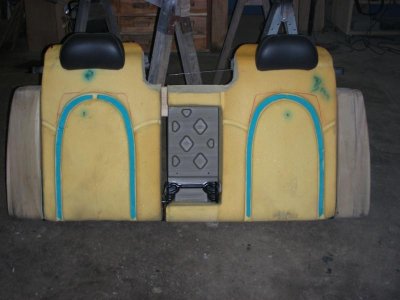
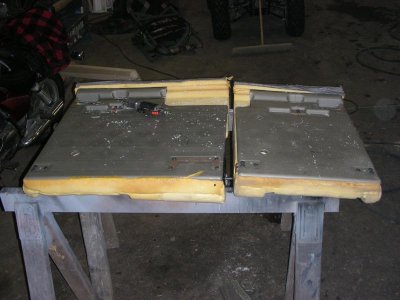
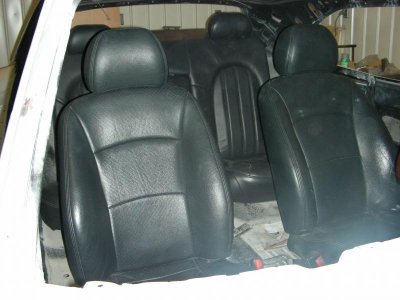
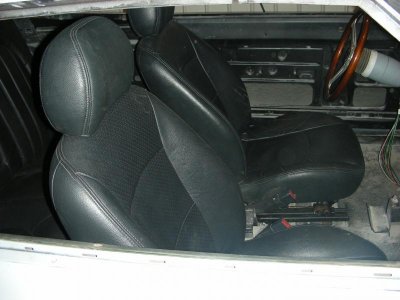
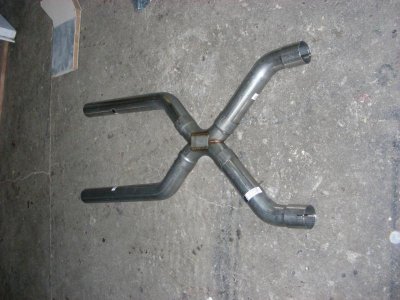
Finally got a few more pics, this one is old obviously but thought I'd post it to show how the dash was built. This weekend I focused on finishing all of the seat mods so I can get them to the upholster today. The fronts as you can see only took minor surgery to the mounts, now they bolt to the original bolt holes. The rear on the other hand was a pain. It came out of a chrysler 300 where the seat bottom sits right on the floor, because of that it only has a 1/4" dia wire frame to hold the upholstry in place. I built a frame out of 3/4" box, welded the factory 1/4" wire frame to it, shaved the foam, and then covered the frame with aluminum. Then there was the back, it fit really well but was a little narrower and way to to tall "can't see out the rear view mirror". I loved the seats with the head rest and all so I decided to try and give them a bucket look, leaving the center even with the speaker tray. I built a new frame out of wood for the back that is even with the speaker tray and is a little wider as well. I'm thinking of building a couple pods on the speaker tray right behind the rear head rest to mount speakers and give me a place to fasten the seat latches. I dropped by the uphoster yesterday to talk to him, turns out he needs alot of wood planed and wants my old seats. Sounds like I might get lucky and not owe anything on them. The funny looking peace of wood on the floor is a mock up for my exhaust tips. I always build my cars with side exit exhaust in front of the rears, this car shore as hell doesn't make it easy. The plan is to use the X pypes (in the picture) then make my own mufflers that will turn it 90 degrees (flowmaster style) and then out of the mufflers into the homemade tips. There is nowhere to run the exhaust and keep it tucked up in (rear frame, subframe connectors, etc) so I did the math to see how wide a 1" tall tip would have to be to have the same area as a 3" pipe. The plan is to build a 1" X 10" tip to get under the frame that will open up into a 1.5"-2" X 10" tip for a little better look, everything will be done in stainless. 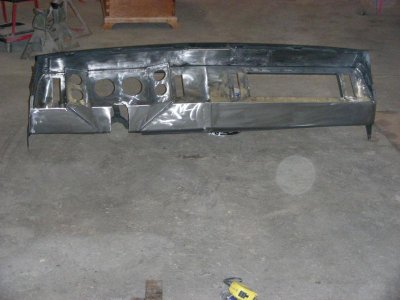

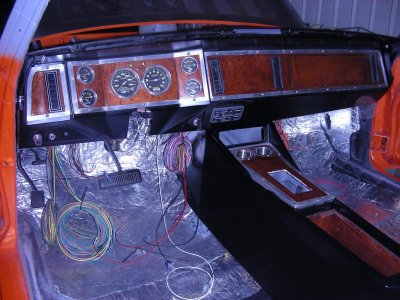 Just got my Vintage air mock up unit, time to finish up the dash installation and get it wired. Looks like I'll have to shave a little off of the console where it tucks under the dash for more clearance to fit the A/C unit. Started to build the exhaust but was quickly sidelined by a stubborn header that won't get off of my tranny. Hopefully after this weekend I'll have a picture of the interior buttoned up minus seats. Things have been going really slow, long hours at work combined with everything I try to do ends up being a fight, on top of that I can only get in the garage on weakend nights to do any work. Oh well, always look on the bright side "I have the car of my dreams".:headbang: This is the look I'm going for with my build (not a General Lee though).
- Local time
- 9:38 AM
- Joined
- Jan 1, 2013
- Messages
- 8,038
- Reaction score
- 3,467
- Location
- Mascoutah, Illinois
I like the body color. my suggestion since you are asking is the rubberized looking matte black paint used on 70 RR hood stripe, not sure if that is what you meant by flat black.
roadrunnerman
Well-Known Member
I like the look of your dash and console. It's cool in a unique sort of way.
440+6
Well-Known Member
I am pretty muck a stock type of person myself but I have seen allot of restomods that look great because they where well thought out ahead of the build.
The dash and console look great and it sounds like you know exactly what you want, so more power to ya.
I would love to see any other drawings you did for this car if there is a way you can post them.
Also can't wait to see this car done
The dash and console look great and it sounds like you know exactly what you want, so more power to ya.
I would love to see any other drawings you did for this car if there is a way you can post them.
Also can't wait to see this car done
Similar threads
- Replies
- 3
- Views
- 474

