You are using an out of date browser. It may not display this or other websites correctly.
You should upgrade or use an alternative browser.
You should upgrade or use an alternative browser.
Restomod charger pics
- Thread starter 747mopar
- Start date
747, is this what you are looking for. Took it out of the van. Has an allen wrench screw that goes into the knob to hold it onto the shaft.
That looks like it, did you happen to look and see if the motor looked like the one I posted (that's what matters, should have a resistor like they used on the ign). I should of mentioned that I will be needing the connector with a short pigtail. Thanks for taking the time to get it, let me know what you want.
- - - Updated - - -
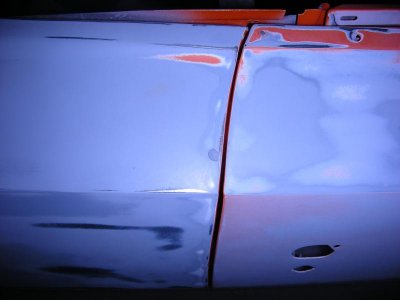
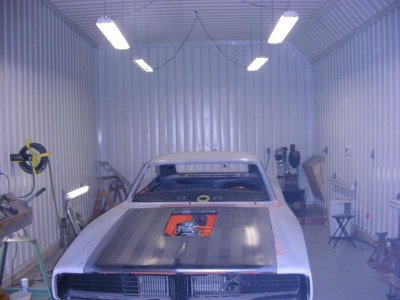
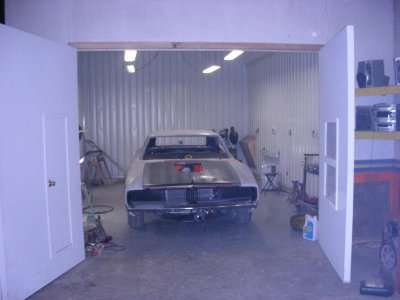
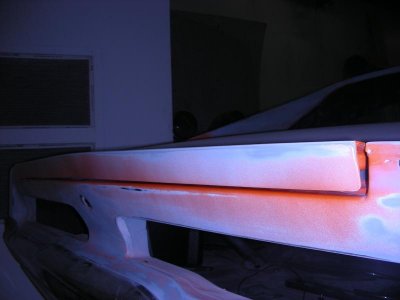
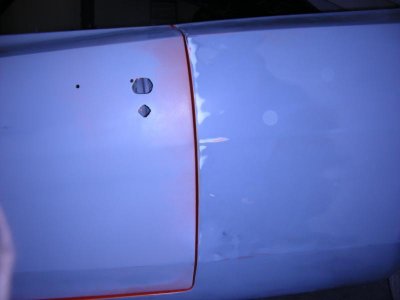
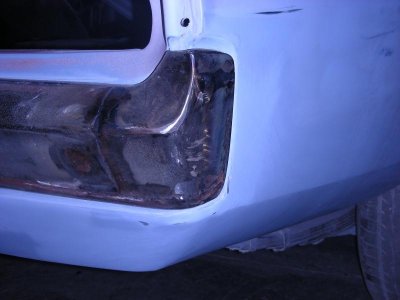
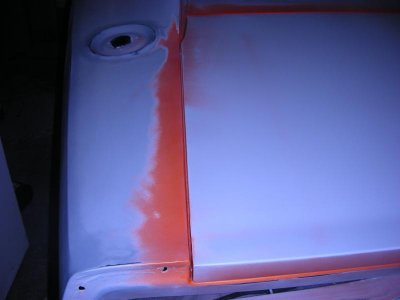
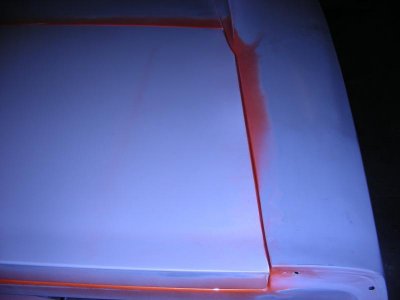
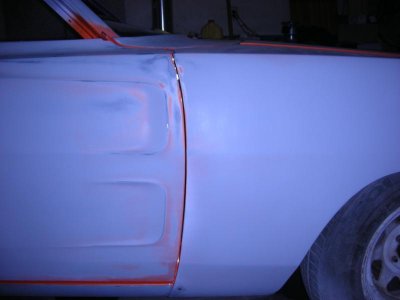
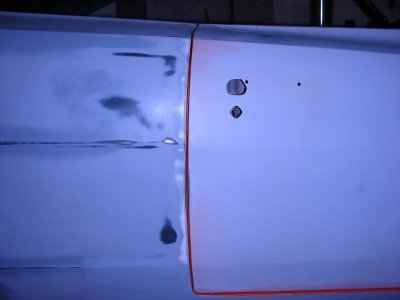
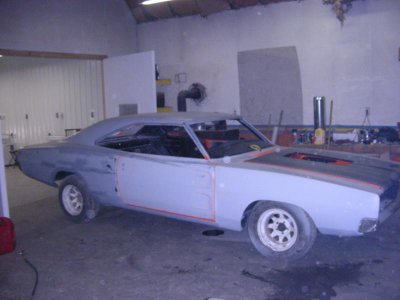
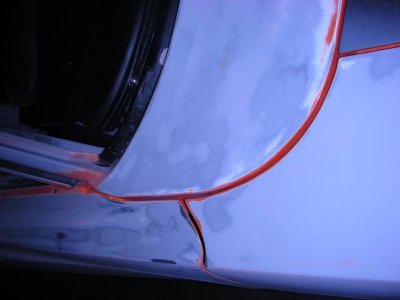
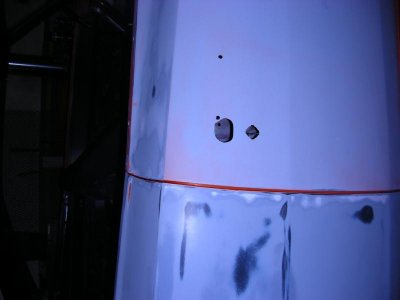
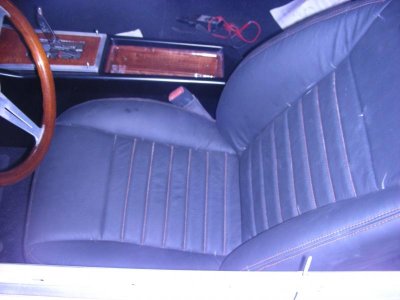 Hears a few pics of what it looks now (a little dusty) and how the panels lined up. The cowl came off a 68 RR, I had to build up the edges a little with the mig to close a slightly uneven gap where it meats the top of the door. You can see the paint booth I built last year after being told it would cost 4,500 to get the Charger painted, I spent 1,000 and have already painted two cars in it. As you can see I got one of my seats back, changed up the pattern a bit with the 2" pleats and orange stitching (hard to make out in the pics). The bottom of the trunk lid was pretty rotten so while replacing it I took the liberty of making the new lip a little longer (I could fit my fingures in the gap before). No, the car will not sit that low in the front, I put all new suspension under it but haven't cranked up the torsion bars yet "it's easier to work on like this haha". I finally fired the motor tonight "it fired first try and sounds mean". Next on the list is to get the carb linkage set up, buy an alt, power steering pump and get started on the shaker hood. Never ends
roadrunnerman
Well-Known Member
Do you need the motor, the wiring off the motor, or the wiring off the wiper switch? Yes the motor looked like the one you showed. I can get you one or all, let me know. That's a nice paint booth. Priced right and payed for itself if you've already done 2 cars in it.
Thanks, I only need the switch and connector for it. If you want to get rid of it all let me know what you want, it never hurts to have an extra.Do you need the motor, the wiring off the motor, or the wiring off the wiper switch? Yes the motor looked like the one you showed. I can get you one or all, let me know. That's a nice paint booth. Priced right and payed for itself if you've already done 2 cars in it.
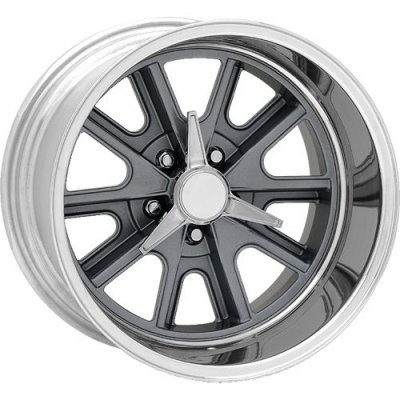
Alright Budnik, I think I'm really seriously thinking about these. After checking on them again it looks like there are more options than before (18x9.5 backspacing says 6.00-3.00). I don't know if that means you can choose anything within that range or what, they are two peace. Honestly these were one of the first ones I looks at but they didn't offer the right combo then.
- - - Updated - - -
- - - Updated - - -

Last edited:
- Local time
- 8:11 PM
- Joined
- Jan 1, 2013
- Messages
- 8,038
- Reaction score
- 3,467
- Location
- Mascoutah, Illinois
I must say this is an interesting build and i'm watching it with interest. I like your build. Also I love the steering wheel i'f i haven't said that before.
roadrunnerman
Well-Known Member
Those wheels don't look too bad. the center spinner really sets them off. IMO
Any pro metal benders out there? With the motor finally running I'm about to start on the shaker scoop pan and trying to figure out how to do it. I'm either going to make it out of fiberglass or stainless, prefer the later. I was thinking about making a mold to push the funnel shape for the carb inlet into the metal using my press. Not sure what's the best way to go about it, I could just wrap a funnel and then weld it in but I'd prefer the smooth radiused shape. Any pointers
Propwash
Well-Known Member
- Local time
- 8:11 PM
- Joined
- Oct 29, 2009
- Messages
- 9,695
- Reaction score
- 4,338
- Location
- Island of Misfit Toys
An english wheel, metal brake, former roller slip roll or rounded rubber dolly hammer on a shot peen bag would all be tools that could be used to do that with metal. Have a map gas torch handy as well. Carbon would be a bit easier to work with than stainless steel. Would take some time and practice, but definitely a possibility. Fiberglass you could make a 2 piece mold. Fiberglass resin/matting over a form made from clay. Nice gaps on the panels. Tough to get them to line up like that on a Mopar.
Good to watch the progress you have been making, You sure did match the gaps up nicely! Good luck with the scoop pan, im just not familiar enough to add any advice..
An english wheel, metal brake, former roller slip roll or rounded rubber dolly hammer on a shot peen bag would all be tools that could be used to do that with metal. Have a map gas torch handy as well. Carbon would be a bit easier to work with than stainless steel. Would take some time and practice, but definitely a possibility. Fiberglass you could make a 2 piece mold. Fiberglass resin/matting over a form made from clay. Nice gaps on the panels. Tough to get them to line up like that on a Mopar.
Thanks, the only thing I have for metal forming is a hammer & dolly set and brake. I just need to brake down and buy some more equipment "I've been wanting to learn metal forming for a while now". I don't know that I'll start it this weekend (probably be dialing in the motor) but likely next weekend.
Propwash
Well-Known Member
- Local time
- 8:11 PM
- Joined
- Oct 29, 2009
- Messages
- 9,695
- Reaction score
- 4,338
- Location
- Island of Misfit Toys
Thanks, the only thing I have for metal forming is a hammer & dolly set and brake. I just need to brake down and buy some more equipment "I've been wanting to learn metal forming for a while now". I don't know that I'll start it this weekend (probably be dialing in the motor) but likely next weekend.
Have fun with it man...It's an art. A lost one at that. Dirty, noisy work, but sure can be a blast...Be sure to post any progress on that, us sheetmetal junkies enjoy that stuff.
I'll keep you posted but I'm afraid it might be more entertaining than anything else. Hey roadrunnerman, thanks allot I just got it today "looks good". What's the blue lights for?
roadrunnerman
Well-Known Member
It was above the switch. I guess it's own little dome light. Was wrapped in with the connector. Thought I would throw it in, you can do what you want/need to with it.
RustyRatRod
Well-Known Member
Dude, VERY impressed with your electrical work. It looks really professional.
It was above the switch. I guess it's own little dome light. Was wrapped in with the connector. Thought I would throw it in, you can do what you want/need to with it.
Makes sense, it seams to work fine. I wired it up to the motor and had it running, high and low but the park was acting funny, it would pause and take back off instead of stopping. I took the wiper motor apart and the grease was so hard that it was acting like a bunch of little cams on the park switch "hard to believe how hard grease can get" it was like scraping plastic off. I believe the motor would be fine if I knew what type of grease to put back in it, whatever I put in it will get on the park switch contacts so I figure it will need to be a special grease. I also want to verify where the two park terminals plug into, the one terminal grounds when in park so it needs to be correct. The switch you sent has the same terminal designations as the Chargers but unfortunetly I don't have one to look at and my manual doesn't show them either. So if anybody has a Charger style two speed wiper switch (rocker style) and could take a pic of the terminal designations that would be great, they should read B/U, H, P2, P1, B etc.
- - - Updated - - -
Dude, VERY impressed with your electrical work. It looks really professional.
Thanks Rusty, the real question will be whether it works or not. So far it at least runs which is a sore subject right now, I finally fired it last weak but need an alternator(so I have a belt on the water pump), a choke cap(because Fed Ex broke mine), throttle cable and bracket and now I find my electric fan won't fit so add that to the list to. Without any of these I'm not firing it again because next time I fire it I plan to run it long enough to break in the cam. Go figure this paycheck sucked do to me being sick and my back is still all screwed up as well, gotta love it. It's times like this you just have to tell yourself "I have a 1969 Charger" and everything seams better. Anyone have a suggestion on a fan, I only have 3" between the radiator and the water pump shaft. What cfm should I shoot for?
smyythe68
Well-Known Member
You do some incredible work 747. I'm working on my dash section as well. I was wondering if you wanted to get rid of your mock up unit and if you do, how much? As far as a cooling fan, I have used early 90's lincoln mark 8 cooling fans. They are rather low profile and made to cool a V8. Next nice day if you can head out with a tape measure and around $30. Good luck!
You do some incredible work 747. I'm working on my dash section as well. I was wondering if you wanted to get rid of your mock up unit and if you do, how much? As far as a cooling fan, I have used early 90's lincoln mark 8 cooling fans. They are rather low profile and made to cool a V8. Next nice day if you can head out with a tape measure and around $30. Good luck!
Good to know. As far as the mock up unit goes, Vintage Air sells them for $45.00 and then refunds your $45.00 when you return it and order the actual evaporator. Doesn't make much sense to sell them when you get your money back, give them a call they'll get you hooked up.
smyythe68
Well-Known Member
Good to know. As far as the mock up unit goes, Vintage Air sells them for $45.00 and then refunds your $45.00 when you return it and order the actual evaporator. Doesn't make much sense to sell them when you get your money back, give them a call they'll get you hooked up.
Didn't know about the refund, thanks!
Similar threads
- Replies
- 3
- Views
- 453


