• When you click on links to various merchants on this site and make a purchase, this can result in this site earning a commission. Affiliate programs and affiliations include, but are not limited to, the eBay Partner Network.

Some changes for LemonWedge

Inbox emptied. Open to any suggestions you may have, 66.

Yeah Malex, I’ve already looked at that area and come to the conclusion that there will have to be a modification made. There are also a couple of other area’s I’ve identified that the USCT outline doesn’t mention that I’ll have to navigate. Where the seat backrest framing attaches to the wheelhouse is conveniently overlooked by USCT. Also, I’ve realized their cut template puts me inside the frame, so I’ll be using my best judgement there.
—-
I had taken pictures of my rear Dart seat frame when I did it, same thing, can’t locate the pics now/yet. But it was simple. I just cut a couple inches of steel out of front of the contoured area, moved the contoured area inward that amount and reinstalled the cut section back in behind it. And the back rest, you could use a button head bolt from the tire side of the tub. Whatever you do there’s no doubt it will be done top notch!
 
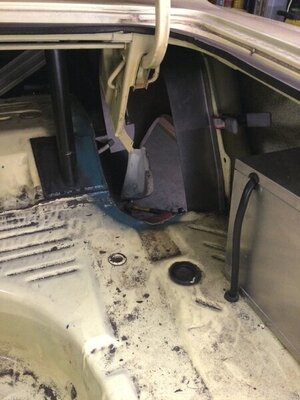
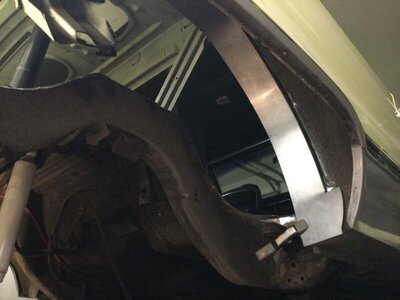
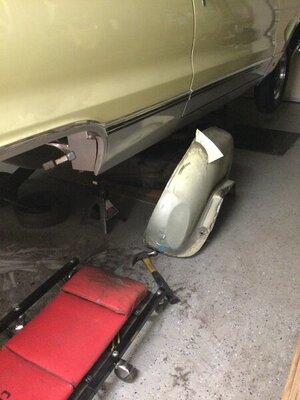
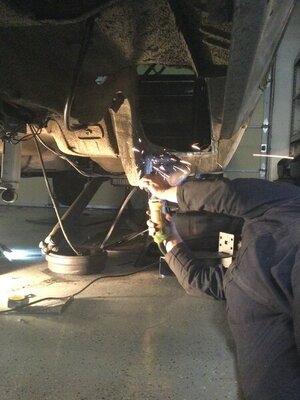
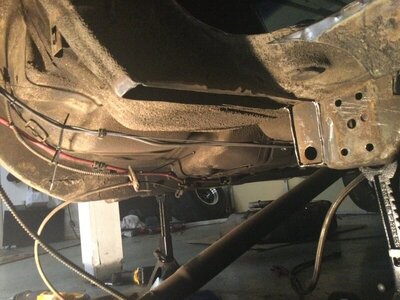
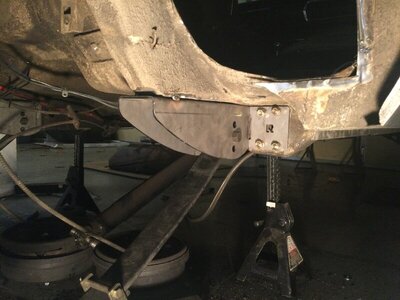
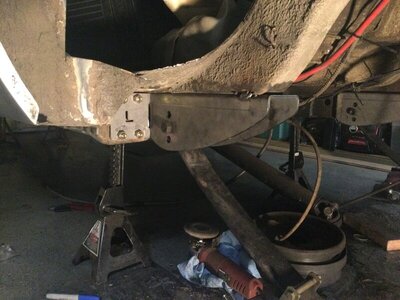
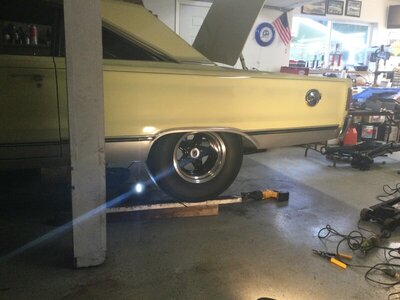
Made a little progress today. Now that I understand how and where to cut, the other side should come out easier.
Use of plasma cutter: check
Use of cutting wheel: check
Use of sawsall: check
Use of at least (3) expletives, and copious amounts of both fortitude and patience: check!
No turning back now!

2BC078E9-B84B-4030-8767-9E402DF988AA.jpeg B96D6CD4-8A06-4685-869D-B2CB81934783.jpeg 35190C2A-F4B9-4B34-A039-E103D0F74B2D.jpeg 5C03B9D9-F0DE-4AC9-9DA2-102D63D6615E.jpeg
 
Made a little progress today. Now that I understand how and where to cut, the other side should come out easier.
Use of plasma cutter: check
Use of cutting wheel: check
Use of sawsall: check
Use of at least (3) expletives, and copious amounts of both fortitude and patience: check!
No turning back now!

View attachment 1032608 View attachment 1032612 View attachment 1032614 View attachment 1032615
—-
Doing a great job! Going to be just as nice as that roll bar turned out.
 
Tons of progress today! Got the 2nd wheel tub out, the frame rails cut, and the new spring buckets tacked in place. I placed the springs in the bucket to make sure they land in the correct spot at the rear. I also plan on measuring everything from side to side diagonally to make sure we’re square. But with the way the USCT kit bolts into the stock locations, I don’t think there’s much to worry about.
I also got a first peek at the new look.... and I’m pretty stoked about it.

5E908FAE-1C3C-4046-82BB-E76EFB25D559.jpeg 209D758C-C2D9-45F1-88C1-94E1FE1FB4F9.jpeg 16103DE3-DD4A-4591-AE24-EFE6274C4EE4.jpeg F1B498B7-2903-441A-83AB-354EEEEC430F.jpeg 25AF46C3-3211-4749-8C03-E093557DED60.jpeg C6E8981E-876C-46EB-8B3C-E023DD8BAAC2.jpeg AF1FC54F-708F-41EE-A205-5FE14186BB16.jpeg
 
It's really coming along. You've got a great start to it, plenty of off season time left for you to do a perfect spotless beautiful job LW!! Removing any undercoating can be a tedious job. If you have a small propane torch and give it a little heat it where you need, it softens up and comes off a lot easier, just gets a little stinky. Keep up the good work LW!
 
The undercoating is the one thing about this car that is really annoying. Really something that would be best addressed on a rotisserie. I may take the time remove what I can, but it’s THICK in spots, and it makes for dirty, grungy, time-consuming work. When you paid for undercoating on your ‘67 Satellite, you got your money’s worth! I guess it did it’s job though, as there is not one bit of rust in this car.
 
On my '65 Coronet, the propane torch, stiff paint scrapers, wide wood chisels got the job done. A couple hours at a time over a couple days did it. IIRC the thick areas seemed to be fairly easy. But at the time my car was only 10 years old.
Great progress, well done!!
 
You could also run a string line through all the holes in the spring buckets to make sure that they sit square with each other before you weld them up. I used a cheapo Harbor Freight needle scaler to remove the undercoat on my 64'. I liked doing it that way because it seemed to chip/ flake off easier , the heat from a torch seems to "Reactivate" the undercoating. I got about 35 hours of doing that in total, not fun.
 
You could also run a string line through all the holes in the spring buckets to make sure that they sit square with each other before you weld them up. Nice progress.
We used a real straight steel rod side to side in the spring buckets, cross checking with the K member mount bolts.
 
I used threaded rod when installing my home made boxes and used the original front spring hangers to align things. I welded them with the bottom of the car facing upward.

DD45C03B-2D67-4B04-AF45-C64F35063B77.jpeg


BDF02DE4-1E4C-4A77-ADED-C8FD65F310E6.jpeg
 
I personally don’t trust the factory hanger location. Cross measure to the rear of each torsion bar anchor at the torsion bar cross member. Also to the front of each of the lower control arm studs.
Doug
 
I personally don’t trust the factory hanger location. Cross measure to the rear of each torsion bar anchor at the torsion bar cross member. Also to the front of each of the lower control arm studs.
Doug
—-
I used the factory hanger locations with the threaded rod. It made it easy to do and when I cross measured it was bang on. Even checked again today for something to do while waiting for some A&A trany parts to show up. I’m not sure about the B body but with the A body the rocker is lower than the hanger bolt hole so a solid rod would need to be cut in order to remove whereas the threaded rod it was just a matter of unbolting them.
 
Another weekend, a little more progress. You guys inspired me to remove all of the undercoating in the wheelhouses. Got them all cleaned out using the butane torch and a scraper. I’ll continue on the frame rail as well. After measuring the spring buckets off of the torsion bar sockets as Doug suggested, I found I wasn’t quite square. So I removed them and did some further cleanup on the frame reliefs so the buckets would fit completely flush. Rebolted them in, haven’t measured again yet, but I’m more confident in what I see now.

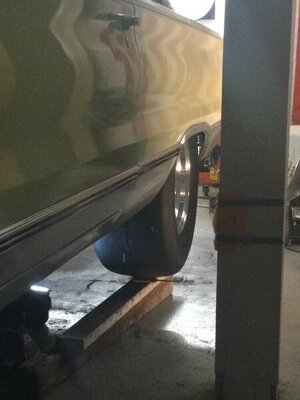
Also got done up front; after initial bolt up of the front wheels, I found that A: the center caps didn’t clear the spindles. And B: I didn’t care for how far inside the fender the tire sat. So I ordered some 3/4” spacers and longer studs, and killed 2 birds with one stone. They now clear the spindles, and look much better out toward the fender lip a little more.

Little by little, I’m walking this project down. My dad even stopped by on Saturday to check on my progress. Some good quality time chatting with pops over a couple of beers probably slowed the days progress, but was also the highlight of the weekend.
—-
Good that you're getting rid of that undercoating, it did it’s job and serves no purpose any longer. Also good that you double checked those spring boxes. Good catch, DVW comes through again, it’s a good site when the members all help each other. Only problem is there’s no pictures.
 
What brand wheels are you using? . I found using the jegs brand they offer 2 different center caps when I tried installing my front wheels, no biggie for me their 10 minutes away from my house. Keep up with the good work
 
Didn’t get any pictures of latest progress, but I will. The car is on stands right now, so the wheel position is skewed. I’ll take a picture next time the car is on the ground, Malex.

the Wheels are indeed Jegs brand, 67MPR. They are the Sport Stars in black, but I went with the satin alum centercaps. I saw that they made deeper caps, but didn’t think I’d like the look especially on 4” wide wheels. The spacers worked out pretty good for me.

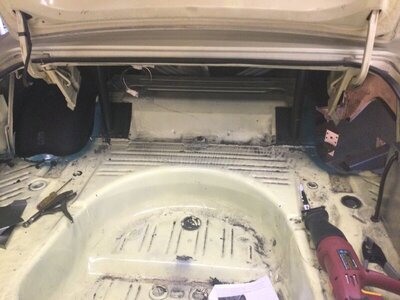
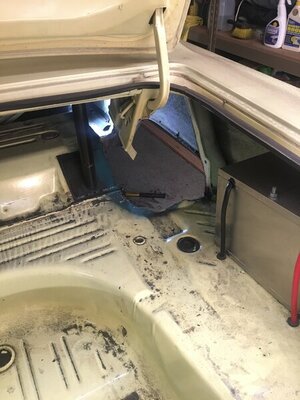
Next challenge is to navigate the trunk hinge bracket. It currently interferes with where I want the wheel wells to sit. We’ll see how it works out. Hopefully the next pictures I post will be of the wheeltubs tacked in place.
 
When building mine I drilled the spot welds out of the hinge brackets and removed them. Trimmed to fit a rewelded right through the original holes. When we mini tubbed my sons Duster they stayed attached. Just kept trimming and bent the lower portion inward. Then rewelded them.
Doug
 
Auto Transport Service
Back
Top