• When you click on links to various merchants on this site and make a purchase, this can result in this site earning a commission. Affiliate programs and affiliations include, but are not limited to, the eBay Partner Network.

The Kelly Charger

Now California is known for great rust free vehicles, but all that beautiful California sun can do some damage.
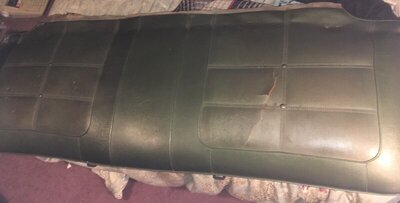
The rear seat in my car was in perfect shape when it arrived to me in NY.
But when I was looking for the build sheet, and I put my knee on the seat bottom, the seat split. On the passenger side

resized seat.jpg resized.jpg
 
Last edited:
When the seat split, it hurt a tad deep inside, as it can only be original once. So I jumped off and told myself I would be more careful.
Now having had many an old Mopar, that have had dash, or door panels that needed some help, right away I drenched all seat and door panels in armor all. This has worked GREAT in the past, my 66's padded door panels came back wonderful, at first it would have cracked and split if you pressed to hard on them, and after a few armor all baths they became soft and beautiful again.
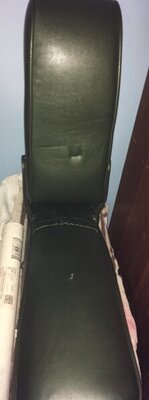
Well after a few heavy armor all treatments the buddy seat has come back to life, very well.

buddy seat.jpg
 
ON the top, seat back of the buddy seat there is an indent, from 25+ years of it being closed on a seat belt buckle, on the bottom is a small tear. After a few armor all baths, it has come back, lets say 70%+.

This brings us to the rear seat back.
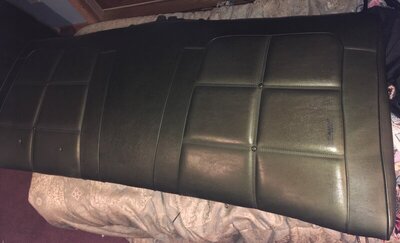
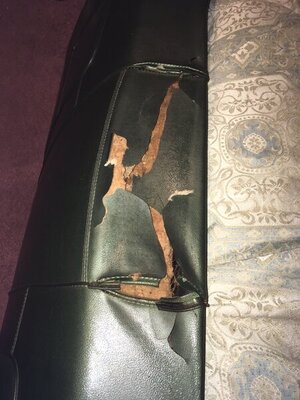
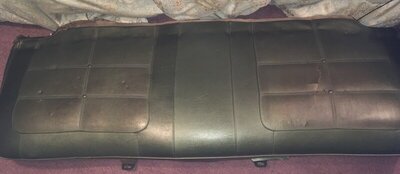
The rear seat back, has also come back fairly nice, but the very top of the seat back, the part by the rear package tray, and took the most direct sun light, has remained super brittle, and cracked and split, when I was GENTLY trying to remove it.
Even after a few treatments it still is very brittle, and I don't dare touch it anymore.

new seat resized.jpg IMG_2014 (1).JPG
 
The dash is ok, only a small crack, that I can live with.
The front padded parts of the door, are very damaged by the sun(pics to follow)

I would rather try and repair the original seats, then to recover them, one, because its the original seat covers, and two, CA$H, new ones cost money. and I am not wealthy,LOL!!!

I have a feeling that although they look good, they are too far gone/sun baked for me to put them back in to service, as they will just continue to split and crack apart.

ANY ADVICE or tips on products or procedures that may help restore flexibility to the seats??
or are they done?
 
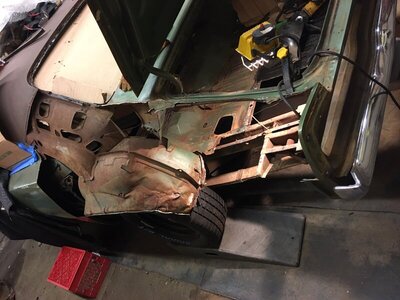
I have all my AMD replacement parts, except the wheel house, and that should be here next week, so I started to remove some more crunched metal.
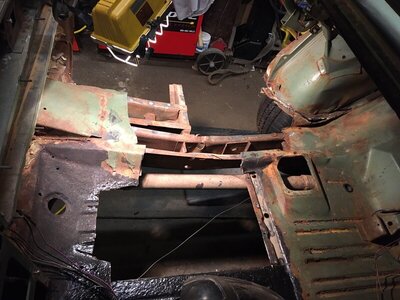
I cut the wheel house free from the trunk, and using a 2x4 and hammer, got wheel house back in place.
Then removed some more of the trunk floor.
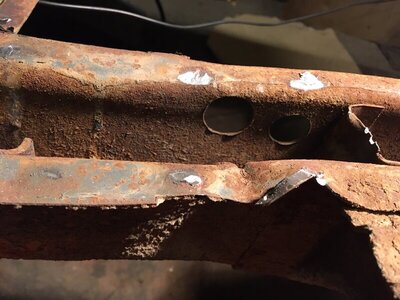
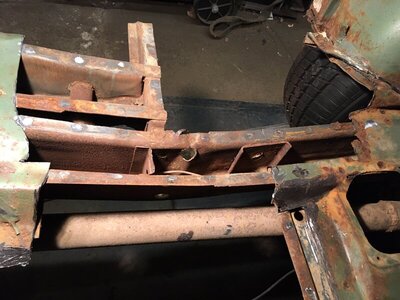
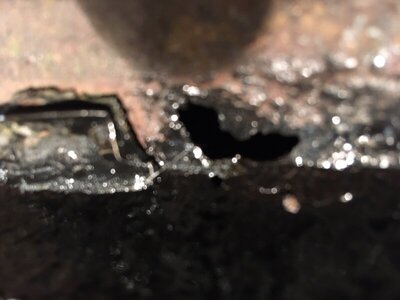
The small bend in the frame,(4th photo) is the only frame damage, that happened, I got lucky.
I only had 2 hrs to work on it tonight.
I hope to get the rest of what I am removing of the old trunk out, dress up the spot welds on the frame, and at least trim and fit the replacement trunk patch this weekend.

IMG_2197.JPG IMG_2190.JPG IMG_2191.JPG IMG_2192.JPG IMG_2193.JPG
 
You can see in last photo, (ABOVE)by the factory hole in the frame, is where the frame is slightly damaged.
I will straighten that out, and continue on with the trunk removal, tomorrow, I hope.

It looks like there is seam sealer in between the 1/4 and trunk extension, at the bottom edge where they get welded together.
What is best seam sealer to use for this?

Also what is the closest to the factory sound deadener I can get for the back side of the 1/4 panel, looks like I will have to apply it before it gets welded in, as it is all the way past the wheel house, up to door jam.
Thanks.
IMG_2208.JPG
IMG_2207.JPG
IMG_2208.JPG
 
Did a few hrs in shop today, and, I almost have new trunk panel fit, I have to remove the driver side rear tail panel to trunk floor brace(one the bumper bracket bolts go threw)
This seams to be the only part of the project so far that I really dont care for.
I had thought about just cutting the new panel to drop over the original brace, and butt weld it it in when done, but I am going to do it correct.

I have to mow lawn then, after dinner I may hit it again.
 
ON the top, seat back of the buddy seat there is an indent, from 25+ years of it being closed on a seat belt buckle, on the bottom is a small tear. After a few armor all baths, it has come back, lets say 70%+.

This brings us to the rear seat back.
The rear seat back, has also come back fairly nice, but the very top of the seat back, the part by the rear package tray, and took the most direct sun light, has remained super brittle, and cracked and split, when I was GENTLY trying to remove it.
Even after a few treatments it still is very brittle, and I don't dare touch it anymore.

View attachment 967561 View attachment 967562

Those seat covers have done their time, 51 years is a good run,but it's time for a new set of covers. They are just going to keep cracking and splitting every time you repair one spot, another one will split.
 
I have never had any luck repairing vinyl seat covers, I was hoping they would become flexible again, like the door panels and dash pad on my 1966 Charger did. So I could get a some use out of them before I have to get covers.
I think the sun has just sucked the life from them.
 
A bit ahead of myself, when I drained the engine oil, I also changed the transmission fluid and filter, using Type F fluid.
When I started the engine, I put the transmission in NETURAL, so it would pump instantly.
I also flushed out the radiator, 3 or 4 times, and I scored an original Direct Connect aluminum Hemi water pump housing, that I also painted tourquirse, and intend on installing.
I removed the aftermarket flex fan, and installed a Mopar Performance viscous drive fan from Mancini Racing.

With the engine running and the transmission shifting, I turned to the brake system.
The master cylinder was completely devoid of fluid when I got the car, and once I had it filled up with brake fluid, and gravity bleed the lines, I discovered the brake pedal was FROZEN SOLID!!!!
Now I run 6 foot 3inch 250lbs, so I do have a broad torque curve.(LOL) and the amount of pressure I had to apply to the petal and still no movement, I knew we had an issue.

Now my father always used to say, "What do you need brakes for? They are only gonna slow you down"
And that's exactly why I started gathering up brake parts.
This Charger was a power drum car, with the Bendix style booster, so I purchased a reman DISC/DRUM master cylinder for the booster.
Then a call to Classic industries for the correct disc brake proportion/distribution valve.
Next up a set of new Disc brake spindles, and a call to DR Diff, for the rear shoes, and wheel cylinders, spring kit and rear wheel seals.
I also got the front wheel bearing kit from him.
I got 11.75 PIN STYLE caliper brackets(used c body Mopar parts) and ordered a set of 11.75 performance rotors and hoses from rock auto(for real they have them)
I got the front brake calipers and pads and rear drums from NAPA.
This, in my opinion is the best FACTORY disc set up. It is important to me to keep the car as much MOPAR as I can.
I also feel that I was able to get all these parts for cheaper, or the same price that most front disc kits go for, and I have the pin type calipers, and the larger rotors, also the pads from the pin type calipers have more surface area then the slider type.

View attachment 965217 View attachment 965218 View attachment 965219 View attachment 965221
Where did you find the 11.75 Pin Style caliper brackets? I need a set of those to complete my conversion to the 11.75.
 
The Ram man sells them, they are not cheap.
You can also modify the smaller brackets.(only mounting holes are different)
Any machine shop can do this, or if you are with a welder.
10.87 calipers are 3.125 and the 11.75 are 3.5 inches
10.87 caliper measures 3.125 @ 11.75 rotors measure 3.5inch.jpg
 
The 10.87 is 3 and 1/4, and the 11.75 is 3 and 5/8.
Photo below is photo of SLIDER style, NOT PIN,
I only using it to show how the measurement was taken to center holes
So IMO, add 9/16 to the bottom and then having new holes cut.
If you weld up the old holes, you still wont have enough to have FULL new ones drilled.
10.87 is 3 and one quarter  11.75bracket is 3 and 5 8ths.jpg
 
I got a pair of them from a 69 Chrysler New Yorker. I believe they were stand equipment on most disc brake equipped C body cars from that era.
 
I have no idea why I have been dragging my *** so bad on this, but I need to snap out of it!!
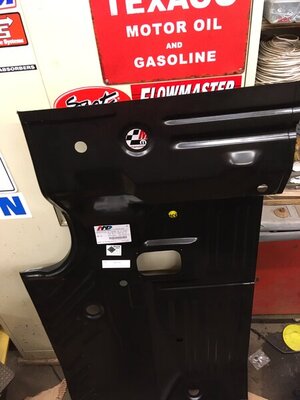
My outer wheel house arrived from AMD, not that I have even touched it, and I finally got the truck pan to fit correctly.
This has been one of the more difficult panels to fit I have ever done.
I had to give the inner wheel house a few shots on the top of housing with a 2x6 and sledge, I thought I had it perfect, but I was wrong, once the top of the housing was moved over it all lined up.
So while waiting for the POR 15 metal prep to arrive (2 days) I took the time to grind some spot welds down, and get the rear window channel clean and ready for repair.
Today I will be applying the POR 15 to inner and top parts of the rear frame rails, that are now exposed, and any other exposed metal that I can slap POR 15 on to protect it.
I will try and get some photos before and after, and post tonight once I am done.
I also got some of the POR15 "patch" product, the one that comes in a tube.
I will try it on a few SMALL pin holes, I have never used it before, and I wanted to get the "epoxy" stuff, as that seamed to work very well, the only other time I used it, but this is all they had, so i will give it a try.
Hopefully when I start welding the new metal in, I will get motivated.
When I get out in the shop, and set up, I totally get into the zone, loose track of time and enjoy myself, but getting out to the garage is the difficult part.
 
Ok 4 1/2 HRS later, I am done with the cleaning, and metal prep, and I have 2 light coats of POR-15 applied, to inside of driver side rear frame rails, the rear window channel, and all the bracing behind the driver side 1/4 panel, and wheel house.

I have used POR-15 for 20 years, and I probably used it by itself for 10 years, with great results.
Then one day, I ended up using the POR-15 "Metal-Prep" first, then the POR-15 rust product what a difference!!!
By itself, as long as it has been cleaned and all loose rust removed it works great, but only will bond to rust when dry.
If you do the Metal-Prep first, the finished product comes out MUCH nicer!!!
It seams to make the POR-15 bond to all the metal, not just rusty metal, and it seams to self level, a bit better then without, and has an over all stronger bond.
It still must be top coated or protected from the sun/UV light, as that seams to be the one think that will remove the product.

I did not get to use the "Patch" product, maybe tomorrow when its all dry.
When my wife gets home from work, I will try to get photos posted.


Its funny, I apply the Por 15 to the inside of the frame rail and top of frame flange, then tomorrow after marking the trunk pan out, and drilling holes, I have to grind the product off those small areas, and use weld thru primer, LOL!!
And honestly do I need to go through all this?
The stuff we go through for our cars, to try and prevent rust/decay.
 
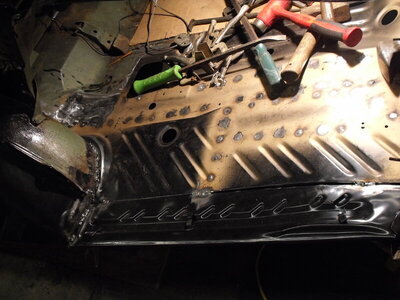
So after the por-15 treatment, and final fitting of the trunk panel. I drilled the hole in the new panel,to plug weld, then removed the E-coating to expose the bare metal, just where I would be welding, and then placed the panel back in place(held with three sheet metal screws) and marked the spot on the frame rails to clean the por-15 off frame to get to the metal.
I then used some cooper weld thru primer on both the panel and frame where I had bare steel showing.
After it dried, I finally, put it back in place, reinstalled the 3 sheet metal screws, and welded it into place.
It went very well, this may be the best fitting, panel I have done so far, most of the time, I have had a few areas that didn't lay 100% flat, and needed to be pushed down, or pried a bit while welding, but this one fit great, and laid tightly on all frame rails.

I only have one hole I drilled a bit off center, I will have to fix.
 
Once the truck panel was welded back in, I started to fit the trunk extension.
Then I moved on to removing ALL of the old 1/4, panel.
I had just cut the bulk of it off, so I had to go back and remove all the spot welded edges.

I must say 1968-1970 Charger 1/4 panels are a BITCH!!!!!
What is being difficult, and that I had not realized before, is how part of the 1/4 lays on the TOP of the trunk gutter, and then UNDER another section of the gutter( in the top corner) then it is sandwiched between the dutchman panel, and the truck/wheel house brace.
Then there is also that small brace welded to the replacement 1/4, that gets welded to the trunk gutter area.
I also have to buy that rear lower window channel brace,(small "L" shaped piece")as I could not save it when removing the 1/4, and actually had no idea that I may need it untill the other day.
Now I know why a lot of people will but weld the top part of the replacement 1/4, instead of doing it the factory way!!! Would save a lot of fitting, and prep.
But for my car, due to the crash damage that was not an option.

After removing all of the old 1/4 off the tail panel, trunk gutter, dutchman, rear window channel, the roof, wheel house, and the rocker area, I just have the door jam, and rear window opening to remove.
That should be done today.
THEN I can start to fit the 1/4!!

I know once I lay that panel on my car, it will be a greet feeling, even though I will still be hrs away from done, it will just give that visual impression of being done, LOL!!!!
 
Been a while, from last update, but I continued to work on the car until mid December.
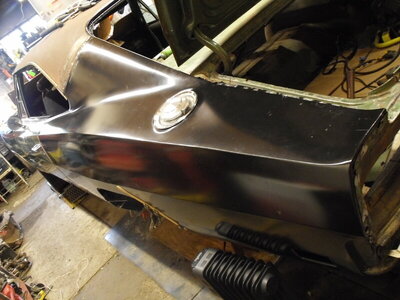
I got the AMD trunk pan, and trunk extension welded in, along with an outer wheel house, that I sectioned to used just what as crunched from the crash.
I had a good friend, and a bodyshop owner, who just retired from vo tech teaching, paint and body work, help me hang 1/4.
He helped my hang it in place, as it has to be fit under, and over many parts of the car, and help make sure I had it straight.
Once welded in, he also helped me fit the rear window area in front of the deck lid, as it had a bit of an "oil can" to it, after I did some rust repair.
He had me crawl in trunk, and hold up on one area, as he hit it with body hammer from out side, and it fixed it.
I hope to continue to learn some of those body tricks, as I a not a body guy.
One other thing he helped me with was the trunk lid brace was twisted a bit from the crash, and I thought, I had it fixed fairly well. But he was able to spend 15 min with me and make it perfect.
That is really why I wanted his help, to make sure I did it correct.

After welding ll the parts on, I also sanded, down the roof, and hit it with por 15 metal prep, then 2 coats of black por-15(sanding after dry first coat) so I can protect the roof for the vinyl top install.

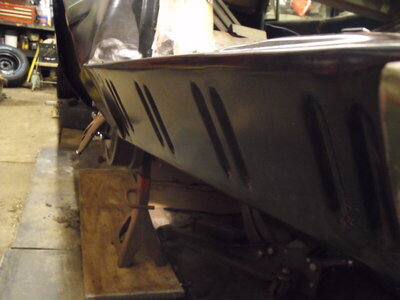
DSCF0044.JPG DSCF0042.JPG DSCF0061.JPG
 
Auto Transport Service
Back
Top