You are using an out of date browser. It may not display this or other websites correctly.
You should upgrade or use an alternative browser.
You should upgrade or use an alternative browser.
The Long Road to my 74 Satellite Rebuild
- Thread starter rebootej
- Start date
rebootej
Well-Known Member
Well between the holidays and other stuff not much has happened with the car. A little frustrating cause its so close to paint, but it will get there eventually. I did start to tackle the rust in the trunk from the leaking rear window, I put a dent in it but still got a ways to go, it was a little bit worse than I remembered.
Here are some of the before pictures
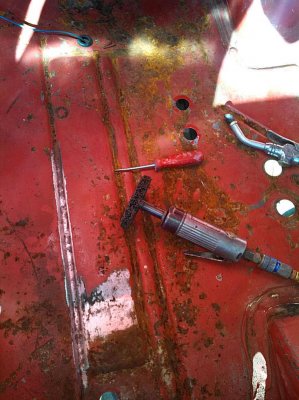

Made a little progress, but still got a ways to go, my uncle let me use his hotshot sandblaster to clean out the spot welds, worked great.
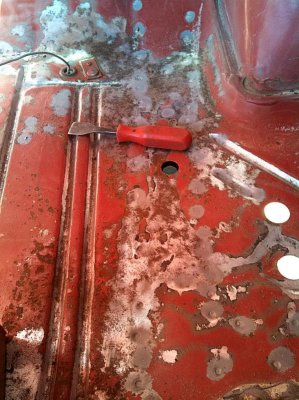

Found some rust under the seam sealer at rear edge of the truck floor, Any one got tips for removing it? been using a chisel but the stuff is still pretty gummy, thought about heating it up a little?

Also been helping my dad upgrade the 318 in his 70 dart swinger to a 4 bbl, its been a lot fun, really makes me miss wrenching on my car.

Here are some of the before pictures


Made a little progress, but still got a ways to go, my uncle let me use his hotshot sandblaster to clean out the spot welds, worked great.


Found some rust under the seam sealer at rear edge of the truck floor, Any one got tips for removing it? been using a chisel but the stuff is still pretty gummy, thought about heating it up a little?

Also been helping my dad upgrade the 318 in his 70 dart swinger to a 4 bbl, its been a lot fun, really makes me miss wrenching on my car.

Basket case
Well-Known Member
you call that rust? looks factory fresh to me. back east you would'nt hav a floor left!
keep at it!:icon_thumright:
keep at it!:icon_thumright:
rebootej
Well-Known Member
Haha ya I've seen some of the incredible repair work guys have done on here, thankful that this is the worst area, gotta love California cars. Should i use por 15 on it? or do you guys have a different product you'd recommend?
Thanks for the support!
Thanks for the support!
rebootej
Well-Known Member
Havent posted in a while. Not a lot has been happening on my car, cause my uncle was working on a project for another customer. We finally got back at it yesterday. I think he could tell i was bummed the cars been sitting in his shop for a year now. So he recommended i take her for a spin down the street before we start working on it again. This was the first time ive got to drive the car since installing the new transmission, rear gears and tail pipes. MAN! It was awesome! I had such a big grin when i got got back. I could only drive it on our road cause the car doesn't have bumpers, or tail lights but it was great the car sounds bitchen with the new pipes and much more responsive with new gears.
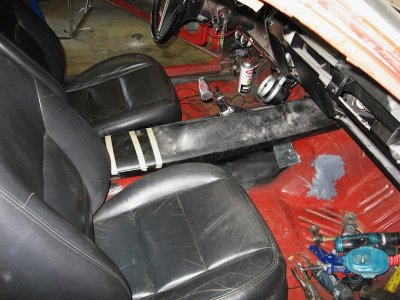
After that we got to work started modifying the tunnel so that i could use my B&M mega shifter with a factory console, we are lowering/flattening the tunnel a bit because currently the shifter is to tall. We also test fit the seats i got up from pick and pull going to have to modify the brackets a little but and figure out the wiring for the controls but they looked great in the car. No pics yet hopefully tomorrow.
Here is a video from summer i just found and forgot to post.
https://www.youtube.com/watch?v=ZtbvqfnFQAw
Homstead
Well-Known Member
Hey the car sounds great! I`m glad your back to working on the car!
roadrunnerman
Well-Known Member
Sounds like that drive was just the kick in the pants you needed to get back working on your car to make it better.
Ron 73
Deceased, But not forgotton
Your car sounds great and i bet that was a pick me up! You'll get it and this will be a cool episode in your life!! 
rebootej
Well-Known Member
Thanks for the support guys! Ya i really needed that drive for sure, it was so nice to test out all the upgrades I've done and hear that new exhaust. Definitely got the attention of a couple of the neighbors.
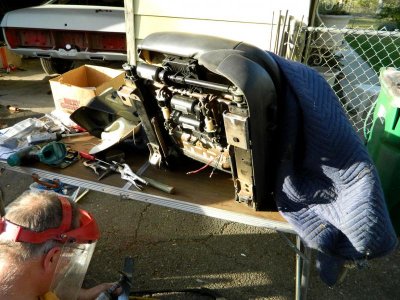
We worked on the seats today, had to bypass the memory switches on the drivers seat and then started mocking up the brackets to fit them in the car.
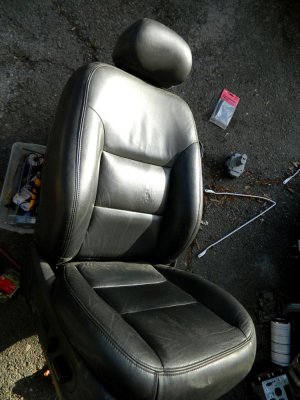
The seats are out of Lincoln. Here is the passage seat, the leather is going to need a little work to try and get those marks out of the seat back but i think it will smooth out.
Driver's seat bottom, modifying the brackets to fit in the Satellite.
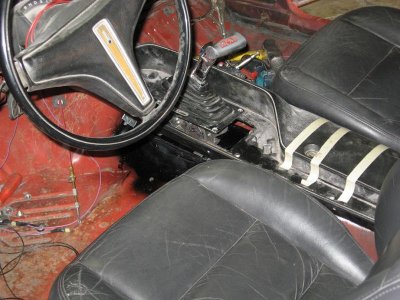
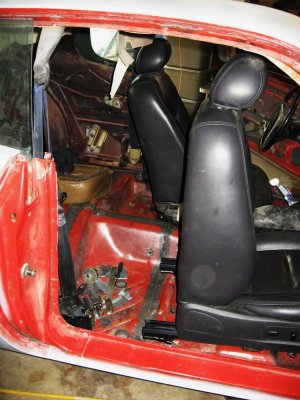
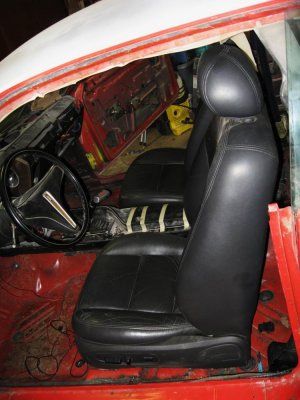
A few pics of the seat test fit in the car with the set up for console and shifter location. A trick my uncle showed me is that you can use the battery from your drill to power the seats if they aren't wired yet. You can see it in the pic.


We worked on the seats today, had to bypass the memory switches on the drivers seat and then started mocking up the brackets to fit them in the car.
The seats are out of Lincoln. Here is the passage seat, the leather is going to need a little work to try and get those marks out of the seat back but i think it will smooth out.

Driver's seat bottom, modifying the brackets to fit in the Satellite.

A few pics of the seat test fit in the car with the set up for console and shifter location. A trick my uncle showed me is that you can use the battery from your drill to power the seats if they aren't wired yet. You can see it in the pic.


rebootej
Well-Known Member
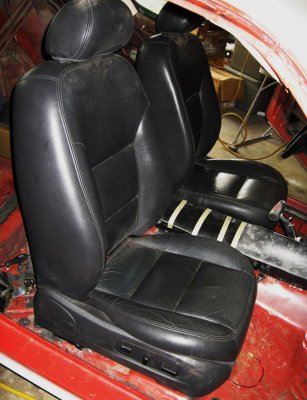
Well im away at work currently, but my uncle is finishing up the seats for me and just sent me an update so i figured id post it. Both of the seat rails have been modified to fit where the original seats where only thing left to do is run power to them and put carpeting over the trim panel he made to cover the rails and mechanics of the seat. Next step will be to finish mounting my B&M mega shifter and come up with some brackets for the center console. Im really excited with how the seats turned out and they are extremely comfortable.


Ron 73
Deceased, But not forgotton
They do look comfortable! Very close i think to the ones that a 74 may have had in it, yes there's a difference but these will do nicely and comfort is the best part!
rebootej
Well-Known Member
Thanks Ron! Yes the look really similar but have a lot more side support. I think I'll be really happy with them.
So im still at work but my uncle has been doing some more work on the car while im gone. Hes got the shifter installed and will probably be finishing up the center console today. A fellow member bruce stopped yesterday and picked up some parts from my donor, I was bummed that i was away and unable to meet him
The trim pieces for the seat to cover the rails
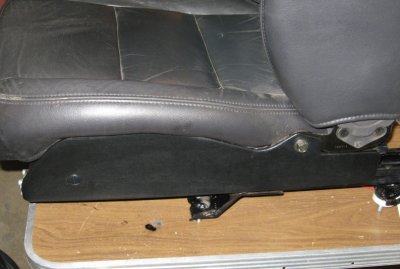

How they look in the car, im gonna try to dye the seats a little bit darker, make the whole interior black.
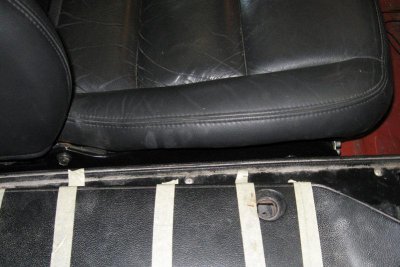
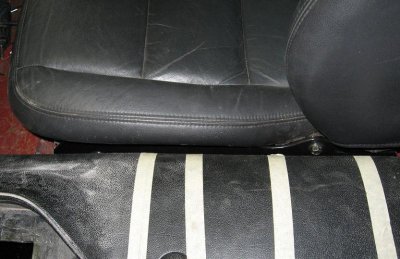
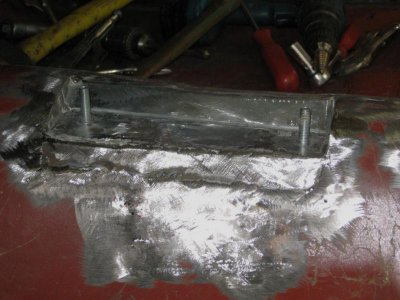
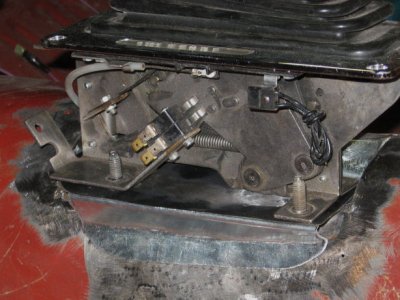
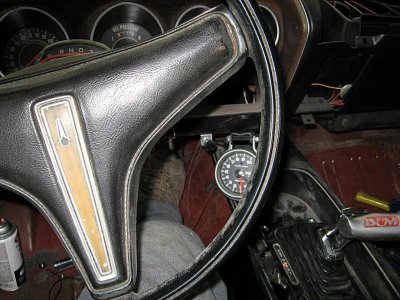
OK now for the shifter, we notched the hump to lower the shifter so that it would fit into the factory console. Hopefully i don't piss to many guys off cutting up a good floor but i don't plan on selling the car and wanted to use this shifter in the console.

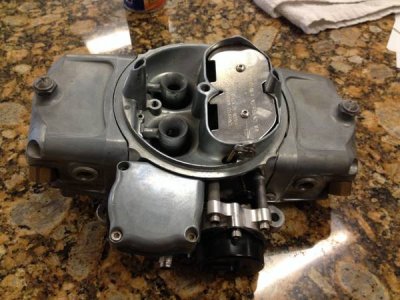
Hope you guys like. Lately I've been looking at wheels for the car so many decisions. I also may have impulse bought a 650 demon carb try out on my engine.
So im still at work but my uncle has been doing some more work on the car while im gone. Hes got the shifter installed and will probably be finishing up the center console today. A fellow member bruce stopped yesterday and picked up some parts from my donor, I was bummed that i was away and unable to meet him
The trim pieces for the seat to cover the rails


How they look in the car, im gonna try to dye the seats a little bit darker, make the whole interior black.


OK now for the shifter, we notched the hump to lower the shifter so that it would fit into the factory console. Hopefully i don't piss to many guys off cutting up a good floor but i don't plan on selling the car and wanted to use this shifter in the console.


Hope you guys like. Lately I've been looking at wheels for the car so many decisions. I also may have impulse bought a 650 demon carb try out on my engine.
Attachments
bm02tj
Well-Known Member
My wife liked your exhaust the way you and your uncle cut them in
We all need an uncle like you have to build stuff for us
Sorry to have missed you but had good visit with Steve
Bruce
We all need an uncle like you have to build stuff for us
Sorry to have missed you but had good visit with Steve
Bruce
Ron 73
Deceased, But not forgotton
I like it! And to be honest you need to have in that car and on it... Exactly what and how you like it, if not you wont be happy, Its your ride buddy!! 
rebootej
Well-Known Member
Bruce, glad you guys had a good visit with him and got to check the car out. Yes im really lucky to have him, trying to learn what i can from him while we work on this project. Hopefully next time you're coming thought we can meet up. I'd really like to meet some of the other members on the site. A lot of great guys on here. Hope those parts help to get your car back on the road in no time.
Ron, Thanks glad you like it! Those are my thoughts exactly, and im beyond excited to how this project has progressed. It was going be a simple resto originally but has become so much more. Going to be one of a kind.
My attack plan when i get home is going to be to finish the trunk and reseal all the seams and then hopefully start jamming. and figuring out what i need to swap to the demon carb that may not happen right away but wanna start gathering parts and making sure it will work with my transmission. I've seen some warning saying that holley carbs don't work with Chrysler Overdrive Transmissions. Anyone know why that is?

rebootej
Well-Known Member
Well im still away at work been about 3 weeks now but my uncle is still at home working on the car and hes been sending me updates.
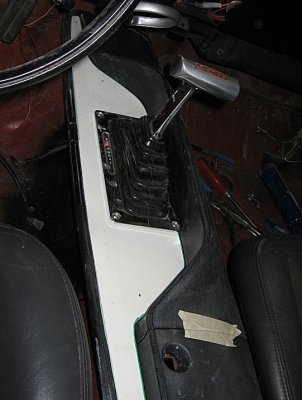
He has all the wiring run for the seats and for the shifter. The console is now mounted up, and he made created a console top trim piece to fit the new shifter. He set some wood grain shelf paper on the console to get the effect, but we are going to be picking up some vinyl that will be more of a match to the factory, also be putting a chrome edge on the plate.
Front bracket for the console, and all the welds are seam sealed

Heres some pics of the top plate

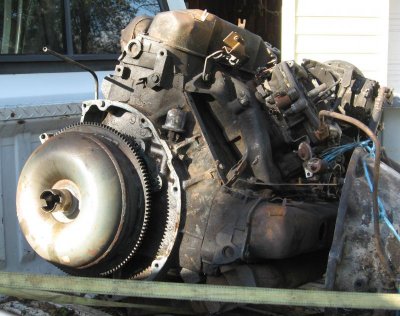
Oh ya and i bought a 440 from a motor home, couldn't pass it up. It will go in to storage for the next project, a 71 satellite wanna build a stroker out of it.
Excited to get home and back to working on the car
He has all the wiring run for the seats and for the shifter. The console is now mounted up, and he made created a console top trim piece to fit the new shifter. He set some wood grain shelf paper on the console to get the effect, but we are going to be picking up some vinyl that will be more of a match to the factory, also be putting a chrome edge on the plate.
Front bracket for the console, and all the welds are seam sealed

Heres some pics of the top plate


Oh ya and i bought a 440 from a motor home, couldn't pass it up. It will go in to storage for the next project, a 71 satellite wanna build a stroker out of it.

Excited to get home and back to working on the car
Propwash
Well-Known Member
- Local time
- 1:44 PM
- Joined
- Oct 29, 2009
- Messages
- 9,710
- Reaction score
- 4,327
- Location
- Island of Misfit Toys
Oh ya and i bought a 440 from a motor home
You can never go wrong picking up a big block...lol
rebootej
Well-Known Member
Very sweet build. I like the idea of tucking the bumpers. Might have to find a way to get it done on mine.
Thanks! Im really happy with how they turned out. Happy to answer any questions you've got.
You can never go wrong picking up a big block...lol
My thoughts exactly prop price was to good to pass up so i figured grab it and store it till im ready.
Similar threads
- Replies
- 9
- Views
- 900
- Replies
- 21
- Views
- 2K

