• When you click on links to various merchants on this site and make a purchase, this can result in this site earning a commission. Affiliate programs and affiliations include, but are not limited to, the eBay Partner Network.

1968 Charger, Ray Barton 528 Hemi, Pro-touring.

Do you have a heated floor? Or maybe an infrared light/heat lamp unit to shine on it?
 
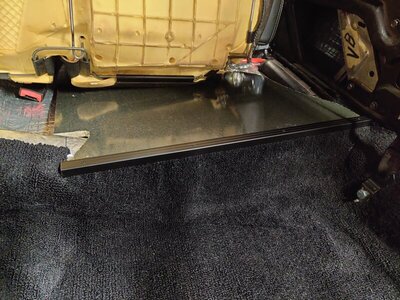
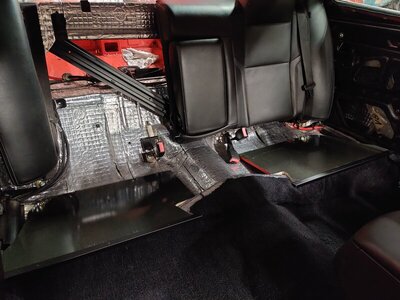
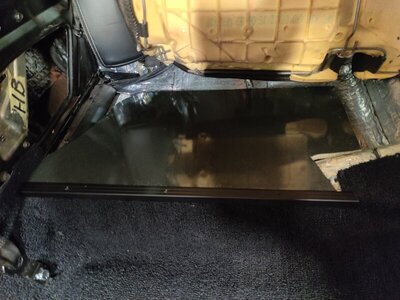
I placed two 20kg cement bags and it seems to do the trick.
Needed some support under the rear seat also..

IMG_20211205_152346.jpg IMG_20211205_184649.jpg IMG_20211205_185629.jpg
 
I bought this carpet from Year One 14 years ago and it's been on the shelf ever since. I haven't even glanced at it and didn't notice until today that Year One sent me the wrong model. I ordered an auto trans carpet for another Charger with a 727 auto. Well, it turns out that I got a 4 speed carpet with the hump which is exactly what I need now! Couldn't believe my eyes.. thank you Year one for your **** up (checked the old receipts and I did order an auto carpet)!:thumbsup:

Should I try doublesided tape or sandbags and heat to get the right shape in the corners and flatten it out?

View attachment 1203309 View attachment 1203310 View attachment 1203311
Here's a saying about luck, "Dumb luck is better than no luck".
 
It went smoother than I thought. Carpet is in and I can now complete the wiring and do final fitment of the center console. This is fun!

IMG_20211207_194705.jpg IMG_20211207_194819.jpg IMG_20211207_200458.jpg IMG_20211207_200633.jpg
 
Might be done just in time for a long, cold winter! :rolleyes:
 
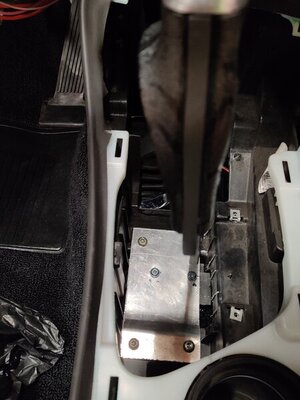
Sneaked into the garage to try and fasten the center console. Got lucky and the factory bracket was in the exact location lining up with the console attachment points. Made a bracket and it fits pretty well.

IMG_20211210_175636.jpg IMG_20211210_175800.jpg IMG_20211210_180026.jpg
 
I like the console too, and so much about the car.
I was very fortunate and had a console manufacturer basically make a custom console for me, but the mutual plan was for it to go into production. Long story short, I needed a console for a bench seat Pistol Grip w/out changing the shift lever, after I swapped in aftermarket bucket seats.
20190701_182010.jpg
 
I like the console too, and so much about the car.
I was very fortunate and had a console manufacturer basically make a custom console for me, but the mutual plan was for it to go into production. Long story short, I needed a console for a bench seat Pistol Grip w/out changing the shift lever, after I swapped in aftermarket bucket seats.
View attachment 1210684
That's a really cool interior!
 
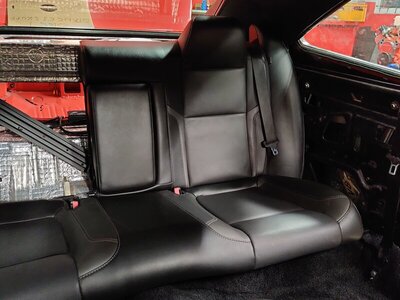
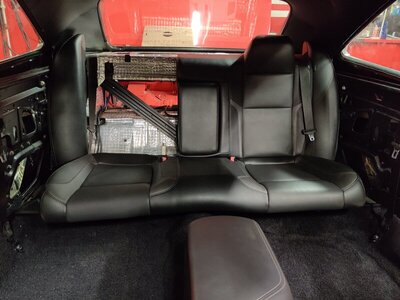
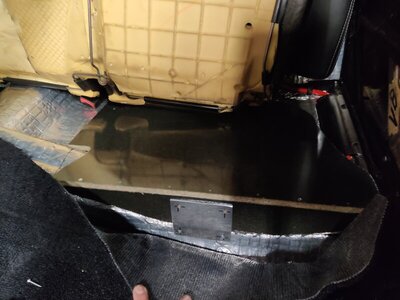
Finished the carpet at the rear seat. Added some brackets to keep the seat supports in place. Glued it and fastened it with some alu trim I found at the hardware store. Thinking about adding more carpet under the seat? Ordered 11 square meters with black loop carpet for this and the trunk so I have enough IF I'd want to. Should look similar to the oem carpet.

IMG_20211221_183659.jpg IMG_20211221_191341.jpg IMG_20211221_191425.jpg IMG_20211221_183726.jpg
 
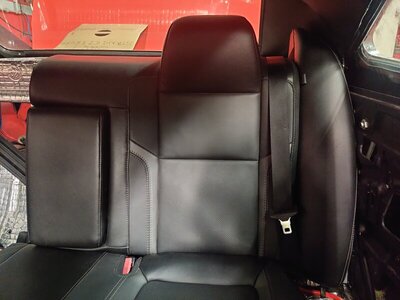
Found some side cushions from a modern Charger rear seat. The fabric matched well. But the stiching was a little bit off, maybe it could be slightly darker? I think it's possible to tint it. Very pleased with how they fit between the seat and the side support and around the wheel well. I just need to shorten them about 4" the same way I did with the seats.

IMG_20211221_191851.jpg IMG_20211221_191809.jpg IMG_20211221_173217.jpg
 
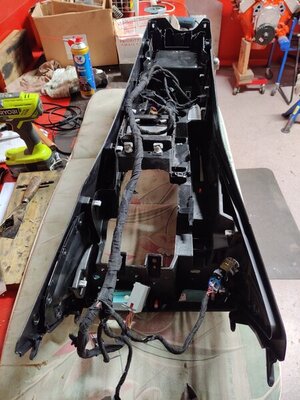
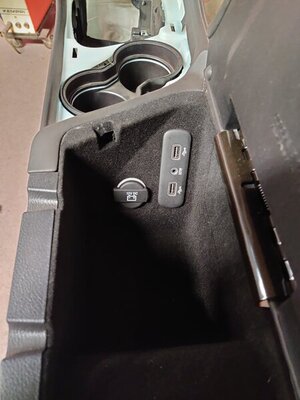
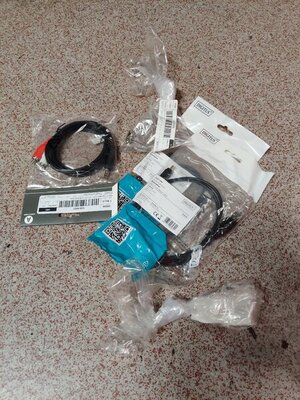
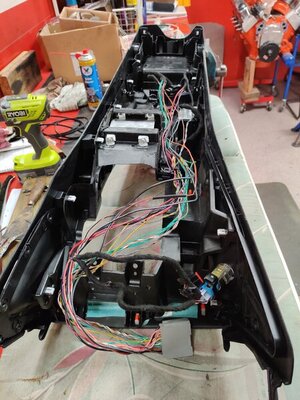
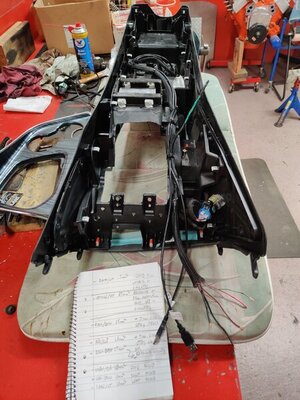
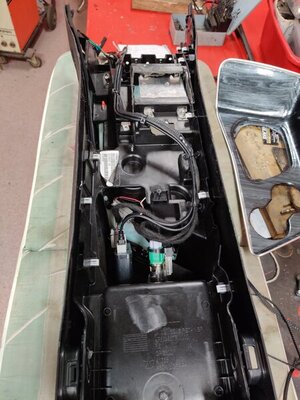
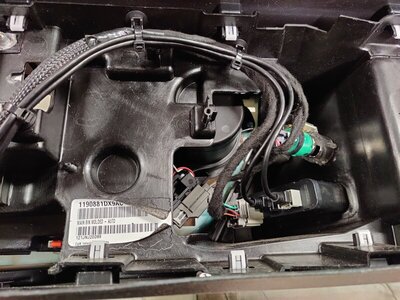
Added a support bracket in the console that I could bolt down to the oem bracket. Very sturdy, doesn't move at all. Decided to clean up the wiring and remove what I don't need. I wanted to keep the nice gadgets. 12v outlets on the side and inside the compartment. 2x USB Charge and connectivity to the android car stereo. Got some USB-a to USB-mini adapter cables for this. The aux input was rewired to a female phono jack. From there I'll go with a male 3,5mm phono to 2xRCA to the android car stereo aux input.
I also wired all lighting to 12v outlets, jacks and cup holder. Everything cleaned up and ready to be wired into the cars loom with a quick connector so it'll be easy to remove it if required.

IMG_20211221_193839.jpg IMG_20211221_194228.jpg IMG_20211221_194331.jpg IMG_20211221_195208.jpg IMG_20211221_210127.jpg IMG_20211221_210133.jpg IMG_20211221_210141.jpg IMG_20211221_191957.jpg
 
Now I'm really feeling "lazy" although any time for me is hard to come by...
I still want to put 2 LED lamps as floor lights in my console, and connect fused power to the USB outputs to have a phone charger...
Good job man!
 
Wired the quick connector, phono outlet and drilled the holes for the billet buttons. Hazard button will require a 4 pole relay though.

IMG_20211228_190905.jpg IMG_20211228_205729.jpg
 
Holy crap, after some tinkering around I have fuel pressure! And actually no leaks! And I've also run out of excuses to start the old beast...
Have a nice friday evening Ladies and Gents..

IMG_20220114_175107.jpg
 
Words of advice. Don't get in a hurry to light it, don't do it after a long day when you are tired, make sure battery is fully charged, fuel leaks you got handled, roll it outside in case of car-b-que, have extinguisher ready, at least 10 gal of fuel, water/atf [if auto ready].
 
Words of advice. Don't get in a hurry to light it, don't do it after a long day when you are tired, make sure battery is fully charged, fuel leaks you got handled, roll it outside in case of car-b-que, have extinguisher ready, at least 10 gal of fuel, water/atf [if auto ready].
Thank's, totally agree. Some really good advice there. You never know what might happen. And one more thing.. don't do it alone, make sure you are two pair of eyes and ears.
 
After sitting for four years, It's ALIVE!!!
Atleast for five seconds until dad screamed at it me to shut it off! He smelled burnt rubber which isn't any good sign.. it turns out that it was the fan hitting my upper radiator hose making a nasty cut into it so that has to be replaced. Not sure why the radiator sits so low and I can't believe I haven't noticed this.
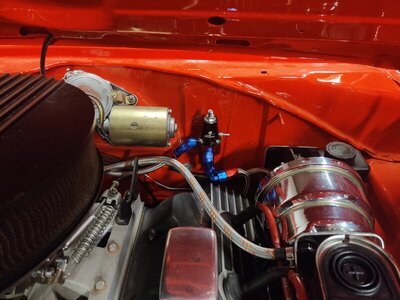
It took me some time to get the right fuel pressure since it wasn't possible to adjust no matter what I did. Only had like 3,5-4psi which isn't enough.
Turns out I had confused the supply and return on the regulator... What an idiot. Luckily I had some AN fittings and connectors to make it work. Anyhow, it'll be replaced when it's time for the holley sniper efi. Adjusted to 7psi after I'd swapped it.
Unfortunately I don't have any footage of the start up but it fired instantly and went straight to a solid idle, no backfiring or stumbling or anything.
I'll make sure to film it next time after replacing the hose. It was loud!!
Well, I guess five seconds of heaven is better than nothing and I know I'll be sleeping well tonight...

IMG_20220115_171153.jpg
 
After sitting for four years, It's ALIVE!!!
Atleast for five seconds until dad screamed at it me to shut it off! He smelled burnt rubber which isn't any good sign.. it turns out that it was the fan hitting my upper radiator hose making a nasty cut into it so that has to be replaced. Not sure why the radiator sits so low and I can't believe I haven't noticed this.
It took me some time to get the right fuel pressure since it wasn't possible to adjust no matter what I did. Only had like 3,5-4psi which isn't enough.
Turns out I had confused the supply and return on the regulator... What an idiot. Luckily I had some AN fittings and connectors to make it work. Anyhow, it'll be replaced when it's time for the holley sniper efi. Adjusted to 7psi after I'd swapped it.
Unfortunately I don't have any footage of the start up but it fired instantly and went straight to a solid idle, no backfiring or stumbling or anything.
I'll make sure to film it next time after replacing the hose. It was loud!!
Well, I guess five seconds of heaven is better than nothing and I know I'll be sleeping well tonight...

View attachment 1224361
Congratulations on a good engine start!

It may be in the earlier posts - is this a fresh engine rebuild with a flat tappet camshaft? If so, then make sure you run the engine at 1800- 2500 RPM for 20-30 minutes to break in the camshaft! (But I'm sure you have this covered, but I figured better safe than sorry!)

Nice work!
Nothing new in this engine. We took it out of a pro street 1968 Charger that my dad owned for some years so we know it's in good shape.
 
Auto Transport Service
Back
Top