• When you click on links to various merchants on this site and make a purchase, this can result in this site earning a commission. Affiliate programs and affiliations include, but are not limited to, the eBay Partner Network.

1968 Coronet 500 Project

I know right! Sounds like something California would pull. No testing in Yuma County either.

Libtario, particularly Toronto is usually not far behind California unfortunately.

Our Etest is from 87 & up and mods are restricted from early 2000 models and up I think. I remember seeing an add for a modified gen2 dodge ram in Ontario a little while ago and I replied to the seller as I would love to swap the engine in my 9 Ram Sport. I asked how he got the truck to pass the etest with the combo he had in the Ram. He replied "what's an etest?". Apparently, parts of Ontario, maybe northern parts, are exempt. I've seen some local gen2 ram trucks had their 5.2/5.9 swapped with Hemis & even cummins diesels, but it's a big deal as you have to provide documents, etc., proving the engine's history etc. Not worth the trouble up here imo.

Sorry for babbling on your thread Jim!
 
Made in the USA wiring components. Man they are way better...

DSC_0434.jpg
DSC_0435.jpg


FITech is wired in cleanly now.
DSC_0437.jpg
DSC_0438.jpg


A little nasty dye in the AC to search for leaks and we have cold AC for the first time in 35 years! The compressor rebuild was a success so far. Runs quiet as a mouse and make pressure!

DSC_0440.jpg
 
Polished the windshield with BonAmi and a buffer. Work slow and use high speed but be careful as the pad can catch the edge and fling the glass....

DSC_0444.jpg
DSC_0445.jpg
DSC_0446.jpg


It makes a mess so dress appropriately.

DSC_0447.jpg
 
Windshield (and back glass) day!

I use 3M "dum-dum" to seal the front glass. Since the goop is not the mechanical seal that keeps the window in I decided to use this instead since it is way cleaner.
DSC_0448.jpg
DSC_0449.jpg


Test fitting the trim before installing the class is smart.... I have 2 different types of clip release tools. Not sure which one I like better yet.

DSC_0450.jpg


Seal along the bottom and up the side and the upper corner.

DSC_0451.jpg

DSC_0452.jpg
DSC_0453.jpg


Now set the glass in place and use lots of lube. DON'T try using metal tools at home unless you are very confident in your skills!

DSC_0455.jpg


The corners can be gotten in with your fingers and thumb from the back if you have the glass in the lip along the top and side far enough.

DSC_0456.jpg


All in.

DSC_0457.jpg
DSC_0454.jpg
 
Tape where the clips are help show where to work the moulding in.

DSC_0460.jpg


DSC_0461.jpg


The aftermarket gasket does not fill the upper corners very well.
DSC_0462.jpg


A little Dum-Dum blends it all in.

DSC_0463.jpg


All done.
DSC_0464.jpg


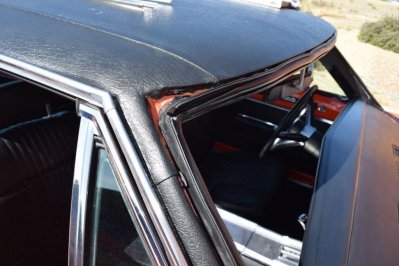
Sexy glass and moulding. This is really great shape for being 49 year old glass!

DSC_0465.jpg
DSC_0466.jpg
DSC_0467.jpg
DSC_0468.jpg
DSC_0469.jpg
 
Well I got exactly 0 photos of the rear glass. It was that simple. Get a 3M Window-Weld 5/16" x 15' kit that includes the bumpers (3M #8611) and run a the bead around the window. Make sure you test fit and tweak the moulding first. The rear moulding was a bugger. It needed some tweaking to get to stay snapped in.

Adjusted the torsion bars for the just a little lower than the correct height and did a drive way alignment using my iPhone angle meter app for camber. I have about +0.5 degrees and toe in with a tape measure to about 1/8" toe in.

Well I took her for a spin to get gas and.... It won't shift out of first and the speedo does not work...

I was heading to the store for gas and victory wine but the no shift almost is not making the victory wine not taste as good.... almost....
 
Last edited:
I am not sure you can do that on a 318. There is no gear on the distributor, the gear is in the block and the distributor just has a slot that goes into it. You can't spin the gear as it is engaged with cam.
Pfffft, tricks of the trade. You remove the intermediate shaft, and put in just the shaft that I have modified to engage the oil pump, and long enough for a drill... Just have to re-establish #1 to TDC, and put the original shaft back in. Your way is easier in the car, my way is easier in the shop on the stand... :lol:
 
Well I got exactly 0 photos of the rear glass. It was that simple. Get a 3M Window-Weld 5/16" x 15' kit that includes the bumpers (3M #8611) and run a the bead around the window. Make sure you test fit and tweak the moulding first. The rear moulding was a bugger. It needed some tweaking to get to stay snapped in.

Adjusted the torsion bars for the just a little lower than the correct height and did a drive way alignment using my iPhone angle meter app for camber. I have about +0.5 degrees and toe in with a tape measure to about 1/8" toe in.

Well I took her for a spin to get gas and.... It won't shift out of first and the speedo does not work...

I was heading to the store for gas and victory wine but the no shift almost is not making the victory wine not taste as good.... almost....
Make sure the TV rod is adjusted properly.
 
Well I shortened the rod and it shifted going to the store for the Sunday morning coffee gang session. Took my helper for the first real ride and we ended up putting the kick down rod right back where it was yesterday.... I have no idea what happened. It is working fine now.

After a 5 mile round trip I found that the speedo has problems. I cleaned and lubed the cable but I am sure there is metal on metal in the cluster as it bounces all over the place and I can hear a tin like noise from the cluster.... that sucks I don't want to take that out in the car :(

Put it up on stands in the driveway and went around checking and cleaning. The cross member was clunking and yes the bolts were not all that tight. Checked the front suspension bolts, all tight. There is a miserable little exhaust leak on the right side and by the time I got done I snapped off my clamp... I should just weld the SOB and be done with it....

The trans cooler fitting in the Glen-ray was leaking, tried a snug up but it required me taking it out and putting some sealer on it.

Changed the break in oil out and installed fresh oil and filter. The drain plug gasket is plastic? When I got back it was dripping a bit so I snugged it down a bit more. Checked the torque on the tranny pan and various other items will it is up on stands.

Got the heater box defroster valve adjusted so the system is 100% functional and finished up with the hoses to the right dash vent and covers under the dash on the passengers side.

The way I ran the fuel line it thumps on the frame under the passengers floor board. You can it is tick-tick-ticking away.... not sure if that will drive me crazy yet.

If I did not snap the exhaust clamp I would take it for another spin, I could use the AC now (this morning there was frost on the other cars)
 
Your continual progress is great! Glad the transmission was an easy fix; I was worried about that one.

Lots of local car shows coming up, and a few Mopar specific. Hope to see NOTABEE there soon.
 
Your continual progress is great! Glad the transmission was an easy fix; I was worried about that one.

Lots of local car shows coming up, and a few Mopar specific. Hope to see NOTABEE there soon.

You and me both, my stomach was in a knot when it would not shift last night....
 
Took it for a number of spins today, each a bit longer than the last :) Fixed a number of loose bolts and leaks, only thing left is the speedometer bounced from stop to stop. Another day.

DSC_0475.jpg
DSC_0476.jpg
DSC_0477.jpg
DSC_0478.jpg
DSC_0479.jpg
DSC_0480.jpg
DSC_0481.jpg
DSC_0482.jpg
DSC_0483.jpg
 
Looking really good Jim . . . WOW . . . very nice ! ! !
 
Auto Transport Service
Back
Top