• When you click on links to various merchants on this site and make a purchase, this can result in this site earning a commission. Affiliate programs and affiliations include, but are not limited to, the eBay Partner Network.

440 oil pump removal

The oil pump seal is available by itself.

http://www.summitracing.com/parts/fel-13338/overview/make/dodge

It does not appear to come with either smaller o ring, but I am sure your local auto parts store can match one up as long as they are not bone stupid. Although not 100% necessary, I like to put the rotors back exactly like they came out. I've heard some old timers even talk about flipping the outer rotor over to provide a "new" wear surface.......but I personally don't like doing that. Lastly, a drop of red lock tite on each screw will assure they will not loosen up. (I said screw huh huh huh).

huh-huh...well, sumbitch! i didnt see it there at scummit. :icon_hang: thanks Rusty!

Since we're on the subject of pumps, does anyone besides me check the rotor end clearance? I got a newly rebuilt 340 in several years ago that had lost pressure. The drive shaft (intermediate shaft) had failed and when I removed the pump, it was stuck. After pulling the cover off, I found that there was only .001" clearance on the rotor measured with a depth mic from the body. A tiny bit of trash got lodged in there and it killed the pump which pretty much killed the engine. .001" isn't really enough with .002" being what I shoot for and .003" being max.

And on your cover leaking, you only have the two small screws holding it on and they are really more about keeping the cover in place so you can install the pump without it flopping around. Once all the other screws are in place, it shouldn't leak unless the o-rings are bad. They are usually trapped in there pretty good tho and usually they don't leak at that area. Also, while it's apart, you could take a straight edge to make sure it's flat.

Thanks Cranky, ya i might as well take it apart and check tolerances. good insurance me reckons. the manual shows all the places and procedures to feeler up, so ill go with that. :read:

thank you kindly Gentlemens
 
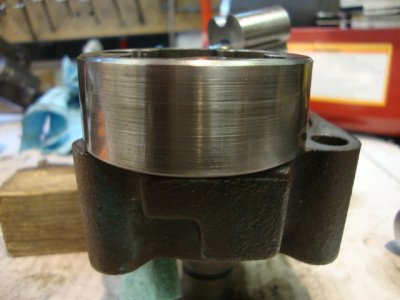
Rusty,I think you will find the one side of the outer rotor edge is beveled,and every pump i have take apart has had the beveled edge to the cover.I'm sure there is a reason for that.I have three N.O.S. pumps and they all have the same bevel on the bottom edge.Here is a picture of one and also the difference between the standard and high volume pump.

I have never seen a pump outer rotor with a slot cut in the OD. My guess this is to hold oil.

What you want to do is make sure nothing binds up, and that probably means the chamfer goes to the inside of the pump body because there may not be a square corner after the casting is machined. It's all about relief. The top of the body where the cover goes on is naturally a square corner so less chamfer is required.

Cranky is right about checking clearances and the procedure is outlined in the FSM. I have done this as required and even lapped parts on a granite block with some 240 grit paper. The main problem I have seen are HUGE grooves in the rotor tips and corresponding surfaces in the outer rotor. At that point it's junk.
 
I have never seen a pump outer rotor with a slot cut in the OD.

Neither have, until last weekend. I rebuilt the oil pump for my Hemi and it had a verticle slot, about 1/16 of an inch wide cut on the OD of the rotor. It was very obviously made that way. First one I ever saw.
 
Cool, thanks. I've seen rotors both with and without bevels, so heck if I know.

Rusty,I think you will find the one side of the outer rotor edge is beveled,and every pump i have take apart has had the beveled edge to the cover.I'm sure there is a reason for that.I have three N.O.S. pumps and they all have the same bevel on the bottom edge.Here is a picture of one and also the difference between the standard and high volume pump.
 
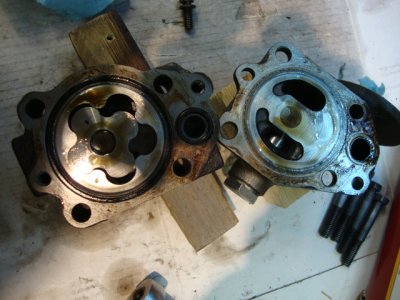
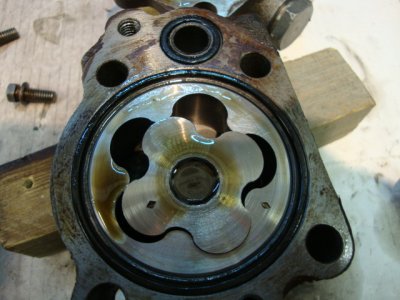
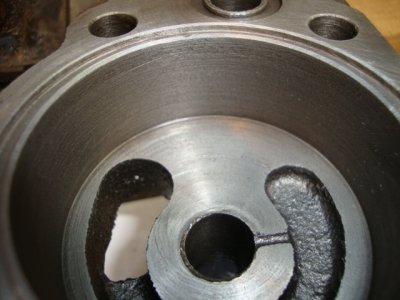
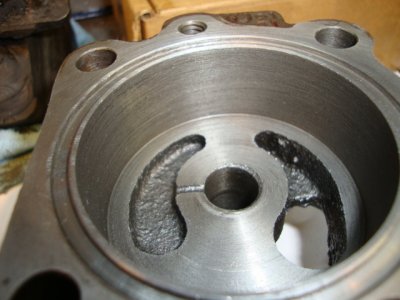
so this is what it looks like on the inside...

what's with the burnt part??

DSC02991.JPG
DSC02992.JPG
DSC02993.JPG

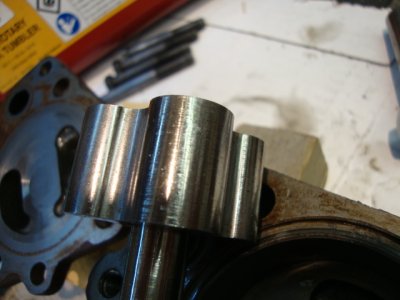
couple of the rotor and shaft (huh-huh)

DSC02995.JPG
DSC02996.JPG
DSC02997.JPG

cleaned it up a bit...

DSC02998.JPG
DSC02999.JPG
DSC03000.JPG

doesn't look bad me thinks. can't catch a nail on any of the scoring, so i reckon i should be good to go?

cant find my feeler (up) gauge. any ideas on an alternative?

as always, thanks Gentlemens!
 
Last edited:
Yeah that looks good. Plus, yours is marked with them little dimples. I don't see nuthin burnt. Just some usual carbon. Clean it up and sling her back together. Oh, and now's the time to get a high pressure pump spring if you want to up the pressure. 5 bucks from Summit.
 
Last edited:
What kind of car is this on, Mar Par? I changed driver side motor mount on my 69 Road Runner and only had to remove the dip stick tube.
 
What kind of car is this on, Mar Par? I changed driver side motor mount on my 69 Road Runner and only had to remove the dip stick tube.

It's a 68 GTX, Gary. I had a whole slew of items i needed to fix so i decided just to tear it all apart at once. getting the starter re-built, purchased a re-man steering box from steer and gear, change out the motor mount and rebuild the coupler for the steering shaft.

Mario
 
So what's the update cool breeze? All this good advice and you just bail on us?
 
So what's the update cool breeze? All this good advice and you just bail on us?

LOL naw, Rusty. been sick as a freakin dog all weekend. just startin to get over it. probably head to the olde garage tonight and get er dun.

btw, 50 psi @ idle is pretty good, aint it? i was considering getting the higher pressure spring, but i reckon 50 is around about right, no?

also, to prime the pump, i just filled er up with oil. that'll work, right?

thanks!!!
 
I would submerge it with the drive stickin up and spin the pump to prime it. I wouldn't think it's real critical though. I mean you know it was a workin pump. And yeah, 50 PSI idlin hot is real good.
 
I would submerge it with the drive stickin up and spin the pump to prime it. I wouldn't think it's real critical though. I mean you know it was a workin pump. And yeah, 50 PSI idlin hot is real good.
.

sweet thanks Rusty. i think im going to order that o-ring from scummit. there's a couple of other things i need anyways so i reckon a little insurance will go a long way...so it looks like i wont be stickin it in (huh-huh) for another couple days. by then my new steer and gear re-man box should arrive and the M/T valve covers i purchased from another member here should arrive too...it's like Christmas in March!! lol
 
It's a 68 GTX, Gary. I had a whole slew of items i needed to fix so i decided just to tear it all apart at once. getting the starter re-built, purchased a re-man steering box from steer and gear, change out the motor mount and rebuild the coupler for the steering shaft.

Mario

Uh-oh. This is where we go off the rails

The knee bones connected to the shin bone, the shin bones connected to the........:icon_kidra:
 
nah, easy peasy...i hope!!! lol!!


No worries mate, I have faith.

I was alluding to the process that goes from fixing a small issue to motor out, rear out, might as well install CalTracs and subframe connectors, new stereo, paint the wheels...................
 
haha ya gotcha now, Pete. and it's the damn truth, ruth.

slicks and headers are on the way!! lol

so gentlemens...i decided to put my motor mount back in tonight awaiting parts from scummit (which shipped tonight already btw)

and i cant get this damn mount to line up. i have the bottom two bolts loose--they look like they have the oblong holes (yikes! lol) so i could get some play out of it, but no dice.

suggestions?

motor mount.jpg

as always, danke shoen...
 
Auto Transport Service
Back
Top