You are using an out of date browser. It may not display this or other websites correctly.
You should upgrade or use an alternative browser.
You should upgrade or use an alternative browser.
$500- 68 charger
- Thread starter daytona kid
- Start date
daytona kid
Well-Known Member
Yep, mine is taking me way to long. But I'm fixing to get rolling at a faster pace, I hope.
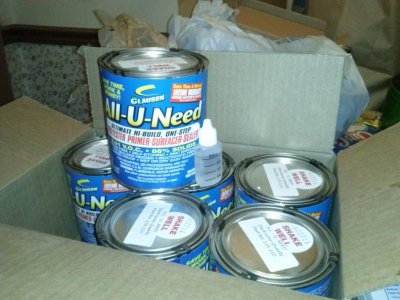
Look what I got today. I plan to prime it in my garage myself, But the final will be done by a pro. I have painted truck toppers and other large objects without to many problems. I'll set up window fans to get a gentle airflow going and leave a water hose trickling on driveway to keep it from getting painted. Don't want to mess it up like my bricks.
Look what I got today. I plan to prime it in my garage myself, But the final will be done by a pro. I have painted truck toppers and other large objects without to many problems. I'll set up window fans to get a gentle airflow going and leave a water hose trickling on driveway to keep it from getting painted. Don't want to mess it up like my bricks.
Attachments
cdr
Well-Known Member
please get a respirator,that stuff is mean,mix one cup at a time & move fast . it will kick off in your paint gun.
Mr.SpeedFreak
Well-Known Member
- Local time
- 10:03 PM
- Joined
- Jan 29, 2013
- Messages
- 1,645
- Reaction score
- 1,056
- Location
- Southern Oregon
Looking forward to seeing how you like that stuff, hopefully won't be too long before I'm ready to lay some down on my car
roadrunnerman
Well-Known Member
don't forget to hang some plastic up to keep the overspray from getting everywhere.
don't forget to hang some plastic up to keep the overspray from getting everywhere.
Especially the brick lol.
Especially the brick lol.
Oh boy Daytona Kid . . . You're NEVER going to live that one down . . . ( sigh ) . . . ( smile )
daytona kid
Well-Known Member
I know, But I got a good laugh out of it myself!Oh boy Daytona Kid . . . You're NEVER going to live that one down . . . ( sigh ) . . . ( smile )
daytona kid
Well-Known Member
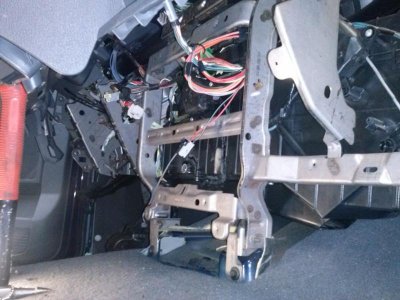
I have been detoured lately from charger work to tow truck work. The heating and air system has been messed up since I got the truck and I didn't find out what a big job it would be to fix till a week or so ago. The mode 2 door was broken. Fortunately I found a kit to fix it without having to remove the whole airbox. But it was still a very difficult job, the dealers want $1500 to do this job, the kit was $130.. Now to put the dash back together.
Attachments

Last edited:
daytona kid
Well-Known Member
I wonder if these are any good?> http://www.ebay.com/itm/mopar-A-B-E...dge|Model:Charger&hash=item4d02f86ba4&vxp=mtr
I wonder if these are any good?> http://www.ebay.com/itm/mopar-A-B-E...dge|Model:Charger&hash=item4d02f86ba4&vxp=mtr
Looks allot like what is on mine (73 and up B Body) but the hoses don't look right, should have a straight thread for the caliper not a block and bolt. Doesn't look bad to me, just a factory setup but would ask where it's made if it were me.
I wonder if these are any good?> http://www.ebay.com/itm/mopar-A-B-E...dge|Model:Charger&hash=item4d02f86ba4&vxp=mtr
Hey Daytona Kid . . . they look very similar to the "right stuff" conversion that I put on my '66 Shoe Box . . . made a World of difference in my stopping.
I think most of them are all made over seas anymore . . .
daytona kid
Well-Known Member
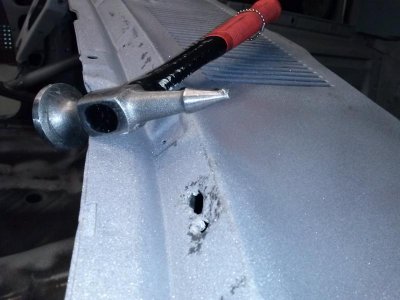
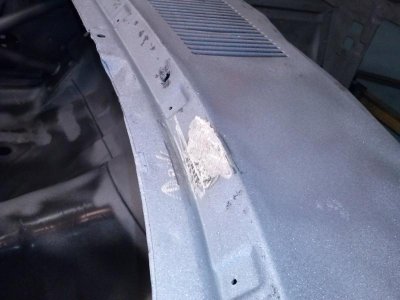
The blasting opened up a few more rusty spots, so I've been working on them before the primer. I've have found a method that works very good for small hole patching. I use the pointed end on my body hammer to open the hole to good metal, rolling the thin weak metal down, forming it into sort of a bowl with no bottom. Then fill the bowl with weld, starting outside working in a circle to the center, and grind smooth. The bowling of the hole keeps it from burning thru so easy and makes a strong repair. In the areas where needed, I go inside and grind smooth also.
Attachments
The blasting opened up a few more rusty spots, so I've been working on them before the primer. I've have found a method that works very good for small hole patching. I use the pointed end on my body hammer to open the hole to good metal, rolling the thin weak metal down, forming it into sort of a bowl with no bottom. Then fill the bowl with weld, starting outside working in a circle to the center, and grind smooth. The bowling of the hole keeps it from burning thru so easy and makes a strong repair. In the areas where needed, I go inside and grind smooth also.
I have a "whole lotta fun" trying to weld a hole that big ( but I'm still working on my technique ) - looks great.
Thought / question - after making the dish, why not stick a small piece of good patch metal in the hole and then weld it ? ?
daytona kid
Well-Known Member
Thought / question - after making the dish, why not stick a small piece of good patch metal in the hole and then weld it ? ?
I did that in larger spots. Some of the spots are small enough and easier to just weld shut. Also kinda depends on where they are. One trick that is a must for me is to pulse the welds in. In other words pull the trigger on and off at a speed that helps keep from burning a bigger hole. My trigger will let off the feed but still let the argon go on, so that helps keep it cool also. And I come in from the side more than straight on while welding.
Ron 73
Deceased, But not forgotton
Man, that looks good! You sure make it look easy enough and the way to explain it does work, cool job!
A piece of copper on the back also helps hold the puddle there till done. Pulls right off after you're done
daytona kid
Well-Known Member
Yep, I did that in some places, I use old pieces of copper tubing, hammered flat. I've gotten good enough with my welding that the smaller holes are easy to weld without copper behind, and some place you can't get behind.
Question for you guys.. Is my 383 K-frame going to work ok with a 440?
I think they are the same for both but wanted to make sure.
Question for you guys.. Is my 383 K-frame going to work ok with a 440?
I think they are the same for both but wanted to make sure.
hunt2elk
Well-Known Member
Question for you guys.. Is my 383 K-frame going to work ok with a 440?
I think they are the same for both but wanted to make sure.
Yep, the k-frame will work fine.
Similar threads
- Replies
- 1
- Views
- 304


