• When you click on links to various merchants on this site and make a purchase, this can result in this site earning a commission. Affiliate programs and affiliations include, but are not limited to, the eBay Partner Network.

$500- 68 charger

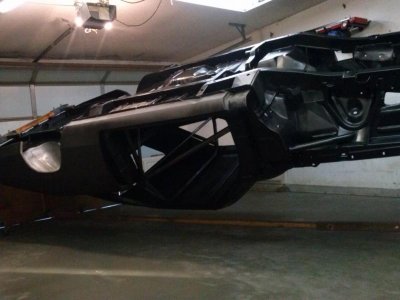
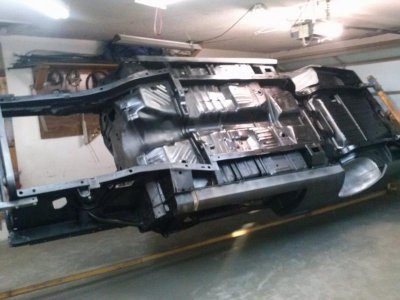
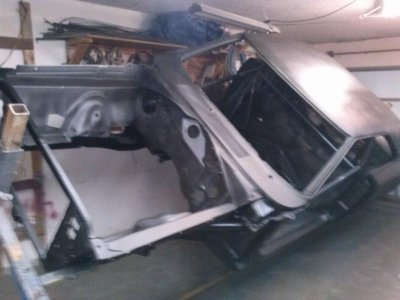
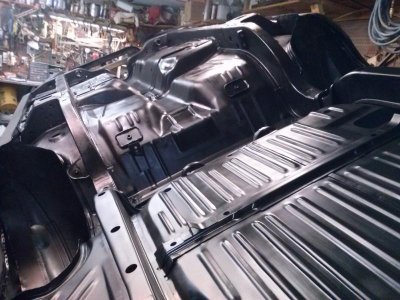
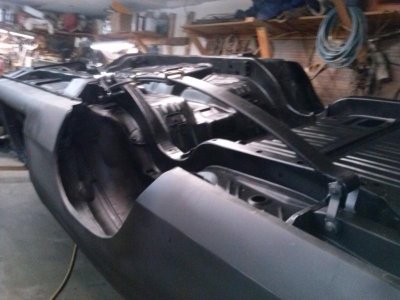
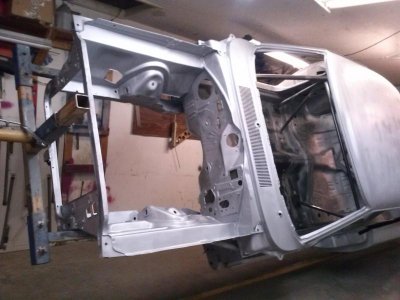
Finally! I got some paint on it! After much research, I sprayed Rust-Bullet on areas that needed it, not the entire uni-body. The new pans and panels didn't need it. I had already sprayed Eastwood's inner frame coating/rust killer inside every nook and cranny I could get it in. Now I'll let this Rust-Bullet gas off/cure today and apply the All-u-Need primer over everything tomorrow.
 

Attachments

  • CAM00086.jpg
    CAM00086.jpg
    56.8 KB · Views: 345
Last edited:
I bet that's really exciting!!!!!!!! Looking good Daytona
 
I bet that's really exciting!!!!!!!! Looking good Daytona
Yep, it is. It's kinda like cresting a big hill, I hope it's mostly downhill now. As soon as I get the All-u-Need primer applied it will be fun going back together with nice clean parts rather than thrashing with old rusty stuff. I do still have a few old crusty parts to go back on and will blast and paint as needed, pre-reinstalltion. Let the good times/reassembling begin.
 
Charger looks better-n-better everytime I see it. That All-U-Need primer, is that like a sealer coat before color?
 
You really have that looking like its so close to the highway its amazing i know its a little ways to it but fast getting there now i imagine! Im happy to hear someone else is using Eastwood for the inside of rockers and rails!!, I wish now i would have bought the rust bullet but i already have the Por 15, waste not want not :) Looking super good Daytona!!!
 
Looking good there Daytona Kid . . . I'm sure looking forward to the day when my car starts getting some primer back on it . . . Keep it up ! !
 
I'm wore out from a fun/long day of painting, but proud to say it is 97.2% primed. 6 qts of All-u-Need is only enough for the exterior of the uni-body, most of the interior and the engine compartment, I could have used twice that much but fortunately had enough new pans and panels that didn't need much or/and I had Rust Bullet on most of the framework underneath. I also applied black satin epoxy to the entire bottom., except for the wheel wells, I'm going to apply truck bed coating in them. I have to get some seam sealer for the interior and trunk before epoxying painting them. Does someone make black seam sealer?
 

Attachments

  • CAM00094.jpg
    CAM00094.jpg
    48.8 KB · Views: 319
  • CAM00096.jpg
    CAM00096.jpg
    56 KB · Views: 317
  • CAM00098.jpg
    CAM00098.jpg
    46.8 KB · Views: 317
3M™ Urethane Seam Sealer, Black, 310 mL Cartridge, 08367

Part Number: 08367
Stock Number: 60455054621

A high solids seam sealer ideal for sealing interior and exterior automotive and RV seams and joints. Adheres well to primed metal and painted surfaces. Can be smoothed to a featheredge and/or brushed. Tack free and paintable in 30-45 minutes.

this is what i am using
 
Just incase you didn't know the Epoxy I used had a long window where you could topcoat it without scuffing it, just thought I'd mention that because it's no fun to scuff the bottom of a car. That looks great Daytona, that's what motivation looks like haha.
 
Just incase you didn't know the Epoxy I used had a long window where you could topcoat it without scuffing it, just thought I'd mention that because it's no fun to scuff the bottom of a car. That looks great Daytona, that's what motivation looks like haha.
That is something I may check on for the epoxy I used. I think I got enough on the entire bottom but I know I'll find spots I missed later. I wear glasses but not while I paint so it's easy for me to miss a spot or two. I put a light coat on it then another heavier one after it flashed, about 4 mins. Side note- the satin doesn't show overspray as bad as gloss.
 
The epoxy bottom turned out good and- Tonight reassembly started! I wrestled with this leaf for 1.5 hours., I fear it's probably a sign of things to come.. My next step/goal now is to get it back rolling on it's own tires., suspension and steering.
 

Attachments

  • CAM00101.jpg
    CAM00101.jpg
    81.6 KB · Views: 291
  • CAM00104.jpg
    CAM00104.jpg
    52.9 KB · Views: 290
Looking good there Daytona Kid . . . I know the feeling, I just put my leaf springs back on the car for the first time since tearing it all apart - feels good !

( but I'll have to pull them back off because "someone" forgot to paint them . . . ) ( sigh )
 
Your car is looking great Kid. Evercoat makes a black brushable seam sealer that is sold in quarts. I used it on my Charger and really liked it. I used the 3M stuff also. I think they each have their place with the Evercoat being a little more fluid.
 
That car has come so far with your steady hand! I can't wait to see this thing done and rolling down the road again! I need to pick up some more seam sealer as well. I will maybe try that evercoat brushable that hunt2elk mentioned. I have used the cauking gun stuff and it works great but sets up very quick. If you are trying to manipulate it, it forms a crust quick and is hard to smooth out. But it paints over very well. I have lots of it painted on my doors and in my trunk and no flaking peeling whatsoever.
 
Looking good there Daytona Kid . . . I know the feeling, I just put my leaf springs back on the car for the first time since tearing it all apart - feels good !

( but I'll have to pull them back off because "someone" forgot to paint them . . . ) ( sigh )

I don't think mine are painted either, .seems like they have some type of thin cosmoline coating on them.. I may take them back off later and epoxy them.
 
Auto Transport Service
Back
Top