• When you click on links to various merchants on this site and make a purchase, this can result in this site earning a commission. Affiliate programs and affiliations include, but are not limited to, the eBay Partner Network.

'64 Fury Pro-Touring

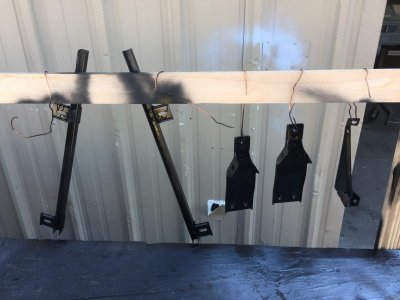
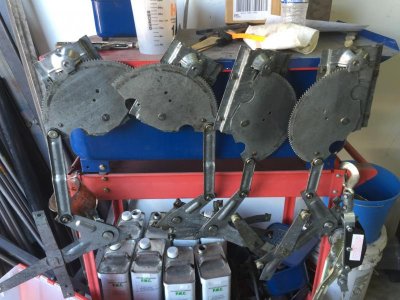
It's been a couple weeks since I posted any progress reports on the Fury but that's only because I've been doing lots of mundane (read: BORING) stuff like rehabbing the window mechanisms, and all the fun stuff that includes, like getting rid of all the crusty old white lithium grease, corrosion, and grit, but it's been time well spent. Luckily the only piece missing was a single round clip that slides over one of the pivot-rivets, but a c-clip and washer worked perfectly.

It's been at least 5 or 6 years since I took the Fury apart and for some reason I had to cut a couple of the pivot-rivets out of one of the mechanisms, so I'll bet getting those welded back in shortly but otherwise (luckily) the mechanisms are in terrific condition.

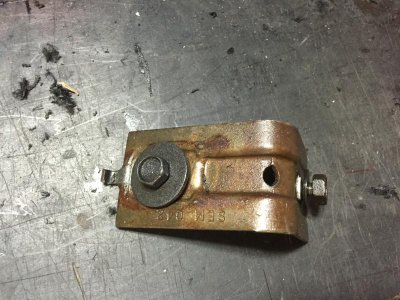
These two pictures show the finished results though the window mechs are not yet lubed up (too much mess when handling; I'll wait until they're actually going in the car for good):

WindowMech01.jpg

WindowMechs02.jpg

WindowRailMount01.jpg

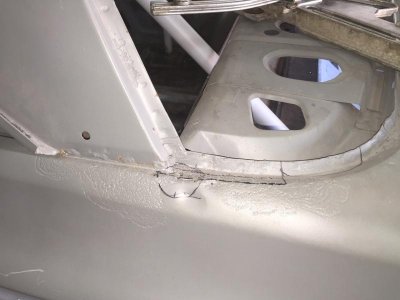
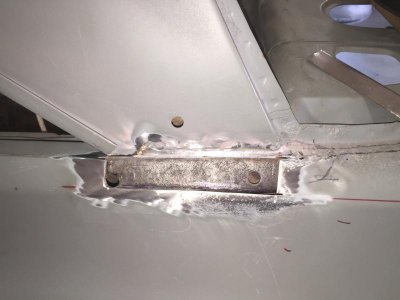
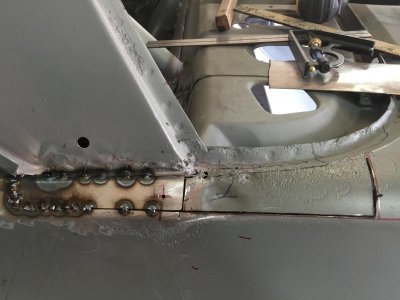
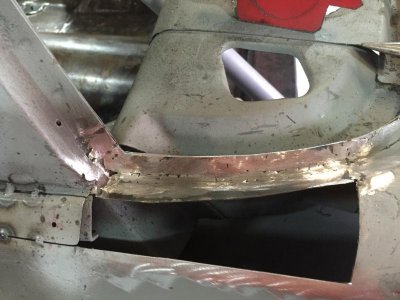
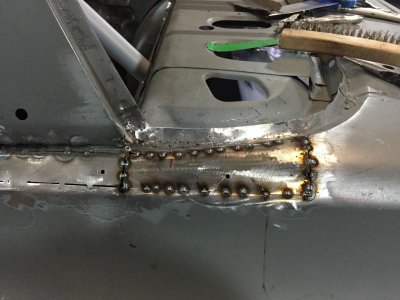
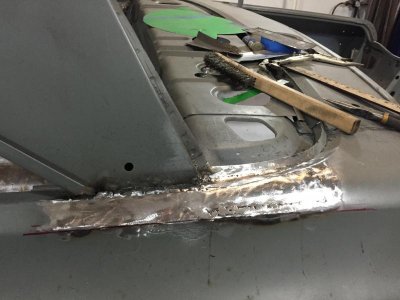
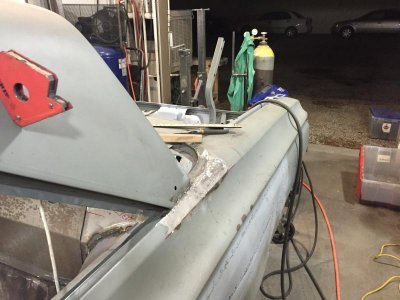
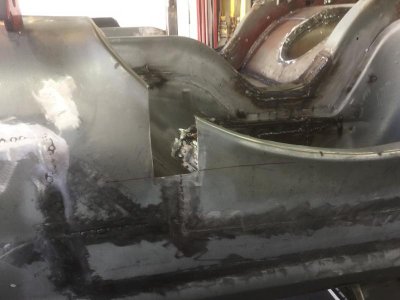
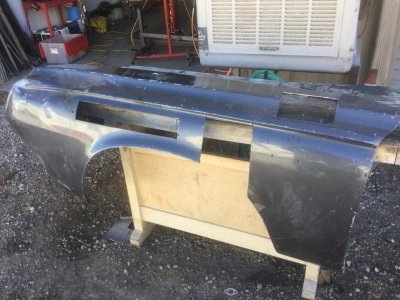
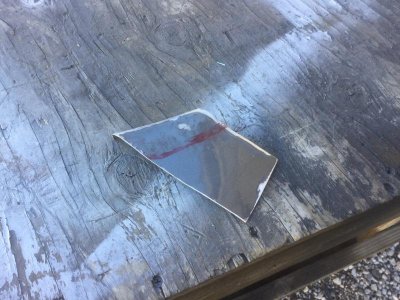
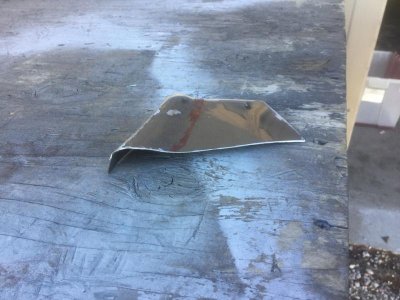
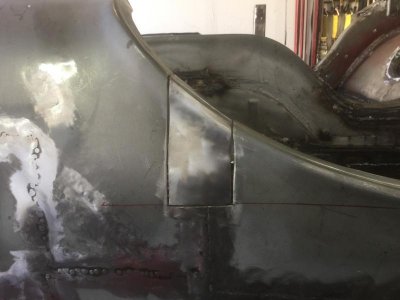
Once I got the mechanisms cleaned up I turned my attention to the final rotted spot, which was located at the base of the C-pillar, where you just know there'd be multiple different shapes and angles converging! Regardless, I took my time and slowly cut out the rotted area and pieced it back together using 4 separate pieces of metal I scavenged from one of the old front fenders (rotted beyond use at the bottom), so here are the pics:

C-Pillar01.jpg

C-Pillar02.jpg

C-Pillar03.jpg

C-Pillar04.jpg

C-Pillar05.jpg

C-Pillar06.jpg

C-Pillar07.jpg

As crazy as it sounds in my own head to say this; I am actually at the point where I need to start doing the body-work because there's really no more mechanical fabbing or rehabbing to do. WTF? I can't believe I'm actually saying that! Oh yea, there's the electrical and stuff, but the heavy lifting seems to be done!
WindowMech01.jpg WindowMechs02.jpg WindowRailMount01.jpg C-Pillar01.jpg C-Pillar02.jpg C-Pillar03.jpg C-Pillar04.jpg C-Pillar05.jpg C-Pillar06.jpg C-Pillar07.jpg
 
Now I"m Jealous Bob . . . you're about to hang up the welder and start putting your car back together ! ! That's fantastic news and I applaud you ! !

I'm still working my way through the last of the metal work so that I can get to the point that you're at . . . Thanks for the update and start BUILDING ! ! !

YAY ! ! !
 
Well the worst is still a ahead...................BODY WORK errrrrrrrrrrrrrrh, not my favorite for sure. Congrats on the milestone and good luck with the body.
 
image.jpgimage.jpgFunny, I was just cleaning the window mechanisms last week too, and also deep into the body work stage. Several cars all at the same stage!
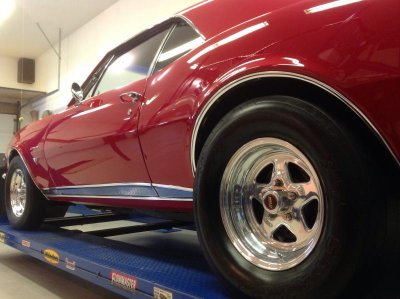
image.jpgimage.jpgimage.jpg

image.jpg image.jpg image.jpg image.jpg image.jpg
 
Now I"m Jealous Bob . . . you're about to hang up the welder and start putting your car back together ! ! That's fantastic news and I applaud you ! !
I'm still working my way through the last of the metal work so that I can get to the point that you're at . . . Thanks for the update and start BUILDING ! ! !

YAY ! ! !

LOL, don't be! I was in the shop yesterday taking stock of what body work supplies I'll need to get and noticed something pretty important: I installed the front suspension so I could line up and install the front sway bar but then totally forgot to actually order it! Can't go cleaning up and painting the frame when I have more welding to do :-( Oh yea, did I mention I forgot the rear bar too? F'n dunce!

- - - Updated - - -

Well the worst is still a ahead...................BODY WORK errrrrrrrrrrrrrrh, not my favorite for sure. Congrats on the milestone and good luck with the body.

Hey Dev,

Ignorance is bliss; the only body work I've EVER done is a small patch in the front valance of my Corvette. Granted, it came out really nicely (IMHO) but that definitely doesn't count as experience, so really have no idea WTF I'm in for.

First I need to figure out what type of primer I'll need; it has to be compatible with PPG DP-40 epoxy primer because that's already on a large portion of the car. Will the primer I choose work as a sealer or will I need to order a separate sealer? Did I mention I don't know WTF I'm doing, LOL?

- - - Updated - - -

View attachment 237156View attachment 237157Funny, I was just cleaning the window mechanisms last week too, and also deep into the body work stage. Several cars all at the same stage!

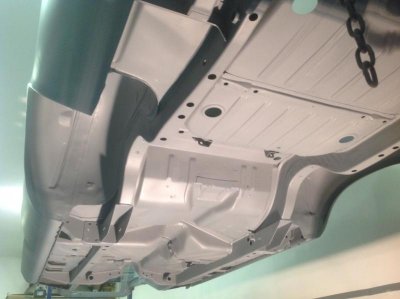
View attachment 237153View attachment 237154View attachment 237155

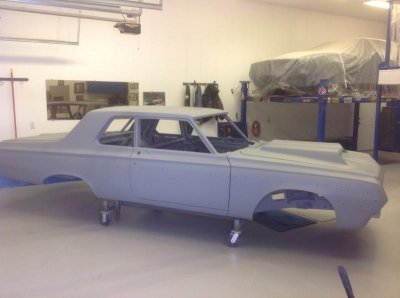
So THAT is what a '64 is supposed to look like? Pretty friggin' good looking; wish mine looked like that. If you see me lurking anywhere around your shop you better call the cops 'cuz I'm gonna pocket all those beautiful steel panels (doors, fenders, etc) you have there.

The guy with the shop next to mine gave me a tip that worked great on the window mechs: first I cleaned them in a parts washer, but you know that doesn't get everything, so he said to mix some auto-trans fluid with some diesel fuel and let the mechs soak in the mixture for a while. It's absolutely amazing how much crud the mixture got to break loose from the crank gears, etc and left the mechs with a nice, thin coat of protective oil until I decide to grease them up and install them in the car.
 
That's sweet! I love those cars! Good luck on your build, can't wait to see more
 
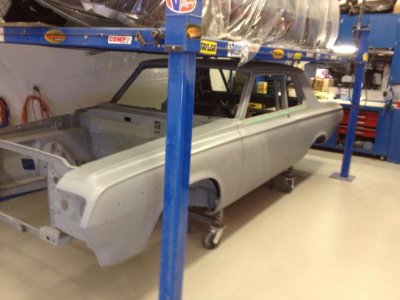
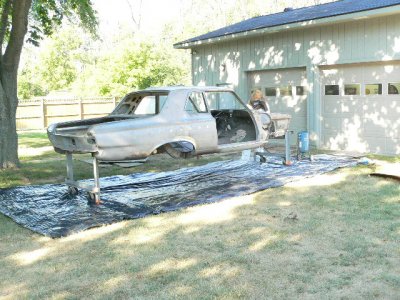
Been working away on the Fury; lots of mundane welding, metal work, and prepping for the body work to begin.

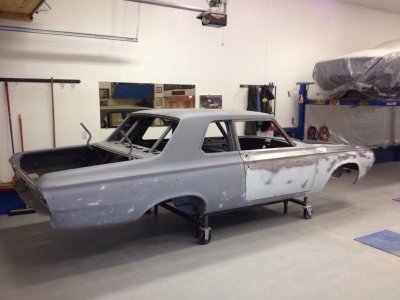
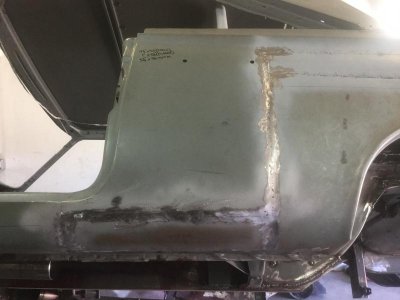
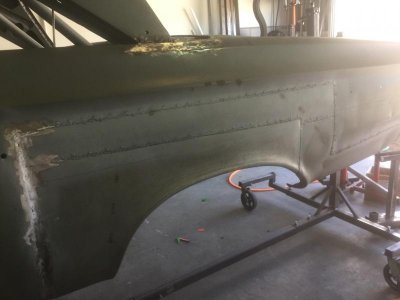
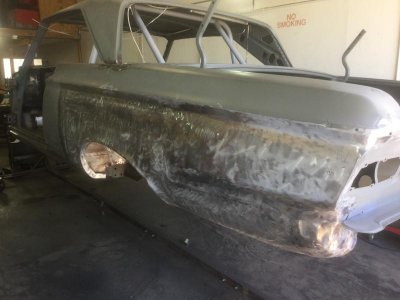
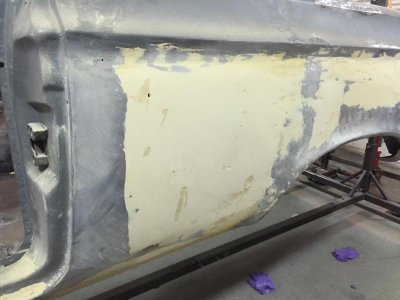
Here are a couple shots of the drivers side quarter, which I tackled first:

image.jpg

image.jpg

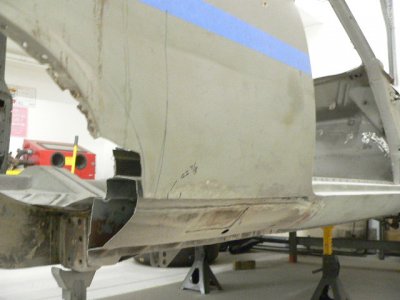
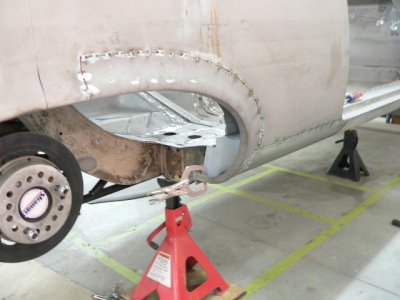
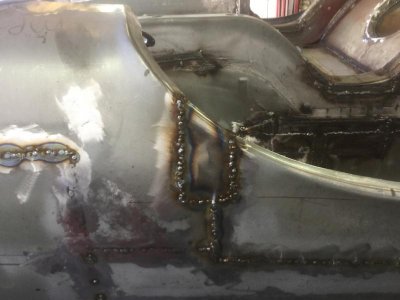
It's a little tough to see but the vertical seam that blends into the wheel lip was really not to my liking, and it only got worse as I began metal working the quarter, so in the shots below it shows what I decided to cut out and replace (again):

image.jpg

Now I know why I held on to those rusty front fenders! The shape of the lip was a little different but with some finnessing, bending, and beating I got the patch to fit nearly perfectly. It took an hour but it was time well spent.
image.jpg

image.jpg

image.jpg

image.jpg

image.jpg

Once that patch was in place I got down to metal finishing with a hammer and dolly, but...
image.jpg

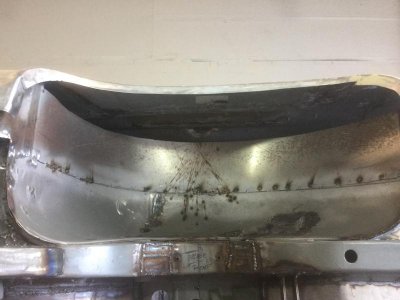
I immediately ran into some trouble. First I was having a bitch of a time cleaning up the welds from the low spots created by flanging the panels instead of butting them, and second, getting the quarter to move how and where I wanted it to because I had already welded the wheel well to the inside of the quarter. Not much I can do about the flanged panels but I decided to cut out part of he wheel well to free up the quarter. It's a little tough to see but I removed a couple inched from the outer edge.

image.jpg

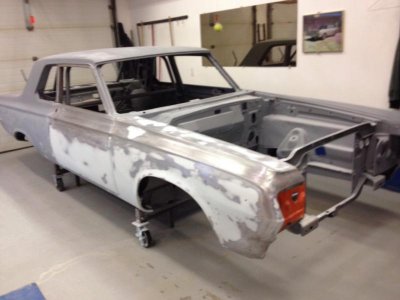
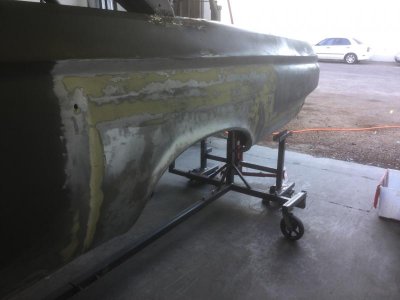
Once I'd freed up the quarter the metal working went really well, and then something happened I'd almost given up hope of ever seeing: the first coat of body filler went on the car!!!! I am SO stoked and motivated, I can't wait to get back to the shop and continue working:

image.jpg

A couple words of advice for other green peas like me:
1) DON'T flange one panel edge under another! As an inexperienced body guy\fabber I thought it would make it easier but in the long run it wasn't worth it: you end up with f'd up low spots that make cleaning the welds MUCH tougher than they should be, which then leads to lots of problems grinding through too much surrounding material.
2) if you do flange the panel seams then make sure to work out the low spots BEFORE you start cleaning up the welds; you'll save yourself lots of extra work.

image.jpg image.jpg image.jpg image.jpg image.jpg image.jpg image.jpg image.jpg image.jpg image.jpg image.jpg
 
Word of caution. Epoxy prime under filler. Filler will still adhere well. Corrosion resistance is much better. Also I grind tack welds while letting the panel cool in between tacks using a cut off wheel. The time spent will save hours of warp repair.
Doug
 
Word of caution. Epoxy prime under filler. Filler will still adhere well. Corrosion resistance is much better. Also I grind tack welds while letting the panel cool in between tacks using a cut off wheel. The time spent will save hours of warp repair.
Doug

Hey Doug,

Thanks for the advice, I really appreciate it.

Prior to beginning the body-fill process I went online and found conflicting evidence about epoxy priming under the filler, and while I was going to go the primer under filler route there were two points that convinced me to go the filler over metal route:
1) I was at a loss as to what route to take so I spoke to a tech about the filler and after he asked about my location (Las Vegas) he said the added corrosion resistance wouldn't mean a thing; he had absolutely no concerns about laying the filler over metal because the lack of humidity and high temps here work in my favor, whereas if I still lived in San Francisco (moved a couple years ago) he would absolutely go the filler over primer route.
2)I invite you to check out the following link and please get back to me before I add another drop of filler: http://www.autobodystore.com/filler_&_epoxy.shtml While I'm anything but an expert I thought this experiment was thoughtfully planned, executed, and explained.

THANKS again for the input; being a complete green-pea at this process I really appreciate your advice.
 
2)I invite you to check out the following link and please get back to me before I add another drop of filler: http://www.autobodystore.com/filler_&_epoxy.shtml While I'm anything but an expert I thought this experiment was thoughtfully planned, executed, and explained.

Thanks CarnalSupply . . . great read . . . guess I need to take heed and start putting filler down on the bare metal ! ! ! LIKE YOU ! ! !

Great to see you putting filler on the car . . . GO . . . GO . . . GO . . .
 
Tests show that the adhesion is equally as good going either route. While I've always gone with fller over bare metal I will still do that when I need to but either way is fine. Make sure the metal is roughed up before applying the filler.
 
This test is showing damage such as an accident. The point here is corosion resistance. Filler is porous. Epoxy seals the metal. Over the course of body work moisture can work it's way below the filler. rust starts to form. I have 3 cars all painted by my friend and 1 by his student. The oldest was painted in 1986. At that time we did not have epoxy. it was filler to bare metal. That car has been garage kept ever since. The result. There are area of rust starting to bubble the paint in various areas in the middle of panels, not on the edge where you would suspect. Car number 2 painted by his helper. No epoxy, Rust bubbles in odd spots (middle of panels with-in5 years. Not a ton of them but when I two toned the car we sanded them to bare and found rust. This car had been media blasted 1 week prior to body work and paint which was completed in 2 weeks. Car #3 striped with chemical stripper. Epoxy under all filler. Car primed in 2002. No signs of any problem. Car #4 current race car primed in 2011. No signs of any problem. Both were primed with DP90 and bare spots were always spot primed again before any filler. Also we do not grind with 36 grit. My painter feels that the filling of the deep scratches with primer will eventually "read" sand scratches in the surface. I'd stack my painter up against anybody.The Volare was chosen best F-Body at 1988 Mopar Nats, and best modified car at the 1990 Mopar Nats. The Challenger was a 2nd place at Detroit Auto-Rama 2004. The Belvedere was 1st place Detroit Auto-Rama Super Stock along with best Competition car of the show. Also has won best paint at the annual CEMA show at Chrysler tech center , and best appearing car at Monster Mopar 2014. The Volare and the Belvedere have had 2 Magazine spreads each.
Doug
 

Attachments

  • Challenger at Staceys BD party Aug. 2011.jpg
    Challenger at Staceys BD party Aug. 2011.jpg
    100.3 KB · Views: 303
  • photo_1_(640x478).jpg
    photo_1_(640x478).jpg
    46.5 KB · Views: 282
  • milan volare.jpg
    milan volare.jpg
    9.1 KB · Views: 267
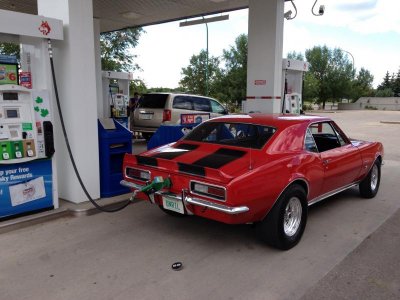
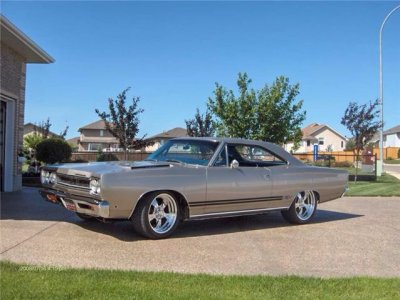
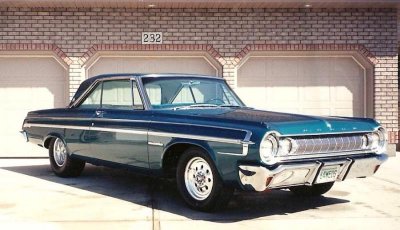
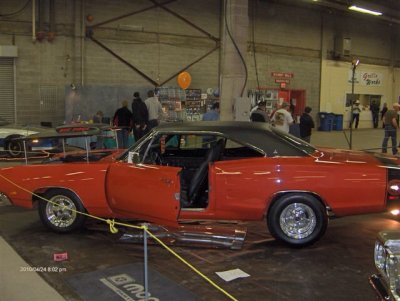
Those are good examples for sure. Having been painting for about 30 years I have a load of experience with this type of thing. The examples below are cars that were done without epoxy primer. I painted my 64 23 years ago, my Camaro I did in 97, and the Hemi GTX was done 7 years ago. While the Dodge I no longer own, the other 2 show no signs of corrosion or anything to justify a problem with filler on bare metal. I use epoxy primer on everything these days, but in my experiences it hasn't been a problem. Just sayin.

image.jpgimage.jpgimage.jpgimage.jpg

- - - Updated - - -

And a couple others that I did more recently with epoxy primer. A very enjoyable hobby these cars!

View attachment 238142View attachment 238143

- - - Updated - - -

2010 with epoxy primer.
image.jpg
 
This test is showing damage such as an accident. The point here is corosion resistance. Filler is porous. Epoxy seals the metal. Over the course of body work moisture can work it's way below the filler. rust starts to form. I have 3 cars all painted by my friend and 1 by his student. The oldest was painted in 1986. At that time we did not have epoxy. it was filler to bare metal. That car has been garage kept ever since. The result. There are area of rust starting to bubble the paint in various areas in the middle of panels, not on the edge where you would suspect. Car number 2 painted by his helper. No epoxy, Rust bubbles in odd spots (middle of panels with-in5 years. Not a ton of them but when I two toned the car we sanded them to bare and found rust. This car had been media blasted 1 week prior to body work and paint which was completed in 2 weeks. Car #3 striped with chemical stripper. Epoxy under all filler. Car primed in 2002. No signs of any problem. Car #4 current race car primed in 2011. No signs of any problem. Both were primed with DP90 and bare spots were always spot primed again before any filler. Also we do not grind with 36 grit. My painter feels that the filling of the deep scratches with primer will eventually "read" sand scratches in the surface. I'd stack my painter up against anybody.The Volare was chosen best F-Body at 1988 Mopar Nats, and best modified car at the 1990 Mopar Nats. The Challenger was a 2nd place at Detroit Auto-Rama 2004. The Belvedere was 1st place Detroit Auto-Rama Super Stock along with best Competition car of the show. Also has won best paint at the annual CEMA show at Chrysler tech center , and best appearing car at Monster Mopar 2014. The Volare and the Belvedere have had 2 Magazine spreads each.
Doug

Hey Doug,

Thank you SO much for the detailed response!
What grit do you and your painter use prior to laying down the epoxy primer?

- - - Updated - - -

Tests show that the adhesion is equally as good going either route. While I've always gone with fller over bare metal I will still do that when I need to but either way is fine. Make sure the metal is roughed up before applying the filler.

Prior to laying down the filler I used a D/A with 80 grit on the bare metal; does your experience tell you I'm in the ballpark?

BTW, a big thanks to my you as well for taking the time to post your thoughts and experiences, it really does make a big difference.
 
80 will work just fine.
 
Last edited:
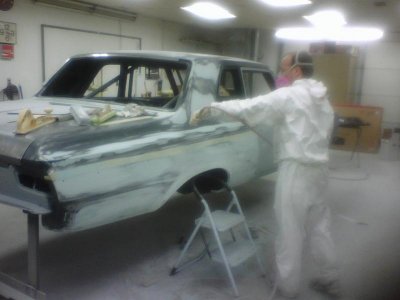
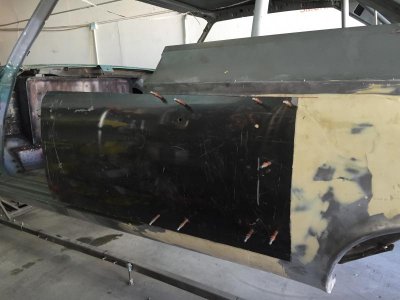
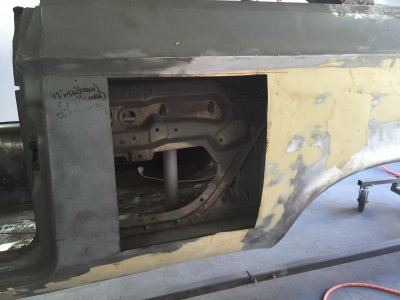
As you can see in the pictures/posts above I started laying down the body filler, but bottom line is I didn't like the panel fit that was below the filler so I decided to grind the filler out of the offending area and replace the sheet metal. The trouble was the seam where I'd earlier spliced in the metal for the quarter panel (just behind the door) created a HUGE low spot and just blatantly filling it with mud was out of the question.

Solution: I figured the door skin would have the same exact contour as the quarter panel (I was right, luckily) so I de-skinned the door, clecko'd the new panel over the existing quarter panel, and used my angle grinder to cut a new patch. Once the patch was cut I tacked it in over about an hour, making sure to let every weld cool before going anywhere near that area again. As was suggested in dvw's post I chose to ground down the welds as I went instead of waiting until the entire panel was finished, and what a difference that made: thanks for the tip!

Here are some pix of the progress:

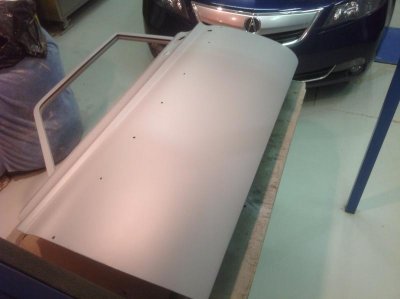
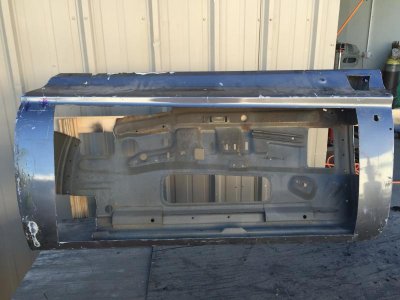
Here's the door after I pulled the skin, which actually allowed me to see a window track I'll need to remove and bond into my f'glass door.
IMG_0588.jpg

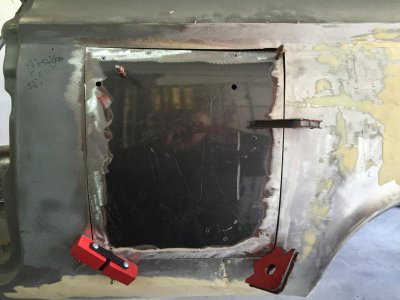
Here's the door skin clecko'd onto the quarter panel; fit like a glove!
IMG_0587.jpg

This is the extent of the quarter removal:
IMG_0589.jpg

Here's the patch panel during the initial fitment. Once I'd cut the patch from the door skin it lost some of it's structural integrity and flattened out a bit, so it took a little bit of finessing to shape it to match the quarter panel contours:
IMG_0590.jpg

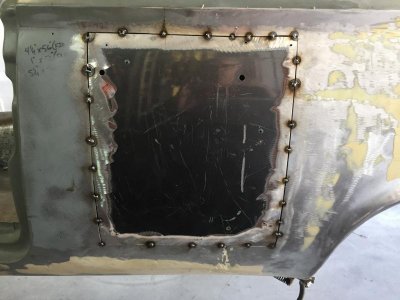
The patch after the first round of tack welds. I was REALLY pleased with the outcome; I'd left the gap between the patch and the existing quarter so the welds made great penetration all the way around.
IMG_0591.jpg

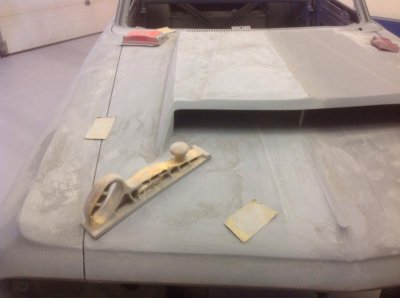
This is a shot after I'd laid down the filler and begun a bit of the sanding/shaping process, but there's still a bunch more to do.
IMG_0592.jpg

IMG_0588.jpg IMG_0587.jpg IMG_0589.jpg IMG_0590.jpg IMG_0591.jpg IMG_0592.jpg
 
Bob, you're right on my heels!image.jpgimage.jpg

image.jpg image.jpg
 

Went to the shop tonight and spent about 3 hours adding filler to the quarter panel and sanding it back of, blocking it as I went, so while I might be on your heels I'm definitely falling behind cuz I'm WAY slow at this bodywork stuff.

BTW - your car is looking AWESOME!
 
Wow bob, the car is coming along nice! I remember the first time my dad and I came and helped you with the shop, you were just working on the firewall now look at it!
 
Auto Transport Service
Back
Top