• When you click on links to various merchants on this site and make a purchase, this can result in this site earning a commission. Affiliate programs and affiliations include, but are not limited to, the eBay Partner Network.

'64 Fury Pro-Touring

361,727,8.75
You should be able to tape the wires or find the plastic covering from a factory GM column.
In looking back, I have installed at least five of these columns and have yet to see one that had the covering from Ididit. After the first one, I have always looked and repaired before the car left the shop.
Roger

Hey Roger,

I pulled off the wheel and began to dig into the column but based on the length of the column (from the wheel mount to the tilt joint) there is no way I'm going to be able to get down in there without tearing the complete assembly apart, and that's not something I think I'm prepared to do, though I'm chomping on the idea. Based on how the bare wires exit the column (through an oblong hole with a grommet) I cannot imagine there is any kind of sheathing inside the column, so like I said, I'm going to chomp on the idea for a while and figure out what I'm going to do.

Thanks much and have a great New Years!
 
I looked through the entire thread. Lots of innovative thinking. Great idea with wheel barrows. I will say the fuel lines in the drive tunnel bother me. If it was to be raced it would never pass tech. There's a good reason for that. Driveline failure=cut fuel line=fire. If it were mine I'd move them. Not to late.
Doug

Hey Doug,

I can't begin to tell you, and all the guys who have been kind enough to put their thoughts in print, how much I appreciate your doing so, especially in critical areas (like the fuel system).

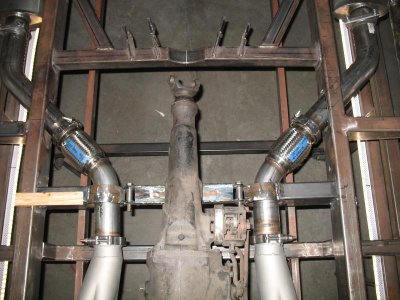
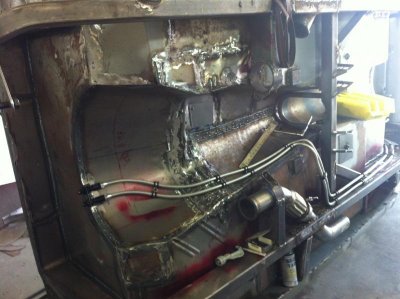
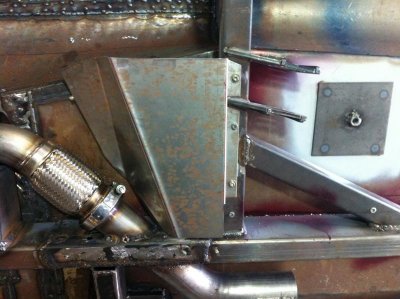
I hope/believe a couple of pictures and a bit of explanation will show the fuel lines should be safe in their current locations, and although the pictures below were taken at different angles and at very different times in the construction I believe there are enough common reference points to validate my thinking.

In the first picture, please note the location of the slip-yoke in relation to the cross-member just behind it (above it in the picture). The slip-yoke and U-joint are within 3" of the cross-member (closer to 2", actually). Although the angle makes it a bit difficult, if you compare to the location where the fuel lines enter the tunnel (middle picture) it's pretty obvious the U-joint is farther to the rear. If you then look at the third picture (which shows my heat shield though without the fuel line in place) there is ample room for the lines to pass into the tunnel at a location in front of the U-joint. Granted, it is close, but if the drive-shaft were to somehow break loose I do not believe the lines would be in danger.

Cross-Member & Pass-throughs.jpg

IMG_0464.jpg

IMG_0469.jpg

A few more points I considered when making the decisions I did:

  • Running the lines outboard of the exhaust, between the exhaust and the rocker, was not a viable option; it placed them in too close a proximity to the exhaust and in certain areas the fuel line would be far too tight a fit for comfort. There is virtually no room between the floor of the car and the frame rails, so with my choice of truck-arm suspension and exhaust location there are very few options available to me.
  • The car, while performance oriented, is not intended as a drag car, and while drive-line failures are a reality they are obviously more prevalent at the strip by comparison to road courses and auto-cross.
  • The car, regardless of my trans choice, will be equipped with an SFI certified scatter-shield.

You may or may not agree with the rationale or the decisions but I hope you can appreciate the fact I didn't lay out the lines without a great of thought, and by all means, don't stop digging at the details, I really do appreciate the input.

Happy New Year,

Bob
 
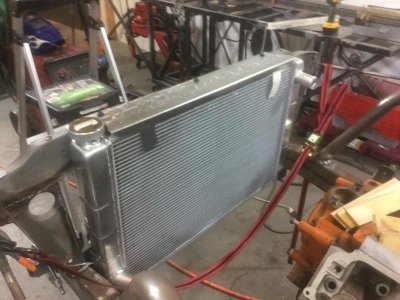
I was really hoping my pedals would show up yesterday, but they didn't, so I decided to work on the radiator.

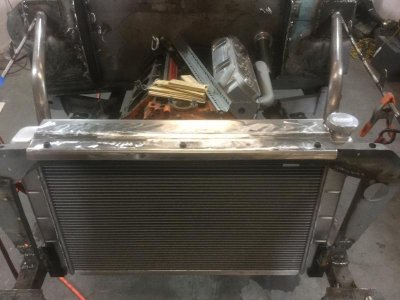
Quite a few weeks ago I installed the two cradles the radiator sits on but had yet to figure out how I wanted to hold it in place. I searched around the web but didn't see anything that really caught my eye so I decided to fab up something that works like the one on my old '69 SS 396 El Camino. When bolted down the mount creates enough pressure to hold the radiator in place both vertically and horizontally.

What looks like a simple piece to fab ended up not being anything of the sort, and in fact, took 8 hours to make and is made from two pieces welded together (from side to side), so WAY more work than expected.

Here are a couple shots:

image.jpg

image.jpg

On Saturday I'll mount the fan shroud and figure out where I want to mount the Accu-sump tank and get it fabbed into place, and IF my pedals show up tomorrow I'll get them mounted this weekend too.

image.jpg image.jpg
 
Bob,
I was just checking out your recent progress.
Isn't fabbing fun? Pays well too!!
I once spent at least 8 hours making a 3" open face air cleaner clear the under hood of a 55 T-bird and the carb.
Nice work on the new born radiator support. :)
Roger
 
Bob,
I was just checking out your recent progress.
Isn't fabbing fun? Pays well too!!
I once spent at least 8 hours making a 3" open face air cleaner clear the under hood of a 55 T-bird and the carb.
Nice work on the new born radiator support. :)
Roger

LOL, "pays well"? Not in my world, and at my speed I think I'd re-define "deficit finance", but I sure do enjoy the problem solving and fabbing.
 
LOL, "pays well"? Not in my world, and at my speed I think I'd re-define "deficit finance", but I sure do enjoy the problem solving and fabbing.

X2 on that Bob . . . I'm into deficit finance as well . . . LMAO . . . and agreed, I love the solving and fabbing . . . OH - and the doodling too ! ! !

- - - Updated - - -

Fabbing keeps my dumba$$ thinking!!

Very true furious64 . . . I have to agree with you on that too . . . LMAO . . .
 
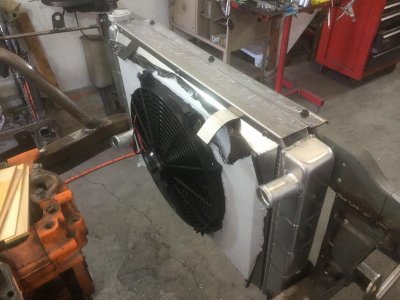
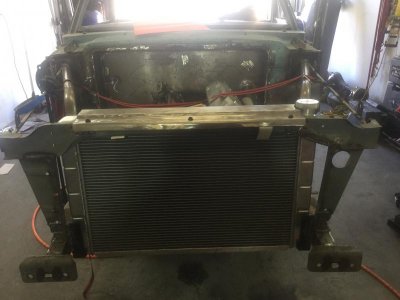
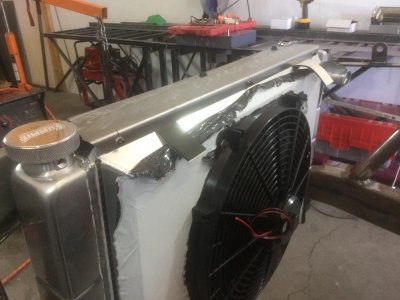
Had a great day at the shop today; got the entire radiator/fan/mount completed, then got to work on the oiling system. Here are some shots of the compleated rad setup and I'll get some shot of the oiling system tomorrow.

image.jpg

image.jpg

image.jpg

The oiling system consists of a Milodon flat bottom pan with baffles and a swinging pickup, a Milodon pump with a billet remote filter adapter and external line, and a Moroso Accu-Sump. The set-up is all pretty straight forward except for the Accu-Sump, which a) I've never used one begore, and b) is pretty sizeable so may prove tough to locate in the engine compartment. Oh well, that's what tomorrow is for.

image.jpg image.jpg image.jpg
 
Boy I wish I had that kind of room in my Charger for the radiator! Looks great
 
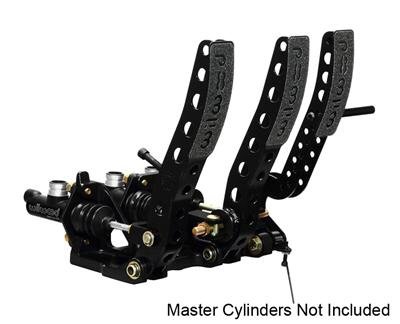
Had my entire Sunday planned out working on the Fury but late Saturday began having some kidney stone trouble that really kicked my *** on Sunday, so no work got done. On the positive side of things, my Wilwood pedals showed up today, but I've got a couple tradeshows over the next couple weeks so I'm not sure when I'll get them put in.

image.jpg
 
Since I haven't bought my master cylinders yet I mocked up some dummies out of sheet stock and conduit:


Once I had the "MC's" in place I put the pedals in the car and not unexpectedly the pedal assembly was much to far rearward, so I cut out a 9" wide area where the firewall meets the floor and boxed it in:


Now I can slip the entire assembly forward with the MC's sitting cleanly in their box and still have ample room to access the banjo's that mount at the front end of the MC's:


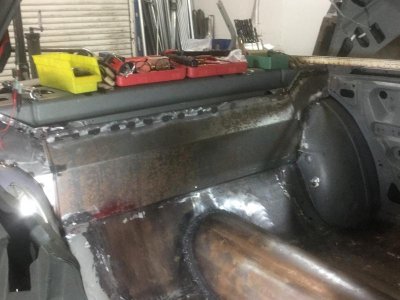
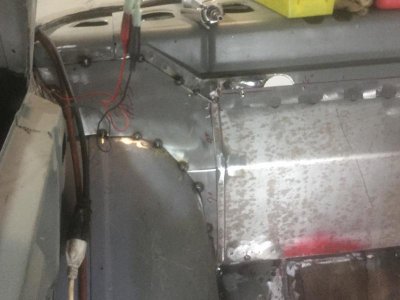
Once the pedals were settled I went back to the rear seat area to finish off the blanking plate I'd begun a couple weeks ago. I'm real pleased with the results, especially the filler plates above the wheel wells:

image.jpg

image.jpg

Tomorrow I'll put the cylinder heads and cross ram on so I can figure out how I want to run the throttle cable.

image.jpg image.jpg
 
Wow, that is looking great Lucifer haha! I really like the pedal setup and your notch to fit them into looks really clean. The more I read this the more I want to do something like this with my 75 Torino (it could use a diet anyhow) because this is to cool. Awesome fab work, keep it up.
 
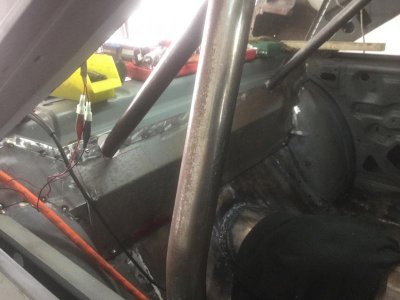
So I get to the shop this morning and realized I'd forgotten to cut the holes for the rollbar in the rear seat block off panel, so I spent a couple hours getting the lined up and cut out:

image.jpg

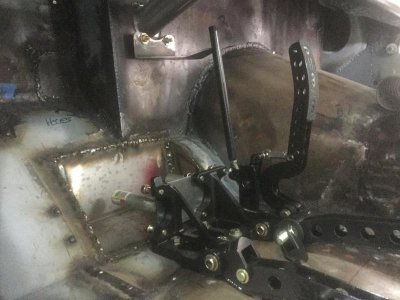
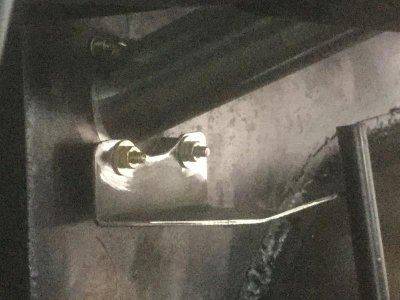
Once I got the panel finished I moved on to the throttle linkage. The Wilwood's use a bell-crank that pulls the throttle cable vertically, which with my setup is an advantage, but I had to come up with some kind of bracket for the end of the cable. When I looked under the dash I realized I could replace a couple of the bolts in the steering column pivot with longer ones and mount the bracket there; no welding, drilling, nothing. I can't tell you how happy that makes me!

image.jpg

image.jpg

The rod you see running vertically from the pedals to the bracket is just for lning up the bracket.

I'll add some holes to lighten the bracket up but I don't want to cut out too much so I'll wait until after I get my cable (Lokar).

image.jpg image.jpg image.jpg
 
Hi Bob, I've just gone back and read your entire build thread. WOW! You have been put through the wringer man. That is an ambitious build. I love all of the fab work. I'm mocking up hood scoops and center cowl right now. My issue is that I need some measurements to position the scoops so that the holes in the hood under them fall in the right place to feed air to the carbs on the same MaxWedge intake your using. Could you get a measurement from the center of your motor mounts to the center of each carb and from the centerline of the top of the motor to each carb center? I would really appreciate that if you find the time. Thanks and congrats on an awesome build. Randy.
 
Hi Bob, I've just gone back and read your entire build thread. WOW! You have been put through the wringer man. That is an ambitious build. I love all of the fab work. I'm mocking up hood scoops and center cowl right now. My issue is that I need some measurements to position the scoops so that the holes in the hood under them fall in the right place to feed air to the carbs on the same MaxWedge intake your using. Could you get a measurement from the center of your motor mounts to the center of each carb and from the centerline of the top of the motor to each carb center? I would really appreciate that if you find the time. Thanks and congrats on an awesome build. Randy.

Hey Randy,

I think I understand what you're asking for, and I'll be happy to help, but my engine mounts are custom, so the measurement would probably steer you wrong.

There's also the fact the factory mounts are not equal distance to a common machined surface, like the bell housing mount. For the fore/aft measrement we need to identify a machined surface that is perpindicular to the block centerline.

The left/right measurement from the centerline would be the same as on my setup, so that's not an issue.
 
Last edited:
Hey Randy,

I was just searching the web regarding scoop and hole placement and the common concensus seems to be locating/cutting the holes only when the complete drivetrain is in the car; turns out there are all kinds of variables at play so waiting until the drivetrain is in the car allows you to use the old-school (but reliable) clay method for locating the correct carb center.
 
Hey Bob,
What's the "old reliable" way...........slamming the hood on the air cleaner studs!!??
LMAO
Roger
 
Brad-Riepe-1969-Road-Runner-5.jpg

Hey Bob,

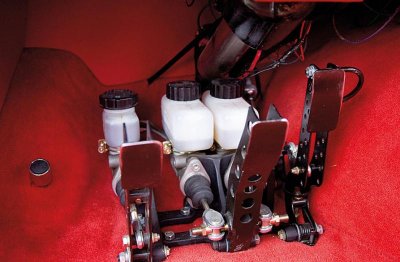
Found this pic for you from this guys crazy roadrunner build. Thought it might add some ideas

btw just a thought.... those pedals are going to be tough to work in stilettos!!
 
View attachment 234355

Hey Bob,

Found this pic for you from this guys crazy roadrunner build. Thought it might add some ideas

btw just a thought.... those pedals are going to be tough to work in stilettos!!

Pole dancing, stilettos, what's next, LOL?

Thanks for the pic, that's a real clean setup, but due to space limitations I'm not sure if I can mount my reservoirs directly to the MC's,but I'll see. If not going put my reservoir(s) outside in the engine compartment on the firewall which has the added benefit that I by won't have to use a a one-way valve to stop fluid bleed off.

It all waits to be figured out.
 
Hey fellas,

We've lost a terrific forum member, Ed Schooler.

Ed became ill about a month ago and was about to begin treatments when he came down with, and succumb to Pneumonia.

Ed's teenage son, Josh, who has helped Ed work on Ed's prized '68 GTX, plans on taking up the reigns, so to that end I hope you will visit their thread and offer all the support, advice, and assistance you can.

http://www.forbbodiesonly.com/mopar...-Finanlly-Started-My-Restoration-of-my-68-GTX

Best wishes,

Bob
 
Auto Transport Service
Back
Top