• When you click on links to various merchants on this site and make a purchase, this can result in this site earning a commission. Affiliate programs and affiliations include, but are not limited to, the eBay Partner Network.

'64 Fury Pro-Touring

My buddy Ted and I switch off. He does the paint and blocking. I do the engines, trans, wiring, suspension, etc. We both weld panels. I get to do the inside of the trunk, engine compartment, door jambs, under chassis, all the fun stuff.
Doug

I did several cars for my friend and there were 2 stars in that movie. I played Ted and buddy Pete played Doug! With the 64 I'm like Bob and play multiple characters!

- - - Updated - - -

Thanks for the tips. It sounds like you're going for a show quality finish; would that be accurate?

Bob I guess you could almost say that. I do my cars so that they are reliable, right and if they roll into a show they won't be out of place. Having said that, all of the cars that I have done are all shown. I'm a one-man show and I've done quite a few. I have to admit though that they are getting harder to do... age thing.
 
Last edited by a moderator:
I use adhesive roll paper 220/320 and get as much as I can. It is a good quality paper and it is easy to hang onto when it is folded and stuck together. I will use Scotch Brite pads where I need to. It's a tough go on the fingers but it's got to be done.
I'll finish up the engine bay tomorrow and then break out the 400 wet sand. I'd rather be doing the underside and engine bay over that damn trunk anyday. That was an ugly job!
Bob I also replied to your hood scoop question the other day.

Just got through reading your post on the scoop install; many thanks!
 
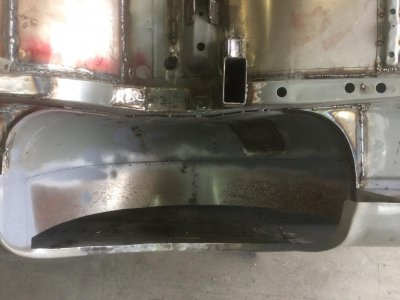
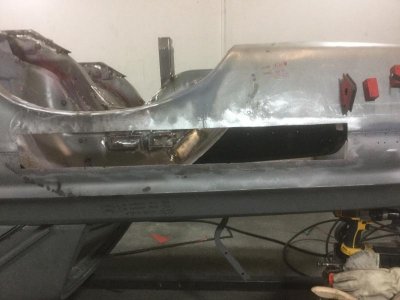
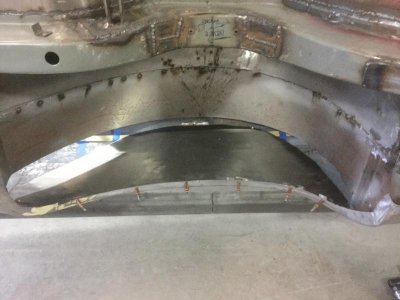
Should have thought of this before doing the body work on the quarter but I've decided to fab and install outer wheel tubs, something I had previously thought I'd do without. Not exciting but definitely a lot of work getting it to fit while maintaining the maximum amount of room for my 335's.

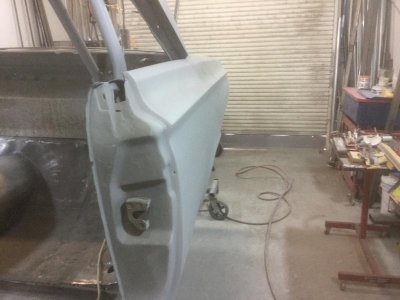
Here's a shot of the outer panel installed (with Cleco's). To orient you, the car is on the rotisserie with the driver side down towards the ground and the front of the car to the right of the picture.
image.jpg

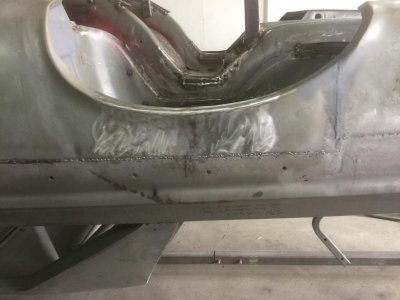
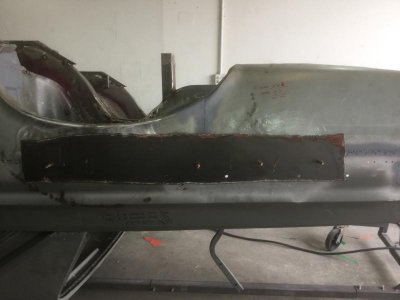
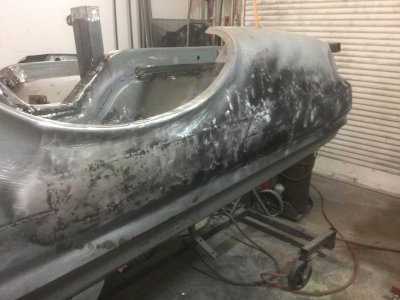
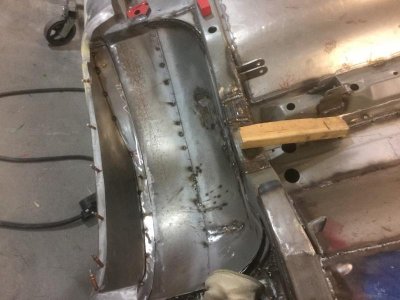
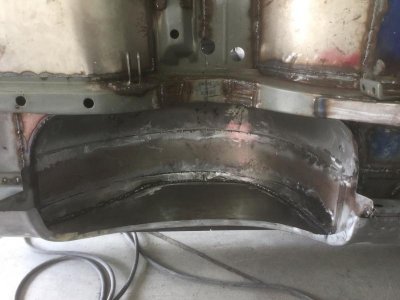
And here are some shots of the panel itself. Yea, there's quite a few plastic mallet marks from shaping on the bag but considering the placement of the panel I'm not going to sweat it. Tomorrow I'll make the filler strip to meld the new outer panel with the remainder of the tub.
image.jpg

It's tough to see in this side view but the compound curves involved in making this panel were QUITE a chore, bit I'm really happy with the results.
image.jpg

image.jpg image.jpg image.jpg
 
My buddy Ted and I switch off. He does the paint and blocking. I do the engines, trans, wiring, suspension, etc. We both weld panels. I get to do the inside of the trunk, engine compartment, door jambs, under chassis, all the fun stuff.
Doug

Where can I get a "buddy Ted"? All my "buddies" come over when they need something but are never around when I need help. :eusa_think:
 
WOW . . . looking good there Bob ! ! ! You'll be happy that you did it now instead of having to come back and do it later . . . ( or is it because you were NOT quite sure that you wanted to hang up the welder yet ? ( smile ) )

That sure looks familiar . . . and think about all the extra room that you'll have for your tires ! ! ! Then wait till you try and stick your head up in that wheel well, with your welding helmet on, and try to weld the extra spacer in, with molten metal falling on your head ? ! ? ! ? ! . . .that was a load of fun for me ! ! ( smile ) . . . but it's all done and behind me now ! ! !

Looking great, like always - can't wait to see the final results . . .

Note to self - I need to get a "bag", add it to my list . . . Grrrrrrrrrrrrrr

Thanks Larry.

I originally did the wheel tubs like I did out of fear of the unknowm; long before I ventured down the path of "I can do that", but now I figure I can make or fab whatever I need so why not make it better while I'm at it.

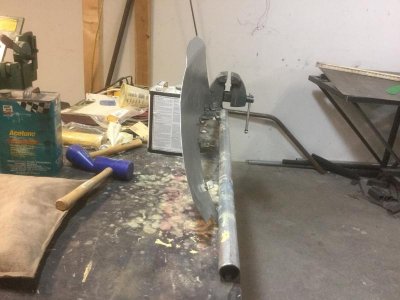
As for the bag and hammers; a GREAT investment along with my 48" metal break. I don't have an English Wheel, which would work perfectly for this latest job but I just can't justify the cost so I toil away with whatever I can come up with, like a section o pipe bolted to a table so I can form smooth curves, etc.

- - - Updated - - -

Where can I get a "buddy Ted"? All my "buddies" come over when they need something but are never around when I need help. :eusa_think:

Sadly, I think we have the same friends, LOL!
 
It's been a couple weeks since I've posted but I've been busy in that time.

In the previous posts I'd begun work on the driver side quarter panel and wheel house, and progress was moving along pretty good until I had to wait for materials to arrive, so I decided to move to the passenger side and boy, do I wish I had even a LITTLE bit of a clue as to WTF I was doing when I installed that sheet metal. Having learned my lesson on the driver side I looked at the passenger quarter to assess what needed to be done and to my horror I saw a 3/4" - 1" "dip" in the quarter that begins near the front of the wheel arch and extends about 6" - 8" past the rear of the arch. I don't remember being f'd up the day we installed that quarter but I obviously must have been enjoying some 'Goose along the way because this quarter is F'd!

First I cut out a couple inches from the outer wheel house, thus freeing up the quarter (the wheel house was welded to the quarter and sucking it in):

IMG_1115.jpg

Next I cut vertically from the wheel arch "up" about 6" to allow the metal to be moved outwards, then welded that seam and ground it smooth:

IMG_1116.jpg

While that helped somewhat I just couldn't get the metal along the body line (see the trim holes along the horizontal body line) to move outwards far enough so I cut out a matching section from my original doors (note the matching body trim holes), lined it up and cut out a section of the quarter. Using the body trim holes as a guide made it really easy to get the body line to match up so I got the patch welded in place. You'll also see a long, narrow strip patched in as well; this is where the original door skin had some rust and I decided to cut it out after the patch was in place.

IMG_1117.jpg

IMG_1118.jpg

IMG_1119.jpg

IMG_1121.jpg

So everything should be good from here, right? Not with my luck and mediocre (at best) skills! Even after all this work the quarter is still sucked in WAY too far and anyone looking down the side of the car would wonder WTF was going on:

IMG_1120.jpg

I began the laborious process of literally beating the quarter into submission, I mean into place, by hand. Below is a shot of the quarter after I pounded on it for hours and began blocking the surface to find the highs and lows:

IMG_1122.jpg

After all this work I've decided I've just been wasting time and I'm going to replace the metal AGAIN, so I'll have shots of that soon.

This last shot shows the driver side quarter after the final (I think) skim coat after I've done the initial pass with the grater and applied some black guide coating. Next will be some 40, 80, and 120 grit on long blocks:

IMG_1123.jpg

One thing I can't figure out is how/why patch panels suck in along the welded seam. If I was running a bead I could understand heat warping the panel but when you're hitting the seam with weld shots spaced at least 4" apart and of less than 1/2 second duration it just isn't making sense to me. I guess I'll have more practice to try and figure it out.

IMG_1115.jpg IMG_1116.jpg IMG_1117.jpg IMG_1118.jpg IMG_1119.jpg IMG_1121.jpg IMG_1120.jpg IMG_1122.jpg IMG_1123.jpg
 
up date please

Hey Joe,

Had trade shows, travel, and selling my house in SF, so work on the Fury has been infrequent at best, but I'll get back to it tomorrow if all goes well.

One thing I've found out since last update is the fact replacement quarters may be available in the next 90 days or so, and if so I'm definitely replacing the passenger side!
 
So I FINALLY got a chance to work on the Fury today and spent the entire day fabbing up the filler pieces for the driver side wheel well. I made the filler strip in two pieces and got the two pieces fitted and tacked onto my newly fabbed outer wheel tub.

Interesting? Probably not so much but progress none the less.

image.jpg

image.jpg
 
It's been a couple weeks since I've posted but I've been busy in that time.

In the previous posts I'd begun work on the driver side quarter panel and wheel house, and progress was moving along pretty good until I had to wait for materials to arrive, so I decided to move to the passenger side and boy, do I wish I had even a LITTLE bit of a clue as to WTF I was doing when I installed that sheet metal. Having learned my lesson on the driver side I looked at the passenger quarter to assess what needed to be done and to my horror I saw a 3/4" - 1" "dip" in the quarter that begins near the front of the wheel arch and extends about 6" - 8" past the rear of the arch. I don't remember being f'd up the day we installed that quarter but I obviously must have been enjoying some 'Goose along the way because this quarter is F'd!

First I cut out a couple inches from the outer wheel house, thus freeing up the quarter (the wheel house was welded to the quarter and sucking it in):


Next I cut vertically from the wheel arch "up" about 6" to allow the metal to be moved outwards, then welded that seam and ground it smooth:


While that helped somewhat I just couldn't get the metal along the body line (see the trim holes along the horizontal body line) to move outwards far enough so I cut out a matching section from my original doors (note the matching body trim holes), lined it up and cut out a section of the quarter. Using the body trim holes as a guide made it really easy to get the body line to match up so I got the patch welded in place. You'll also see a long, narrow strip patched in as well; this is where the original door skin had some rust and I decided to cut it out after the patch was in place.


So everything should be good from here, right? Not with my luck and mediocre (at best) skills! Even after all this work the quarter is still sucked in WAY too far and anyone looking down the side of the car would wonder WTF was going on:


I began the laborious process of literally beating the quarter into submission, I mean into place, by hand. Below is a shot of the quarter after I pounded on it for hours and began blocking the surface to find the highs and lows:


After all this work I've decided I've just been wasting time and I'm going to replace the metal AGAIN, so I'll have shots of that soon.

This last shot shows the driver side quarter after the final (I think) skim coat after I've done the initial pass with the grater and applied some black guide coating. Next will be some 40, 80, and 120 grit on long blocks:


One thing I can't figure out is how/why patch panels suck in along the welded seam. If I was running a bead I could understand heat warping the panel but when you're hitting the seam with weld shots spaced at least 4" apart and of less than 1/2 second duration it just isn't making sense to me. I guess I'll have more practice to try and figure it out.

The panel sucks in because the metal shrinks from the heating and cooling process. Therefore you need to stretch the weld back out. When you put your tacks on. Take a zip cut and knock down the tack until almost flush. The give it a few smacks on dolly and do this as you go along. You will be able to control the distortion way better this way. Keep working the panel this way. Its tedious but works.
 
The panel sucks in because the metal shrinks from the heating and cooling process. Therefore you need to stretch the weld back out. When you put your tacks on. Take a zip cut and knock down the tack until almost flush. The give it a few smacks on dolly and do this as you go along. You will be able to control the distortion way better this way. Keep working the panel this way. Its tedious but works.

Hey Chad,

Thanks for the info; it virtually mirrors some advice I received via PM so I know I'm on the right track now though I am going to wait to see if Stephen's Performance comes good with the replacement quarter panels they told me about. If so then off comes the mangled one and on goes the new.

Thanks again,

Bob
 
Metal work can be so frustrating when skills are low and patience dwindles. Keep at it, that's all you can do.
 
Metal work can be so frustrating when skills are low and patience dwindles. Keep at it, that's all you can do.
VERY accurate statement!

- - - Updated - - -

I got some time to work on the Fury this weekend and was able to finish the wheel tub as well as refine/finish the body work on th driver side quarter. I thought I was finished with the body work on the quarter but it got kind of dinged up while working on the tub.

Here are a couple shots of the wheel tub; I'll get some of the quarter next time.

image.jpg

image.jpg

image.jpg image.jpg
 
Your making headway with that tub for sure. Once you get those quarters fixed up you'll be off to the races!
 
Your making headway with that tub for sure. Once you get those quarters fixed up you'll be off to the races!

Yea, I keep thinking about when I'm finally done with the tubs and quarters: it will be a HUGE milestone.

It's been a while since I've done any updates but I have gotten a bit of work in.

This weekend I got the car all prepped for priming the driver side quarter, mixed up a batch of Matrix 2K primer, but had totally forgotten to check the needle size in my Craftsman gun. The Matrix calls for a 1.8 and my Craftsman has a 1.5 but since I'd already mixed the batch I figured I'd lay down some practice coats IF the primer would flow, but it wouldn't. I mean, it would flow, but so minimally there would be no way to lay down useable coats, so one batch of primer in the garbage. I found the replacement needle sets online and ordered them but they won't be here for about a week; bummer.

Since it was only 11 I decided to spend a couple hours cleaning up the firewall mounts for the front down tubes, which I'd welded in place while I was still haing issues with my electricity, making for uglier than I could accept welds. I got the welds all cleaned up, re-welded them, and called it a day. I forgot to take pix so I'll get some shots next time.
 
I waited until the new needle set for my Craftsman gun showed up and don't you know it the 2.0 needle has been discontinued! Since I now had a 1.7 I figured I'd give it a shot so off to the shop I went.

The 2K primer I'd previously shot looked good from a distance but up close it was obvious it had laid down WAY too dry: the surface was uniform but very rough and dry to the touch. Next step, block and sand the surface smoothin preparation for additional coats with the 1.7 needle.

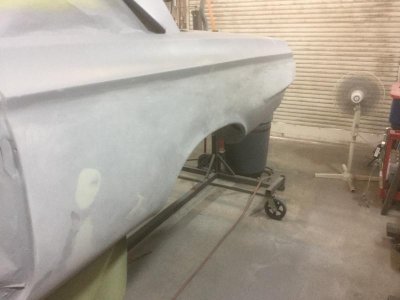
Once I began sanding the overall surface began to look fairly decent though the primer was just to dry and thin to work as a filler, but it felt like I was making progress. Here are a couple shots of the quarter after sanding:

image.jpg

image.jpg

I'd also read on the web where someone suggested removing any internal filters fron your gun to allow the heavy 2K to flow more easily, so I did then mixed up a new batch and began some practicing, and while the 1.7 made a significant improvement I just couldn't get a fan and flow I really liked. Yea, I could get the 2K to flow with a nice pattern but getting the 2K to lay down flat just did not happen; the coating looked like it had light texturing to it, like the 2K wasn't atomizing. I slowed my stroke, adjusted air pressure, adjusted flow, you name it, and while the results were better than the first attempt I just can't imagine this is what the 2K is really supposed to look like when applied.

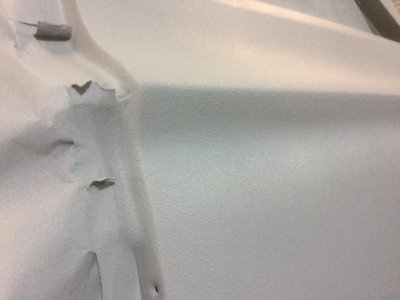
I took a couple pix and in the closeup you can just make out how the 2K laid down:

image.jpg

image.jpg

Thoughts and comments invited.

image.jpg image.jpg image.jpg image.jpg image.jpg
 
Last edited:
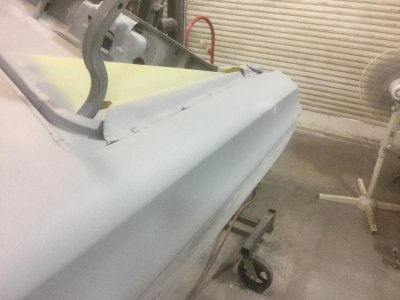
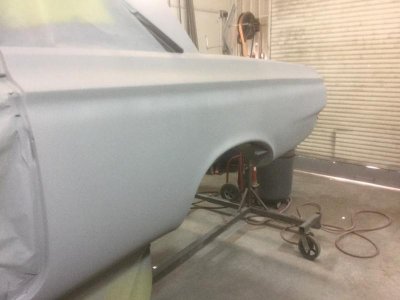
Between work and family I've been working on the Fury, but I've been doing nothing but body work so there's just not much exciting to show. Regardless, here's a couple shots I took today just after priming prior to moving to 220 grit:

image.jpg

image.jpg

After doing some searching I found out the tech people at Matrix are all good with adding 1 part thinner to the mixture, which I've tried, and it really makes a big difference in how well the primer flows and lays down.

Tomorrow it's back to sanding!

image.jpg image.jpg
 
Great to hear that the thinner helped out the 2K primer . . . I'll keep that in mind.

Nice looking progress on the bodywork, that might be in my near future too . . . if I can EVER get done with the rust removal and metal work ! ! !

Like you - I'm taking it one step at a time . . . keep at it Carnal Supply - looking good !
 
Auto Transport Service
Back
Top