• When you click on links to various merchants on this site and make a purchase, this can result in this site earning a commission. Affiliate programs and affiliations include, but are not limited to, the eBay Partner Network.

'64 Fury Pro-Touring

Bob, are you going with a new quarter on the right side? I understand some guys have been buying them now. I think you mentioned you were so it would be good to compare the wheel openings. Glad you're making headway!
 
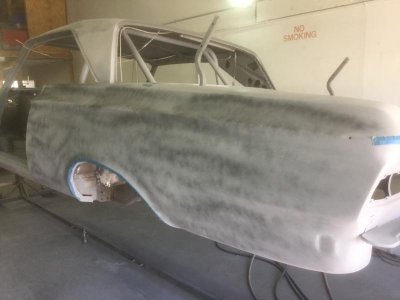
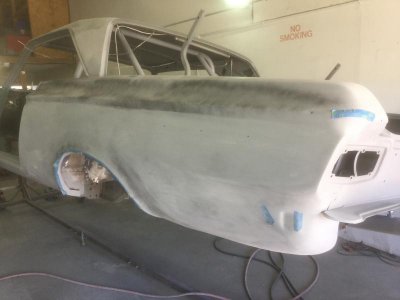
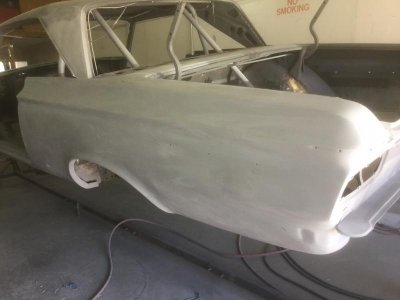
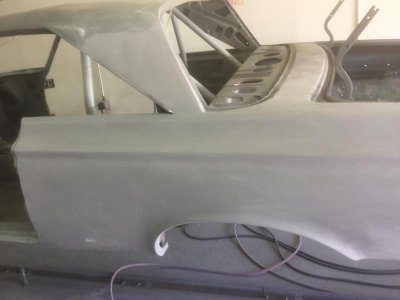
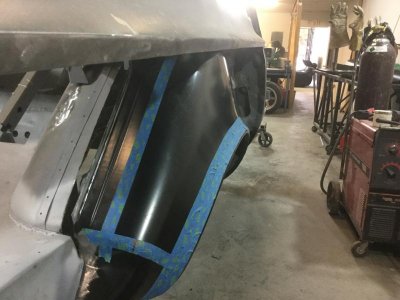
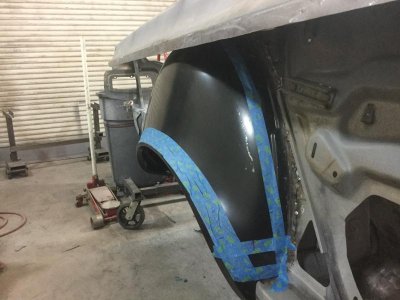
Not very exciting watching paint dry or somebody sanding it but I got to the shop today and did more block sanding. The first pix below shows the quarter panel after I'd completed a round with 220 and laid down some guide coat while the follow on pix shows the quarter after a round of 320.

I had a couple spots near edges where I burned through so I touched them up with 3 coats of 2K primer and will blend them in during the next round (400+ grit).

image.jpg

image.jpg

image.jpg

image.jpg

image.jpg image.jpg image.jpg image.jpg
 
Very nice . . . so THAT'S what a car is suppose to look like ! !

Looking good CarnalSupply - love to see your progress . . . keep us posted.
 
Wow, it's been ages since I got a chance to work on the Fury so I have no idea if anyone is following this thread anymore but I'm still out here and made some HUGE progress today.

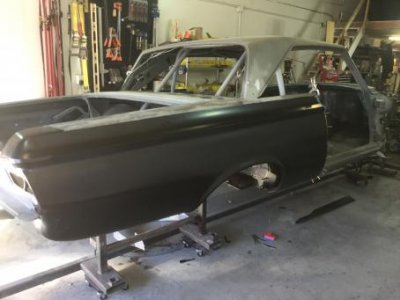
A month or so ago I saw AMD was releasing quarter panels and inner wheel well halves for '64's so ordered a quarter and outer half for the passenger side, cut off the old damaged quarter, and got the new quarter and wheel well hung. I'll take more pix tomorrow after I make more progress:

image.jpg

If my experience is anything to go by then AMD is producing AWESOME pieces for '64's. They're long overdue but the fit and finish are stunning!

image.jpg
 
You're darn tooting that I'm still following your thread ! ! ! What are friends for ! ! !

( go look at my thread . . . there's a Hemi in the Belvvedere ! ! ! )
 
So I made it to the shop today and got the wheel well installed, so next will be the quarter:

image.jpg

image.jpg

image.jpg

image.jpg

image.jpg

image.jpg image.jpg image.jpg image.jpg image.jpg
 
So I might as well ask the question now . . . while you have access to it . . .

Are you going to de-hump the outer-inner wheel well ? ?

( or does it not need to be done as it did in my 67 ? ) - now would be the time if it something that needs to be done . . .
 
Hey Larry,

As far as I can tell the outer wheel well will work as-is but I'll neet to mock up the rear end to make sure; really glad you mentioned it!

More pix and updates to follow.

- - - Updated - - -

Thanks HJ, it's been quite a haul with our business and re-modeling our house, leaving me virtually no free time, but if I can squeeze in a couple hours a week I'll be in the shop.

- - - Updated - - -

Hey Homestead, thanks much; there'll be more to come!
 
Looking great, being fresh releases those quarters outa look pretty good and straight.
 
Looking great, being fresh releases those quarters outa look pretty good and straight.

What'up stranger; how's the HORRIBLE looking Charger of yours, LOL?

Yea, I was VERY happy with the quality of both pieces; I've tried pieces from another company (to remain nameless) and they were absolute junk, so this was a real pleasant surprise; wish they'd have released them years ago.
 
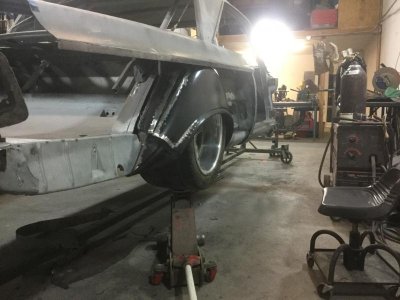
So after talking to Larry/MadScientist/Conv67bdere a bit more about "de-humping" my outer wheel well I went back to the shop, put one of the rear tire/rims on a floor jack and lifted it up into the new wheel well. I actually believe the tire would fit without the "de-humping" but it would be awfully close and I don't think I'd be comfortable with it so I sat there for about 30 minutes, making lots of Vroom Vroom noises, and tried to develop a plan.

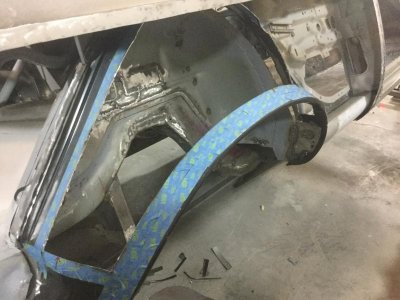
I decided if I cut out the offending part of the wheel well and slid it outward about 1 1/2" I would have WAY more room than I would ever need, so below are some pix with the layout lines:

IMG_1219.jpg

IMG_1220.jpg

IMG_1221.jpg

Once I had the section cut out I found the rear did not need to be moved outward nearly as much as the front, which will make re-assembly much easier . Why? The rear has a bunch of contouring that would be really difficult to blend but since I don't have to move the rear out much I'll be able to blend the patch back in much easier. The pix below show the patch sitting in place and I think you'll get a much better idea of what I'm talking about:
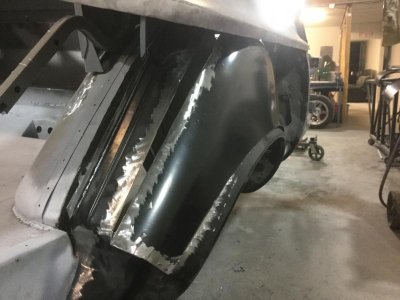
IMG_1222.jpg
Notice how tight the gap is between the patch and the wheel well; that area has a bunch of contouring that will blend together pretty easily since the two surfaces are so close to their original positions.
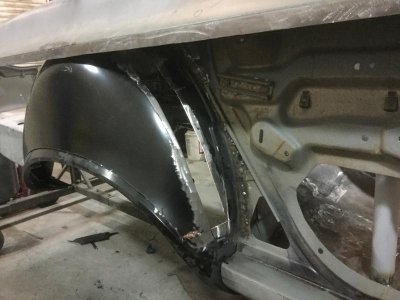
IMG_1223.jpg
You can see how much larger the gap at the front of the wheel well is, but this section will be filled with sheet metal with little or no problem.

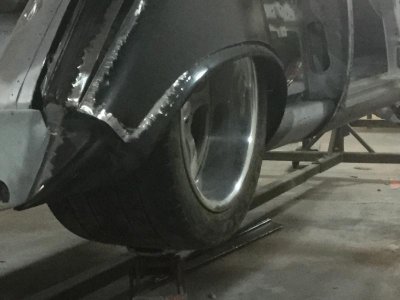
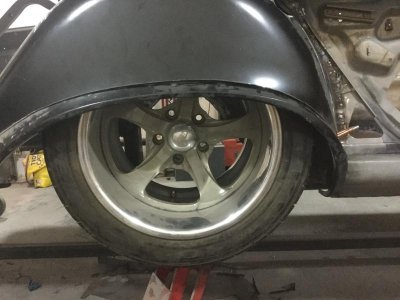
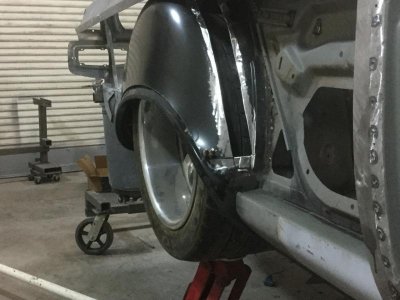
Now comes the exciting part; fitting the tire/rim into the wheel well, and as you'll see, there are definitely no clearance issues even with 335/17's! WooooHoooo, another problem solved!

IMG_1224.jpg

IMG_1225.jpg

IMG_1226.jpg

IMG_1227.jpg

IMG_1228.jpg

As soon as I can get out of the office I'm heading back to the shop to start filling the gaps, so more pix to follow.
IMG_1219.jpg IMG_1220.jpg IMG_1221.jpg IMG_1222.jpg IMG_1223.jpg IMG_1224.jpg IMG_1225.jpg IMG_1226.jpg IMG_1227.jpg IMG_1228.jpg
 
Loving the way those deep dish wheels look and sit in there!

And good job on the Vroom Vroom that's a very important step Fer Racin'!
 
Thanks Goon; I've been practicing my Vroom Vroom skills quite a bit during my down time away from the car.
 
Now CarnalSupply . . .

THAT'S the way to do the "de-humping" of the outer-inner wheel well - from the outside of the panel ! ! !

Because, believe me . . . getting your head up inside the wheel well, with a welding helmet on . . . and molten metal dropping on you . . . is NOT FUN ! ! !

Looking good . . . and the wheels and tires look incredible ! ! ! Whooohooooo ! ! ! !
 
I had a couple hours to work on the wheel well last night so I fabbed up and tacked in the first of four patches. I thought about using only two patches but they'd be twice the length and much more difficult to work with; there's lots of contouring and massaging that has to be done and I figured four shorter pieces would be easier to work with.
Spent very little time on the Vroom Vroom seat though; actually worked the entire time I was at the shop. Sorry about that Goon :)

IMG_1229.jpg

IMG_1230.jpg

IMG_1229.jpg IMG_1230.jpg
 
Works continued on the passenger side wheel house and progressed pretty well.

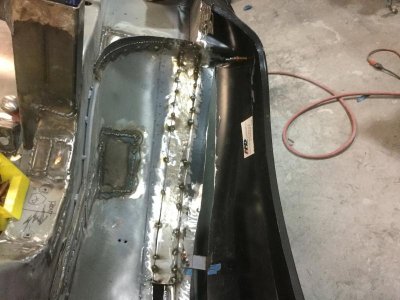
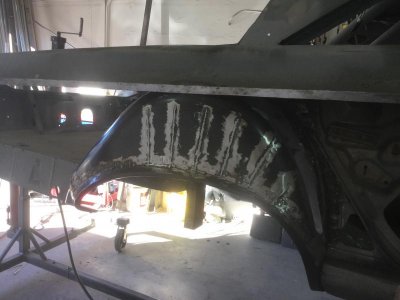
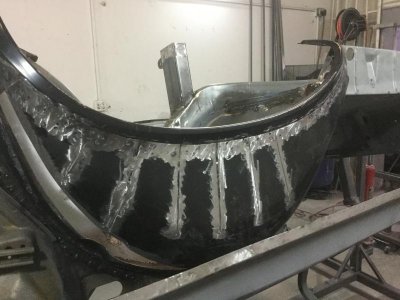
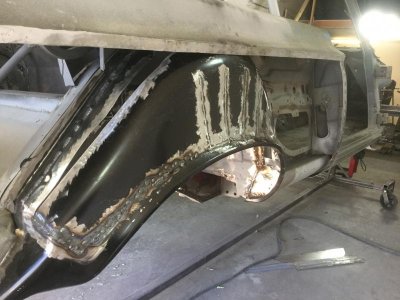
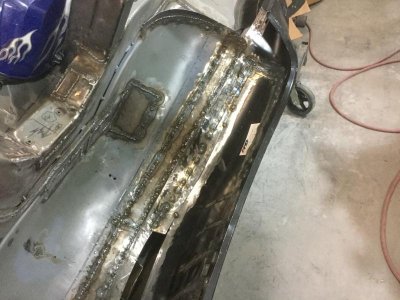
I began by using Cleco's to hold the wheel tub "hump" (that I had previously cut out) in place, about an inch and a half out from the stock location, then made vertical cuts from the lower edge (at the wheel arch) up to within a couple inches of the upper edge.

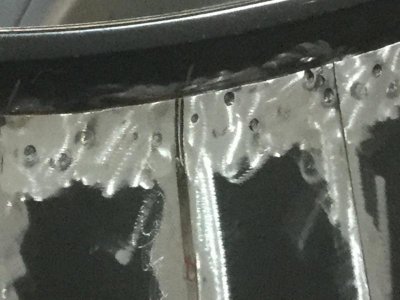
With the cuts made I could massage and contour the metal to get a fairly smooth and natural surface with no buckling or bending. I rolled the rotisserie over so the wheel tub was facing the floor (passenger side down) which gave me perfect access to the wheel tub with my spot welder. Using vice grips along the way to ensure good contact I went ahead and welded all the tabs in place.

IMG_1233.jpg

IMG_1234.jpg

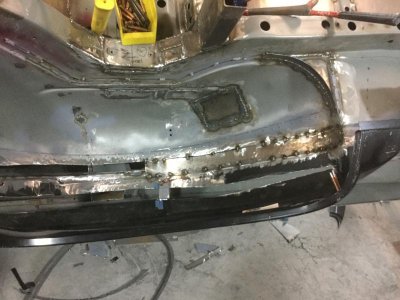
Once I had all the spot welds in place I went back and began welding all the cuts I'd made:

IMG_1235.jpg

IMG_1236.jpg

Once the entire hump was finished I went back to filling the gap between the old wheel well and the hump, so here's a picture of the next to last filler strip in place:

IMG_1237.jpg

Once I complete the last filler strip and dress the welds it will be time to install the new quarter panel. I've now had it on and off the car at least a dozen times and the fit is GREAT, so I'm really looking forward to getting it mounted on the car permanently and moving on to the next stage (which I'm not to sure about exactly what that is?).

IMG_1235.jpg IMG_1233.jpg IMG_1234.jpg IMG_1236.jpg IMG_1237.jpg
 
Auto Transport Service
Back
Top