• When you click on links to various merchants on this site and make a purchase, this can result in this site earning a commission. Affiliate programs and affiliations include, but are not limited to, the eBay Partner Network.

'64 Fury Pro-Touring

Still seams weird seeing it in paint after all of the welding and fab work, car looks amazing! Those first dings are about enough to make you sick, been there.

Hey Dev,

Yea, it feels like a lifetime since I started work on this thing, but hopefully I'll see it through fairly smoothly from here.
Hope all is well for you and your family.
 
Got to the shop today and focused on repairing the corner of the door that broke when the rotisserie unexpectedly spun, so here are a couple shots. Nothing exciting, but I feel like I need to document the good and the bad.

This shot shows the corner of the door after I've ground away the paint, primer, and any filler from both sides of the door:

IMG_0320.jpeg

Once I had a clean area to work with I built a cardboard template of sorts, hot glued it together and lined with wax paper for easier removal. The template replicated the curvature of the door so the plan was to lay one layer of lightweight glass between the template and the door then add a layer of porous matte and several layers of both heavy and lightweight glass from the in/backside of the door (hope that makes sense), so here's the template:

IMG_0322.jpeg


IMG_0323.jpeg

Since fiberglass resin becomes more brittle the faster it cures, and the temps here in Vegas are in the 90's today, I decided to go on the really light side in terms of hardener. My hope is the resin will take a good 18 - 24 hours to cure and leave me with a really durable repair.

Can't get to the shop tomorrow but I'll be there on Friday when I'll get the rest of the front end solidly bolted in place so the painters can do the necessary bodywork on the door, touch up a couple areas, and get to work wet sanding then buffing :bananadance:

 
Been hard at work on the Fury putting it together so it will be a "roller" as opposed to hanging on the rotisserie. This will allow me to get the car home and out of the shop, saving me from having a monthly bill for shop space.
Here's what I've been up to.

The door damage got repaired and repainted so I re-installed it, then moved on to the fenders. I was using the original bolts for mounting the fenders when I ran across the bitchin' Phosphate coated 12-point bolts (with matching washers). Wherever a bolt head can be seen I'll be using these instead of standard 6-points. I'll get some pics of them installed.

IMG_0381.jpeg

Here's a shot of the front end back in place:

IMG_0394.jpeg

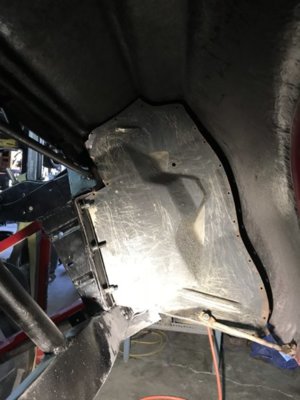
After the doors and fenders were installed it was time to try and get the inner fender shields mounted. Knowing the SC fiberglass fenders were a friggin' mess I had no doubt the shields would be a mess to install, and I was right, but regardless, they're in and solid:

IMG_0389.jpeg


IMG_0390.jpeg

With the shields installed I could focus on the front suspension, which went together really well save for one issue: when I originally fabbed up the front sway bar arms I didn't install the coils on the shocks, and they now appear to be a bit long and make contact with the springs. No big deal, I can trim the ends of the arms and/or shorten them with no real trouble. Regardless, here are some pics of the suspension in place:

IMG_0392.jpeg


IMG_0393.jpeg


IMG_0395.jpeg

I have no idea why the pic below keeps showing up, I can't seem to delete it no matter what I do.
IMG_0391.jpeg
 
I've had lots of time in the shop over the last week and I wanted to get the Fury off the rotisserie and on the ground but I didn't quite make it, but I made LOTS of progress, so here are some pix.

I got the front suspension completed, brakes and all:

IMG_0397.jpeg


IMG_0398.jpeg


IMG_0399.jpeg


IMG_0400.jpeg

No worries, the suspension is at full droop, the finished ride height will have the top of the tire right around the wheel opening.

After getting the front end completed I moved to the rear and started by installing the truck arms, then slid the 9" into place.

IMG_0401.jpeg


IMG_0402.jpeg

 
After sliding the 9" into place I tried to install the rear coil-overs, but found the truss I'd welded onto the rear-end was now interfering with the coil springs! Duhhhhh, I never thought to check for interference after adding the truss, so I marked where the truss needed to be scalloped and started cutting. These next two shots show the scallop before I finish welded and painted them:
IMG_0404.jpeg


IMG_0405.jpeg

After finishing up the scallops I got the rear-end in place with the lowering blocks in place and hanging from the coil-overs:
IMG_0406.jpeg

Next came the Watts Link. In hindsight I know I could have used a Panhard Bar instead of the Watts Link, and it would have been MUCH easier, but I love the precision of the Watts Link, the rear-end is rock-solid in the middle of the chassis and will never vary from side to side like a Panhard Bar does when it arcs through the suspension travel.
IMG_0423.jpeg

The rear sway bar followed the Watts and it went in without any difficulties:
IMG_0425.jpeg

Next came the floating hubs. These things (as well as the 9" rear-end and axles) came from Coleman racing, and they are absolutely stunning pieces of machining artwork! They include 2 massive bearings for each hub that ride on a stub axle welded to each end of the 9" housing. If you look at the picture above you can just see the raw metal stub axle on the left side, just above the end of the sway bar.
The hub slides on the stub axle then a special "star" (?) washer goes on, and that locks the axle nut in place:
IMG_0426.jpeg


IMG_0427.jpeg

I have NO idea what size the nut is, but it's HUGE! I don't have a socket big enough and you can't get a large Crescent wrench inside so I took an old socket that was really close to the same OD as the nut and welded 3 heavy metal tabs onto it. When you line up the tabs to the slots in the nut the hold the socket securely in place and all me to tighten the nut. Here's my handy-work:
IMG_0428.jpeg

I didn't get the car on the ground like I wanted but it's not too far away so I'm really pleased with my progress.
 
Looking good Bob. I'll try to come by next month to eyeball it when I come in for SEMA.
 
Bob, I'll be rolling in on monday afternoon, leave saturday morning. Not sure how long it will take to get there since my route changed with our move to the central coast. I have your number and will jingle you up when I get there.
 
Bob, I'll be rolling in on monday afternoon, leave saturday morning. Not sure how long it will take to get there since my route changed with our move to the central coast. I have your number and will jingle you up when I get there.
Look forward to hearing from you, safe travels.
 
You've been very busy!!! I'm loving it, brakes, suspension and everything else is looking great:thumbsup:. Now I'm itching to see a full picture of it at ride height:popcorn:.
 
You've been very busy!!! I'm loving it, brakes, suspension and everything else is looking great:thumbsup:. Now I'm itching to see a full picture of it at ride height:popcorn:.
Hey Dev,

Great to hear from you, hope all is well.

Yea, the progress has been going really well and I'm about to post a new update; I think you're going to like what you see.

Take care,

Bob
 
It's been a couple weeks since I posted any progress pix but I've been working on the Fury full-time virtually every day (being unemployed has its benefits) and making killer progress, so here are a couple posts with updates (can't upload too many pix with a single post):

The first major breakthrough came last week when I finally got the car off the rotisserie (which is for sale), which went really smoothly save for a single mishap that chipped the paint on the trunk, but at this point it's no big deal, I was just thrilled to have the car on jack-stands.

IMG_0432.jpeg

With the car on jack-stands I could start adding components, so I started with the core support, radiator, remote oil filter, Accu-sump, and grill support. Everything went to plan though as usual the quality and fitment of the fiberglass made it a much more difficult chore than it should have.
One thing I did have to alter was the plumbing for the Accu-sump. I originally planned to have the lines run along the outside of the frame rail towards the remote oil filters but the lines interfered with the tire, so I added a 90 degree fitting and will route the lines along the inside of the frame rail. It turns out to be a much better option in the end so I'm happy with how it turned out.

IMG_0434.jpeg

I moved on to something I've feared for a long time, mounting the headlights, but it actually worked out really well. I bought a $30 Dremel knock-off from Amazon and used a really small bit to cut out square holes so I could insert the plastic clips. Luckily, this is one thing the fiberglass guys actually did right; they pre-drilled the holes for the headlight buckets so I didn't have to guess as to where to make my square holes. I know it seems ridiculous, but just seeing progress like this makes me that much more enthused to get'r done! Here are some shots as I made progress:

IMG_0435.jpeg


IMG_0436.jpeg


IMG_0437.jpeg

Assembling the Fury brought back a flood of memories from when I disassembled it. Aside from all the rust and body-filler the seller used when he put this hacked up POS together, the Fury was assembled with odds and ends, with clips, nuts, bolts missing everywhere, so I'm basically having to make daily trips to my supplier to get what I need, or worse yet, manufacture it when nothing is available. Then there are those things you'd NEVER consider, like the fiberglass being so thick the threaded end of the clips that secure the headlight surround trim won't protrude far enough to get a nut on the end! WTF? Yea, and my wife wonders why this thing takes so long to make any progress! Oh, and even though you need 4 clips, of course my Fury only has 3 and you can't buy the one you need! I got some threaded couplers, chucked them in my drill, and as they spun in my drill I used a flap disc on my angle grinder to turn them down (in diameter) and smooth them out (poor mans lathe). I cut off the majority of the threaded part of the clip, screwed on the coupler, then added an inch of all-thread. New "long reach" clips, and all it cost was $5 and 3 hours of F'n around!

IMG_0441.jpeg


IMG_0442.jpeg


IMG_0443.jpeg


These next couple of pix belong with the prior post but I didn't have enough room to upload the pictures.
Once the headlights were in place and all the trim attaching issues were remedied I got the entire grill and headlight surround assembly installed. I can't begin to tell you how happy this made me!
The grill and headlight surrounds are in decent shape but when the money is available I'll probably pull them, have them stripped and re-anodized, but for now, it's all good!

IMG_0444.jpeg


IMG_0447.jpeg

This next series of pictures are ones I've been waiting 12 long years to take: the Fury is on the ground and sitting on its own suspension!
The ride height is awesome and the tires/wheels are beautifully tucked up and in. I can't wait to see it with the engine/trans in place so the nose drops a bit more, adding a slight nose-down stance. Hope you like it.

IMG_0449.jpeg


IMG_0452.jpeg

Yep, 335's tucked underneath the quarters with TONS of room to spare, and yes, I have to unbolt the rear coil-overs and lower the diff away from the car to get the tires mounted, but it's a VERY small price to pay for the look I'm after.

IMG_0450.jpeg

I took these pictures before I removed one lowering block from each side, changed the links for the sway bar, and adjusted the coil-over heights. These changes did the following:
  • Raised the rear of the car 1 - 1 1/2", giving the car a bit of the rake I want
  • Raised the front end of the sway bar ends so they are now higher and above the height of the truck arms
  • Took out the "tilt" in the car

IMG_0451.jpeg

My nickel-copper brake line showed up today so I'll be ordering my Wilwood master cylinders, and while I'm waiting for those to arrive I'll start getting the wiring laid out.
 
Oh my.... that is just badass, the grill, stance, rims, rear tire size... everything!:thumbsup:
 
Been working quietly behind the scenes collecting pieces and parts for both the electrical and braking system, all the while still working away, focusing mainly on the electrical system.
The AAW harness and fuse block I'm using really seems to be of nice quality, I'm very pleased, though their instructions are about as basic as you can get. It would be nice to see AAW spend a bit more time in detailing exactly what's going on (for instance, is a circuit switched 12V or always hot). Don't get me wrong, if I can figure it out most anyone should be able to, but as I said, a bit more detail would be nice.
I spent the better part of 2 days getting the fuse/relay panel installed and the wires routed out of the fuse block the way I want; the fuse block, as delivered, has all the wires coming out the bottom of the block, but I prefer having the wires coming out of the sides or top, thus keep them tucked up and out of site, and if you've ever tried to re-route wires out of a fuse block then you'll know why it's a slow, tedious process (but worth it).
Regardless, here's a picture of the panel, in place, with the relay trigger, ground, and power wires in place (wiring to devices comes next), as well as the wires coming out of the fuse block as I want/prefer:

IMG_0455.jpeg

The panel is in the center of the car, above the tunnel and below the wiper motor. Living in Vegas I have no intentions of running a heater, aside from the fact the seats are heated, and if I run an A/C system it will be a retro-looking under-dash unit.

More updates and pix to follow.
 
I also used one of their harnesses, I gave up on getting any meaningful help from them and figured it out on my own... if you have any questions feel free to ask. One thing to always double check is some of the accessories, some like the electric fan circuit are fairly small wires, I only used them to wire the control side of the circuit then added relays tied directly to the battery to actually power the fans. I was very happy with mine but as you said about the instructions..... gotta figure it out on your own.
 
Auto Transport Service
Back
Top