You are using an out of date browser. It may not display this or other websites correctly.
You should upgrade or use an alternative browser.
You should upgrade or use an alternative browser.
'64 Fury Pro-Touring
- Thread starter carnalsupply
- Start date
"Sweet" congrats and way to go 68GTX440 on the help. Sometimes it ends up being something simple. Enjoy
X2 - "Sweet" congrats and way to go 68GTX440 on the help.
This is the greatest group on the internet - and everyone seems willing to lend a hand when needed ! ! !
Can't wait for the building to get re-started ! ! !
( so . . . did the extension cord get the boot ? ? )
Doright
Well-Known Member
Well I'm glad you figured it out now I'm free to go do last minute shopping and spend a little extra Time with my Friend Howard over at Vegas Machine. Maybe I can see the car another time.
carnalsupply
Well-Known Member
Any time you want to come by to see the Fury I would love to have you. Since moving to Vegas I have yet to meet any other car peeps so this hiccup has turned into a wonderful opportunity as opposed to a problem.
Shoot me a PM and we'll set something up.
Shoot me a PM and we'll set something up.
Well I'm glad you figured it out now I'm free to go do last minute shopping and spend a little extra Time with my Friend Howard over at Vegas Machine. Maybe I can see the car another time.
Herr_Poopschitz
Well-Known Member
Excellent to hear you've gotten the welder sorted.
Is this being built to drive across the country, or car shows, or autocross/open track events?
Only thing I see that might be a potential issue is there seems to be a lot of flat sheet metal - firewall and floor specifically. Some beads in some of that acreage, for strength/vibration resistance, might prove worthwhile.
I may have missed it in skimming the thread...is the exhaust affixed to the frame rail (only thing I could figure that would necessitate the flex joints)? How do you plan on dealing w/ heat?
Otherwise everything looks good. Love the Watts and the ds/trans tunnel.
carnalsupply
Well-Known Member
I don't want to beat on the "welder issue" any longer but I did want to post the video 68GTX and I shot last night after diagnosing the problem, so I invite you to compare this video against the one I posted a couple days ago; the difference is immediately apparent just by the sound.
- - - Updated - - -
Hallo Mein Herr,
Before anything else, I LOVE the screen name!
The car was originally supposed to be just a nice muscle car used for jackpotting around, nothing special, but with the way it spiraled out of control the car became far more hardcore in nature. That doesn't mean I'm planning on tons of track time, though it may see some, but there just wasn't enough left of the car to validate a concourse restoration type of a build, and building a raw "race" type car is far easier than building a numbers matching car. Hell, it turns out the car isn't even a Sport Fury, just a run-of-the-mill Fury, so what kind of value could/would there be in a numbers matching car? I also had to take into account sitting around car shows with a car I'm reluctant or afraid to thrash just isn't my style.
I agree with you on the bead rolling but just haven't had the resources to invest in a roller, so lots of solid mounted materials (the floor is SERIOUSLY mounted to the frame rails) and lots of sound deadening, but I have no illusions this thing is going to rattle me teeth. As for the firewall, now that I have the replacement cowl in place I'm unsure of exactly how the firewall is going to look. It may be the same or similar to what I showed earlier in the thread or it may be totally different, I just don't know, but that should change shortly.
The exhaust is 3" stainless, runs directly through the frame rails (there's an Art Morrison chassis under the car), and is solidly mounted to the frame where it passes through, hence the use of the flexible joints. Again, I have no illusions this thing is going to be quiet, cool, or calm to drive, but then again, it's not my every day car.
As for heat, there are some amazing coatings/barriers out there nowadays, including the Lizard Skin products, one of which is for sound deadening and one for heat reflection. I watched a demo on TV where they coated 1/2 of an electric frying pan with the heat treatment and left the other half un-coated, turned on the frying pan, let it get hot, then put an ice cube on each half. The un-coated side melted away in a couple seconds while the coated side literally just sat there with just a trickle of melted water. After seeing that I plan on using it, as well as some of the adhesive backed materials available, to keep things somewhat calm in terms of heat and noise.
LOL, the Watts Link reminds me of something that happened this past weekend; my wife and I were driving along and came up behind a Dodge Durango, and low and behold the thing had a Watts Link under it, so while I'm following it I'm giving my wife a play-by-play of how the link works and what it's intended function is. Yeah, she's a big racing fan and likes cars, but I vividly saw her looking at me like I was talking in some alien language. Guess you had to be there, but amusing.
The trans tunnel was a BITCH! I thought it'd be a piece of cake but with all the various angles (vertical, horizontal, and everything in between) it was WAY more work than I ever expected. I've got lots of little areas of the tunnel to finish up but overall there's not much more to do to it.
Take care.
[video=youtube_share;jLExTGPJveQ]http://youtu.be/jLExTGPJveQ[/video]
- - - Updated - - -
Hallo Mein Herr,
Before anything else, I LOVE the screen name!
The car was originally supposed to be just a nice muscle car used for jackpotting around, nothing special, but with the way it spiraled out of control the car became far more hardcore in nature. That doesn't mean I'm planning on tons of track time, though it may see some, but there just wasn't enough left of the car to validate a concourse restoration type of a build, and building a raw "race" type car is far easier than building a numbers matching car. Hell, it turns out the car isn't even a Sport Fury, just a run-of-the-mill Fury, so what kind of value could/would there be in a numbers matching car? I also had to take into account sitting around car shows with a car I'm reluctant or afraid to thrash just isn't my style.
I agree with you on the bead rolling but just haven't had the resources to invest in a roller, so lots of solid mounted materials (the floor is SERIOUSLY mounted to the frame rails) and lots of sound deadening, but I have no illusions this thing is going to rattle me teeth. As for the firewall, now that I have the replacement cowl in place I'm unsure of exactly how the firewall is going to look. It may be the same or similar to what I showed earlier in the thread or it may be totally different, I just don't know, but that should change shortly.
The exhaust is 3" stainless, runs directly through the frame rails (there's an Art Morrison chassis under the car), and is solidly mounted to the frame where it passes through, hence the use of the flexible joints. Again, I have no illusions this thing is going to be quiet, cool, or calm to drive, but then again, it's not my every day car.
As for heat, there are some amazing coatings/barriers out there nowadays, including the Lizard Skin products, one of which is for sound deadening and one for heat reflection. I watched a demo on TV where they coated 1/2 of an electric frying pan with the heat treatment and left the other half un-coated, turned on the frying pan, let it get hot, then put an ice cube on each half. The un-coated side melted away in a couple seconds while the coated side literally just sat there with just a trickle of melted water. After seeing that I plan on using it, as well as some of the adhesive backed materials available, to keep things somewhat calm in terms of heat and noise.
LOL, the Watts Link reminds me of something that happened this past weekend; my wife and I were driving along and came up behind a Dodge Durango, and low and behold the thing had a Watts Link under it, so while I'm following it I'm giving my wife a play-by-play of how the link works and what it's intended function is. Yeah, she's a big racing fan and likes cars, but I vividly saw her looking at me like I was talking in some alien language. Guess you had to be there, but amusing.
The trans tunnel was a BITCH! I thought it'd be a piece of cake but with all the various angles (vertical, horizontal, and everything in between) it was WAY more work than I ever expected. I've got lots of little areas of the tunnel to finish up but overall there's not much more to do to it.
Take care.
Excellent to hear you've gotten the welder sorted.
Is this being built to drive across the country, or car shows, or autocross/open track events?
Only thing I see that might be a potential issue is there seems to be a lot of flat sheet metal - firewall and floor specifically. Some beads in some of that acreage, for strength/vibration resistance, might prove worthwhile.
I may have missed it in skimming the thread...is the exhaust affixed to the frame rail (only thing I could figure that would necessitate the flex joints)? How do you plan on dealing w/ heat?
Otherwise everything looks good. Love the Watts and the ds/trans tunnel.
Doright
Well-Known Member
That welding ground you have that's the one they supply with the welder when they are sold new.
They put the same grounding clamps on the smaller Miller welders, Reps I have all talked too say to get rid of that ground and get a good heavy duty one.
Not saying that that was your problem or is a Problem, Just that most Welders prefer a better ground clamp.
I didn't think it would make much of a difference but I was wrong a Good ground is a Must.
I have replaced the clamps on two of my welders and still need one more to do the 3rd one.
The Corrosion on the Wire in the spool I was talking about....
OK well all these spools are shipped in plastic bags to keep the Moisture out so the wire wont corrode well after you leave a spool on your welder for how long? I think you said 3 years??? between that your gas was that old as well then you got bottle refilled.
Any way take several feet of wire off machine hold one end and grip it firmly with other hand drag your fingers down the wire if any rusty or not smooth you will feel the corrosion on the wire the corrosion travels down the Mig guns hose inside is a Metal liner that liner gets covered with all that corrosion dust and has no where to go except building up inside the liner causing drag on the wire which messes up the machine while trying to weld. also the Liner can and does get bent and Kinked right at the end as it comes out of the machine. at least it does on My Miller Machines.
Another thing about this Magic liner deal its Part of your Pos connection and if the steel liner is covered in corrosion it cant make contact to the wire no contact no POS no POS no weld no weld = unhappy welder
The liners are made to take apart and be replaced It probably wouldn't hurt to take it out and Blow it out with air and some contact cleaner Especially on an Older used welder or one that sits and collects dust more than it gets used I don't mean that in a bad way either my machines sit more than they get used too we just not full time welders.
By the way if I knew for a fact that the wire was old like 3 years+ old and it hadn't been bagged I would have just pitched it and bought a new spool I wouldn't have even messed with it.
Welding is hard enough I don't need to be putting corrosion into my welds to boot!
68GTX440
Well-Known Member
Carnal it was great to meet you and I am very happy I could lend a helping hand to make things work for you.
Just as I was thinking it was a power issue and not the welder. He does have a nice welder and everything looked good. Can't remember if the main power was a 12 or 10 gauge but the ext cord was an 8 gauge and that alone can create issues. But the main thing is everything is now good so he can get back to the hardcore build that he is doing. The project still has a long ways to go but will be real nice when done. Maybe after our talks we can do some of the things we discussed and our projects can be done side by side and help each other out on each others car. Mine is just about ready for sand blasting. I will be updating my project page with pics in the next couple of days.
Just glad I could be of assistance
carnalsupply
Well-Known Member
Hey DoRight,
No worries, your advice is VERY well taken and I will be checking the spools for corrosion and ensuring the gun/line is clean and clear.
Appreciate all the input and hope to hear from you when you head over the hump to LV.
Have a wonderful Christmas.
No worries, your advice is VERY well taken and I will be checking the spools for corrosion and ensuring the gun/line is clean and clear.
Appreciate all the input and hope to hear from you when you head over the hump to LV.
Have a wonderful Christmas.
That welding ground you have that's the one they supply with the welder when they are sold new.
They put the same grounding clamps on the smaller Miller welders, Reps I have all talked too say to get rid of that ground and get a good heavy duty one.
Not saying that that was your problem or is a Problem, Just that most Welders prefer a better ground clamp.
I didn't think it would make much of a difference but I was wrong a Good ground is a Must.
I have replaced the clamps on two of my welders and still need one more to do the 3rd one.
The Corrosion on the Wire in the spool I was talking about....
OK well all these spools are shipped in plastic bags to keep the Moisture out so the wire wont corrode well after you leave a spool on your welder for how long? I think you said 3 years??? between that your gas was that old as well then you got bottle refilled.
Any way take several feet of wire off machine hold one end and grip it firmly with other hand drag your fingers down the wire if any rusty or not smooth you will feel the corrosion on the wire the corrosion travels down the Mig guns hose inside is a Metal liner that liner gets covered with all that corrosion dust and has no where to go except building up inside the liner causing drag on the wire which messes up the machine while trying to weld. also the Liner can and does get bent and Kinked right at the end as it comes out of the machine. at least it does on My Miller Machines.
Another thing about this Magic liner deal its Part of your Pos connection and if the steel liner is covered in corrosion it cant make contact to the wire no contact no POS no POS no weld no weld = unhappy welder
The liners are made to take apart and be replaced It probably wouldn't hurt to take it out and Blow it out with air and some contact cleaner Especially on an Older used welder or one that sits and collects dust more than it gets used I don't mean that in a bad way either my machines sit more than they get used too we just not full time welders.
By the way if I knew for a fact that the wire was old like 3 years+ old and it hadn't been bagged I would have just pitched it and bought a new spool I wouldn't have even messed with it.
Welding is hard enough I don't need to be putting corrosion into my welds to boot!
That's pretty awesome of you to take the time to get it straightened out :yourock: "extension cords and welders don't mix very well".Carnal it was great to meet you and I am very happy I could lend a helping hand to make things work for you.
Just as I was thinking it was a power issue and not the welder. He does have a nice welder and everything looked good. Can't remember if the main power was a 12 or 10 gauge but the ext cord was an 8 gauge and that alone can create issues. But the main thing is everything is now good so he can get back to the hardcore build that he is doing. The project still has a long ways to go but will be real nice when done. Maybe after our talks we can do some of the things we discussed and our projects can be done side by side and help each other out on each others car. Mine is just about ready for sand blasting. I will be updating my project page with pics in the next couple of days.
Just glad I could be of assistance
Doright
Well-Known Member
Its just were I have found problems with my machines over past couple years.
I am by no means any sort of welder lots more people know lots more than me!
I'm just learning myself, self taught mostly with some formal training.
Im trying to master my Tig wich is er um ah errr a pain in the u know what
I read and read and practice and I need a LOT more practice! lol plus im going blind cant see squat any more very frustrating.
Lets just say I cant do a stack of dimes yet, stack of gobbled goop im good at! lol!
carnalsupply
Well-Known Member
I've met "stacked gobbly gook" and he's certainly not on my Xmas card list!
As for TIG: knowing the problems I've had MIGging, can you imagine the thread I'd have to start if I attempted TIG welding? LOL!
Looking forward to meeting you when you get over the hump, so by all means PM me before you head over.
As for TIG: knowing the problems I've had MIGging, can you imagine the thread I'd have to start if I attempted TIG welding? LOL!
Looking forward to meeting you when you get over the hump, so by all means PM me before you head over.
Its just were I have found problems with my machines over past couple years.
I am by no means any sort of welder lots more people know lots more than me!
I'm just learning myself, self taught mostly with some formal training.
Im trying to master my Tig wich is er um ah errr a pain in the u know what
I read and read and practice and I need a LOT more practice! lol plus im going blind cant see squat any more very frustrating.
Lets just say I cant do a stack of dimes yet, stack of gobbled goop im good at! lol!
68GTX440
Well-Known Member
Just happy to be able to help and meet another Mopar owner that shares the same love for cars that I do.
That's pretty awesome of you to take the time to get it straightened out :yourock: "extension cords and welders don't mix very well".
Lets just say I cant do a stack of dimes yet, stack of gobbled goop im good at! lol!
Hee hee . . . sounds like you're talking about some of "my" welds now ! ! ! ( smile ) Gobbled goop about sums it up ! !
Still trying to work toward the stacked dime look . . . ( sigh )
Doright
Well-Known Member
Hee hee . . . sounds like you're talking about some of "my" welds now ! ! ! ( smile ) Gobbled goop about sums it up ! !
Still trying to work toward the stacked dime look . . . ( sigh )
Ya some day I keep Practicing I used to be a pretty good Gas welder 20+ years ago and even used to do some Tig / Heli-arc back then but I'm way out of practice now days and Its the type of equipment that you need to be using every day to stay good at.
Welding gas has gotten so expensive now days I cant afford to just burn it up practicing.
Speaking of Gas Im still looking for a few more Big bottles
carnalsupply
Well-Known Member
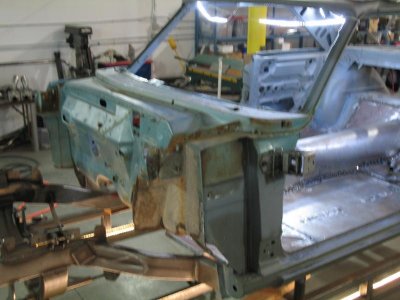
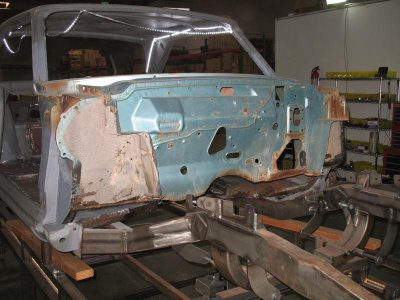
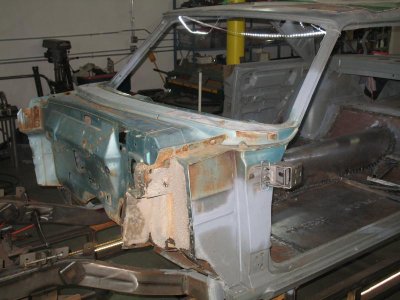
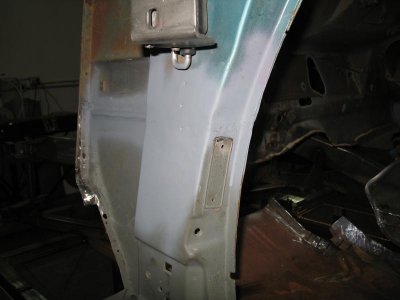
It seems like ages since I last got to work on the Fury, and that's probably because it has been, but I finally got some time and finished up the cowl replacement. Now that the cowl is in place I'll move on to the firewall and the front floor extensions. Nothing too tough with the firewall, I've already got it completed (from before I replaced the cowl) but it is somewhat tricky getting the existing firewall cut away due to the airbox tucked just below the cowl vent. On my original cowl I simply cut the airbox away but this time I'm going to try and save it. We'll see.
carnalsupply
Well-Known Member
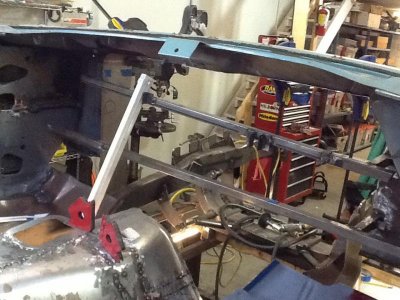
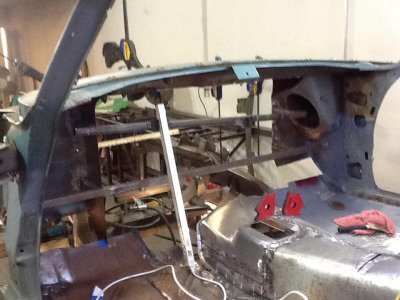
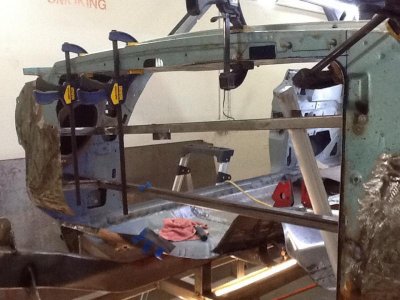
So I finally got back to work on the Fury (at the new shop) and figured I'd get the firewall completed so I could finally get the car off the chassis plate if I wanted to do so, but in getting back to it I decided not to go with the setup I put together a couple years ago and started fresh.
I found a great article online that gave me some terrific ideas that really helped, especially the square tube bracing that outlines the overall size of the setback as well as giving me some support while I fabricate; here's the link:
http://www.customclassictrucks.com/techarticles/1311_1956_chevy_pickup_firewall_fabrication/
- - - Updated - - -
Oh yea, I would be a total dumbass if I didn't throw out my sincere thanks to Ed, 68GTX440 and his son Josh. I had to find and put together a new shop (that's why my build has been so quiet lately) and they took time out of their weekend to come down and help me with the nightmarish electrical situation, and wow, it took HOURS, but now all my 110 and 220 needs are met with no issues.
Thanks much fellas.
- - - Updated - - -
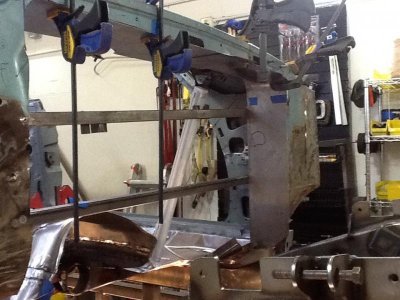
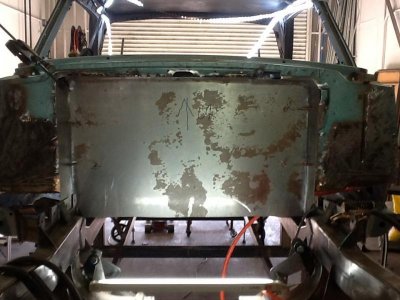
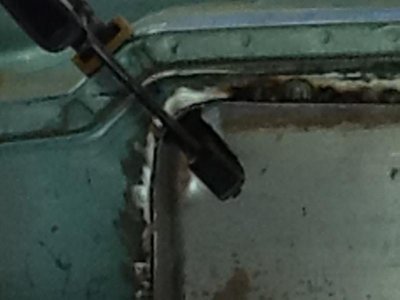
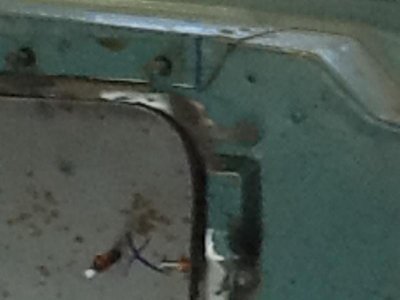
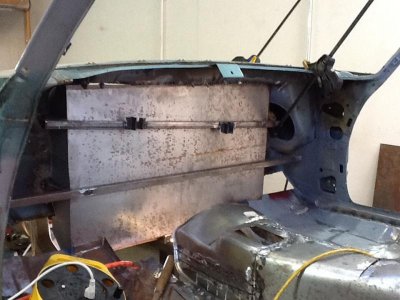
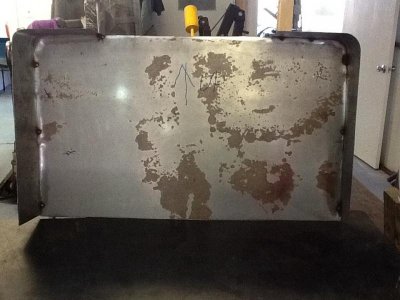
The previous couple of pix were taken this past weekend so here are some follow-up shots from this week, and the last couple of days at the shop have been REALLY productive; the firewall is nearing completion and I hope to have it solidly mounted by this weekend.
Here are some shots of the 3 pieces that make up the setback, both mocked up in the car and a final picture taken after I'd tackerd all the pieces together and pulled them out for final welding.
One area I'm really pleased with are the upper corners where I used a 3" radius as opposed to simply using a 90 degree/square corner. To make smooth, consistent radius bends in the sheet metal I fabbed up a table top bender utilizing a 36" long piece of exhaust tubing and a couple of bolts and nuts to hold it firmly against the table. I slide the metal between the table top and the tubing, tighten down the nuts just enough to apply even pressure downwards against the sheet, then apply upward pressure on the sheet, forming a bend around the tubing. To vary the radius I can change the tubing diamter or move the sheet in and out of the "throat" while applying pressure. If anyone wantts a picture let me know.


rapidtransitric
Well-Known Member
coming along nicely bob. keep it coming
carnalsupply
Well-Known Member
Work continues on the firewall, moving ahead really nicely.
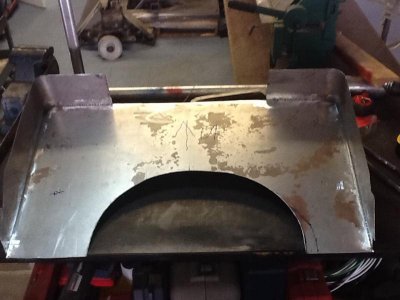
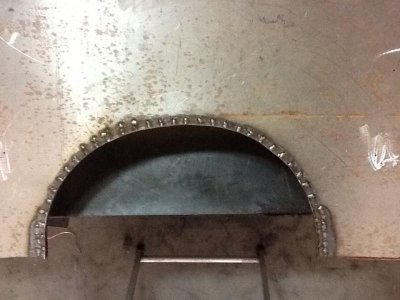
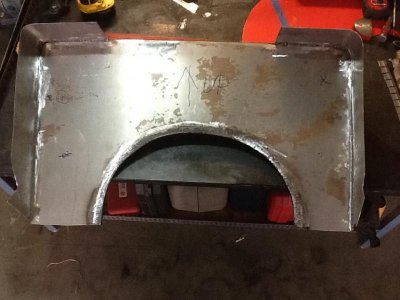
Today I needed to put the final touches on the firewall set-back prior to the install, including radiusing the bottom to fit around the bell housing and flanging that radius once it was cut. Easy enough but it did necessitate installing the engine/trans combo.
Here are some shots of the firewall set-back now that it's done:
I know it's tough to see but I used a 1" wide by 36" long piece of 16 gauge to create the 90 degree flange i(n my sheet metal break) then used my spot welder to weld the flange to the firewall. Once the set-back is welded in place I'll be in a great position to finish off the floors and trans tunnel.


