• When you click on links to various merchants on this site and make a purchase, this can result in this site earning a commission. Affiliate programs and affiliations include, but are not limited to, the eBay Partner Network.

'64 Fury Pro-Touring

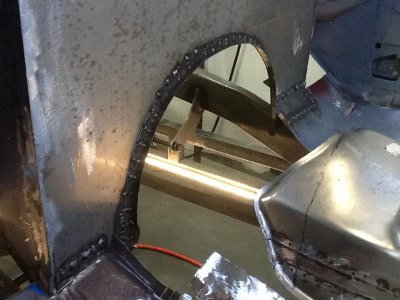
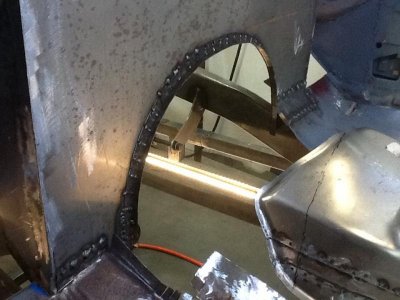
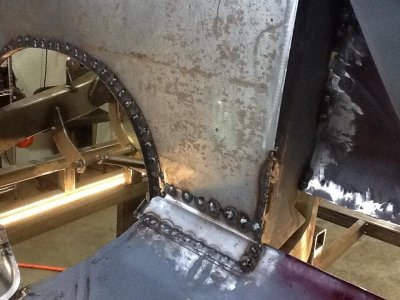
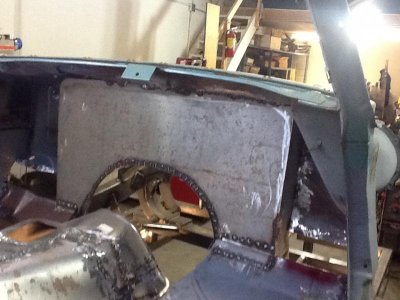
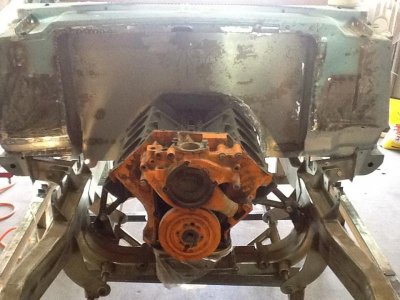
Today I reached a milestone; the firewall set-back is permanantly in place so now I can move on to pedal, seat, and steering column placement, as well as finishing the floor and tunnel, all of which had to be held off until I finished the set-back.

I have to admit, I have really had doubts over the years, wondering if I would ever actually get to this point, but now that I have I feel totally energized about pushing forward and can't wait to get to the shop every day.

Here are some shots of the completed firewall, though final welding will wait for the car to be mounted on the rotisserie so I can get easy access and not have to weld upside down, etc.
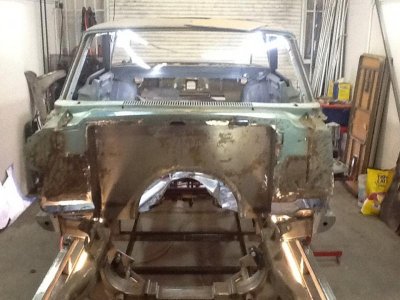
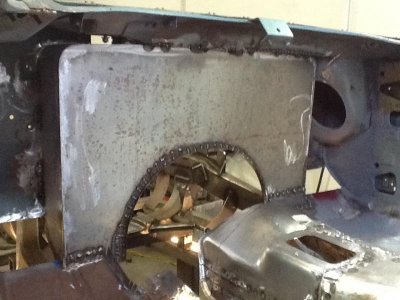
image.jpg

image.jpg

image.jpg

image.jpg

image.jpg

image.jpg image.jpg image.jpg image.jpg image.jpg image.jpg
 
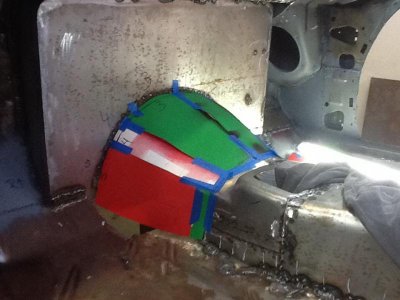
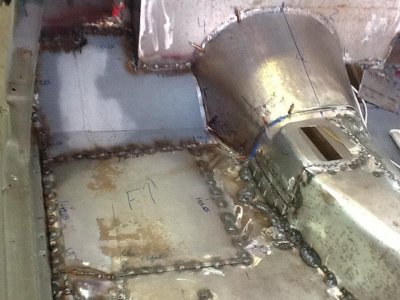
With the set-back and firewall secured I've been focusing on the toe boards and tunnel and below are some shots of the progress.

The last picture shows the rough template I'm going to use and have the leading portion of the tunnel rolled for me. As much as I'd like to go buy a slip roller it's just not in the cards so I'm going to try and find a fab shop in our complex.

image.jpg

image.jpg

image.jpg

image.jpg

image.jpg

image.jpg image.jpg image.jpg image.jpg image.jpg
 
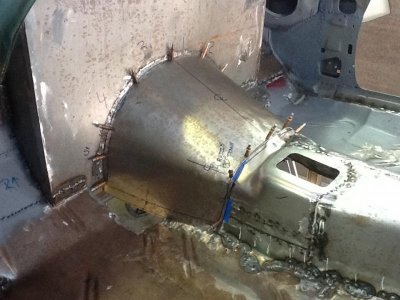
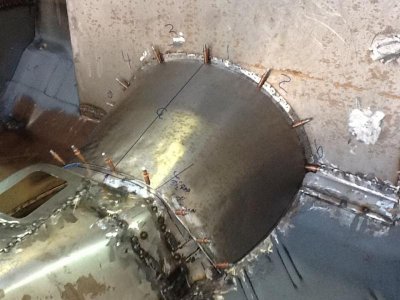
After my last post I got to thinking about what I'd said, and what I need to get done, and figured I could make the tunnel myself as opposed to having someone make it for me. For inspiration I watched a number of "how to" videos on YouTube and came away convinced I could do it.

I took the template (see previous post) and laid out what I needed on some 16 gauge and cut it out (roughly) with my plasma cutter. The front edge of the tunnel is a pretty constant radius with a 22" diameter but the rear edge has a somewhat convex upper surface with different radius bends on the left and right sides, so after marking the centerline on the rough cut tunnel stock I used the centerline to mark off where both the left and right bends should begin.

Now that I had the flat stock marked I used my tried and true bender (exhaust tubing bolted to my work table) and got the leading edge bent to match the flange on the firewall. Once the leading edge radius was correct I used a combination of my "bender", a panel beating bag, and a number of plastic and dead blow hammers to form the rear edge.

Sorry if I'm going on too long about this but I have to admit I am probably more proud of this one part than I am of anything else I've done so far.

image.jpg

image.jpg

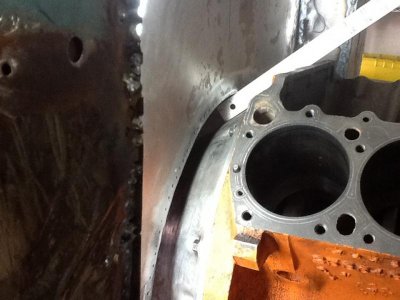
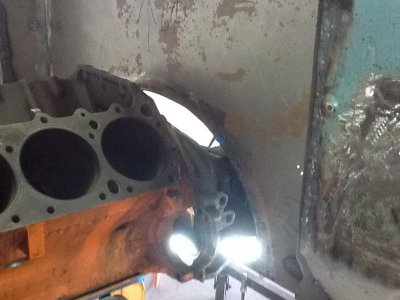
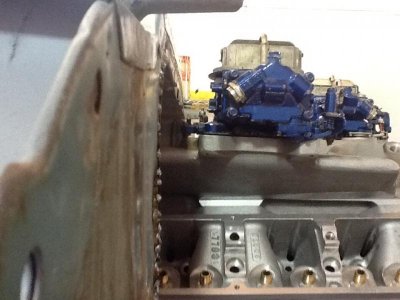
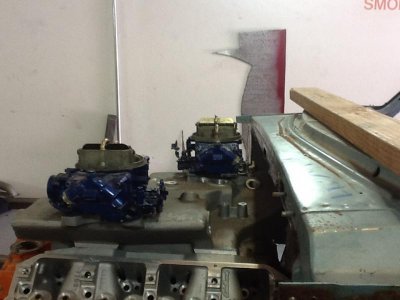
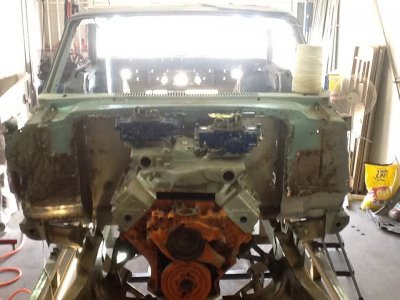
With the tunnel done and in place it was time to put the drivetrain in place to make sure everything fit as planned.

image.jpg

image.jpg

image.jpg

The picture above illustrates the single tightest gap around the entire bellhousing, which at 1 1/2" was more than I could have hoped for.

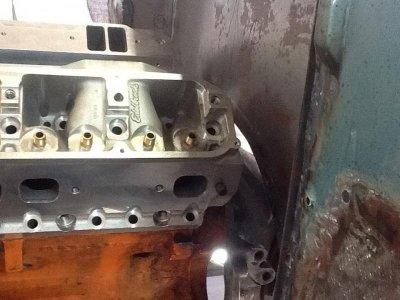
Next came the heads:

image.jpg

image.jpg

Then the intake and carbs, though I am planning on running FAST EZ EFI throttle bodies as opposed to carbs:

image.jpg

image.jpg

image.jpg

Sure glad I'm running a '65 Super Stock hood scoop because without it i think I'd have a "liitle" hood clearance issue!

Tomorrow will be trimming and cutting the firewall and floors to fit the headers, then on to the dash, steering column, pedals, and seats.

image.jpg image.jpg image.jpg image.jpg image.jpg image.jpg image.jpg image.jpg image.jpg image.jpg
 
Nice work, the tunnel is looking really good. Can't wait to see some sheet metal on this thing!
 
BOY, if that engine got any closer, you would've had to put asbestos on the bottom of your shoes.
 
Sorry if I'm going on too long about this but I have to admit I am probably more proud of this one part than I am of anything else I've done so far.


Very nicely done carnalsupply . . . no need to say you're sorry - you did a great job ! ! ! Thanks for sharing your pictures and explaining the process.

We might need to do it on one of our cars someday - at least we have seen HOW it can be done ! ! !
 
Nice work, the tunnel is looking really good. Can't wait to see some sheet metal on this thing!

Hey 747, the last time I mocked it up with body panels, tires, and rims was at least 5 years ago, so I'm kind of anxious myself but the main objective has been to get all the structural things put in place (though maybe not finish welded) so I could get the car off the chassis plate, and we're close!

- - - Updated - - -

BOY, if that engine got any closer, you would've had to put asbestos on the bottom of your shoes.

The exhaust is definitely close so I'm planning on using a combination of Lizard Skin heat retardant formula combined with various heat shields and wraps, but I'm not dillusional, it's gonna be hot on the floorboards!

- - - Updated - - -

wow nice work looking great

Thanks B, the encouragement DEINITELY helps!

- - - Updated - - -

Very nicely done carnalsupply . . . no need to say you're sorry - you did a great job ! ! ! Thanks for sharing your pictures and explaining the process.

We might need to do it on one of our cars someday - at least we have seen HOW it can be done ! ! !

Good morning 67,

When I first began this project my friend and ace fabricator Jimmy was fully on board, so NOTHING seemed to daunting (he is a truly gifted fabricator), but sadly life got in the way for both of us and Jimmy hasn't been able to physically help me near as much as he or I would have liked, so it forced me to do and learn things I had only heard, read, or seen other people doing. Daunting? Yes. Frightening? Absolutely. Is my craftsmanship on par with the Alan Johnson's, Steve Moal's, and thousands of lesser known auto artists of the world? Hell no, but for what it's worth I am unabashidly proud of what I've been able to accomplish, none of which would have happened without the support and encouragement from board members like you.
 
love the way you used chevy truck trailing arms for your rear suspension

I am doing a similar rebuild on a 63 valiant that had a real rotton floor and frame but am keeping the front suspension in tack and replacing every thing from there back take a look here is the link

http://www.forabodiesonly.com/mopar/showthread.php?t=267340

Hey Joe,

You aren't kidding, it looks like our cars came from the bottom of the same pond!

Best of luck on the build; I finally get to work on mine this weekend after a couple weeks away.
 
I have to admit, I have really had doubts over the years, wondering if I would ever actually get to this point, but now that I have I feel totally energized about pushing forward and can't wait to get to the shop every day.


I know that feeling all to well there CarnalSupply . . . the "fear" of working on something that you've never done, and wonder how you're going to pull it off . . . and then you try and fumble through it, and find out that you can do it ( just takes a little longer since we're new at it ) . . . and when it's done, you feel on TOP OF THE WORLD.

And YES, can't wait to get back into the shop and work on it MORE . . .

it's a great feeling . . . keep it up, love the progress, and keep up updated with pictures ! ! ! Thanks ! ! !
 
Thank You I love the way your getting on with the work its not as easy as some think when there is a ton of measuements that need to be made before any welding can start and our cars very few parts are avalable to fix em up
 
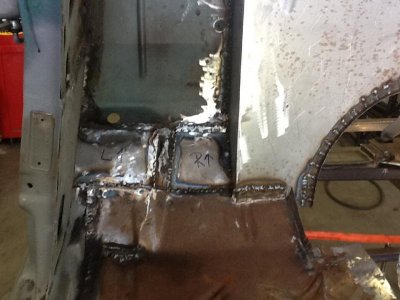
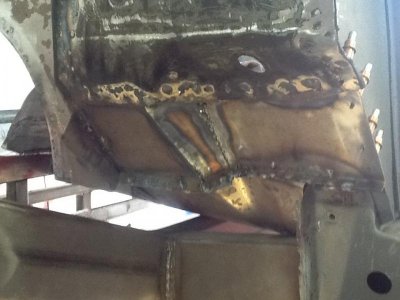
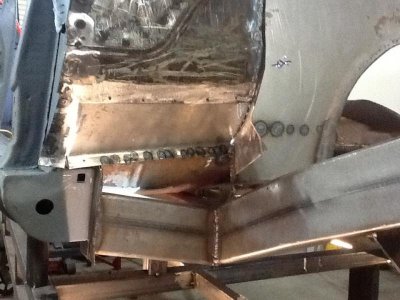
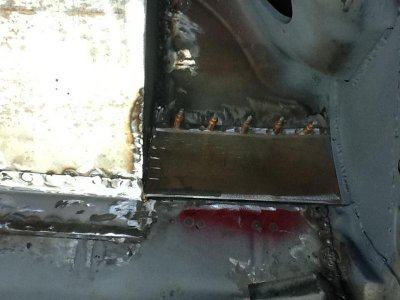
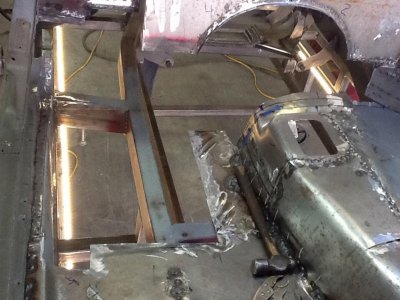
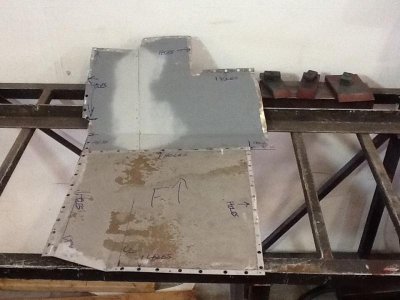
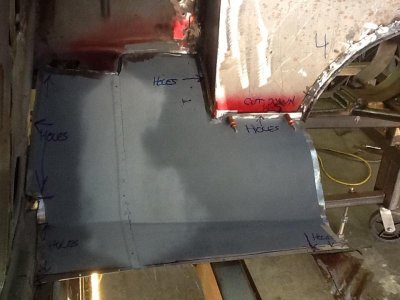
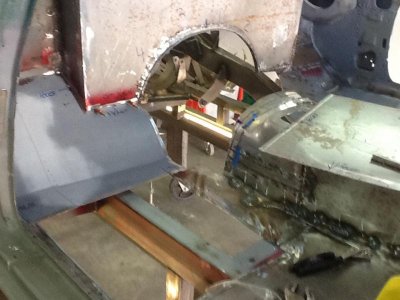
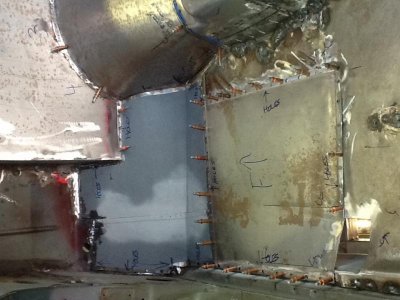
The last time I posted the firewall and setback were completed and the final part of the trans tunnel was completed (though not welded), with the next step being the completion of the front floors where they meet the firewall.

The passenger side came out just fine, there were no compound curves to deal with and the headers have plenty of room; I knocked that out in no time.

The driver side was going to be a bit more difficult; the floor near the front of the tunnel has a crazy compound curve and the firewall zigs and zags like a drunk outside a bar at 2am. Since I already had most of the floor completed as well as the footwell (leading edge of the floors) I figured I'd just lay out some 16 gauge and pound, pull, and bend it into shape. Nope! With only a few inches from the leading edge of the completed floor and the curvy, zig zagging firewall I just could not form a piece to fit satisfactorally. Left with no other choice (that I could come up with) I cut out all the footwell material I'd only recently complete as well as about 18" of the already completed floor.

Once I had the area clear I formed the new footwell and floor leading edges, melding them into the firewall and setback in a way that increased the room between the floor and the headers as well as eliminating some of the worst compound curves.

Once I got the forward area fit and secured with Clecos I moved on to the floor. Having 18" or so in length to work with makes compound curves much easier to deal with, but they are still a pain in the butt! I have no idea what I did before I got my panel beating bag and hammers; a MUST have if your replacing panels!

Lots of talking (sorry) so here are the pix:


image.jpg

image.jpg

image.jpg

image.jpg

image.jpg

image.jpg

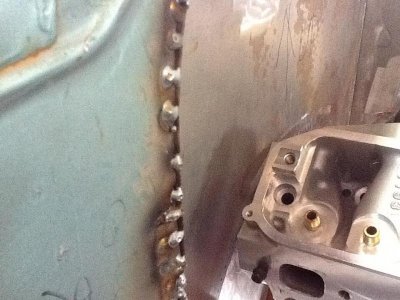
I am TOTALLY thrilled with the results, my welds came out terrific, the fitment of the panels is tight, the overall look is far beeter than what I had before, and the headers now have even more room. A win win all the way around with only one mior setback; the corner where the firewall meets the setback is going to need some work. The firewall metal was really thin and blew out so I'm going to fab up a small corner patch and finish things up. At that point I can get to the steering column, dash, pedal, and seat placement.

image.jpg image.jpg image.jpg image.jpg image.jpg image.jpg
 
nice job on the floor really starting to look complete on the set back

- - - Updated - - -

are you going with an under the dash brake pedal and master
 
nice job bob

Hey Ric,

Thanks for the encouragement! Now that I seem to have my welding situation in hand I hope/believe the quality of workmanship will improve.

- - - Updated - - -

nice job on the floor really starting to look complete on the set back

- - - Updated - - -

are you going with an under the dash brake pedal and master

Hi Joe,

It all depends on what kind of room I have, and I won't know that until I mock up the dash, steering column, and seats, which is next on the agenda.
I would prefer swinging pedals but have my doubts about the necessary brackets fitting or having room for full range of movement even if I can get them to mount.
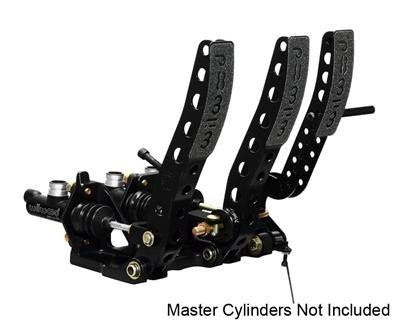
If I go to floor mount I am going to use a Wilwood combo setup:

image.jpg

Thanks for following along and throw me any ideas you may have for pedals!
 
Between you and Superfreak I'm finding myself wanting to build something crazy like you guys "really cool build". Keep it up
 
Between you and Superfreak I'm finding myself wanting to build something crazy like you guys "really cool build". Keep it up

Thanks Dev!

I can't imagine building or owning a councourse restoration; too many worries and rules. My rust bucket is like a clear canvas; I can throw anything at it with no concerns about ruining its value because save for what it means to me it has none.
 
You got it it may not be worth a fortune but we own it and its payed for all we want is to be able to drive it in the best condition we can make it
 
Auto Transport Service
Back
Top