• When you click on links to various merchants on this site and make a purchase, this can result in this site earning a commission. Affiliate programs and affiliations include, but are not limited to, the eBay Partner Network.

'64 Fury Pro-Touring

I like the way the floor "flows" back. I can already see once you get it welded, sealed and primered how smooth it will look.
 
Hey RR,

Thanks much, and one of the most difficult parts was the transition from the flat floor moving rearward where the floor "drops" down as opposed to being flat like it is at the front. When I removed the existing floorpan I did so as carefully as I could so as not to destroy the metal being removed because I didn't know if I'd have to re-use any of it or not, and lucky I did! I ended up using a 4" x 3" area that transitions from a flat to curved part of the floor, something I could not have replicated very easily. You can see the piece in the last picture, it's the small area at the rear-most edge of the new floor pan. Damn I'd like to have a 50-ton press and some dies; pieces like that would be SO easy to make, LOL!

I like the way the floor "flows" back. I can already see once you get it welded, sealed and primered how smooth it will look.
 
The last few days working on the Fury have been pretty amazing; after many years I am finally in a position to begin fitting pieces back to the car as opposed to nothing but repairing. What a feeling! OK, the repair on the corner of the setback/firewall is being a pain in the *** but otherwise...

The first thing I wanted to test fit is the dash since the steering column and pedals mount directly to it and the driver seat aligns with it. Surprising to nobody, least of all me, it was instantly obvious the stock pedal assembly will never work and the steering column is going to need "some" work.

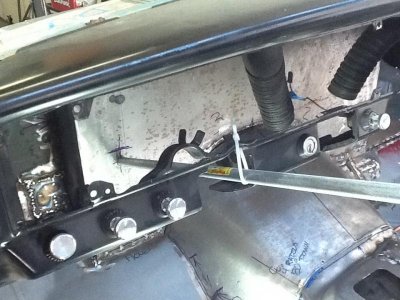
This first picture shows the dash in place, alleviating any fears of whether the height of the engine setback would interfere with the underside of the dash or defroster tubes.

image.jpg

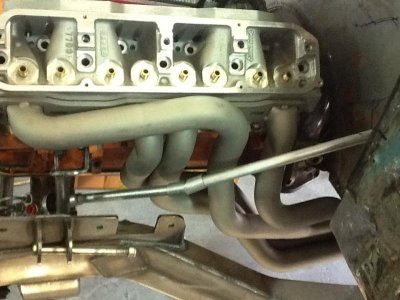
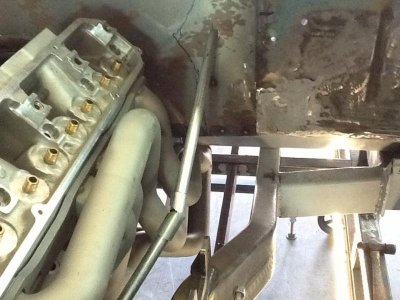
This picture, from a bit of a different angle, shows how the steering column centerline will go through the setback. If you squint really hard you can see a light vertical line on the backside of the setback. That line represents the outside edge of the engine, including headers and valve cover, meaning I may have up to 4" or so of room to slip the steering column past the engine.

image.jpg

My initial reaction to the situation is to use a VERY short steering column with one universal under the dash, an extension passing through the firewall, another universal in the engine compartment, and another extension leading to the rack. This will necessitate using a rigidly mounted heim as a bearing (passing the rack extension through it) but I have TONS of space to mount one.

Before spending any money on a tilt column I'll modify the existing column, cutting it way down in length and develop the rest of the steering from there.
 
The last few days working on the Fury have been pretty amazing; after many years I am finally in a position to begin fitting pieces back to the car as opposed to nothing but repairing. What a feeling! OK, the repair on the corner of the setback/firewall is being a pain in the *** but otherwise...

The first thing I wanted to test fit is the dash since the steering column and pedals mount directly to it and the driver seat aligns with it. Surprising to nobody, least of all me, it was instantly obvious the stock pedal assembly will never work and the steering column is going to need "some" work.

This first picture shows the dash in place, alleviating any fears of whether the height of the engine setback would interfere with the underside of the dash or defroster tubes.


This picture, from a bit of a different angle, shows how the steering column centerline will go through the setback. If you squint really hard you can see a light vertical line on the backside of the setback. That line represents the outside edge of the engine, including headers and valve cover, meaning I may have up to 4" or so of room to slip the steering column past the engine.


My initial reaction to the situation is to use a VERY short steering column with one universal under the dash, an extension passing through the firewall, another universal in the engine compartment, and another extension leading to the rack. This will necessitate using a rigidly mounted heim as a bearing (passing the rack extension through it) but I have TONS of space to mount one.

Before spending any money on a tilt column I'll modify the existing column, cutting it way down in length and develop the rest of the steering from there.

I agree with your approach with just modifying you steering column, there's a few things in this hobby that I'll never understand and one is buying an expensive column "it's a tube with bearings that turns the wheels, not a go fast part for crying out loud". Nice work
 
I agree with your approach with just modifying you steering column, there's a few things in this hobby that I'll never understand and one is buying an expensive column "it's a tube with bearings that turns the wheels, not a go fast part for crying out loud". Nice work

Hey Dev,

I'm an old fat guy so at some point I'll probably put in a tilt column, but if I can get away with modifying the one that came in the car, a late model Mopar column with a real nice wheel in place (probably the nicest thing on the entire car), I'll use it as opposed to spending hundreds on a new one.
 
carnalsupply

have posted a few new pics today if you would like to check it out

Hemijoe
 
carnalsupply

have posted a few new pics today if you would like to check it out

Hemijoe

Hey Joe,

I am really surprised you're sticking with the torsion bars, it's usually one of the first things to do.
OK, I have no idea, what are the frame rails from? Whatever they are they look like they were meant to be there?
BTW - any time you want to come to Las Vegas and give welding lessons I'm ready!
 
carnalsupply

cant wait to see how you are going to put peddles on this car that's really got curious
 
What an awesome day at the shop! I'd been telling my wife about some of the blowouts I've been experiencing and she made an off-handed comment about the fact some of the metal has been acid dipped, some is fresh and new, while other parts are from a donor car and have surface rust, so maybe I'm not cleaning it well enough. I thought about what she'd said and decided to use lacquer cleaner to clean all the weld areas prior to welding (after bringing them to bare metal) and low and behold, the welds stopped popping and blowing out! UNBELIEVABLE!

OK, so onto the work.

I had two areas of the footwells to complete as well as a bit of the floor near the front of the tunnel, and with my newfound cleaning method I knocked them out in a couple hours then got on to the steering.

I thought I was going to have trouble getting the column to line up with the rack due to the offset and possible interference with the headers so I dropped the engine and trans back in, threw on the driver side head and header, and began measuring. Pleasantly I have much more room coming up from the rack than I'd remembered.

I used some conduit to mock up the column, extensions, and u-joints rather than hacking up the steering column I have. Here's how it came out:

image.jpg

image.jpg

image.jpg

image.jpg

image.jpg

After figuring out the wiring harness for my CTS-V seats I'll start working on the placement and attachment points.

- - - Updated - - -

believe it or not they are nova rails 67 to 72 pat number 3035 from Comp Eng

They look fantastic, but if you told me a Nova but not the year I would have assumed the would be from a pre-67.

Luckily the rear rails weren't rotten in the Fury (one of the only places!).

- - - Updated - - -

carnalsupply

cant wait to see how you are going to put peddles on this car that's really got curious

Hey Joe,

The floor mounted pedals should actually be a pretty straight-forward process; I just need to make sure I reinforce the floor enough so it doesn't flex under hard breaking. The reservoirs will be mounted in the engine compartment, well off to the drivers side.

- - - Updated - - -

She's looking great Bob! Coming together quite nicely.
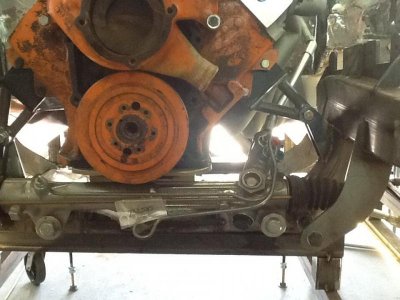
Hey, thanks Prop! It feels SO good to finally be fabbing pieces and parts as opposed to constantly repairing, though I am under no illusions; there is still a ton of work to do on items I left partially completed in my effort to get the car off the chassis plate; it's too tall to fit in my garage (if need be).

image.jpg image.jpg image.jpg image.jpg image.jpg
 
Looks really good, keep after it.
 
Updates have been slow in coming but I've been making progress.

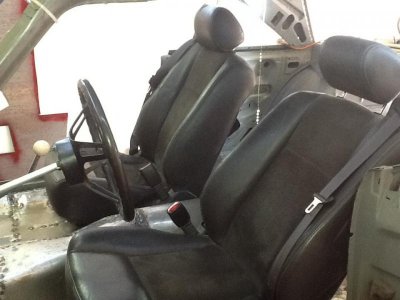
I'm using the seats from a Caddy CTS-V so figuring out the wiring and mounting occupied a bunch of time because of 2 things:
1) The seats have a memory, lumbar adjust, heat, as well as fore, aft, and vertical movement, so there's quite a bit more to hooking them up than connecting a single 12V and ground. I found othe people who have made them work but every one of those guys treats the wiring hook-up as some kind of f'n secret, so if there's anyone that ever wants the layout just let me know.
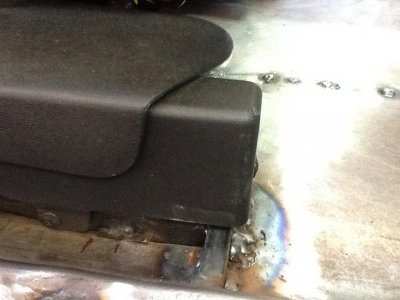
2) Unlike seats we've all pulled out of muscle cars over the years, the Caddy seats don'tjust bolt to the floor, the clip in the front and bolt down in the rear, so figuring out a clip-in method took me a little while.

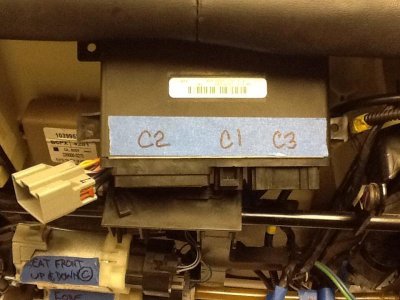
This is the primary control unit for the driver seat, so if you use these seats you can virtually ignore all the other boxes and concentrate on the primary plug leading into this box that has to be correctly hooked up to power and grounds.
image.jpg

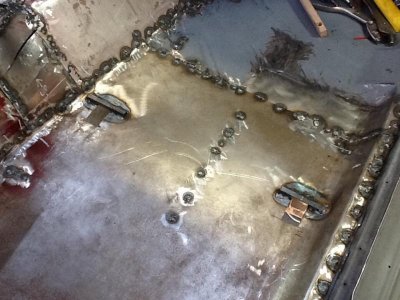
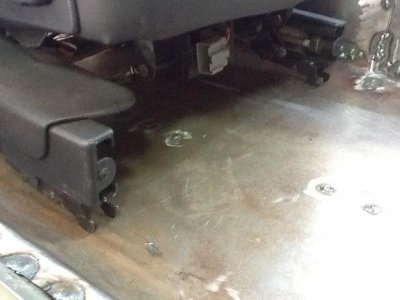
These are the hooks on the front of the seats, and they have to be recessed into the floor so the weight of the seat is evenly distributed. I cut rectangular holes in the floor and carefully trimmed the holes until the hooks slid into them with very little play.
image.jpg
I found that 1/4" square tubing fit in the hook perfectly so I put the seats in place and slid 4" pieces into the correct position, and tacked them in place.
image.jpg

image.jpg

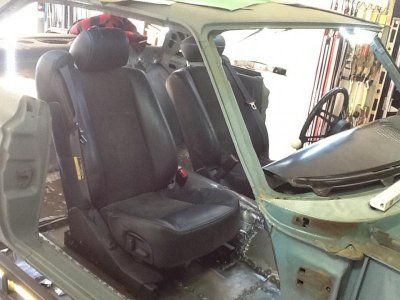
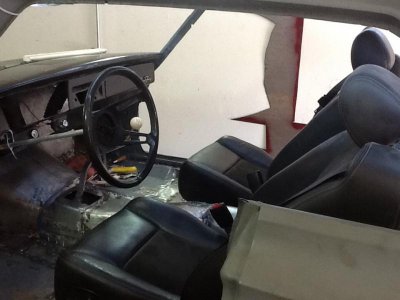
Here are the seats solidly mounted in place.
image.jpg

image.jpg

image.jpg

To solidly mount the rear I welded a grade 8 1/2" x 13 nut to a 6" x 6" plate, then welded the plate to the underside of the floor, giving me a hold down that isn't going anywhere!

image.jpg image.jpg image.jpg image.jpg image.jpg image.jpg image.jpg
 
That really cool ! !! Now you've got a "nice" place to sit and make engine sounds while working on your car ! ! ! Thanks for the update ! !

( I still have to sit on a bucket . . . ) ( smile )
 
LOL, no matter how old we get we still act like little kids!

When I sit there figuring out the placement of the wheel, shifter and pedals it really is hard not to fantasize about what it will be like, someday.

That really cool ! !! Now you've got a "nice" place to sit and make engine sounds while working on your car ! ! ! Thanks for the update ! !

( I still have to sit on a bucket . . . ) ( smile )
 
Very nice, I like the seats. Don't understand why more people do this because it sure beats sitting in the old seats. Curious what your going to do to seal the floors up where the hooks come threw (box them in)?
 
nice work, newer car seats in the older cars is a good way to make driving them long distances more comfortable.
 
Hey bud,

I totally agree, especially since I've been sitting in a set of V seats since 2005; they are amazingly comfortable AND incorporate superb inertia belts along with all the various features.

As for the floors I'm either going to box them in or, if I can find someone that pre-fabs them, use small round or oval "domes" punched out of 16 - 18 gauge. The domes would be my preference since they'd have a much cleaner look.

Very nice, I like the seats. Don't understand why more people do this because it sure beats sitting in the old seats. Curious what your going to do to seal the floors up where the hooks come threw (box them in)?

- - - Updated - - -

Hey Kelly,

I totally agree. The longest trip I've ever done in my V is from SF to Vegas when I moved and the seats were superb!

Technology has brought so many good things to modern seats I don't know why anyone other than a restorer would use old-school replacements or originals.

nice work, newer car seats in the older cars is a good way to make driving them long distances more comfortable.
 
Bob, Really nice job with the seats. Did you take them out of your caddy or pick up another set? Those will definitely make for a comfortable ride in the fury!!!

- - - Updated - - -

Josh just said you had another set in the shop. I don't remember seeing them though.
 
Auto Transport Service
Back
Top