• When you click on links to various merchants on this site and make a purchase, this can result in this site earning a commission. Affiliate programs and affiliations include, but are not limited to, the eBay Partner Network.

64 Polara - the fun begins

Jim, my projects are done so go ahead and trailer it down so I can get to work on it!:rolleyes:

Floors are pretty easy to do correctly, that shop half assed it bigtime. Do you have replacement panels or are you re-using the ones you pulled out?
 
LOL ... Thanks Mark. I have a new AMD full front pan in the garage that I will be installing. I still have a lot of grinding, repair and prep work before I can get it in place. Hopefully once that's done it's off to body and paint.
 
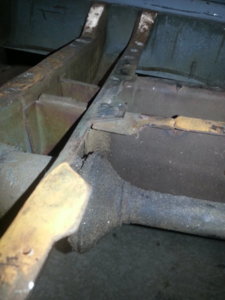
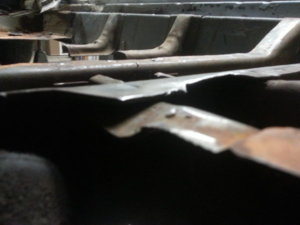
Tomorrow now equals 7 months! I was cleaning up some of the firewall area and noticed this .... it appears like the drivers side subframe to cross member connection is not very good. Is it normal or do I need to pay special attention to this?

subframe split 1.jpg subframe split 2.jpg

Also ... my MIG welding gas has been sitting idle for over 5 years. Should I get new gas or just roll it around to stir it up before I use it.
 
Last edited:
YEA! That needs to be reattached and reweld all 4 connecting points. I had broke the spotwelds there and did not notice right away.......
 
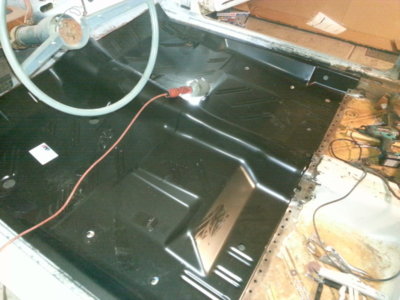
SO ... 1 year later and I opened my new AMD floor pan box that had been patiently waiting for me to get off my a$$ and get something done. It took a while but I was finally able to wrestle it "mostly" into place. You can't see it in the picture but the top left corner got adjusted during shipping AND the seat belt holes along the frame rail are at least 3" - 4" from where they should be.

Perhaps this is just wishful thinking but someday soon I hope to be able to install a new part without it needing any significant adjustments.

floor pan.jpg
 
Jim, stick with it. She is going to be a great car when done. I want to say my AMD floorpan was bent up in the front too much as shipped, took a little tweaking.
 
Thanks Bearman ... wrestling that floor pan in and out by myself is like herding cats. I "think" I will only need to do it one more time before I can actually begin the final welding.

I plan to make a template of the frame rail / fire wall area and get the damaged area on the floor pan as close as possible before putting it in one last time.

On a more positive note I contacted Summit regarding the missing hardware and it is already on it's way.
 
Last edited:
That's good but if you need some help let me know.
 
I need some help with getting the floor pan to fit correctly. I believe I know the probable answer but I am open to additional suggestions.

If I just lay the pan in place it fits well and all the holes line up and it snugs up to the firewall without issue.

As soon as I slip it under the rear floor pan I can not get it to move forward enough to meet the firewall. I've tried jacking up the rear floor pan slightly but it just will not move forward.


I had to pull my firewall down once the floor was in place and tacked. I found the firewall pretty flexible.

https://www.forbbodiesonly.com/moparforum/threads/can-of-rusty-worms.104526/page-17#post-910544502
 
Thanks Glenwood!!! It's nice to know I am at least moving in the correct direction.

My issue has been that when I put the new floor pan under the rear floor pans and give it a little lift the new pan overlaps the front fire wall by close to 1/2" ... which effectively does not even allow the pan to rest anywhere near the crossmember, seat supports or side rails.

I'm certainly no professional but it sure seems like the floor pan wasn't stamped very well.

It's beginning to look like I might be easier to remove & replace the rear pans too.
 
The pan will probably lay down okay once your weight is on it, but you might have to push the firewall forward to get it to pop into place. Clecos or self tapping screws help pull it down in place after it clears the firewall. The problem I had was getting it to snug up over the cross member hump.
 
Dry heat if you need some help with that I can come over after work tomorrow
 
Thanks Bearman ... I'm a weekend only warrior in the garage. This coming weekend sucks ... but I will reach out to you for the following weekend (2/9) cuz I know I will need assistance.
 
Got it. I'm the same way. 2/9 just let me know what time.
 
Great Guy ALERT!!! @bearman came over this morning to give me a hand and we made some serious progress on the floor pan. Getting the floor pan in and out with 2 people is a hell of a lot easier. THANKS Barry!
 
No problem let me know when you're ready to go further. Heads up folks dry heat gots a solid car. Can't wait to see the finished product.
 
That's awesome. If I was closer I would have brought the beer!

Any pics Jim? Hope to see you guys at the H.E.M.I. show :)
 
Auto Transport Service
Back
Top