We seem to have the same taste in music. I think I have every Stones cd made. Saw them live in the mid 80's - awesome show. I even brought up the idea of their logo you have above in place of the R/T in the rump stripe on the black Charger to the wife, needless to say she wasn't impressed with that.
You are using an out of date browser. It may not display this or other websites correctly.
You should upgrade or use an alternative browser.
You should upgrade or use an alternative browser.
'69 charger r/t-se: Building my dream car
- Thread starter Mr.SpeedFreak
- Start date
Don't sweat that grill, half of mine was broke but was easily fixed with the epoxy "it's the finishing touches that slow it down". Hey, if your not doing anything with the old inserts let me know, I'm thinking about putting a grill insert in my Shaker scoop.
PFG MOPAR
Well-Known Member
Martin Senour ?
Martin Senour paint ?
Where did you buy that in GP?
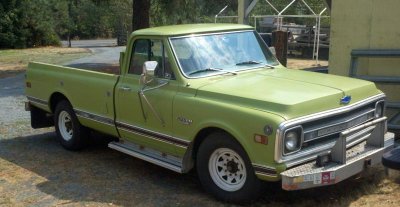
I need some black for my brake booster on a chevy :confused1: I just bought ..
a 69 pickup w/ 402 BB :headbang:
I thought I saw mention of "eastwood?" paint on here ?
cant seem to find it now..
I also want to paint the air cleaner and radiator black, what should I use?
Thanks,
Mike..

- Local time
- 12:01 PM
- Joined
- Jan 16, 2011
- Messages
- 78,641
- Reaction score
- 126,621
- Location
- NorCal Sierras
Good tunes!!
X3, you got to have the 70's rock going, while thrashing on our Mopars, it's a prerequisite...LOL... ome cool back ground music & a video I like too ... AC/DC Altered Montage , www.youtube.com/watch?v=X-z9mSu8k6o
Mr.SpeedFreak
Well-Known Member
- Local time
- 12:01 PM
- Joined
- Jan 29, 2013
- Messages
- 1,645
- Reaction score
- 1,056
- Location
- Southern Oregon
Joel, sounds like its time for an executive decision haha that'd be a badass stripe :icon_thumleft:
747, yeah I have the section transplanted straight and solid, just all the little sanding and detailing is taking ages. :banghead:
Mike, that Martin senior paint is just at Napa, works awesome. Man, you must get a new car every week! nice little work truck!
Hell yeah budnicks! Everyone's got some awesome taste in music on here
Mr.SpeedFreak
Well-Known Member
- Local time
- 12:01 PM
- Joined
- Jan 29, 2013
- Messages
- 1,645
- Reaction score
- 1,056
- Location
- Southern Oregon
Alright guys I'm starting to get ahead of myself so I guess it's time for an update. I'm still moving right along on the grille but all the little tedious work is slow-going so I'll just do a full post on that once it's done.
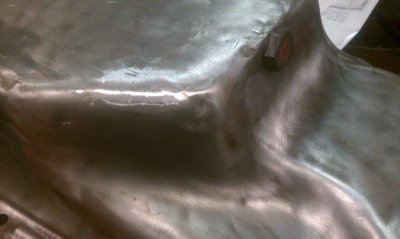
Some pretty exciting progress on other fronts though, spent my Labor Day weekend buttoning up the motor and getting ready to drop it in. Started off with my oil pan since someone apparently watched too much Dukes of Hazzard and bottomed out pretty good at some point.
"Gently used"
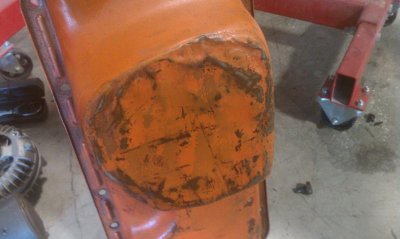
So I spent some time with a block of wood and a BFH straightening it out, then stripped the old paint with a wire wheel. Didn't care too much about it being perfect, just functional. Battle scars add character :icon_blackeye:
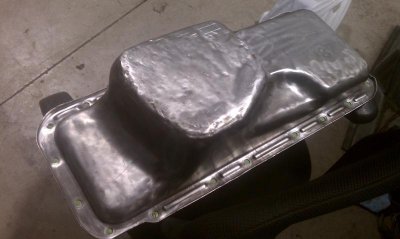
I'm guessing somewhere along the line of beating on it with the body hammer, one tiny pinhole opened up. Extremely small so I just used a flashlight under it in a dark room to check for any others. Ended up just having one, so I gave it a quick tack with the MIG and ground it smooth.
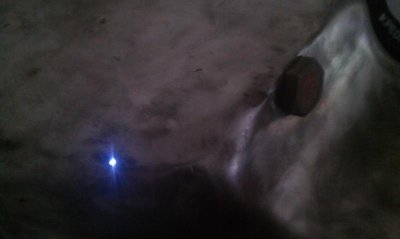
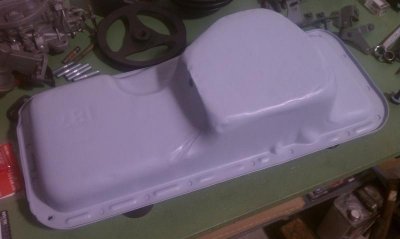
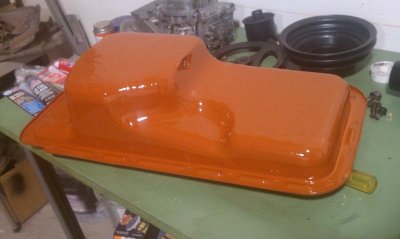
Then some etching primer and topcoated with the extra paint I had mixed up for the motor.
Checking For Oil Pickup Clearance
I didn't get any pics of this process, but when I went to bolt it back onto the motor I did a test fit to check for oil pickup clearance, I was told it needed about 1/8 to 1/4". Mine was bent slightly so I straightened it out and checked for clearance by taping a 1/4" drill to the bottom of the pickup, smeared it with some paint, and set the pan down in place. Pull it off and if its touching you'll see the paint on the inside of the pan. In my case with the 1/4" drill, it had one almost unnoticeable dot of paint, so "good to go."
Another issue I had to deal with was my exhaust studs. I had already replaced that one that was broken off in the head, but still had 2 broken ones I thought were still long enough to save. (avoiding removing any studs you don't absolutely have to is a good idea if they're old, as you risk snapping them off in the head and making a lot more work for yourself.)
Sheared off but still a good amount of thread left.
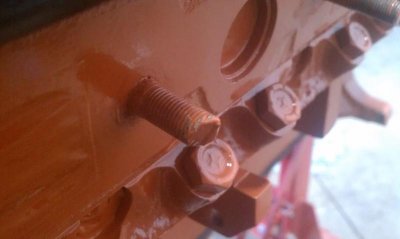
So I just shaved the damaged end off with a cutoff wheel
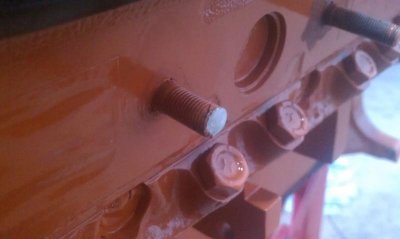
And chased the threads with a 5/16-24 dye I got for a couple bucks at Napa.
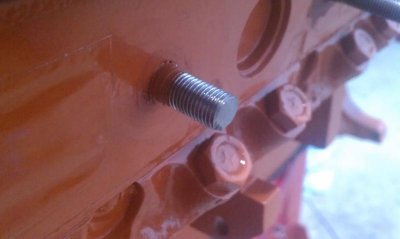
Each of the 2 broken studs I had to cut short were the 2nd one back from the front, on either side, which worked out conveniently since clearance is a little tight on those ones with my headers lol.
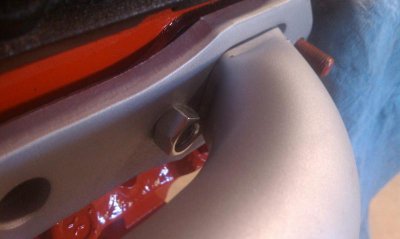
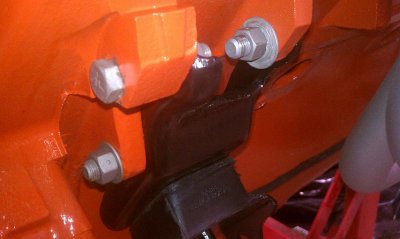
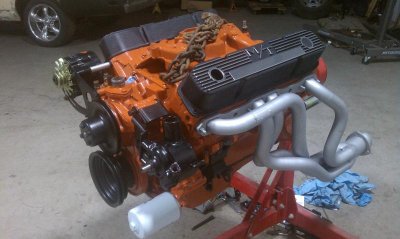
And after test-fitting the headers with no issues, I took care of some other odds and ends. Bolted the fuel pump back on, new oil pressure and water temp sending units, swapped out my old motor mounts for new ones, sandblasted/ flat cleared the hardware and bolted them on.
And one last finishing touch I'm really happy with, sanded/polished my valve covers. Started with 180 grit to get through the wrinkle finish, then stepped up through 350, 400, 800, 1000, and 2000. Then I threw them in the sink for a light scrubbing with a soft dish washing sponge to get the sanding dust off, and finished them with some "Blue Magic" alluminum polish.
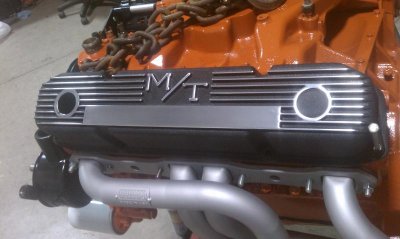
So here it is with the major stuff done and ready to go home back in the engine bay
Some pretty exciting progress on other fronts though, spent my Labor Day weekend buttoning up the motor and getting ready to drop it in. Started off with my oil pan since someone apparently watched too much Dukes of Hazzard and bottomed out pretty good at some point.
"Gently used"

So I spent some time with a block of wood and a BFH straightening it out, then stripped the old paint with a wire wheel. Didn't care too much about it being perfect, just functional. Battle scars add character :icon_blackeye:

I'm guessing somewhere along the line of beating on it with the body hammer, one tiny pinhole opened up. Extremely small so I just used a flashlight under it in a dark room to check for any others. Ended up just having one, so I gave it a quick tack with the MIG and ground it smooth.


Then some etching primer and topcoated with the extra paint I had mixed up for the motor.


Checking For Oil Pickup Clearance
I didn't get any pics of this process, but when I went to bolt it back onto the motor I did a test fit to check for oil pickup clearance, I was told it needed about 1/8 to 1/4". Mine was bent slightly so I straightened it out and checked for clearance by taping a 1/4" drill to the bottom of the pickup, smeared it with some paint, and set the pan down in place. Pull it off and if its touching you'll see the paint on the inside of the pan. In my case with the 1/4" drill, it had one almost unnoticeable dot of paint, so "good to go."
Another issue I had to deal with was my exhaust studs. I had already replaced that one that was broken off in the head, but still had 2 broken ones I thought were still long enough to save. (avoiding removing any studs you don't absolutely have to is a good idea if they're old, as you risk snapping them off in the head and making a lot more work for yourself.)
Sheared off but still a good amount of thread left.

So I just shaved the damaged end off with a cutoff wheel

And chased the threads with a 5/16-24 dye I got for a couple bucks at Napa.

Each of the 2 broken studs I had to cut short were the 2nd one back from the front, on either side, which worked out conveniently since clearance is a little tight on those ones with my headers lol.

And after test-fitting the headers with no issues, I took care of some other odds and ends. Bolted the fuel pump back on, new oil pressure and water temp sending units, swapped out my old motor mounts for new ones, sandblasted/ flat cleared the hardware and bolted them on.

And one last finishing touch I'm really happy with, sanded/polished my valve covers. Started with 180 grit to get through the wrinkle finish, then stepped up through 350, 400, 800, 1000, and 2000. Then I threw them in the sink for a light scrubbing with a soft dish washing sponge to get the sanding dust off, and finished them with some "Blue Magic" alluminum polish.

So here it is with the major stuff done and ready to go home back in the engine bay

Attachments
Last edited:
cdr
Well-Known Member
VERY nice !!!!
roadrunnerman
Well-Known Member
Nice work on everything. The oil pan looks brand new.
Mr.SpeedFreak
Well-Known Member
- Local time
- 12:01 PM
- Joined
- Jan 29, 2013
- Messages
- 1,645
- Reaction score
- 1,056
- Location
- Southern Oregon
Thanks guys! And here's the next project from a couple nights ago, got all my steering bolted up and engine bay brake lines run.
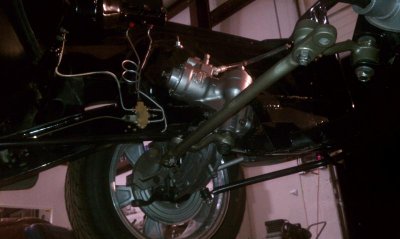
Naturally the brake line kit I ended up with was wrong (meant for no proportioning valve and master cylinder ports on the opposite side) but I made it work. Took up the extra length in the main line with a "U" bend just forward of the torsion bar crossmember, bought a standard brake line section from Napa that I bent to fit from the distribution block to the ssbc adjustable proportioning valve, and locked everything down.
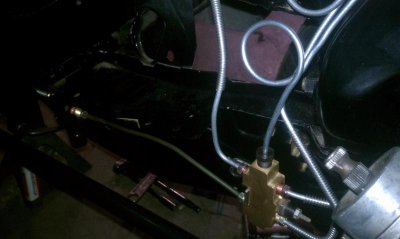
The lines up to the MC also needed a good amount of convincing, but I ended up deciding on running a '71 Charger MC (ports on the fender side). My lines are meant for that side, and figured it couldn't hurt to have them a little further away from the headers.
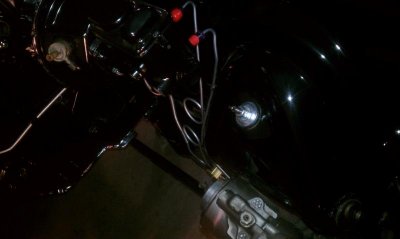
So the new MC is on its way and should be at Napa this morning, then I'm planning on finally dropping the engine in today
:icon_pray:

Naturally the brake line kit I ended up with was wrong (meant for no proportioning valve and master cylinder ports on the opposite side) but I made it work. Took up the extra length in the main line with a "U" bend just forward of the torsion bar crossmember, bought a standard brake line section from Napa that I bent to fit from the distribution block to the ssbc adjustable proportioning valve, and locked everything down.

The lines up to the MC also needed a good amount of convincing, but I ended up deciding on running a '71 Charger MC (ports on the fender side). My lines are meant for that side, and figured it couldn't hurt to have them a little further away from the headers.

So the new MC is on its way and should be at Napa this morning, then I'm planning on finally dropping the engine in today
:icon_pray:
cdr
Well-Known Member
:buffer:
BigBlock61
Well-Known Member
Good luck Speed.
- Local time
- 2:01 PM
- Joined
- Jan 1, 2013
- Messages
- 8,038
- Reaction score
- 3,467
- Location
- Mascoutah, Illinois
Oil pan rework, valve covers, engine bay .. everything looks most excellent and very tidy. Nice work speedy .. to copy 747's nick for you.
PFG MOPAR
Well-Known Member
Martin Senour ..
AAAAAHHHAAAA !!!
I found it online but not at the NAPA store .. (on 7th street?)
They told me they custom mix Martin Senour paints and to come back on Monday :angry1:
I put a brake booster in my Chevy truck and wanted to paint it "underhood black" .. oh well .. cast color looks ok .
Is there another napa in town I don't know about ? :confused2:
Thanks Jake .. :headbang: I'll stop by soon ..
Mike..
Mike, that Martin senior paint is just at Napa, works awesome. Man, you must get a new car every week! nice little work truck!
Mr.SpeedFreak
Well-Known Member
- Local time
- 12:01 PM
- Joined
- Jan 29, 2013
- Messages
- 1,645
- Reaction score
- 1,056
- Location
- Southern Oregon
Thanks for the compliments guys, and finally the big news. After a couple hours of colorful language, the engine is finally back home. I got it roughly in place by myself on Saturday, then my dad came over yesterday to help knock it out. Took some convincing but it's finally in place and all bolted up. My phone (read: "camera") crapped out so I'll be posting some pics soon
 ccasion14:
Forgot how big of a pain in the *** headers are lol, but all things considered I can't complain about the fitment of the Hedmans I'm running. 1 7/8" primaries and 3" collector, and the only close spot is the second primary back against the steering box (real close). Made the drop-in insteresting but everything clears just fine. :icon_pray:
Also had a weird crack all the way around one of the bolt holes on my transmission bellhousing, so I'm taking it to the welding wizard friend of mine after work to get it fixed up. Hopefully I can get it in the car around the headers, wish me luck lol
Huh that's weird, not sure who you talked to but yeah the one on 7th. The Martin senour aerosol cans are in on the bottom shelf to the right of the bodywork stuff (fiberglass mat, spreaders, All-metal cans, etc),tall black rattlecans. They're not with the other duplicolor rattlecans so maybe thats what threw them off ? I know that place like the back of my hand by now haha, hope that helps.
Forgot how big of a pain in the *** headers are lol, but all things considered I can't complain about the fitment of the Hedmans I'm running. 1 7/8" primaries and 3" collector, and the only close spot is the second primary back against the steering box (real close). Made the drop-in insteresting but everything clears just fine. :icon_pray:
Also had a weird crack all the way around one of the bolt holes on my transmission bellhousing, so I'm taking it to the welding wizard friend of mine after work to get it fixed up. Hopefully I can get it in the car around the headers, wish me luck lol
AAAAAHHHAAAA !!!
I found it online but not at the NAPA store .. (on 7th street?)
They told me they custom mix Martin Senour paints and to come back on Monday :angry1:
I put a brake booster in my Chevy truck and wanted to paint it "underhood black" .. oh well .. cast color looks ok .
Is there another napa in town I don't know about ? :confused2:
Huh that's weird, not sure who you talked to but yeah the one on 7th. The Martin senour aerosol cans are in on the bottom shelf to the right of the bodywork stuff (fiberglass mat, spreaders, All-metal cans, etc),tall black rattlecans. They're not with the other duplicolor rattlecans so maybe thats what threw them off ? I know that place like the back of my hand by now haha, hope that helps.
Sucks to hear about the trans, especially seeing how it's easier to just drop them in as one and not have to deal with the torque converter, etc under the car. Hope it works out.
Mr.SpeedFreak
Well-Known Member
- Local time
- 12:01 PM
- Joined
- Jan 29, 2013
- Messages
- 1,645
- Reaction score
- 1,056
- Location
- Southern Oregon
Yep, should be interesting. I'm not ruling out having to pull the engine again if I have to, but fingers crossed I won't. I've done a transmission swap on my Chevelle that also has a big block/big headers with the engine in, so hopefully that fun experience comes in handy lol
Mr.SpeedFreak
Well-Known Member
- Local time
- 12:01 PM
- Joined
- Jan 29, 2013
- Messages
- 1,645
- Reaction score
- 1,056
- Location
- Southern Oregon
Alright guys, I'm happy to say the Charger now has a complete drivetrain for the first time in who knows how many years.
 ccasion14:
Picking up from my last post about me and my dad getting the engine dropped in, at this point my transmission still needed welding so I left the floorjack under the rear of the engine to support it overnight and keep my motor mounts from being over stressed

Then yesterday I took the trans to my buddy's place, ground a wedge along the crack (top and bottom), then he tig-welded it back solid. Hopefully I'll be switching to a 5 speed manual next year so this should work just fine for now


And then came the fun part.. Called up some friends to come give me a hand, and started with hooking the hoist up to support the rear of the engine. Then we jacked the car up by the k frame with the floorjack, keeping tension on the hoist as we jacked everything up. Managed to slide the trans under the car, then lifted it up onto the floorjack.


Now the strategy here was the same as I used with my Chevelle: slide the transmission under the headers at an angle, slowly raise it enough to get the bellhousing even with the headers, then start straightening it out as it goes up until the entire trans is now straight and sitting just above the collectors. At this point we bolted up the starter, and pushed the trans up to the block, jacking it up as the trans tunnel allowed. And finally just bolted up the bellhousing and crossmember. Took some creativity but went in without any real issues. :icon_pray:

So I got lucky with that one, wouldn't have been fun having to pull the engine back out :icon_blackeye: It's a huge relief and a great feeling to see the complete drivetrain finally back in the car.

Now for all the other odds and ends in the engine bay, finishing up the grille, and a ton of bodywork.
Picking up from my last post about me and my dad getting the engine dropped in, at this point my transmission still needed welding so I left the floorjack under the rear of the engine to support it overnight and keep my motor mounts from being over stressed
Then yesterday I took the trans to my buddy's place, ground a wedge along the crack (top and bottom), then he tig-welded it back solid. Hopefully I'll be switching to a 5 speed manual next year so this should work just fine for now
And then came the fun part.. Called up some friends to come give me a hand, and started with hooking the hoist up to support the rear of the engine. Then we jacked the car up by the k frame with the floorjack, keeping tension on the hoist as we jacked everything up. Managed to slide the trans under the car, then lifted it up onto the floorjack.
Now the strategy here was the same as I used with my Chevelle: slide the transmission under the headers at an angle, slowly raise it enough to get the bellhousing even with the headers, then start straightening it out as it goes up until the entire trans is now straight and sitting just above the collectors. At this point we bolted up the starter, and pushed the trans up to the block, jacking it up as the trans tunnel allowed. And finally just bolted up the bellhousing and crossmember. Took some creativity but went in without any real issues. :icon_pray:
So I got lucky with that one, wouldn't have been fun having to pull the engine back out :icon_blackeye: It's a huge relief and a great feeling to see the complete drivetrain finally back in the car.
Now for all the other odds and ends in the engine bay, finishing up the grille, and a ton of bodywork.
Last edited:
Mr.SpeedFreak
Well-Known Member
- Local time
- 12:01 PM
- Joined
- Jan 29, 2013
- Messages
- 1,645
- Reaction score
- 1,056
- Location
- Southern Oregon
Updated: added all the pics to my last post. Had trouble uploading them earlier
cdr
Well-Known Member
wont be long to hear that 440 burn some gas 
Similar threads
- Replies
- 100
- Views
- 3K
- Replies
- 20
- Views
- 1K
- Replies
- 7
- Views
- 452
- Replies
- 5
- Views
- 356


