• When you click on links to various merchants on this site and make a purchase, this can result in this site earning a commission. Affiliate programs and affiliations include, but are not limited to, the eBay Partner Network.

'69 charger r/t-se: Building my dream car

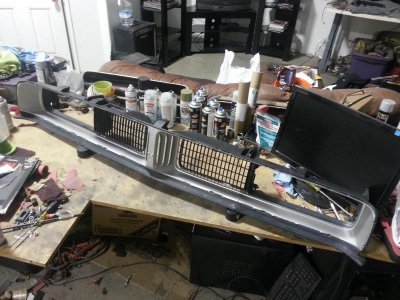
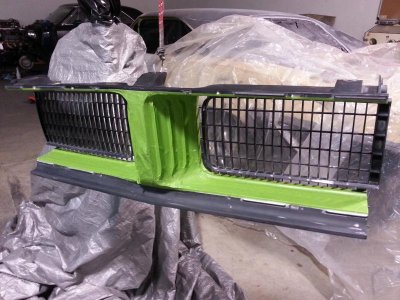
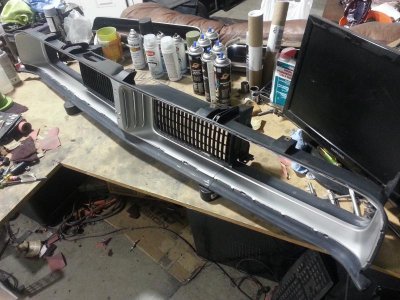
I love the smell of fresh paint in the morning, smells like.. victory. :icon_cool:
20131107_080818.jpg

My ocd tape-job haha:
20131106_233332.jpg

So now I'll hit the headlight doors tonight and let all this stuff cure for a couple days so I can back-mask and finish up with the trim black this weekend. I think I'm finally starting to see the light at the end of the tunnel for this thing
 
Looking good so far. Can't wait to see the finished results.
 
Looking real good MrSpeedFreak!
If I only had that skill when I was 20, keep up the good work!
 
Looking good - I was sure glad when my grill resto was behind me.
 
Nice work speedy did you use the easy off oven cleaner like a lot off people suggest on this site. This is probaley my next stage to do grill n heater a/c box
 
Thanks guys, good to at least have the most tedious stuff behind me and I'm really loving this silver, should pop pretty nice against the black. Looking forward to making my patch-job disappear now (hopefully haha)

Looking real good MrSpeedFreak!
If I only had that skill when I was 20, keep up the good work!

Thanks Swede! I'm just trying to keep up with all the quality work everyone else has been doing on here, it's great to have the help and inspiration of seeing all the projects including your 'net :icon_thumleft:

Nice work speedy did you use the easy off oven cleaner like a lot off people suggest on this site. This is probaley my next stage to do grill n heater a/c box

Thanks Steven, and no since I had to do so much sanding to smooth everything out, I just scrubbed everything with "LA's Totally Awesome" and scotch brite pads, just to clean all the big dirt and grime off before sanding. Then wiped everything down with denatured alcohol on shop towels, and followed with a tac cloth before paint. Didn't have any problems at all after all that haha. I'll be doing a full step by step when this whole thing is done

And if you're doing your heater box, I posted a step by step on mine a couple pages back in this thread. Hunt2elk has a good one on his build thread too :icon_thumleft:
 
Great work n detail from both builds

thanks guys, good to at least have the most tedious stuff behind me and i'm really loving this silver, should pop pretty nice against the black. Looking forward to making my patch-job disappear now (hopefully haha)


thanks swede! I'm just trying to keep up with all the quality work everyone else has been doing on here, it's great to have the help and inspiration of seeing all the projects including your 'net :icon_thumleft:


Thanks steven, and no since i had to do so much sanding to smooth everything out, i just scrubbed everything with "la's totally awesome" and scotch brite pads, just to clean all the big dirt and grime off before sanding. Then wiped everything down with denatured alcohol on shop towels, and followed with a tac cloth before paint. Didn't have any problems at all after all that haha. I'll be doing a full step by step when this whole thing is done

and if you're doing your heater box, i posted a step by step on mine a couple pages back in this thread. Hunt2elk has a good one on his build thread too :icon_thumleft:
ive been watching his site since it started it is awsome detail good reference extra pics n info is allways good just keep posting

- - - Updated - - -

I THINK YOUR CAR N MINE ARE TWO OF THE SAME BOTH 69 R/TSE 440 HP. I HAVENT TAKEN MANY PICS OF REBUILT ONLY ON ITEMS IVE FINISHED. I GUESS I SHOULD HAVE TAKEN MORE WHEN I FOUND OUT BY READING N BROWSING THRU SOME OF THE BUILDS. A LOT OF PEOPLE GO INTO GREAT DETAIL.
 
Great work SF! it looks like you have this mastered! That light at the end of the tunnel looking brighter to.. Cant wait to see it complete as good as it looking! :)
 
I found something to use your WalMart touch up paint on, My gas cap and ring are in really good shape so as soon as I get the buffer and get them polished I'll try that out. Hopefully they look as good as your emblems.
 
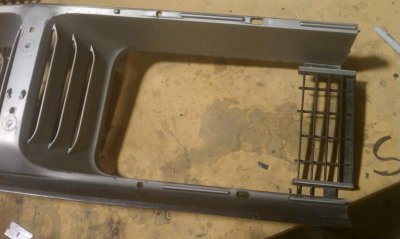
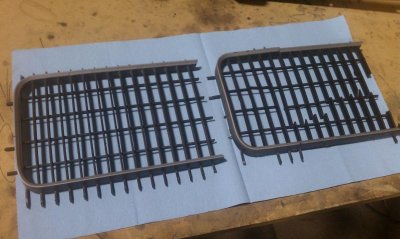
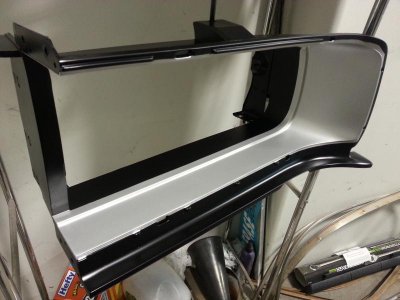
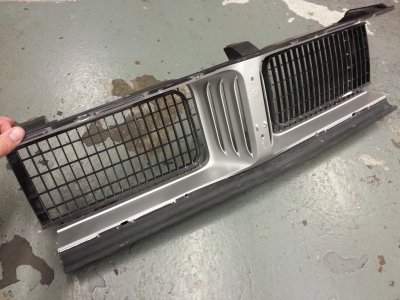
Thanks for the compliments guys, here's a look at the center and headlight buckets just mocked up, looking forward to hitting them with some black tomorrow

20131108_215203.jpg

20131108_215216(0).jpg

Can't believe how well that transplanted fin section ended up blending in, this is what it looked like in the middle of surgery
IMAG2671.jpg

Old busted section on the right, donor section on the left
IMAG2676.jpg


Check your vin Steven maybe they're twins! Haha mine was from the Hamtramck plant

I found something to use your WalMart touch up paint on, My gas cap and ring are in really good shape so as soon as I get the buffer and get them polished I'll try that out. Hopefully they look as good as your emblems.

Oh yeah I was meaning to use it on my fuel cap and ring too, should work pretty damn good! Unfortunately my stuff has the kinda fisheye type blemishes starting on the chrome so I'm not sure how well it'll polish up. What kind of shape is yours in?
 
I love the smell of fresh paint in the morning, smells like.. victory. :icon_cool:


My ocd tape-job haha:
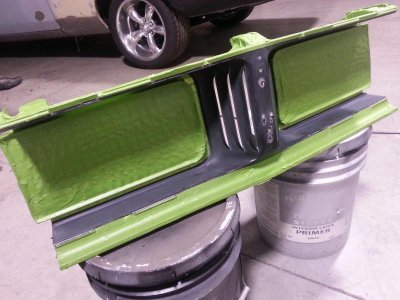

So now I'll hit the headlight doors tonight and let all this stuff cure for a couple days so I can back-mask and finish up with the trim black this weekend. I think I'm finally starting to see the light at the end of the tunnel for this thing

Hey Speedy . . . you can't be that OCD, because if you were "really" bad, that would be CDO ! ! ! ( smirk )

Great progress, can't wait to see the end result ! ! !
 
Speedfreak are you there ??

I need a shot of silver paint for a CAMARO grill I just got !!
I'll stop by and you can show me your ocd tape job technique ..

:violent-smiley-101:

When ya gonna be there ?

:toothy3:

Mike..

I found something to use your WalMart touch up paint on, My gas cap and ring are in really good shape so as soon as I get the buffer and get them polished I'll try that out. Hopefully they look as good as your emblems.
 
Hey Mr Speedfreak
I came on board a little late and spent about an hour going through all your old posts. Wow, great restoration you are doing there. I have my own Charger (a third gen) to restore soon, and I'm getting lots of great tips from your thread. Keep up the great work and can't wait to see the finished product.
 
Last edited:
Hey Mike sorry it's been pretty hit or miss on when I'm there lately, been really busy. If you shoot me a private message on here with pics of the grille I could probably get it done for ya. Hope everything's been good!

Hey Mr Speedfreak
I came on board a little late and spent about an hour going through all your old posts. Wow, great restoration you are doing there. I have my own Charger (a third gen) to restore soon, and I'm getting lots of great tips from your thread. Keep up the great work and can't wait to see the finished product.

Hey thanks a lot Jase, glad I could help and if you have any questions on anything feel free to drop me a line. Welcome aboard!
:eek:ccasion14:
 
Well guys it's been a long 3 day weekend, here's a little progress report

Spent most of Saturday taking a field trip to my friend Chuck's to pick up some grille spacers and have him teach me the ways of trim polishing. I'll do a post about that soon since that's the next thing up for me to do on my grille project. Also got to check out his (factory) triple black Hemi '70 Challenger that my car's brakes came from. :eusa_drool:

20131109_102058.jpg

Then yesterday and today I spent more hours than I'd like to admit back-masking the silver on my grille getting ready for the black. Here's your "CDO" tape job conv67 lol

20131111_144124.jpg

Then I tested out the SEM trim black on my headlight doors, with some disappointing results. Might have been the temperature or my prep but it had some weird differences in sheen around the finned areas. So I picked up some satin black rustoleum ultra 2x coverage that Chuck recommended and it worked awesome for me, fine spray that went on smooth and leaves a nice even finish. I was even able to lay it right over the trim black on the headlight doors and they came out perfect, good stuff :icon_thumleft:

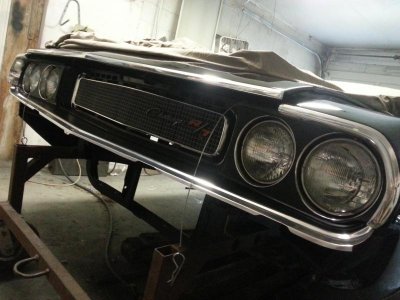
I'll have more pictures tonight after the center section dries and I get the tape off, but here's one of the headlight buckets finished up :icon_cool:

20131111_122013.jpg
 
Auto Transport Service
Back
Top