• When you click on links to various merchants on this site and make a purchase, this can result in this site earning a commission. Affiliate programs and affiliations include, but are not limited to, the eBay Partner Network.

'69 charger r/t-se: Building my dream car

You got skills Speedy, that already looks pretty damn good "Glad I could help". I don't know if all dipsticks are the same but I'd order the flexible Lokar one if I had it to do over (had to bend this one and it barely fits still). If insulating the floor I'd check into Bonded Logic from Summit, I used they're super mat and sticky stuff adhesive "allot more for your money", it is a little thick for doing doors but really nice stuff. Enjoy

Thanks man! And I'm being way more careful with the sandpaper this time lol. Yeah the lokar ones are expensive but I wasn't sure if I'd have that same problem as you with a standard dipstick, especially since you've seen how tight everything is around my headers haha. Hm I'll have to check that stuff out, I was just gonna go with dynamat xtreme cause it got a lot of good reviews other than price, but its half price right now with instant rebate :shruggy:

Great job on the I-beam ( or H-beam if you look at it sideways (SMILE ) ) . . . and awesomeness from 747Mopar for adding his "part" to your Frankenstein ! ! !

How can you beat that - this group is the greatest when I see things like this - people helping each other out ! ! ! You're top notch 747Mopar ! ! !

Thanks 67! And yep that was really cool of him to help out like that! Just more proof of how the fbbo is such a great place to be, thanks to friends like 747 :icon_thumleft:

Nice job on the I trim Speedy. I didn't know it was possible to bring those pieces back from the dead. After seeing yours, I never should have boughten a new set for my car. Live and learn I guess - at least I didn't throw my old set in the dumpster.

Thanks elk! And if you have the money, buying a new set may be a more reasonable way to go lol. It's possible to save them especially if they only have a couple little dings, but I've spent about 3 hours on this I beam and still have a little less than half of it left to straighten out. They're just chromed aluminum, so if you sand the chrome off and work the metal straight they can be buffed with blue compound to look brand new. This is the back of it where you can see how much I've worked the metal, I just used a body hammer, some small scrap square pieces of aluminum I picked up from the machine shop I work in, and an old flattened punch:
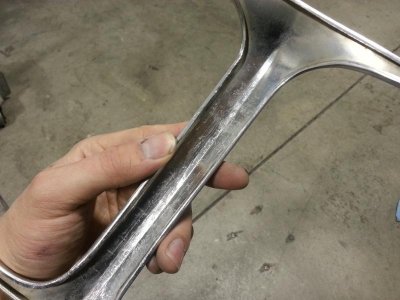
20140113_001748.jpg

- - - Updated - - -

Wow Speedy, she sure is coming together fast. It's amazing what a little spit and polish can do. :)

And don't forget the elbow grease! Haha, thanks man!

You sure got a knack for this work! Great job. Hit her with the brown, grey then white compounds and that puppy will be shinning like chrome. Real nice of 747 to donate that to you. True car guys around here! Doing their own hard work and helping each other out. Much rather hang out with you fella's then sit and listen to a turn key car show junky brag about his #'s matching wiper blades and vintage floor mats.

Keep up the good work!

Thanks Prop! And I agree 100% you guys are all way cooler to hang with on here than the typical parking lot/lawn chair warriors that seem to be all too common these days. You're all an awesome group of friends and make me glad I joined up with this misfit outfit in the first place haha
:eek:ccasion14:

And thanks for the suggestion on compounds, I might have to try that out! I was also told if you hand sand it up to like a wet 400 grit and hit it with blue compound it'll look like chrome too, have you ever tried that way? My friend buffed a little spot that was only sanded with 320 just to show what it looks like, and you can barely see any sanding scratches, crazy!
 
You bet! Same here man. Thought that part was stainless. Being Aluminum you'd want to go with the black, brown, then white.... That trim can be sure time consuming! Chrome shops around here want $40 bucks a foot to redo trim...Yikes! After hearing that price, that's when I took up buying a buffing kit, table buffer and some junk trim from the boneyard to practice on. Here's a little article if you get bored:

http://www.caswellplating.com/buffman.htm

Yeah it's ridiculous what chrome shops want around here too, and even then I've heard the results can be real hit or miss so it's worth spending the time to save what I got and polish it. Does take ages but thanks to all the other stuff I've had to buy for the car I've got more time than money, so I guess it works out lol! And thanks for the link, that'll be really useful here shortly!

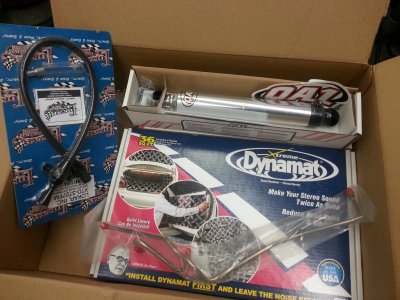
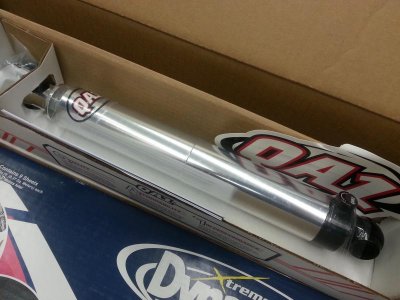
Speaking of all those other parts, just go my shipment from Summit! My wallet's on life support now, but you can't beat that year-round christmas feeling when new car parts show up haha
:beavisnbutthead:
20140115_112843.jpg

20140115_112858.jpg

20140115_112904.jpg

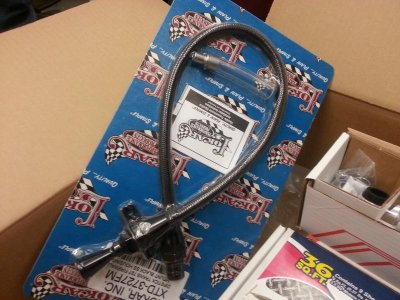
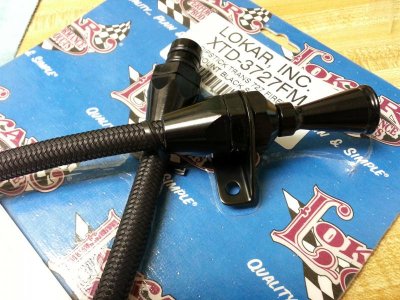
Still waiting on the Lokar flexible dipstick being dropshipped through Jegs, the Grant hub adapter from Summit, and steering wheel from Sparco. But looks like I'll be having fun installing some of this stuff tonight and working on that I-beam
:eek:ccasion14:
 
That was quick, gotta love new parts. Race to get them on and then back to twiddling your thumbs waiting on more money and parts "Ahhhhhh" isn't life great.
 
That was quick, gotta love new parts. Race to get them on and then back to twiddling your thumbs waiting on more money and parts "Ahhhhhh" isn't life great.

Ain't that the truth! But after I get these on I'll have plenty of other odds and ends left to do before fireup, still have to hook up all my linkages, run plug wires, figure out how to modify my alternator bracket, and monkey with wiring. Plenty to do til I save more money up haha. Man, I never thought I could be excited about dipsticks, but I think the black anodizing will be a nice little touch to the engine bay if anyone ever even notices them haha
20140115_135554.jpg

And a new-ish development I don't think I've mentioned yet, sometime soon maybe this weekend I'll be getting hooked up with a 6 point rollbar for only 50 bucks! It was taken out of a '69 Roadrunner drag car my friend is restoring for a guy that wants it to be more back to stock, and has nothing to do with the cage. It will need rewelding and new door bars bent up (I wanted to make my own to tuck in close to the seat anyway), but I'm excited about it!
 
Ain't that the truth! But after I get these on I'll have plenty of other odds and ends left to do before fireup, still have to hook up all my linkages, run plug wires, figure out how to modify my alternator bracket, and monkey with wiring. Plenty to do til I save more money up haha. Man, I never thought I could be excited about dipsticks, but I think the black anodizing will be a nice little touch to the engine bay if anyone ever even notices them haha

Speedy ? ! ? You're going to put that Black anodized dipstick on your ORANGE engine with the engine compartment painted BLACK ? ?

What are you thinking ? ? ? ( wink ) ( smile ) . . . sorry, couldn't resist . . .
 
Speedy ? ! ? You're going to put that Black anodized dipstick on your ORANGE engine with the engine compartment painted BLACK ? ?

What are you thinking ? ? ? ( wink ) ( smile ) . . . sorry, couldn't resist . . .

Speedy!! QUICK PAINT THE ENGINE COMPARTMENT ORANGE BEFORE IT'S TOO LATE!!!!!
 
Speedy ? ! ? You're going to put that Black anodized dipstick on your ORANGE engine with the engine compartment painted BLACK ? ?

What are you thinking ? ? ? ( wink ) ( smile ) . . . sorry, couldn't resist . . .
Speedy!! QUICK PAINT THE ENGINE COMPARTMENT ORANGE BEFORE IT'S TOO LATE!!!!!

Uh-oh, I better call Mark Worman to tell me everything I'm doing that's not OEM :eusa_dance: haha

Curious what made you decide on QA1's?

They're really shiny! :icon_thumleft: (just joking) I decided to go with them mainly because I like that you can adjust the dampening rates, that way with just a couple clicks I can soften them up for the quarter mile (or backwoods country straightaway when no one's looking), or stiffen them up for the twisties or daily driving. I've read some good reviews on them, they seem to be really well made, and whenever they wear out I can send them in to be rebuilt by QA1. They're also supposed to be lighter than a standard shock, not by a ton I'm sure but I'll be putting Frankenstein on a diet next winter so I guess any little bit helps.
 
Last edited:
I'll be waiting to see how that dipstick works out for you "I'm ready to throw mine in the trash". Mine had to be bent to clear motor mount and the headers, even thou I didn't kink it it's hard to pull in and out now. Also curious to see the rollcage go in "another thing I've been thinking about". I used the Lokar throttle and kickdown cables and was very happy with them "good stuff".
 
The roll cage is sounding pretty cool! I have the Lokar throttle and kick down to, they seem to work good.. You've come a long way Speed, and i like that dip stick set up, i have to admit this is the first time i seem them, pretty neat idea!
 
Thanks guys! I have the lokar kickdown on my Chevelle and like it a lot too, but I'll be using the factory kickdown linkage and throttle cable with the Charger since I already have em. Just got an email today that the engine oil dipstick dropshipped from lokar so I'll let you guys know how it fits when it gets here.

And as for the rollcage, it'll just be a roll bar with downbars through the package tray and door bars hopefully bent and tucked close in to the seats so I won't have to climb over them every day. As far as I know since I'm retaining the stock firewall, dash, and floorpan, this would meet NHRA cage requirements up to 10.0 sec runs (which I'd be over the moon to one day even be in the low 11's haha). And it'll help chassis rigidity with tying into the front and rear subframes. :icon_thumleft:
 
Last edited:
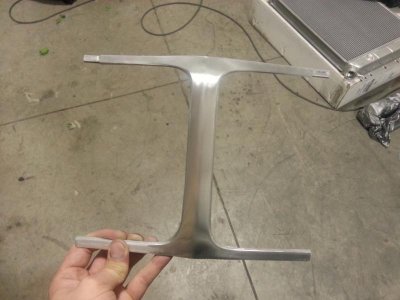
Well guys, unless something catastrophic happens during buffing, it looks like 747's I-beam trim will live to find it's way onto the front of another Charger! Took another 3 1/2 hours last night but it's straight as an arrow ready for polishing
:icon_pray:
20140116_002423.jpg

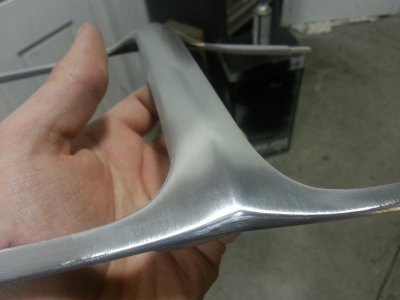
This is the side that was pancaked flat pretty bad, surprised it came out so straight
20140116_002143.jpg

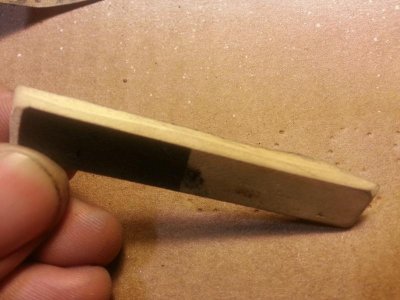
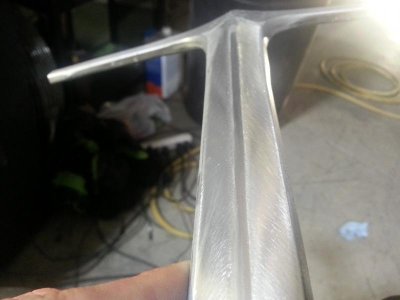
So here's just a couple tips on how I straightened it out that I don't think I've mentioned so far. I noticed that the long flat sections had some light waves in them still (you can see high or low spots in the metal as the "glare" or shiny-ness moves down it when moved under a bright light), so I cut a piece of paint stick into the width I needed to cover the entire width of the flat, and sanded the edges round to fit the form of the metal:
20140115_213922.jpg

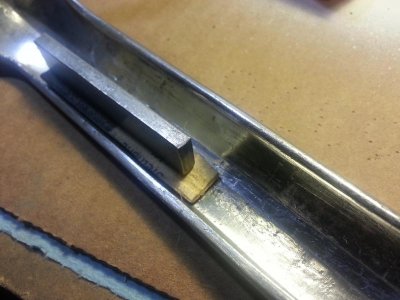
Then I just held the I-beam flat against the flat steel of the bench vice and lightly hammered down the piece of aluminum I set on top of the wood. This way the trim is sandwiched between the wood and the vice, flattening it straight. Worked like a charm!
20140115_214156.jpg

Once the metal was worked as close as I could get it, I block sanded it with 320 grit and one of those little sponge-sized square flexible sanding blocks you can get in a 3-pack at Napa. Block it in a few different directions til it's straight just like any panel on a car, and a good trick is to use the direction of the grain to keep track of the size and sharpness of the small flat running down the center of the trim like you can see in this pic:
20140115_214035.jpg

But when it comes to the compound curves at each end you're kinda screwed lol.
20140115_215022.jpg

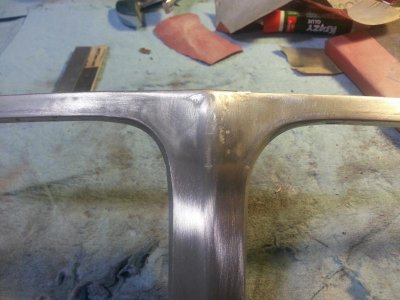
I just worked the metal with the bigger square flat end of a center punch, and the only real way to keep track of how straight it is, is to use the light reflection like I mentioned earlier in this post, and you'll see it's good when the movement of light on one side matches the other side. (Notice the line of reflection is now even and straight across both sides of the trim)
20140116_002143.jpg

If you're patient and take your time (I have about 7 1/2 hours in this one up to this point), it'll come out looking like new! Just have to buff it up to a nice shine and I'll be set. Huge thanks again to 747 for giving me his old I-beam to fix up!
:eek:ccasion14:
20140116_002539.jpg
 
Great tips and pic's! Thanks for taking the time MSF. Goes to show hard work does pay off. Looking forward to seeing it all buffed up. Guessing it will look better than new.
 
'Sweet" I was worried it may not clean up "don't doubt Speedy" haha. Great job
 
Great tips and pic's! Thanks for taking the time MSF. Goes to show hard work does pay off. Looking forward to seeing it all buffed up. Guessing it will look better than new.

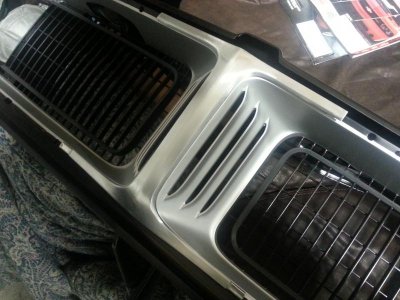
Thanks prop! I got lucky and only found a whopping grand total of two small dings in the rest of my grille trim, so I'll be prepping them tonight and should have everything buffed up tomorrow. I'm excited to see how it all comes out too

And thanks 747! I thought I was gonna have to call in a witch doctor there for a minute haha
 
Great work Speed! Gos to show, if we don't give up it gets done, Your going to have a great looking grill on your Charger bud...
 
Auto Transport Service
Back
Top