• When you click on links to various merchants on this site and make a purchase, this can result in this site earning a commission. Affiliate programs and affiliations include, but are not limited to, the eBay Partner Network.

'69 charger r/t-se: Building my dream car

Not to confuse the issue but you said 'cockpit' and as I was looking at Drew's 68 1/2 RR post this morning and this steering wheels screams aircraft style cockpit don't you think? Your choices are cool above too but thought you might want to see this if you haven't already before you make a purchase.

attachment.jpg

UH . . . am I allowed to change my vote ? ? ? ? . . .

GOOD ONE Tallhair . . . Thanks for the pic ! !

This steering wheel is really COOL ! ! I might have to change my vote - is this steering wheel #3 ? ? ?
 
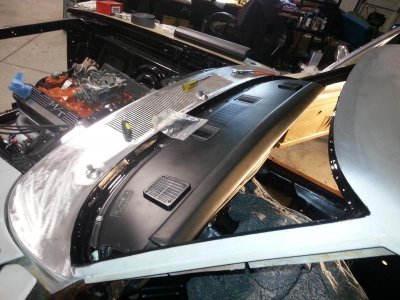
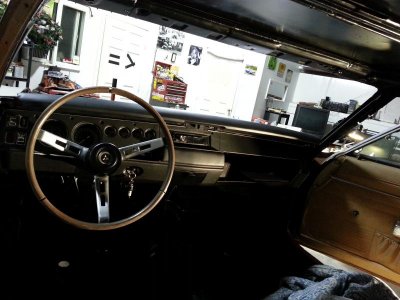
Well its been a big afternoon guys, my buddy Mike came by and we finally got the dash in
:icon_pray:
It was fun having someone that's already done a ton of them there to help and show how to hook everything up, how this works, that works, etc. And I think it's looking pretty damn good in there!

20140104_144628.jpg

20140104_144536.jpg

20140104_144656.jpg

Finally starting to feel more like a car! So on tonight's punch list is wrapping the header around the starter and getting my steering collumn in, feeling really good about the progress
:eek:ccasion14:
20140104_150336.jpg
 
Thanks for those links Brian, I actually meant to ask about the corrosion problem in my original post. I don't plan on driving through any monsoons, but it still seems like a valid concern.. with how close my starter is to those headers I really need to do something though. :thinker: maybe I'll mess with some cadboard as a heat shield template and see if it's going to be as impossible as I thought. Or maybe just wrap the closest parts of the header closest to the starter?


Thanks red! I have pictures saved of your Charger from your welcome wagon thread, I love what you did with your build :icon_thumleft: I actually have a question for ya too, I'm planning on machining some lowering blocks like Mr Angry did to get my stance closer to his and your cars, and was thinking like a 1 1/2" or 2" drop. What would you suggest?

+1 for steering wheel #1! Any more opinions guys? And should i go with a leather or suade grip? :eek:ccasion14:

Thanks Speedfreak. I like the car low so i'd say go with a 2" drop. My leafs are pre-lowered 2" and am satisfied with how it sits. Still gives it a bit of a raked look while not being too low. I think Mr. Angry has a 2" drop as well.

As for the steering wheel, that's a tough one. The suede and leather both look great. But I think the leather will hold up better than the suede in the long run.

Dash looks killer! Keep the updates rolling. :eek:ccasion14:

Yeah that's what I was thinking too :thinker: I'll have to take a better look at my car later with a tape measure, I have the front end where I want it with the torsion bars but can tell the rear needs to come down now. But yeah Mr Angry has 1" pre lowered springs with 1" blocks, so between that and your car it sounds like 2" will be spot on. Eventually I'd like to get the hotchkis springs like yours but for right now the blocks will be fine. And free since I work in my dad's machine shop where I can make em haha

Yeah I think you're right, and old frankenstein's gonna be seeing a lot of drive time so I should probably go the more durable route with leather

And thanks man, now I just gotta get those gauges moving! :eek:ccasion14:
 
Dash, gauges, 3 speaker setup, engine bay .. everything looks stellar !
 
Speedy your Charger is looking fantastic! I love the dash in it, just SWEET!
 
Dash, gauges, 3 speaker setup, engine bay .. everything looks stellar !

Thanks Brian! There's actually no speakers installed, I just made up a template for some block-off plates that will fit under the speaker grilles so at first glance nothing will look modified. Good to know it's working so far lol!

Speedy your Charger is looking fantastic! I love the dash in it, just SWEET!

Thanks Ron! Definitely feels like a big step in the right direction, and some good motivation to keep this pace up :icon_thumleft:
 
Out of curiosity why are you going to block off the speakers wholes in a 3 speaker dash instead of putting speakers in there?
 
Out of curiosity why are you going to block off the speakers wholes in a 3 speaker dash instead of putting speakers in there?

I was planning on just running my 6 1/2's in the doors for the fuller sound of the big woofer and they also have built in direction adjustable tweeters, but actually now you have me thinking I could probably use splitters and run the two stereo dash speakers as part of the system too :thinker:
 
Well I got the two header primaries around my starter all wrapped up last night, itchy as hell but came out pretty good and should hopefully do the job

20140106_011137.jpg

20140106_010939.jpg

Headerwrap.jpg

And looks like I still have pretty decent clearance for the starter wires :thinker:

20140106_010734.jpg
 
"Man is that tight" makes me glad I never had an original to start with haha. Sucky thing is even with the mini I have to unbolt one motor mount, lift driver side of motor and unbolt the header just to change it. Your car sure looks really clean underneath "been a while since mine was that clean" as usual "attention to detail".
 
Wheel # 4 !!!

Wheel # 4 !!!

Tuff.jpg

Although I kinda like the wood one too :headbang:

Tuffwood.jpg

Mike ..

UH . . . am I allowed to change my vote ? ? ? ? . . .

GOOD ONE Tallhair . . . Thanks for the pic ! !

This steering wheel is really COOL ! ! I might have to change my vote - is this steering wheel #3 ? ? ?
 
The fit and finish looks great down there speedy. Looks like everything fits nice and I'm sure the shielding will server your starter well
 
I have the green version of PFG's Tuff Wheel pictured #4 (at least I think it's green I'm colour blind)

I'm not trying to hijack your thread Speedy I want your input since you are familiar with the product... will SEM Color Coat stand up to the abuse a steering wheel takes and sweaty palms? I'd like to change mine to Black but wondering if the SEM is the way to do it?
 
"Man is that tight" makes me glad I never had an original to start with haha. Sucky thing is even with the mini I have to unbolt one motor mount, lift driver side of motor and unbolt the header just to change it. Your car sure looks really clean underneath "been a while since mine was that clean" as usual "attention to detail".

Yeah not a whole lot of room in there haha. Man that must be fun! All I'd have to do is drop my driveshaft, unbolt my header, completely disconnect the linkages, bolts, etc from the transmission, and drop it back far enough to where I can pull the starter out from its exhaust cage. Yeah, hopefully I don't have any starter issues.. :head_smack: lol


Yeah I really like the mopar tuff wheel but I can't leave anything alone "gotta do something different" haha but part of why I like the sparco one is it reminds me of the tuff wheel

I have the green version of PFG's Tuff Wheel pictured #4 (at least I think it's green I'm colour blind)

I'm not trying to hijack your thread Speedy I want your input since you are familiar with the product... will SEM Color Coat stand up to the abuse a steering wheel takes and sweaty palms? I'd like to change mine to Black but wondering if the SEM is the way to do it?

Haha no problem goon! I can't say for sure on how it will hold up to sweat since none of my redyed pads have been put through daily driving yet, but just testing it trying to scratch or chip them gave me the impression Colorcoat is some pretty tough sh!t lol. Imo it'd be worth a try!
 
Late nights and a long couple days

Well guys, I've spent the last couple days working full 9 hour days at my job then on the Charger til 2:30 in the morning, classic rock blasting and copious amounts of caffeine onhand, but it's been more than worth the precious hours of lost sleep haha. Here's what I've been up to in my mad scientist lab the last few days

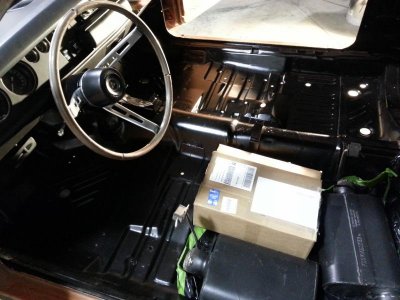
Got the pre-install odds and ends sorted out under the dash (some wiring, hooking up the vacuum lines to the light switch, etc) and got the steering column in with only minor persuasion courtesy of the "BFH." Haha

20140109_014058.jpg

20140109_015922.jpg

Need to do some touch up painting still, but here's some tips on that install for people like that haven't done one before; it's not rocket science but was a little tricky getting the coupler fully seated. First get your steering box centered up (mine is 3 turns lock to lock and think that's standard on all of our cars with factory boxes ?), so all the way to the left or right, mark the position with a sharpie, then 1 1/2 turn back and you're centered up. You should see the keyway (single wide spline) facing up on the steering box, this will line up with the keyway on the collumn. Then I cleaned the splines on both the box and coupler really well with a wire brush and scraping with a small screwdriver, respectively, and hit them both with a good amount of general purpose grease. Now from the inside of the car I got the steering collumn through the firewall and roughly into position with the coupler halfway close to steering box. I was doing this by myself so I used a 5 gallon bucket in the car under the steering wheel to support it somewhat in position while I went around to the engine bay, worked really well. Then just line up the keyways and the coupler should connect slightly by hand. At this point I found out the trick is to get the coupler as straight on the steering box as possible (don't mind the rest of the collumn, just hold the coupler in position for now) and talk nice to it with an appropriately sized hammer, and it should go the rest of the way on relatively easy. Finally with that out of the way just drive the coupler pin into place with a hammer and center punch, lock down all the collumn bolts to the dash, and the cover bolts to the firewall. Pretty simple process anyone can do on their own with a little patience

After that was in, I crawled back under the car and bolted up my tie rods. A halfway decent eyeball-alignment was good enough to get the car rolling much easier than it has been previously lol

20140109_014424.jpg

And piled in some parts for a little field trip..
20140109_020129.jpg

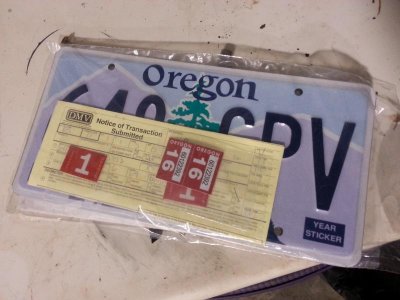
First stop, the eternal hellfire that is the local DMV. Luckily the title change, vin check and registration went off without a hitch and didn't even have to wait in line, "we're legal!" Haha
20140109_175749.jpg

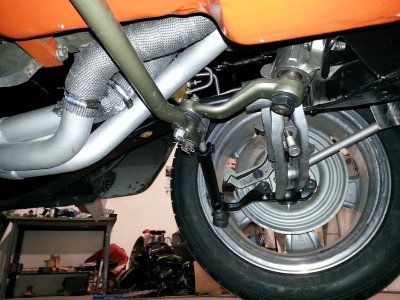
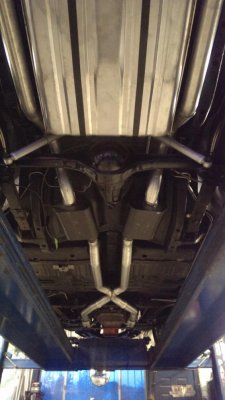
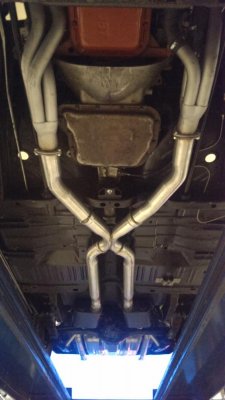
And then came the fun part of the field trip, took Frankenstein up to my buddy Russ' muffler shop for custom 3" x pipe exhaust. :eusa_dance:
20140109_021736.jpg

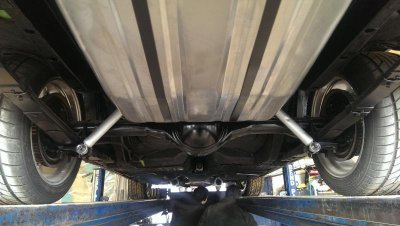
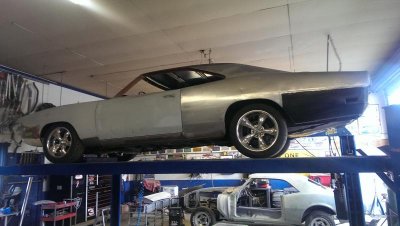
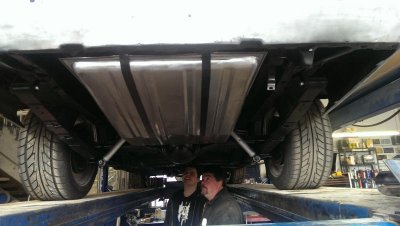
It was cool having it up on the lift and really getting to see the results of all the hours crawling around under the car stripping and painting everything. Here's some pretty cool shots my dad took

IMAG0140.jpg

IMAG0138.jpg

IMAG0139.jpg

Russ is a good friend of mine and a fellow mopar guy with a gorgeous viper red '68 440 six pack Roadrunner done up like a '69 1/2 (built by himself), so I feel a lot better going to him than some random exhaust shop. Gave me a good deal and did a great job, can't wait to hear it run! :grin:

IMAG0153.jpg

IMAG0150.jpg

IMAG0154.jpg

So now I'm just left with the odds and ends left in the engine bay and some wiring before I'll be ready for the maiden fire-off. Getting real close fellas!
:eek:ccasion14:
20140106_235546.jpg
 
Looking real sharp now Mr SF :headbang: That exhaust turned out great, and it will be a neat sound once you get it fired. My GTX has the same shape to the pipes with the X and Flowmasters - only difference is mine is 2-1/2" throughout.
Glad to hear your column is in now, they can be a real PITA on your own to install.
 
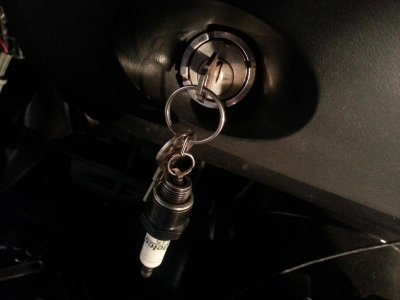
"Kick a$$" now that's some good progress. Your car is really coming together and the exhaust looks great "like the keychain". Congrats on getting the title taken care of :hello2:.
 
Are you going to sell tickets when you starter up? I'm In!

Great Thread, it's like a great show that is only on once a week. Can't get enough.

Great Job Mr.SpeedFreak. (I usually don't use "Mr" but you have earned it, much respect.)
 
Auto Transport Service
Back
Top