• When you click on links to various merchants on this site and make a purchase, this can result in this site earning a commission. Affiliate programs and affiliations include, but are not limited to, the eBay Partner Network.

'69 charger r/t-se: Building my dream car

mopar

Just remember that charger is gonna have way more HP because its a MOPAR baby!!!!!!!!!!!!!!!!:beavisnbutthead::3gears:
 
Thanks fellas, and you better believe the Charger will be having every bit as much fun and then some once it's done. No trailer queens here lol :icon_thumleft:

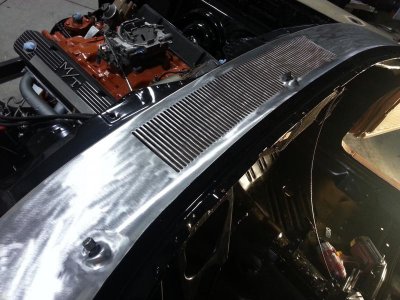
Got off to a good start this morning, windshield shelf and cowl are all stripped down

View attachment 159338

The cowl will get hit with etch-primer, then the windshield shelf will get chassis saver and then jammed with single stage gloss black. But first I gotta grab some lunch haha

View attachment 159339


You stage these photo's right? LOL Nice job speedy
 
I have a feeling if we lived close together it wouldn't be a good thing for the local police haha. I'm chomping at the bit to get out there and execute some power slides for the kids but for now they'll have to accept donuts in the snow covered field in the old Dakota. Glad to see the bodywork under way and as usual it's looking great.
 
I have a feeling if we lived close together it wouldn't be a good thing for the local police haha. I'm chomping at the bit to get out there and execute some power slides for the kids but for now they'll have to accept donuts in the snow covered field in the old Dakota. Glad to see the bodywork under way and as usual it's looking great.

Me too ! ! Wait . . . I don't have a Charger, so I'm the red-headed step child because I drive a Belvedere . . .

the local police would still have their hands full !

( smile )
 
I have a feeling if we lived close together it wouldn't be a good thing for the local police haha. I'm chomping at the bit to get out there and execute some power slides for the kids but for now they'll have to accept donuts in the snow covered field in the old Dakota. Glad to see the bodywork under way and as usual it's looking great.

Don't worry 7, When the Coronet's done I'll be down to see ya!
 
Man that's for sure, the local ticket writers already have fun with me as it is, let alone all of us hooligans in one place haha. I still say we all gotta have a fbbo reunion at Mopars At The Strip one year!

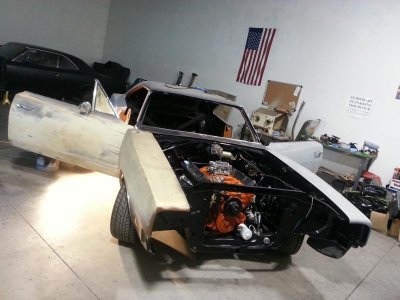
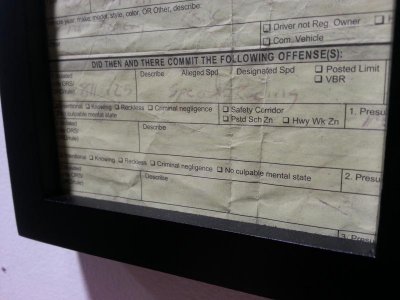
That reminds me, here's a pic of one of my more expensive wall decorations... lol :eusa_dance:
20131118_221529.jpg
 
Last edited:
Progress!

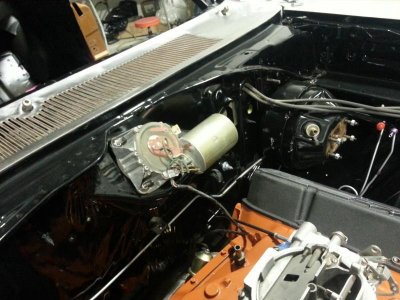
Alright guys, had a great weekend powering through on the Charger. Got that window shelf taped off, sealed with Chassis Saver and topcoated with single stage jet black. Came out nice even though no one's ever gonna see it haha. I also shot my battery tray and k-frame-to-rad-support brace with it, I'll have to post up some pics of them later
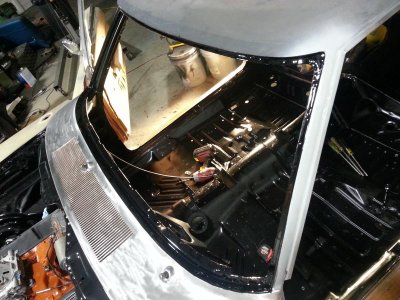
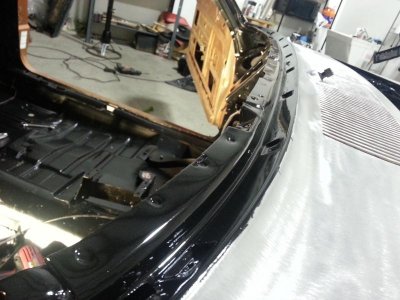
20131229_163600.jpg

20131229_163613.jpg

20131229_163535.jpg

I should also note, when I was stripping the shelf I had to remove some pretty rusty lower molding clips. I just center-punched the screws and drilled them out with a 1/8" carbide drill (comes in handy working in a machine shop that makes them haha). It seemed like the original screws still worked with the 1/8" hole but I was told if not, they can be riveted on in place of screws.

So with that done I went to work on the brake pedal assembly and got it stripped, etch primed and painted like the emergency brake. Sorry I forgot to take one of it after topcoating. Also I removed the little joint that connects it to the brake booster, painted it separately, and regreased the special bolt with the o-ring that connects it to the brake pedal itself.
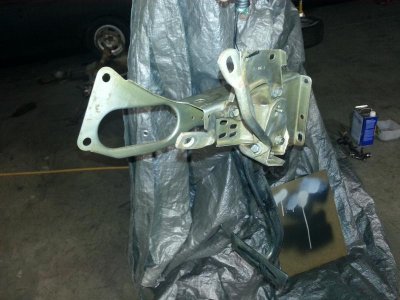
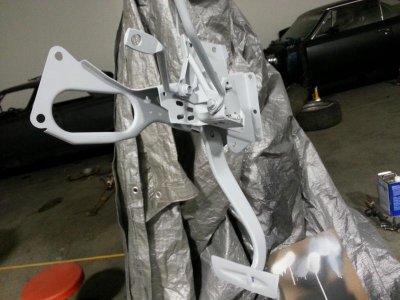
20131228_161703.jpg

20131229_011226.jpg

Then sandblasted and painted/flat cleared a bunch of hardware for the pedal assemblies, steering collumn, dash, wipers, etc. (Not all of them are in this pic) and painted the steering collumn support bracket. I know this would normally be a semi-gloss black and most of the pedals assemblies would be bare metal, but I thought having all these things satin black would look better with my interior.

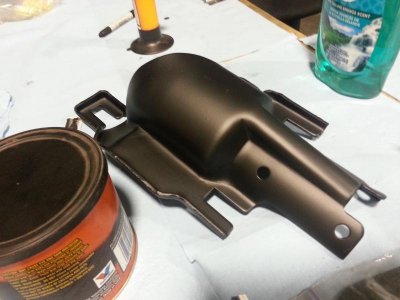
20131229_164021.jpg

20131229_164030.jpg

Then wrapped up with some tinkering on my dash: cleaned up the wiring with some zipties (someone also spliced in a couple random wires which I removed), secured my macguyvered-in modern pioneer stereo, got all the pad fastened down, ignition and ignition light hooked up, vacuum switch connected to my light switch, and glove box in. Finally ready to go in the car :icon_pray:

So Saturday night I pulled a traditional caffeine-fueled all-nighter getting all this stuff done, so I'd be ready for my car builder friend/"Mopar Mr. Miagi", Mike to come over for some Sunday wrenching. We got the driver's side fresh air vent box in, then the parking brake, then the windshield wiper linkage with new seals. Before I put that in, I sprayed wd40 down the crimped end of each pivot by where the wipers attach, and worked them back and forth until they freed up and turned nicely. We were on track to get the dash in until we noticed I was missing some standard bolts for the brake pedal assembly, so I'll be hitting Napa for a hardware run later today and hopefully be putting the steering collumn and dash in with Mike later this week. I'll get some better pics later when I get the brake assembly bolted up, but here's a few I grabbed in the middle of all the action
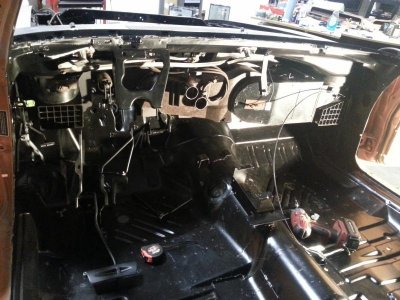
20131229_163442.jpg

20131229_163505.jpg

20131229_163913.jpg

20131229_124850.jpg

Starting to feel less like a shop ornament and more like a car :eek:ccasion14:
20131229_164002.jpg
 

I wonder if I add a couple things onto Speedy's TO-DO list for my car. . . if he'll get them done for me too ! ! !

( SMILE )

With all the things he knocked off the list, I'm sure it would all just blend in ? ! ? ! ? ! At least I could hope . . .

Great progress Speedy ! !

- - - Updated - - -

Don't worry 7, When the Coronet's done I'll be down to see ya!

That would be cool . . . Michigan is my old stomping grounds, I might have to head up your way and grab 747Mopar on the way past his house ! ! !

( SMILE )

Don't think I'd have to twist 747Mopar's arm TOO MUCH to make that happen . . . ( wink )
 
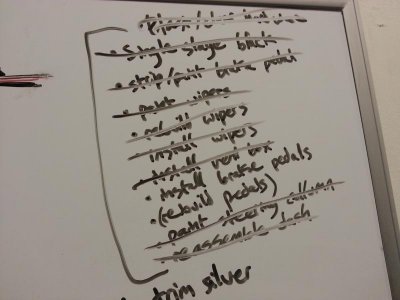
Great progress Speedy, I have the same board in my garage but my problem is the to do list gets knocked down pretty quick while the to buy list just stays the same. Your car is definitely coming together "sweet". As far as Vegas goes "I don't know about that" I map quested it "very looooooooooooooooooooooong haul". Looking good

- - - Updated - - -

I wonder if I add a couple things onto Speedy's TO-DO list for my car. . . if he'll get them done for me too ! ! !

( SMILE )

With all the things he knocked off the list, I'm sure it would all just blend in ? ! ? ! ? ! At least I could hope . . .

Great progress Speedy ! !

- - - Updated - - -


That would be cool . . . Michigan is my old stomping grounds, I might have to head up your way and grab 747Mopar on the way past his house ! ! !

( SMILE )

Don't think I'd have to twist 747Mopar's arm TOO MUCH to make that happen . . . ( wink )
There would be no twisting needed "I'm game".
 
looks very good,can't wait for that TIRE SMOKE. great job there speedy
 
Nice job Speedy - that punch list is sure getting short.
 
Hey SF, you're doing about the same thing i'm doing on mine right now. Painted my brake assembly and gas pas pedal. Still got to paint my steering column so you're 1 up on me there. Did you take yours apart or just clean and paint? Keep up the good work. I enjoy seeing what you're going to do next.
 
Thanks guys :icon_thumleft: really exciting to be getting closer to a first fireup

Great progress Speedy, I have the same board in my garage but my problem is the to do list gets knocked down pretty quick while the to buy list just stays the same. Your car is definitely coming together "sweet". As far as Vegas goes "I don't know about that" I map quested it "very looooooooooooooooooooooong haul". Looking good

Ahhh.. you just had to mention that To Buy list! And now my wallet's on fire. :( haha. Well I figure we've all had our cars for so long with no seat time, I'm thinkin a road trip to Vegas sounds like a good start to making up for lost time! :thinker:

looks very good,can't wait for that TIRE SMOKE. great job there speedy

You and me both Charlie! :eek:ccasion14: or at least breaking some noise ordinances lol

Nice job Speedy - that punch list is sure getting short.

Thanks elk! And yeah it helps doing those little weekend lists, the rest of the whiteboard with my main punch list is still at "Mount Everest" levels of work to be done. Those little ones are like setting up base camps haha

Hey SF, you're doing about the same thing i'm doing on mine right now. Painted my brake assembly and gas pas pedal. Still got to paint my steering column so you're 1 up on me there. Did you take yours apart or just clean and paint? Keep up the good work. I enjoy seeing what you're going to do next.

Thanks rrman! And I just cleaned mine up and painted it mainly for the color change from tan to black. There wasn't even any real surface rust, and spins like brand new, so I figured in that nice of condition it didn't really need taking apart and rebuilding. The "paint steering collumn" on my punch list was actually just the little coupler at the end I still had to paint silver :icon_thumleft:
 
Just wanted to mention to RRman that taking the column apart, cleaning and re-lubing the column bearings made a huge difference on mine (they were filthy and rough).
 
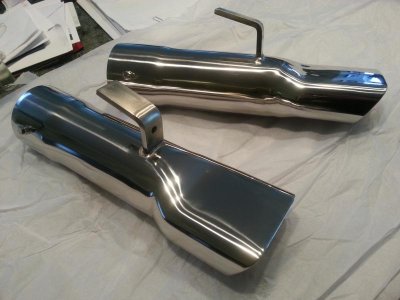
And "Oh yeah!" My exhaust tips from P&G classic showed up today. Like Hyrdgoon said about his, I'm really happy with em!

20131230_114538.jpg

20131230_114701(0).jpg

On the other end of the product quality spectrum, take it from me and avoid REM gloveboxes. Bought mine from a store on ebay for what ended up being a ridiculous 40 bucks after shipping, took a little over a month to even get it (supposedly "built to order"), and barely fit for $h!t. The spacing of the metal clips was off by a lot, and after a good amount of frustration I was barely able to catch them with the screws to make it work.

- - - Updated - - -

Just wanted to mention to RRman that taking the column apart, cleaning and re-lubing the column bearings made a huge difference on mine (they were filthy and rough).

Yeah I was really lucky all my interior stuff was in such good shape, for the most part I would guess they usually need taking apart and rebuilding.
 
I had problems with my REM glovebox also. One of the metal tabs actually broke off because I was trying to force it to fit. Is there anybody else making these that you know of?
 
Auto Transport Service
Back
Top