• When you click on links to various merchants on this site and make a purchase, this can result in this site earning a commission. Affiliate programs and affiliations include, but are not limited to, the eBay Partner Network.

'69 charger r/t-se: Building my dream car

Wow thanks for all the congrats and kind words guys, I'm definitely still wearing the permament grin on my face lol. Can't speak on any interior drone yet but the second I heard the engine fire off I was happy with the flowmasters, just sounds mean as hell haha. I'm gonna take the carb apart and clean it out this weekend and see if I can get a good idle, then I'll be sure to do a proper walk-around video where you can really hear exhaust.

And yeah that's my dad on the throttle and me turning the key and checking the gauges. The friend next to me helped when I was doing the sheet metal work and the one closest to the camera was the one that made the drive down to LA with me when I got the car, so it was pretty cool to have everyone there!
:eek:ccasion14:

- - - Updated - - -

Frankenstein lives!!!!! That's gotta be music to you're ears. Can't wait to hear it once it's dialed in. Speedy was that you on the left starting the Charger? For some reason I was expecting longer hair and a baseball cap LOL.
You bet man just wait til you fire up the 'net for the first time, sweetest song you'll ever hear!
Lmao! Well I may have shorter hair these days but don't let it fool you I'm still a longhair at heart hahaha so here's another tune to celebrate the milestone, and my birthday I guess since that's today too lol
[video=youtube;yMeD9F_BeMo]https://www.youtube.com/watch?v=yMeD9F_BeMo&feature=youtube_gdata_player[/video]
 
I know how you feel, the best part of the build is always hearing it fire the first time at least for me it is. Hope you get the carb figured out, they can be a real pain if they've sat around and got gummy or corroded but I'm sure you'll get it. You can never go wrong with a Flowmaster "love that sound". Cool that you got to enjoy it with your dad and buds.
 
That rocks! You hit another big milestone, congrats.
 
Man speedy its great to hear that sound keep up the good work. When rebuilding that carb if its sat for awhile n is gummy and a little rusty i have soaked the main body n parts in clr to remove rust n grime.just make sure you wear gloves and rinse well with water n clean good with air pressure.

- - - Updated - - -

AFTER YOU ARE DONE SPRAY IT LITELY WITH FOGGING OIL TO KEEP RUST FROM FORMING.
 
god awful music :)

Speaking of bad music, check this out:

[video=youtube;8MPWk7527QE]http://www.youtube.com/watch?feature=player_detailpage&v=8MPWk7527QE#t=55[/video]

That's me at 55 seconds .. The longhair behind the barricade holding the beer :headbang:
and again at 2:56 Thrashing !! wow .. a blast from the past :pottytrain1:

Mike..

"1 hour complete vid":The ultimate revenge venom slayer exodus live 1985"
http://www.youtube.com/watch?feature=player_detailpage&v=ISABRu2xTDA
:icon_evil:


You bet man just wait til you fire up the 'net for the first time, sweetest song you'll ever hear!
Lmao! Well I may have shorter hair these days but don't let it fool you I'm still a longhair at heart hahaha so here's another tune to celebrate the milestone, and my birthday I guess since that's today too lol
 
Thanks for all the congrats and birthday wishes guys! Had a great day with family and my girlfriend checking out the "Radical Reels Tour" of the BANFF film festival, a lot of really cool outdoors adventure type documentaries with some pretty crazy shots of extreme sports stuff. Check it out if you ever get the chance, got me motivated to get some more video with frankenstein when we finally get on the road haha
Man speedy its great to hear that sound keep up the good work. When rebuilding that carb if its sat for awhile n is gummy and a little rusty i have soaked the main body n parts in clr to remove rust n grime.just make sure you wear gloves and rinse well with water n clean good with air pressure.

- - - Updated - - -

AFTER YOU ARE DONE SPRAY IT LITELY WITH FOGGING OIL TO KEEP RUST FROM FORMING.
Cool thanks for the tips Steven! I'm finally about to tear into it so we'll see how it goes haha
Just read the whole thread! Great build man! So much attention to detail.
Thanks man! It's been a pretty long road with all those details but they definitely add up in the end haha welcome aboard
:eek:ccasion14:

No way Mike! I used to watch those "ultimate revenge for disco" tour videos all the time in high school, jealous you actually got to be there haha that's awesome!
Here's some more garage music for ya!

http://www.youtube.com/watch?v=l12Csc_lW0Q
What the hell did I just watch... Hahaha
 
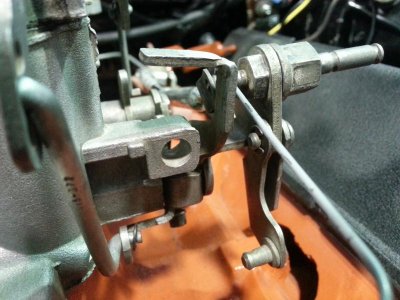
Well guys, I go out this morning to take the carb off for a good clean out and "lo and behold" I realize there's no curb idle adjustment screw.
Doh! And I wonder why it won't idle.. lol :head_smack:
20140222_105751.jpg

I guess at some point some genius felt the need to drill the hole out to 5/16" for whatever reason. I have an adjustment screw and spring pirated off the AFB that came on my Chevelle, but I think I'll machine a brass insert with the correct thread and press it into that 5/16" hole rather than tap it and have some backyard-engineered looking 3/8" bolt for an idle adjusment haha

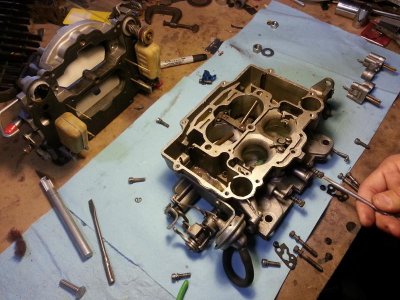
I pulled the carb anyway and took it apart with pops this morning, everything looked pretty nice inside

20140222_101820.jpg

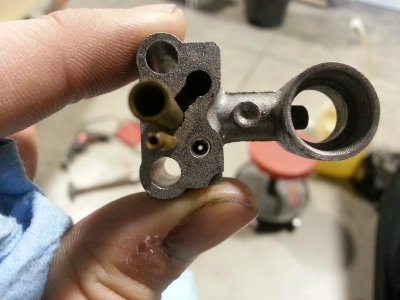
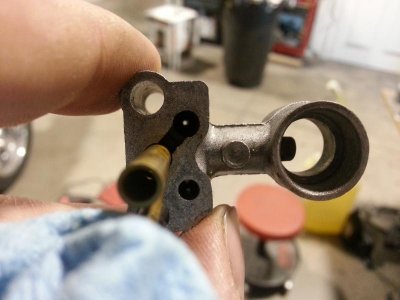
But there was still a little crap gummed up in these little circuits (2 holes in the center of the pics) just used some pb blaster and scraped with a small drill before blowing them out with the compressor. All clear and good to go

20140222_102909.jpg

20140222_102946.jpg

So the rest of today I'm gonna finish the wiring cleanup, check out a leak I have somewhere in the power steering, and now that I have the horn figured out I'll get the sparco steering wheel all bolted up. I'll try and get a better exhaust video too, but right now it's time for lunch haha
 
looks pretty clean now anyway .. cool you can machine stuff like that
 
Last edited:
X 2 You will have the beast idling in no time speed! Looking forward to your exhaust video!, Getting some gremlins all fixed up is fun eh! :confused2: Always something to keep us on our toes i guess, but your getting them! ;)
 
Bhahhaaah I knew it was good for a laugh 747 and scary enough I think this guy is for real!

SPEEDY WE NEED AN EXHAUST VIDEO HURRRRYYYYYYY!!!!
 
looks pretty clean now anyway .. cool you can machine stuff like that
Yep should be good to go soon as I get the adjustment screw in there lol and yeah it definitely comes in handy!
X 2 You will have the beast idling in no time speed! Looking forward to your exhaust video!, Getting some gremlins all fixed up is fun eh! :confused2: Always something to keep us on our toes i guess, but your getting them! ;)
Oh yeah, been keeping busy chasing all of em down haha. Had a small leak on the passenger side valve cover so I pulled both of em and gave the bottom part of each gasket a light skim of ultra black I think did the trick (hopefully haha). But hey, the engine sounds great and no rear main leak or anything so I'll consider myself lucky :icon_thumleft:
Bhahhaaah I knew it was good for a laugh 747 and scary enough I think this guy is for real!

SPEEDY WE NEED AN EXHAUST VIDEO HURRRRYYYYYYY!!!!
Sorry goon, no video yet haha but I got the measurements I needed so I'll probably be machining that insert today after work. I tweaked initial timing just a hair and got it where it needs to be I think so we'll see!
 
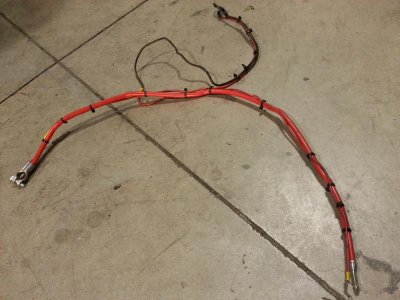
Don't have much to report, but I've kept at it chasing down all the little odds and ends, fixing that leak, attempting to get the steering wheel installed, and cleaning up wiring. Here's what I did with the battery/starter/relay leads: with everything hooked up in the car, I just zip-tied the wires together where I wanted them

20140222_190643.jpg

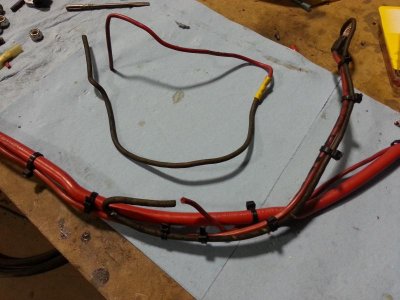
Then cut the excess out of the long wire and spliced it back together, since it's not a huge gauge I just used a heatshrink/crimp type butt connector.
20140222_191109.jpg

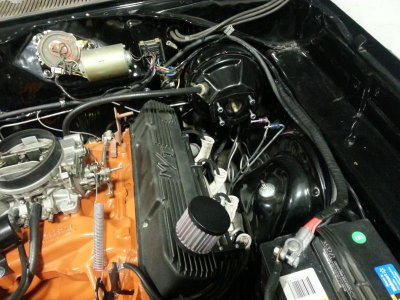
Then starting at one end I wrapped the new harness with electrical tape, removing all the zip-ties as I go, and then put a small zip-tie at each end to help prevent any unraveling. Still a little messy looking with nothing secured down yet, but it's all tucked in around/under the brake booster how I wanted

20140226_002305.jpg

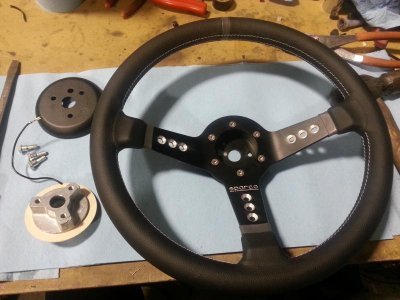
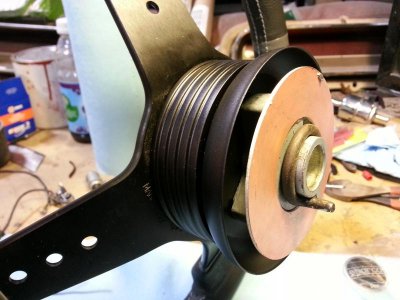
Then came the steering wheel, which went awesome til I actually bolted it on haha. If anyone goes with a sparco wheel, this is basically what you need: grant 3 hole hub adapter and the black cover piece that comes with it, and in this pic the steering wheel is bolted to the 3-hole to 6-hole adapter you'll need.

20140224_182541.jpg

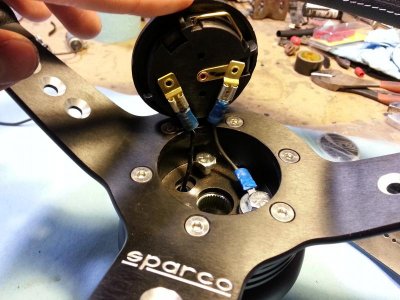
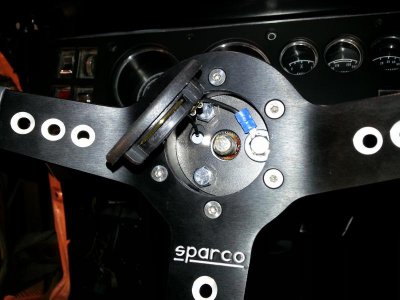
It's pretty cool the Sparco center cap has the horn button self-contained (no loose spring), just connected the wire from the hub and an isolated ground to one of the adapter bolts and it should be good to go.

20140224_185424.jpg

20140224_185701.jpg

20140224_190334.jpg

So I bolted everything up and tightened down the collumn nut, but something must have been off with how I put the turn signal canceler on because it catches and doesn't want to turn. :banghead: So tonight I'll be pulling it back off and probably just reinstall without the canceler

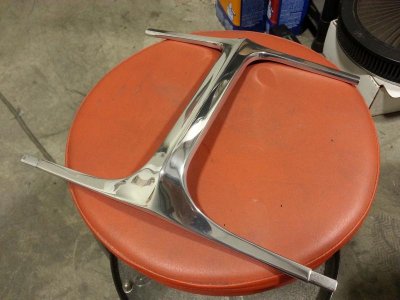
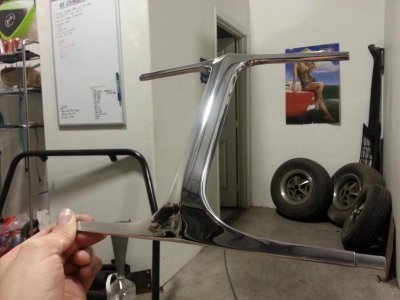
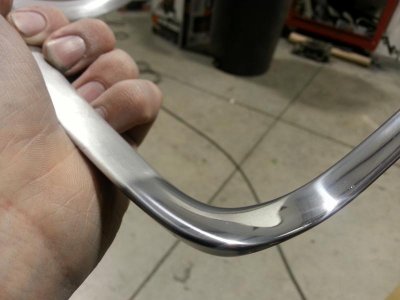
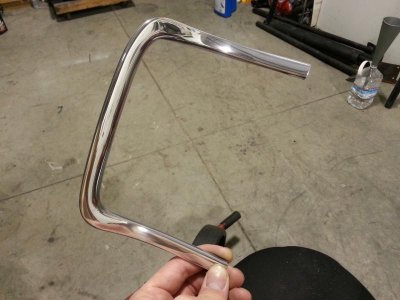
On a more successful note, I got tired of seeing the grille assembly sitting halfway put together on my couch so I decided I'm going to get that project all buttoned up this week, starting with all the trim. Here's that I-beam 747 donated to me to try and save, finally finished and polished up. Looks a little different now eh? Haha

20140226_002852.jpg

20140226_003117.jpg

I only had white compound onhand, so I sanded these up starting with 180 to get the chrome and pitting out, then (dry) 320, then stepped up wetsanding with 400, 600, 800, 1000, and 2,000. After it's sanded I hit it with the white buffing compound and "blue magic" polish to clean everything up.

20140225_231820.jpg

20140226_003654.jpg

More polishing today and hopefully get that insert machined so I can get the exhaust video!
 
Nice build.

Couple ideas...

Not sure if you're keeping that carb or how performance oriented the build is going to be, but you may consider blending any casting marks out of the flow path...just noticed it on the pic of the booster you posted.

Also, when polishing, you can save a few sanding steps...sand to 600, then hit w/ blk emery, white rouge, and finish w/ your blue magic. Will save a bunch of time and not nearly as labor intesive, since the buffer is doing the work...
 
Thanks for the tips Herr, Propwash said the same thing about the compounds but all I had laying around last night was white. I'lll definitely pick up some black today though, less work is always nice haha
And I was actually wondering about that on the carb. I'm planning on moving to FAST efi next fall/winter, but maybe I'll go ahead and smooth em out anyway
 
Auto Transport Service
Back
Top