• When you click on links to various merchants on this site and make a purchase, this can result in this site earning a commission. Affiliate programs and affiliations include, but are not limited to, the eBay Partner Network.

'69 charger r/t-se: Building my dream car

was it on the compression stroke ?

Yeah that's what I was wondering, maybe when I thought it was 180 out the first time I should have had it one more rotation. I guess that falls under "noob mistake on my end" :head_smack: haha
 
Mr.SpeedFreak, I haven't really checked on very many members projects lately, your Charger R/T-SE project is looking great, she's come a long ways... I love the flavor of your project & the interior & the grill is looking awesome now too... keep it up, she'll be done in no time...
 
Hey Speedy, easy way to check that timing it just put your thumb over the #1 plug hole while someone bumps the starter over (coil wire off of coarse). Once you feel it start to blow your thumb off bring it up to 10 or whatever and there you go. If I'm by myself I just pull the #1 valve cover with it at TDC and see if both valves are closed. Ignore me if this is all old news to you haha. I've got some tuning issues on mine yet to do but I'll have to wait for warmer weather (really rich at idle), can't be fixed with the air screws and it stinks the garage up way to fast to even mess with. Good luck
 
Mr.SpeedFreak, I haven't really checked on very many members projects lately, your Charger R/T-SE project is looking great, she's come a long ways... I love the flavor of your project & the interior & the grill is looking awesome now too... keep it up, she'll be done in no time...
Thanks Bud! I know it's hard sometimes to keep up with all the cool projects everyone's got going on here, but thanks for the compliments on my old jalopy haha not sure about "in no time" but as long as I'm laying down that rubber ride road to freedom by summer I'm willing to wait a little while longer lol
:eek:ccasion14:

And yep 747 I was actually gonna do that last night but it was getting late so I called it a night, but thanks for the heads-up! I talked to my dad and figured what cdr was on to, I guess the first time I thought it was 180 out was because I was on the wrong stroke. So my "fix" actually put it 180 out lol. Feel a little dumb now but at least I learned from it haha. Just flipped it back around and it fired right up!
New video incoming :icon_thumleft:
 
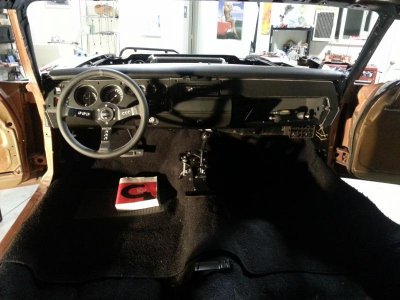
Dash and steering wheel look great speedy and nice work on the fab of that insert to resolve the carb problem
 
Dash looks great! Cant wait for the video. Glad it was an easy fix man.
 
Great to hear you got her running right. Learning from experience can be tough, but it's the best way to learn. Dash/Wheel looks pretty snazy!
 
Where's the new video you're killin' me Speedy!! :)

C'mon GOON . . . give Speedy a little slack . . . he's been busy flipping the dizzy around "again" ! ! ( smile ) . . . Keep up the great work Speedy ! ! !
 
Oh im sure there will be a video just relax n get the popcorn n beer ready. Good work speedy n glad you figured your problem out with the performance off the car not wanting to idle etc.
 
no slack!!! Viiiii deeeeee ooooooo!!!!!

Lmao! Sorry for keepin you guys hanging with the video, I got frankenstein running but still doesn't want to idle below about 1200 rpm so my buddy Mike's supposed come by this week to help out and see if we can't get it sorted.

In the meantime I've been busy plugging away at the last few pieces of the grille trim to get that all put back together, and knocked out a fun little project restoring my shifter.

No rocket science here but I thought I'd document it anyway haha
20140305_191421.jpg

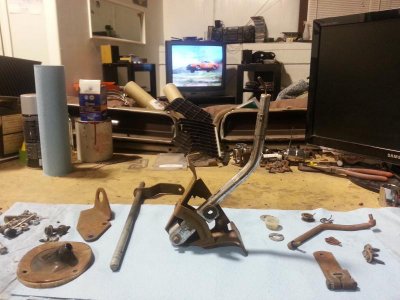
Just took a few pictures and notes of how it all goes together and got it all disassembled
20140305_213522.jpg
Dukes on the tube while I'm working too haha :headbang:
20140305_205908.jpg

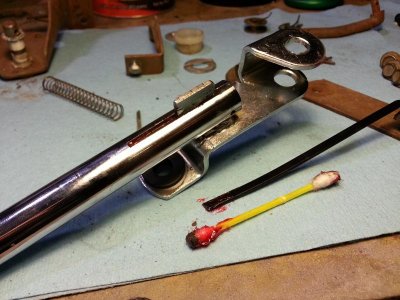
The shift lever cleaned up really nice with some buffing, but the slide didn't want to move very easily. Just used a clipped piece of ziptie and a q-tip to work some grease back into it, slides like new again
20140305_214805.jpg

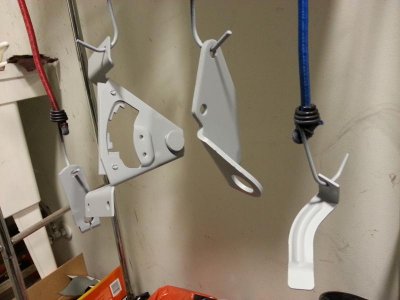
Then the usual quality time with the blast cabinet cleaning up all the brackets, etch primed, and topcoated with sem trim black. The hardware also got blasted and flat cleared
20140305_235215.jpg

20140306_013910.jpg

20140307_001551.jpg

Naturally I somehow lost one of the nylon split bushings that goes at the bottom of the shift lever, so I Macguyver'd up a replacement out of a nylon spacer I got at the local home improvement store
20140308_170101.jpg

We'll see how well it holds up, but I gave SEM's colorcoat a shot on the shift knob plastic. Prepped with 320 grit, denatured alcohol and tac cloth, and after it dried the finish feels pretty damn strong! Colorcoat is really great stuff so I think it should last pretty well
20140306_005430.jpg

20140306_013506.jpg

And all put back together :icon_thumleft:
20140307_011301.jpg

20140308_175734.jpg

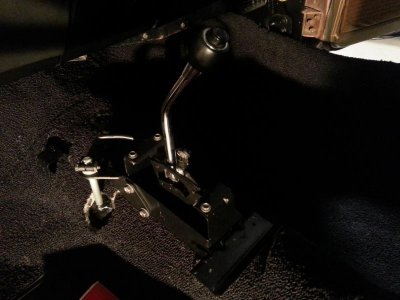
So with the doorjambs still needing painting and the cage still needing to go in, this is just in temporarily, but I wanted to get my carpet kit fitted and trimmed for the shifter, go-pedal, dimmer, and console brackets. (Also cause I wanted to get them laid in place to regain their shape) So I'll have to take them back out but at least all the fitment is done and it'll be a little more comfortable in there when I put the headliner in haha
20140309_053518.jpg

20140309_051950.jpg

20140309_052206.jpg
:eek:ccasion14:
 
As usual there Speedy - VERY nicely done . . . Keep up the great work, she's moving along quite nicely ! ! !
 
Looks good Speedy. I wonder how many quality hours I spent with my blast cabinet over the last 1.5 years lol. Just when a guy thinks everything is blasted, something else turns up. The little parts and pieces seem to multiply sitting on the shelves.
 
Damn Brother Looking Good!! Keep on your grind and you'll be doing power slides and donuts before you know it!

Oh ya and..... VIIIIII DEEEEEE OOOOOOO!!! lol
 
looking very good thanks for sharing :headbang:
 
Auto Transport Service
Back
Top