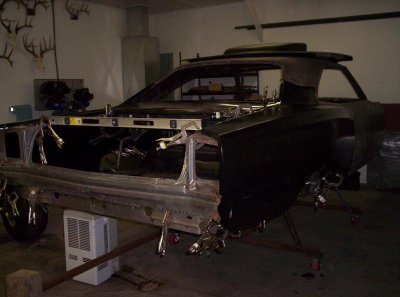
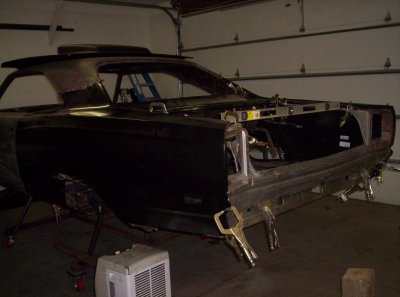
Ordered and on the way, I'll post the kit instal for those thinking about this. Mine will be a little easier because I have all the sheet metal out and getting ready to reinstal.
You are using an out of date browser. It may not display this or other websites correctly.
You should upgrade or use an alternative browser.
You should upgrade or use an alternative browser.
69 gtx
- Thread starter 69 GTX
- Start date
Propwash
Well-Known Member
- Local time
- 6:59 AM
- Joined
- Oct 29, 2009
- Messages
- 9,710
- Reaction score
- 4,325
- Location
- Island of Misfit Toys
Sharp looking wheel!
OK so just finished the deep clean on the garage & storage shed. Got every thing in its place & inventoriedo. Goodo news
I have more new parts than I had thought. Also found my code tag. So all you decoders help me out! Here goes. In order
END 51
L31 M21 M33 R11 V1X V6W
A01 A04 C21 C55 G33 J25
B5 B5 P60 B7 128 080741
E86 D32 RS23 L96 210138
I will be starting the mini tubs this week. I'll be documenting it for every one to see. I'll be offering some of my left overs here on this link for those of you helping along also. I'm really ready to get started again!
Well I found out a couple things from my code plate. It didn't leave the factory with a air grabber or accent stripes top or bottom. But it did come with the white accent stripe. So pretty much a plain Jane with a buddy seat. So I don't feel to bad about the A12 hood I'm putting on.
- - - Updated - - -
I just need to decide whether or not to put the Black vinyl top back on.....I think it may look better all B5 except for the hood. Or put the black lower stripes on with the black top.
- - - Updated - - -
I just need to decide whether or not to put the Black vinyl top back on.....I think it may look better all B5 except for the hood. Or put the black lower stripes on with the black top.
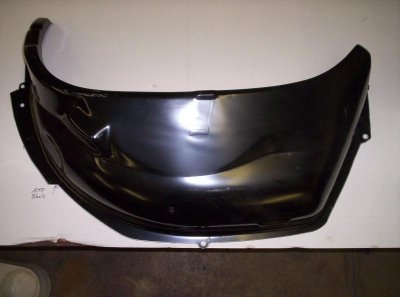 So I put the AMD inner tub on cardboard and trace it for refferance.
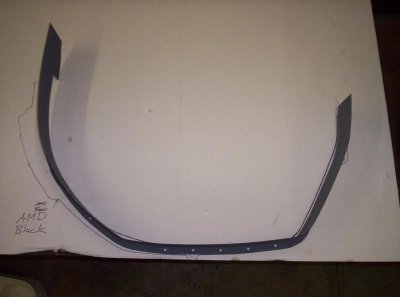 The US Car Tool piece is close but will need some tweaking. I plan on rolling in a step so it will weld in flush. I want to try and make it as stock appearing as possible.
 I'm going to make some gussets to instal inside the fram rails for added support.
- - - Updated - - -
I made this aluminum one just for fit up.
 I plan on instaling them in all places marked with X's
I don't really like the trunk supports so I'll probably make my own to closer match the OEMs.
- - - Updated - - -
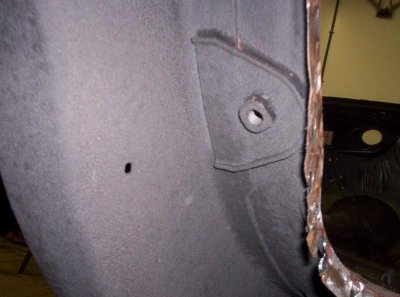
Are these brackets for the rear seat belts, if so shouldn't be a big deal to move.
Basket case
Well-Known Member
yeah look like the seat belts to me. If you're doing a lift off, the vinyl top gives you a plac for the hood.
My hood is aftermarket with springs so I wont have to worry about that. Had a lift off on my race car, could be a pain sometimes, really tricky if it was windy!
Basket case
Well-Known Member
and after hearing too many horro stories about guys forgetting the pins untill the hood flew off, i went with a bolt on for mine.
View attachment 186528View attachment 186529
- - - Updated - - -
Got the frame rail brackets made.View attachment 186530
- - - Updated - - -
View attachment 186533 I took the stock brace off to rework. I heated it up, straightened it then put a cople bends in it.View attachment 186534
- - - Updated - - -
View attachment 186535
I think this will look much better than the US Car Tool brackets.
- - - Updated - - -
View attachment 186554
- - - Updated - - -
I hope to get the rest of the cutting done tomorrow. I'll need to get the chassis squared & leveled before I start putting everything together.
- - - Updated - - -
Got the frame rail brackets made.View attachment 186530
- - - Updated - - -
View attachment 186533 I took the stock brace off to rework. I heated it up, straightened it then put a cople bends in it.View attachment 186534
- - - Updated - - -
View attachment 186535
I think this will look much better than the US Car Tool brackets.
- - - Updated - - -
View attachment 186554
- - - Updated - - -
I hope to get the rest of the cutting done tomorrow. I'll need to get the chassis squared & leveled before I start putting everything together.
View attachment 186760
- - - Updated - - -
I put the 2 halves of the wheeltub together (or tried), you'd think AMD would realize the 3 big holes are for jigging the 2 pieces together and make sure they fit. To much material in some places and not enough in others, but I'll make them work.
- - - Updated - - -
View attachment 186761View attachment 186762
- - - Updated - - -
I put the splice piece in to confirm the profile. Took a couple tweaks to make it match up good but was able to do it.
Then rolled a lip in the piece and screwed everything together for mock up.
View attachment 186766
View attachment 186767
- - - Updated - - -
Almost there but need a couple more tweaks.
- - - Updated - - -
I put the 2 halves of the wheeltub together (or tried), you'd think AMD would realize the 3 big holes are for jigging the 2 pieces together and make sure they fit. To much material in some places and not enough in others, but I'll make them work.
- - - Updated - - -
View attachment 186761View attachment 186762
- - - Updated - - -
I put the splice piece in to confirm the profile. Took a couple tweaks to make it match up good but was able to do it.
Then rolled a lip in the piece and screwed everything together for mock up.
View attachment 186766
View attachment 186767
- - - Updated - - -
Almost there but need a couple more tweaks.
Well after wrestling with the outer tub last night trying to get a good fit, I've decided to wait till I get the 1/4's, trunk ext., & rest of the metal on before I finish fit the inner tubs. I think this will save me some grief in the long run making up some of the fittment there. That way I can take up any miscalculations in the spacer piece. Got a vacation planned with the better half so might be a week or two till I get some more progress.
roadrunnerman
Well-Known Member
Nice work on everything. That's what I plan to do on mine with the frame rails, putting in some extra support inside.
minnesota guy
Well-Known Member
Nice job!!!
Propwash
Well-Known Member
- Local time
- 6:59 AM
- Joined
- Oct 29, 2009
- Messages
- 9,710
- Reaction score
- 4,325
- Location
- Island of Misfit Toys
Nice job!!!
X2!!
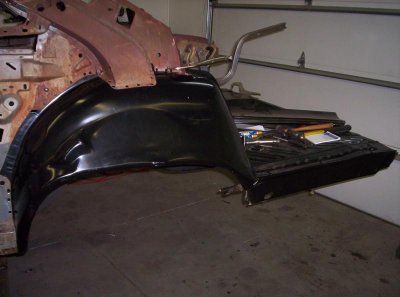
Well getting back to the X for some sheetmetal work.
- - - Updated - - -
- - - Updated - - -
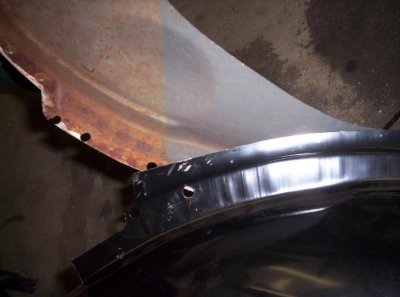
First had to pound flat the extra lip AMD so kindly put in the outer wheel tub. This will not allow the tub to fit correctly on the chassis.
- - - Updated - - -
- - - Updated - - -
- - - Updated - - -
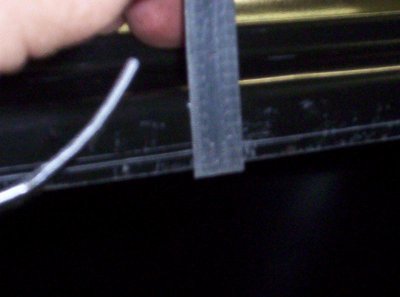
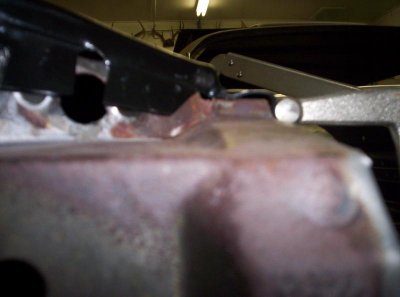
You can't see very well but the lip on the 1/4 panel is about 1/8th of an inch to long so needed to be trimmed back to fit down on the trunk rail.
- - - Updated - - -
- - - Updated - - -
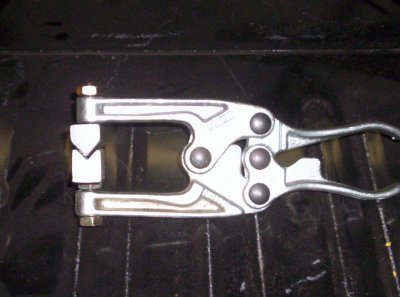
Also had to square up bends to 90 degrees, nearly all the bends need some help. Made some pliers to help with this.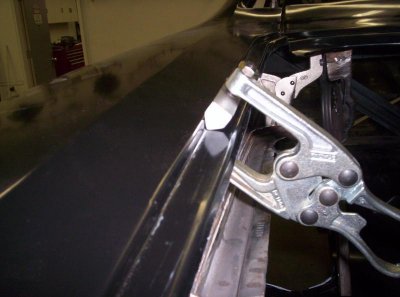
- - - Updated - - -
- - - Updated - - -
- - - Updated - - -
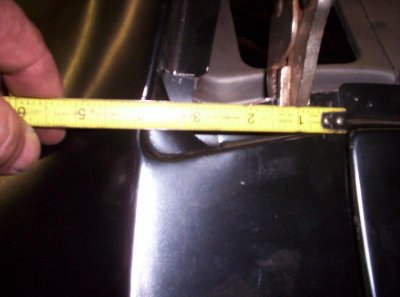
As you can see the middle panel below the rear window looks to me to be about 1/4 inch off center. 3" one side 2.5 other. I think I will wait till I get the other quarter hung before I try to do anything with it. I want to get everything hung and screwed into place before I dismantle and start welding it back up. Let me run this by you guys. I was thinking of taking it to a frame shop and have them put it on the rack and tweak it if need be. Before I send it to the body shop.
- - - Updated - - -
I'm hoping to get everything trial fitted this next weekend so I can start doing some final welding. I'd like to get her to the body shop by the end of July.
- - - Updated - - -

- - - Updated - - -
First had to pound flat the extra lip AMD so kindly put in the outer wheel tub. This will not allow the tub to fit correctly on the chassis.
- - - Updated - - -

- - - Updated - - -

- - - Updated - - -
You can't see very well but the lip on the 1/4 panel is about 1/8th of an inch to long so needed to be trimmed back to fit down on the trunk rail.
- - - Updated - - -

- - - Updated - - -
Also had to square up bends to 90 degrees, nearly all the bends need some help. Made some pliers to help with this.

- - - Updated - - -

- - - Updated - - -

- - - Updated - - -
As you can see the middle panel below the rear window looks to me to be about 1/4 inch off center. 3" one side 2.5 other. I think I will wait till I get the other quarter hung before I try to do anything with it. I want to get everything hung and screwed into place before I dismantle and start welding it back up. Let me run this by you guys. I was thinking of taking it to a frame shop and have them put it on the rack and tweak it if need be. Before I send it to the body shop.
- - - Updated - - -
I'm hoping to get everything trial fitted this next weekend so I can start doing some final welding. I'd like to get her to the body shop by the end of July.
Last edited:
minnesota guy
Well-Known Member
Doesn't hurt. My 69 GTX had been hit in the left rear and kinked the frame in wheel well. We put it on the trailer and used a come-along to straighten. Frame shop is better for issues
Ron 73
Deceased, But not forgotton
Man that's looking real good, I like the ingenuity with the pliers! Bad enough playing with metal that doesn't fit the way we want sometimes now building tools to help meet the problem head on... Cool as it gets, Good luck!!!
I want to make sure everything fits before I plug in the welder. Or at least very close because you don't now how far back you need to back track to correct the problem. My guy should be over this week to help coach me. Maybe I won't feel so over whelmed after he gives me his perspective. After talking to him on the phone I feel a little better. BTW Harbor Frieght had a sale on the clamps 4$ a piece!!!! A franklin later I was in set. Thanks Ron, hope to be welding in 2 weeks. I'll try to document all the needed rework for anyone have to do this and what to expect. I'm a pictures guy as they sometimes tell the story better. One thing for sure I run that dehumidifier 24/7 to keep moisture out of the shop.
Last edited:
Similar threads
- Replies
- 7
- Views
- 915
- Locked
- Replies
- 1
- Views
- 899

![IMG_20140429_180439[2].jpg IMG_20140429_180439[2].jpg](https://www.forbbodiesonly.com/moparforum/data/attachments/142/142890-5afcf59a94ba4f00c5b3dfcc96c62dbc.jpg)
