• When you click on links to various merchants on this site and make a purchase, this can result in this site earning a commission. Affiliate programs and affiliations include, but are not limited to, the eBay Partner Network.

71 Road Runner Restoration Started

The Bird is the Word......

Thanks again for the compliments. Don't worry tallhair the plan is to go forward on the Bird next.

I have 2 Challengers that need restoration. The blue one you see here in the back ground is a 73, and it has a very nice body. I cut the lower quarters off to expose the inner metal so I could stop the rust back in 2007 right after I bought it. The rest of the car is rust free. I have a TON of new parts for it and have a lot of things already restored for this car. The plan was to install a nice street 440 in it with the console I used for comparison earlier on this thread.

I have been thinking about selling it as is to help fund the restoration on the RR.

The other Challenger I have is a 70, and it's an original lime green car. I plan on cloning it into a 440 Six Pack with a Shaker hood and a pistol grip 4 speed.

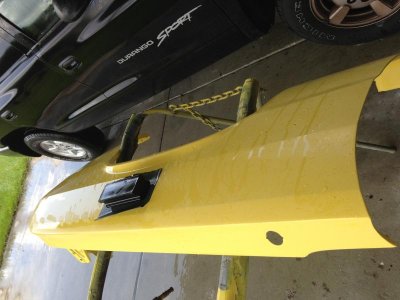
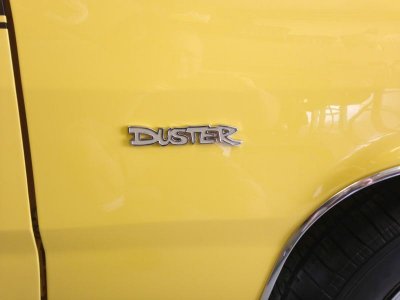
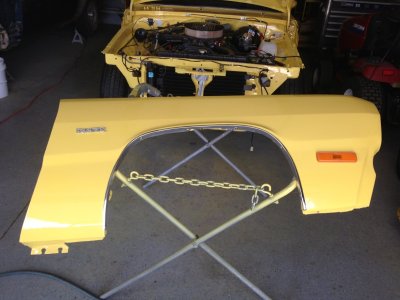
I didn't get too much done on the Duster. I started wet sanding the driver side fender in preparation for paint. It has been blocked prior so it shouldn't take too much more work other than the wet sanding.
 
Parts Photos

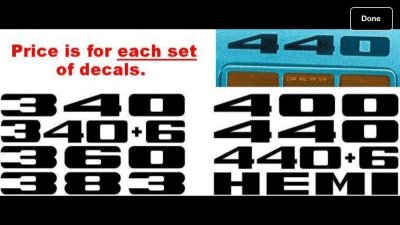
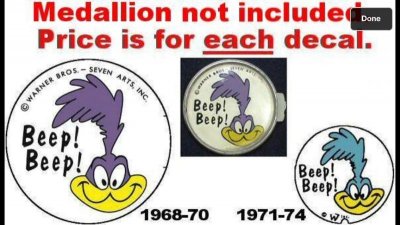
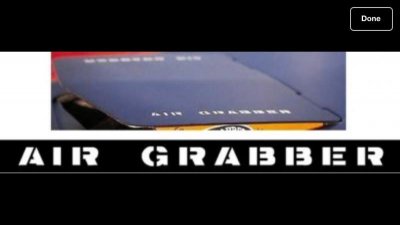
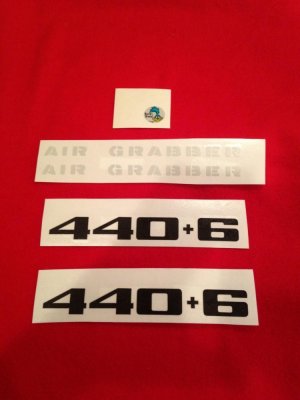
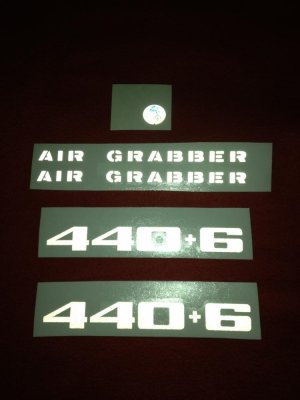
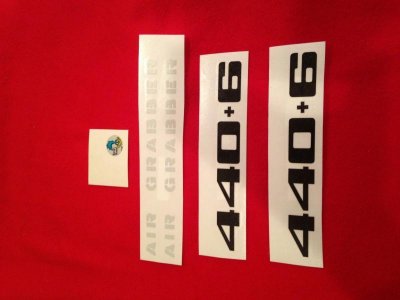
Here are a few pictures of some parts I ordered the other day for the Bird. The 440+6 fender decal, Road Runner steering wheel emblem and "AIRGRABBER" scoop decals should arrive any day.

image.jpgimage.jpgimage.jpg

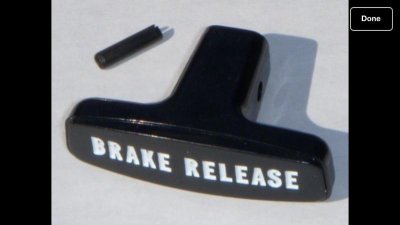
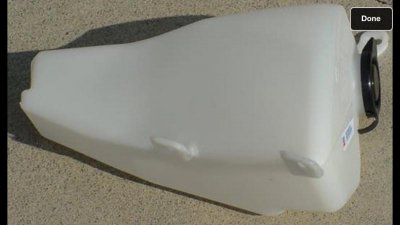
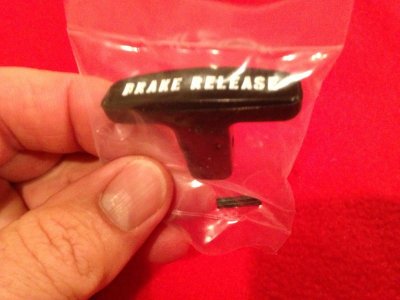
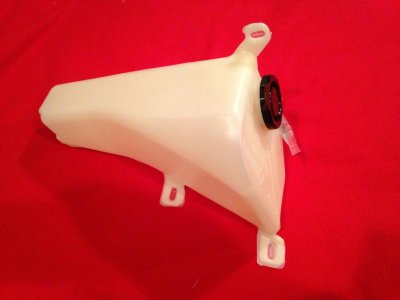
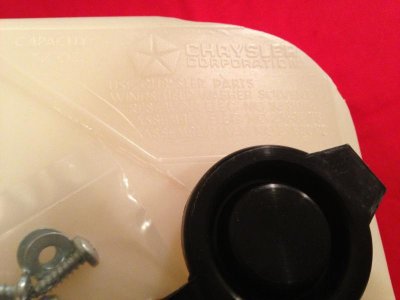
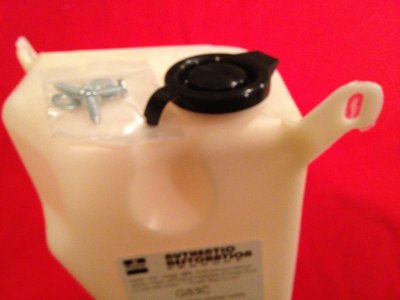
Tonight I just ordered a new windshield washer bottle and an emergency brake handle for the Bird.

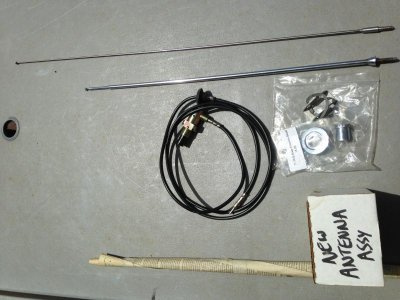
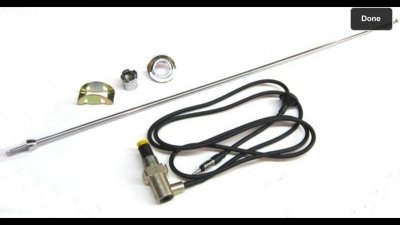
Here are a few pictures from the online vendor. I will take better pictures when the parts arrive. I should also be receiving the new radio antenna assembly soon as well.

- - - Updated - - -

View attachment 132241image.jpg
 

Attachments

  • image.jpg
    image.jpg
    30.8 KB · Views: 760
Last edited:
Some Parts Come In.......

Some of the parts I mentioned that I ordered the other day arrived while I was at work yesterday. I would have posted the pictures up a little sooner but we had a very busy night last night at work. I went to bee this morning and slept in a little while because of it. 24 hour shifts catch up to you after a while.......

- - - Updated - - -

image.jpg
These are reflective. You don't really notice until the lights are out.....

- - - Updated - - -

View attachment 132455

- - - Updated - - -

View attachment 132456

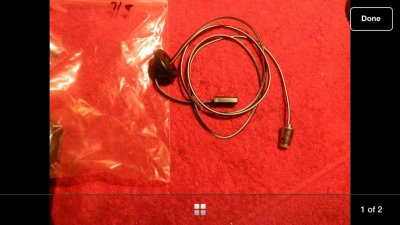
Here is the new antennae for the Bird. The mast on the right is an original non collapsible Mopar unit from a Challenger. The one that came with the kit expands. The two masts will interchange. I will probably use the Challenger mast on the RR. I think it would just look more proper on the car.

As soon as the new washer bottle and emergency brake handle arrive I will post some more pictures.

Im headed out to the shop and going to wet sand some more on the Duster fenders. I have to get this car done!!!!! The excitement is building in anticipation of working on the Bird....
Stay tuned!!!!

- - - Updated - - -

View attachment 132456


- - - Updated - - -

image.jpg

- - - Updated - - -

image.jpg
 

Attachments

  • image.jpg
    image.jpg
    35.8 KB · Views: 735
  • image.jpg
    image.jpg
    35.6 KB · Views: 734
Last edited:
Where did you order the RR steering wheel birds and the antenna from. I need to get some for my 69 bird.
 
Agreed!! Well put tallhair.

- - - Updated - - -

Where did you order the RR steering wheel birds and the antenna from. I need to get some for my 69 bird.

Roger i bought mine at Year One, shipping a pain in the back side though! And i just bought the horn decal, (should be cheap shipping... should be!) cant remember where i got the antenna, ill check and see if i have still the info for you though..
 
Parts Info

Where did you order the RR steering wheel birds and the antenna from. I need to get some for my 69 bird.

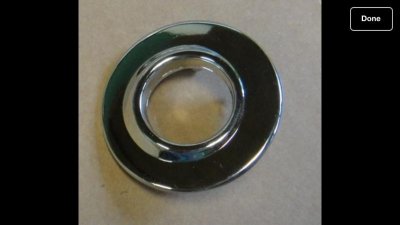
I purchased the antennae kit on EBay for a Challenger / 'Cuda and then bought a bezel to fit the fender contour on the RR. The antennae kit I purchased has a right angle 90 degree exit for the coax wire and is the closest thing you can find to the originals on the market now. Most everyone sells one that the cable exits straight out of the bottom.

The antennas will interchange as long as you have the proper fender bezel. The gasket that comes with the kit is kind of cheesy, but I plan on buying a complete paint gasket set from DMT and a new better gasket will be in the kit.

Here is the item number for the antenna kit: 181194951161

and the separate bezel:171022684193

The shipping was a hell of a lot cheaper than from Year One.

The steering wheel center medallion decal also came from eBay. Performance Car Graphics has a store on eBay too. You have to tell them what year car you have because the size varied depending on what year your car is.

Here is the item number for the decal:160869366195

The medallion had free shipping too.....

Hope this helps.

- - - Updated - - -

While I was on there I found something else that I just couldn't live without......

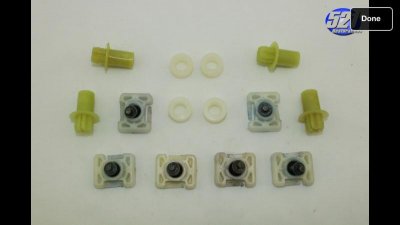
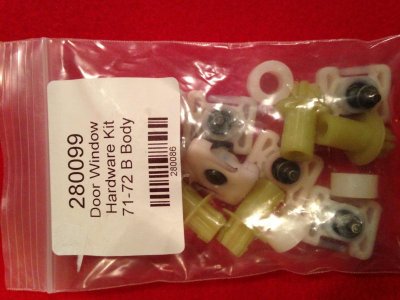
I purchased a door window / hardware /roller set for the Bird.......

Item # 231011000058

This was the last one left. Others have them, but this was the best priced one. I always install new parts inside my doors when I can get the parts. It makes a big difference when you close the door and nothing rattles inside. Plus you have the added comfort knowing that your not relying on 40 plus year old plastic, hoping that it won't break and your window pops off the track......

- - - Updated - - -

image.jpgimage.jpgimage.jpg
 
Here are a few pictures of some parts I ordered the other day for the Bird. The 440+6 fender decal, Road Runner steering wheel emblem and "AIRGRABBER" scoop decals should arrive any day.

who did you get the decals from ??, what company ??

- - - Updated - - -

sorry I guess I'm going blind too, I see it now Performance Car Graphics on Ebag
 
Sweet score brother .. I hate rattling doors. Experienced many and always did my best to quiet them up before there were repro parts.
 
who did you get the decals from ??, what company ??

- - - Updated - - -

sorry I guess I'm going blind too, I see it now Performance Car Graphics on Ebag


No problem. I'm not a great big fan of EBay, but if you do your homework you can get some sweet deals. You need to be careful though. You can pay more for an item too. I do a lot of "comparison" shopping and check the feedback ratings before I bid.
 
YEP, Ive gotten a few good deals but as a rule, careful is a good way to put it.. Ive seen things that cost more by far then the company making them wanted, I think it was a body part, cant remember just what..
 
Latest Updates......

The door window hardware came in a few minutes ago.
Here is a picture.image.jpg

- - - Updated - - -

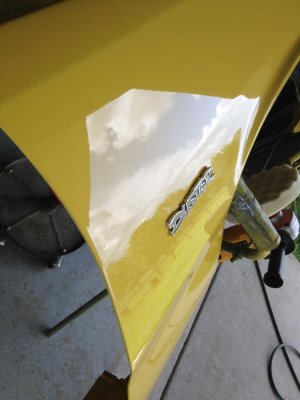
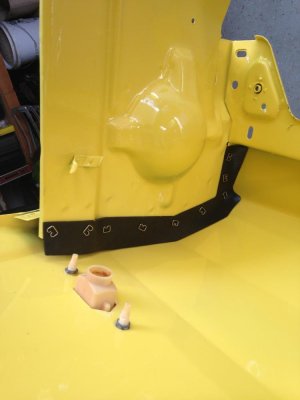
image.jpgimage.jpgimage.jpgI was able to wet sand and buff the passenger side fender of the Duster. Then I installed the side marker light, "DUSTER" nameplate, and front inner splash shield that is made of rubber.

- - - Updated - - -

These are the steps I use to wet sand and buff.....

Start by blocking out the clear using 600 grit wet / dry paper.

Sand until no more shiny spots are visible. Always use a sanding block. They come in various shapes and sizes. Use one that is appropriate for the contour of the metal you are sanding.
Then I buff it to a shine using 3M perfect it compound and a foam pad. I use a Dewalt variable speed buffer at the lowest speed setting.
Once it is shining again I go to either 1200 or 1500 grit paper and repeat the process.

Finally I sand it again using 2000 grit and a final buff. The end result is a finish that looks like glass.

Now if it was only the fender for the Bird that I was buffing out....

- - - Updated - - -

Tomorrow I hope to install the fender well molding and then bolt the fender in place.

If I'm lucky I can get a good start with wet sanding the driver side fender and lower grill surround. Once that is done I can spray it and repeat the process shown above.

Getting closer!!!!!

Stay tuned ........
 
Looks like glass man!

- - - Updated - - -

Or a mirror in that pic showing the blue sky :)
 
On my last post I stated that I buff the paint in between the changes in sandpaper grit. It's really not necessary, but it makes it a whole lot easier to see what has been sanded, and what has not. Just FYI. It doesn't take long to buff the clear out that I use. This stuff really works great. It's made by Southern Polyurethanes and its called "Universal High Solids Clear coat", P/N 4000-4

You can buff it when ever you get to it. Most clears set up and get harder as time goes by. This part was painted several months ago and it was no problem at all to sand and buff as you can see......

- - - Updated - - -

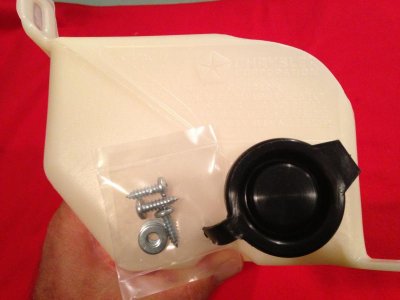
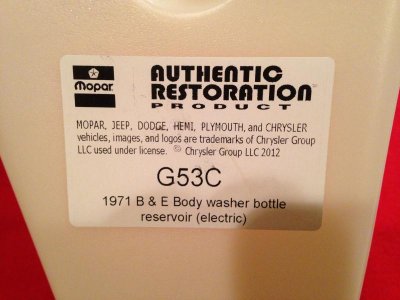
Here are some pictures of the new washer bottle and emergency brake pull handle.image.jpg

- - - Updated - - -

image.jpg

- - - Updated - - -

image.jpgimage.jpgimage.jpg

- - - Updated - - -

The washer bottle came with the mounting screws.
 

Attachments

  • image.jpg
    image.jpg
    52.1 KB · Views: 652
I agree with tallhair, does look like a mirror and with your bird, all those new parts going on that, a car show should bring you some high points in this resto job, outstanding workmanship..
 
Todays Progress..............

Today was a VERY GOOD day. I got a lot of stuff done towards finishing up the Duster. (which means I'm that much closer to starting the restoration of the Bird)
I was able to install the wheel opening molding and then bolt the passenger side fender in place. Once it was aligned and tightened, I installed the hood pin stud for that side. Then I adjusted the hood striker, etc.

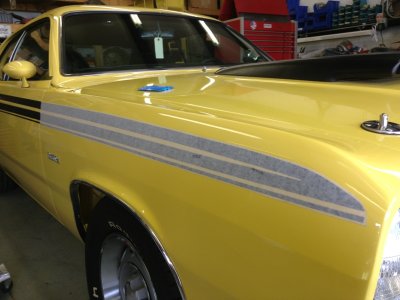
Once this was done, I installed the side stripe.


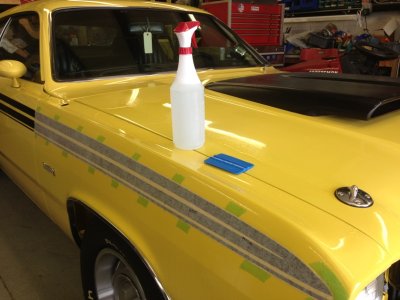
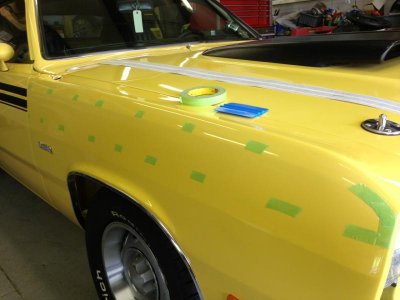
I took a lot of pictures during this step and follow below for a quick explanation / how to. I know this is a Duster but the same principle applies when you add stripes on any car.IMG_1437.jpgIMG_2818.jpgIMG_3169.jpgIMG_3363.jpgIMG_8506.jpgIMG_8846.jpgIMG_9085.jpg

- - - Updated - - -

IMG_2166.jpg
Start by cleaning the surface. Make sure no waxes or other contaminants are on the paint. Then tape the stripe into position where it needs to be. Once you are happy with the location, mark the outline with tape along the edge of the paper.

- - - Updated - - -

IMG_4034.jpg
Then remove the stripe from the car. Now you can see the tape marks which will be important later............

- - - Updated - - -

IMG_4297.jpg
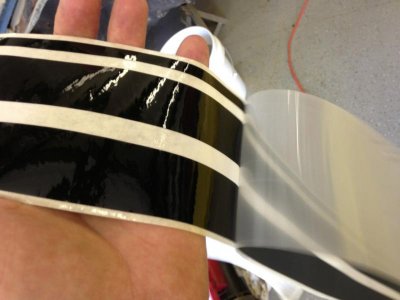
Now remove the clear backing from the stripe. This will expose the glue surface. If the actual stripe tries to come off with the clear backing, simply try to remove it from another spot.

- - - Updated - - -

Try not to touch the area where the adhesive is.

- - - Updated - - -

View attachment 133197
Now use a spray bottle with a little dish washing soap mixed with water and spray the back side adhesive area of the stripe AND the surface of the car where the stripe will be applied.

- - - Updated - - -

While it is still wet position the stripe where it needs to be. Now is when you use the tape markings you put on earlier. This allows you to position the stripe in the exact place you had it before. Never soak the stripe in a bucket of water. If it didn't end up where you wanted it to be, simply lift it off carefully, and spray it again with the soapy water. This allows the stripe to be slid into position.

- - - Updated - - -

IMG_7644.jpg
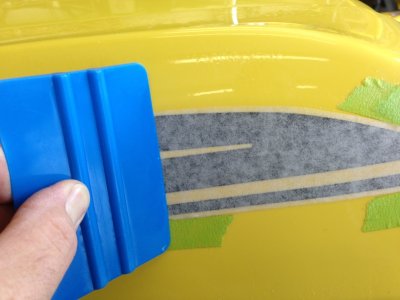
Now use a plastic or rubber squeegee to push out the excess soapy water. You can start in the middle with larger stripes and work to the edge. You will notice a change in the color of the paper as the water solution is forced out.

- - - Updated - - -

This is how you remove any bubbles too.

- - - Updated - - -

IMG_1646.jpg
Now is when I remove my tape alignment strips. If you leave them in position it can hinder the removal of the paper which comes next.

- - - Updated - - -

IMG_3497.jpgIMG_7352.jpg

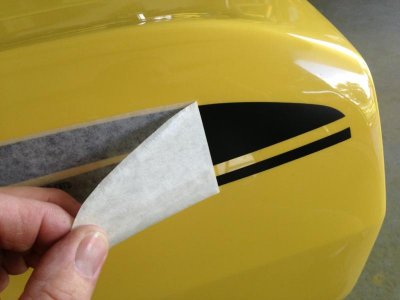
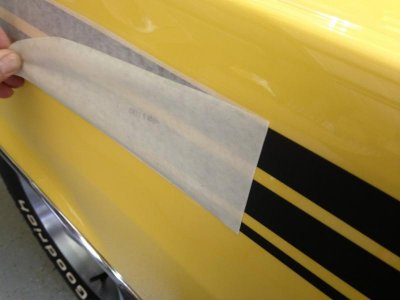
When the stripe is dry, start removing the paper backing. Start at one end and carefully pull it away from the stripe. If it has not dried sufficiently or if you pull the paper off too quick or at a wrong angle, you can cause the stripe to bubble. The key here is to go very slow and be gentle. I pull my paper off almost in line with the car as shown in the last picture. It helps to keep from lifting the stripe off the car.
- - - Updated - - -

IMG_7255.jpgIMG_6279.jpg
Here is the end result.

I know this is a Duster on a "B" Body site, but the same process is used no matter what car the stripes are going on. If any of you have been thinking about adding a stripe kit on your car, hopefully this little "how to" will help.

- - - Updated - - -

After this fender was completed, I was able to completely wet sand the driver side fender, inside and out, along with the front lower grill surround. Hopefully on Saturday I can paint these last 2 parts. When they are done, I have to repeat the process shown here today.

As you can see, this one is getting very close to being done now.

When it is, I will start working on the 71 RR.

Take care and have a good one!!!!

- - - Updated - - -

IMG_2893.jpg
 
Thanks for the how-to 71AG. Another very nicely done post and it's a great looking Mopar so you don't have to qualify your posts :). Just keep them coming. I'm happy to see updates on this car for as long as it takes you take to finish it and I don't care what it is.
 
Today was a VERY GOOD day. I got a lot of stuff done towards finishing up the Duster. (which means I'm that much closer to starting the restoration of the Bird)
I was able to install the wheel opening molding and then bolt the passenger side fender in place. Once it was aligned and tightened, I installed the hood pin stud for that side. Then I adjusted the hood striker, etc.

Once this was done, I installed the side stripe.


I took a lot of pictures during this step and follow below for a quick explanation / how to. I know this is a Duster but the same principle applies when you add stripes on any car.View attachment 133187View attachment 133188View attachment 133189View attachment 133190View attachment 133191View attachment 133192View attachment 133193

- - - Updated - - -

View attachment 133194
Start by cleaning the surface. Make sure no waxes or other contaminants are on the paint. Then tape the stripe into position where it needs to be. Once you are happy with the location, mark the outline with tape along the edge of the paper.

- - - Updated - - -

View attachment 133195
Then remove the stripe from the car. Now you can see the tape marks which will be important later............

- - - Updated - - -

View attachment 133196
Now remove the clear backing from the stripe. This will expose the glue surface. If the actual stripe tries to come off with the clear backing, simply try to remove it from another spot.

- - - Updated - - -

Try not to touch the area where the adhesive is.

- - - Updated - - -

View attachment 133197
Now use a spray bottle with a little dish washing soap mixed with water and spray the back side adhesive area of the stripe AND the surface of the car where the stripe will be applied.

- - - Updated - - -

While it is still wet position the stripe where it needs to be. Now is when you use the tape markings you put on earlier. This allows you to position the stripe in the exact place you had it before. Never soak the stripe in a bucket of water. If it didn't end up where you wanted it to be, simply lift it off carefully, and spray it again with the soapy water. This allows the stripe to be slid into position.

- - - Updated - - -

View attachment 133198
Now use a plastic or rubber squeegee to push out the excess soapy water. You can start in the middle with larger stripes and work to the edge. You will notice a change in the color of the paper as the water solution is forced out.

- - - Updated - - -

This is how you remove any bubbles too.

- - - Updated - - -

View attachment 133199
Now is when I remove my tape alignment strips. If you leave them in position it can hinder the removal of the paper which comes next.

- - - Updated - - -

View attachment 133201View attachment 133202

When the stripe is dry, start removing the paper backing. Start at one end and carefully pull it away from the stripe. If it has not dried sufficiently or if you pull the paper off too quick or at a wrong angle, you can cause the stripe to bubble. The key here is to go very slow and be gentle. I pull my paper off almost in line with the car as shown in the last picture. It helps to keep from lifting the stripe off the car.

- - - Updated - - -

View attachment 133203View attachment 133204
Here is the end result.

I know this is a Duster on a "B" Body site, but the same process is used no matter what car the stripes are going on. If any of you have been thinking about adding a stripe kit on your car, hopefully this little "how to" will help.

- - - Updated - - -

After this fender was completed, I was able to completely wet sand the driver side fender, inside and out, along with the front lower grill surround. Hopefully on Saturday I can paint these last 2 parts. When they are done, I have to repeat the process shown here today.

As you can see, this one is getting very close to being done now.

When it is, I will start working on the 71 RR.

Take care and have a good one!!!!

- - - Updated - - -

View attachment 133205


it is turning out awesome...i used to have a graphics shop and if you spray the transfer tape before you take it off it helps release it better so you wont damage the graphic. can not wait to watch you work your magic on that bird. once again....AWESOME WORK!!!
 
Todays Progress

Thanks for the compliments. I too always spray the back side of the tape just before sliding it into position. It helps big time........

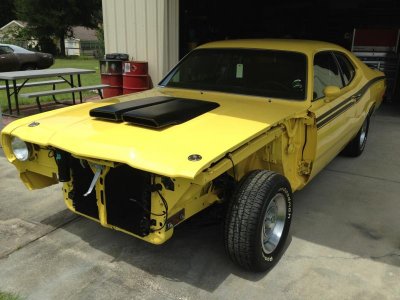
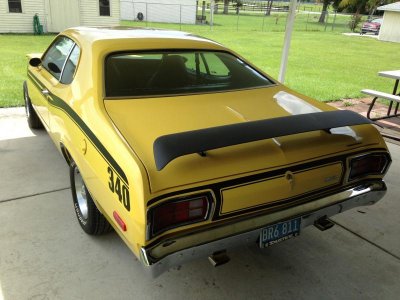
Today I had to sleep in some when I got home from work this morning. We had a busy night at work......... Then I had some errands to run, but I did make some progress on the Duster.

I was able to blast to clean bare metal all of the attachment bolts for the fenders, hood and trunk lid.

I know your probably thinking to yourself, "but these parts are installed"......

But the reason is this. The original bolts have a much bigger washer than the aftermarket ones do. So I always install a part using mock up bolts to get things lined up. When you tighten them down they always leave a mark in the paint. So by replacing these bolts with the originals one at a time after the parts are aligned, you cover up any marks that were left in the paint that were left by the mock up bolts. It gives you a little more room for adjustment without damaging the final finish.

It's a simple little trick that helps with the final product.

I then had to glass bead the lower grill surround, because I was not happy with how it was looking. So I took it down to bare metal again, and re-sprayed the black epoxy primer / sealer.

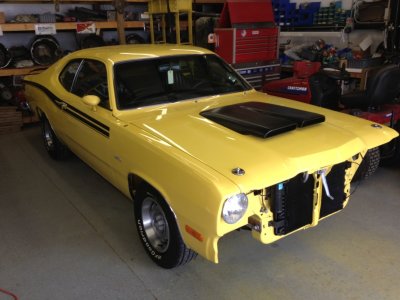
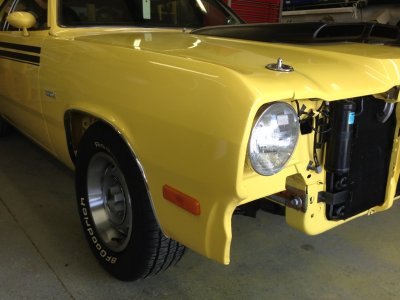
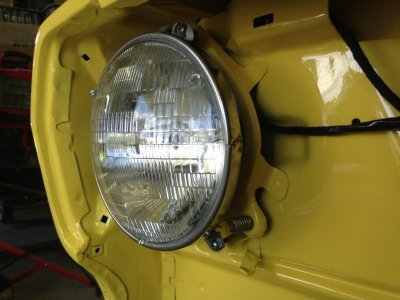
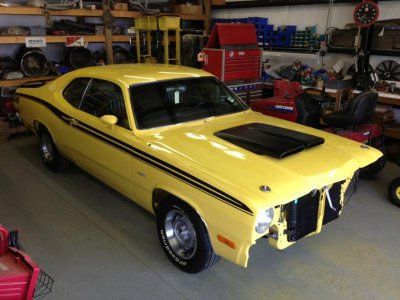
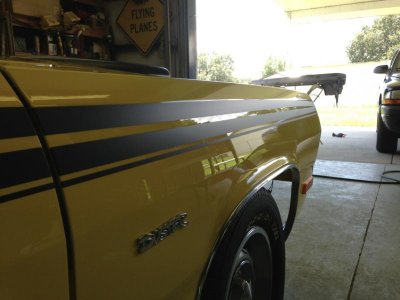
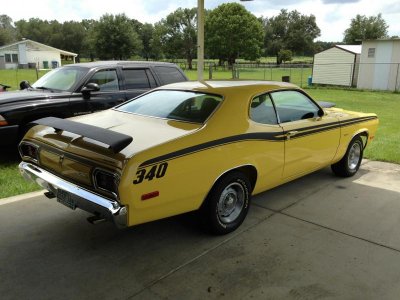
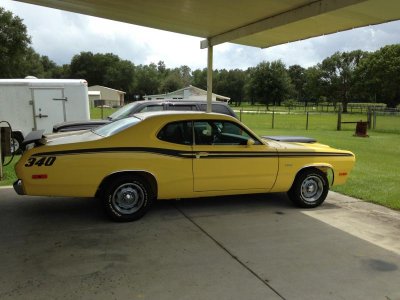
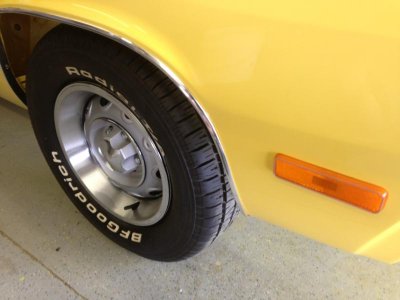
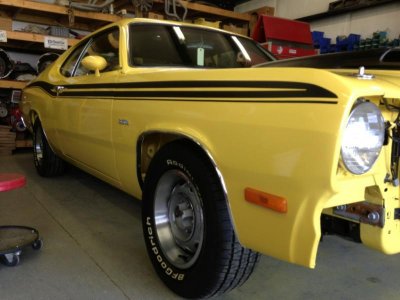
While I had the Duster rolled out of the shop, I snapped a few photos.......

- - - Updated - - -

image.jpgimage.jpgimage.jpgimage.jpg

- - - Updated - - -

Tonight I ordered a few more parts for the Bird.

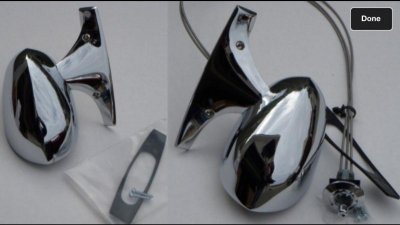
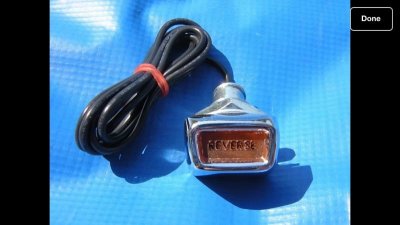
I ordered a set of chrome rally mirrors, a dash mounted "reverse" warning light and a new separate harness for the dash light. The reverse light is almost identical to the seat belt warning light, but the lens is a different color.

- - - Updated - - -

image.jpgimage.jpgimage.jpg

- - - Updated - - -

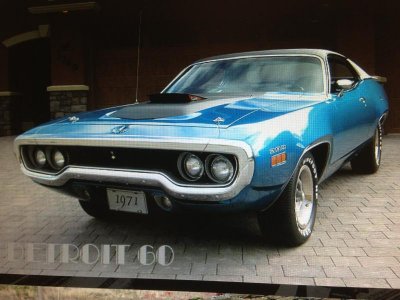
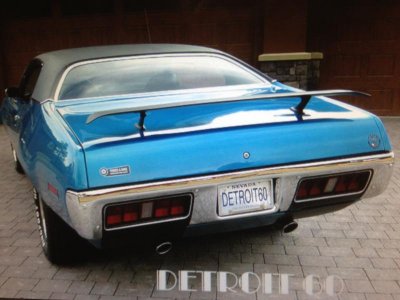
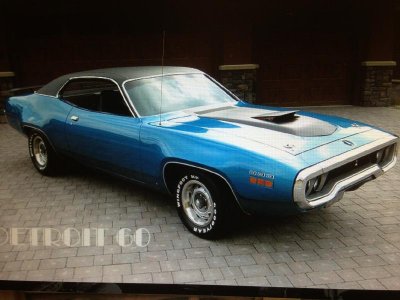
These are some items that I will need to make my car look just like this one.

- - - Updated - - -

IMG_0388.jpgIMG_0389.jpgIMG_0390.jpg

- - - Updated - - -

In fact, this car was built the day before mine was at the same plant................... It has a lot of the same options and is the same color with the full vinyl top........... They could be twins, but mine will now have a 440+6.................

- - - Updated - - -

Just a reminder of what is to come.
 
Auto Transport Service
Back
Top