• When you click on links to various merchants on this site and make a purchase, this can result in this site earning a commission. Affiliate programs and affiliations include, but are not limited to, the eBay Partner Network.

71 Road Runner Restoration Started

Progress........

Windows are in the Duster..... One more thing less to do, and one step closer to starting back up on the Bird.....

- - - Updated - - -

image.jpgimage.jpgimage.jpgimage.jpgimage.jpgimage.jpg
 

Attachments

  • image.jpg
    image.jpg
    77.7 KB · Views: 677
damm that is gonna be nice...i cant wait til ya get back on the 71. JUST DAMM NICE WORK!!!! keep us posted
 
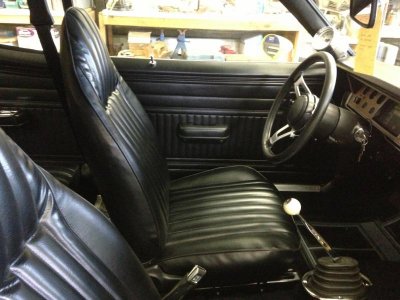
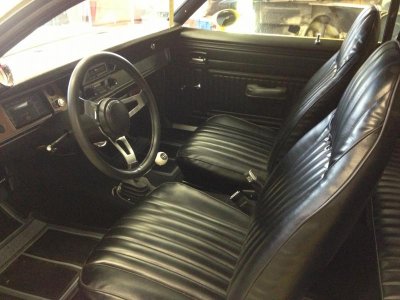
Interior is Finished!!!!

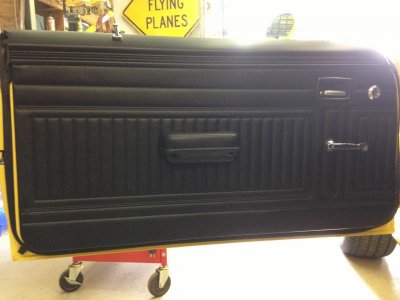
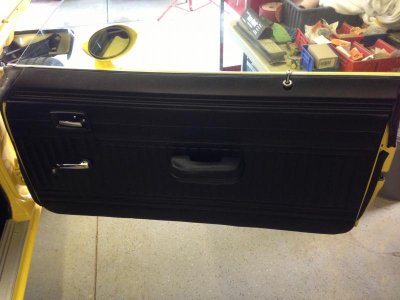
image.jpgimage.jpgimage.jpgimage.jpgToday after the glass was installed I was able to install both front door panels and all hardware on the Duster. It would normally be an hour job at the most, but like everything else with this car nothing is ever easy. The door panels had holes punched out for the retaining clips, but most of them were in the WRONG spots. So I had to mock fit the door panels and measure for each clip. Then I had to cut these new holes out with a razor blade while being very careful not to cut through the front vinyl of the panel. It was a major PITA. But it's done now, so one more thing off the list......
Getting closer to the day I start back up on the Bird!!!!
 
WOW!!!!!!!!!!! That duster looks great. You're not playing 2nd fiddle to anything on the work you've done.
 
I agree with the others, That Duster is one great looking car! You do some very high quality work!!
 
Today's Progress..........

Thanks for the compliments.

I accomplished a lot on the Duster today.

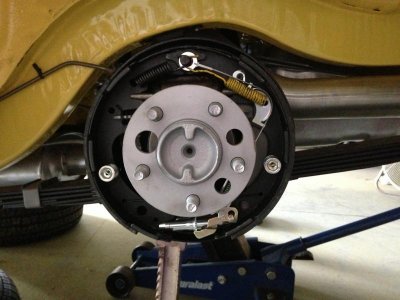
The rear brakes are finally done other than bleeding the system, adjusted the emergency brake and clutch, measured and cut the chrome 3 inch factory style tips to fit on the TTI tail pipes. I also had to cut the turn downs off the tail pipes too. Now I have to get the chrome tips stretched to slide over the tail pipes.

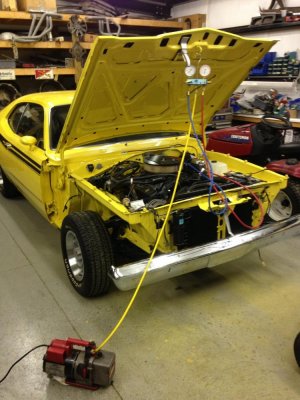
Then I vacuumed the A/C system down and it's holding great. That's always a good sign.

I added antifreeze and water pump lubricant / rust inhibitor. No leaks there either........

I changed over the engine fan blades to another one that was 1 inch smaller in diameter. The fan that was installed was just too close to the fan shroud for my liking. Now it has good clearance all the way around as it spins.

The new owner stopped by today and brought his step son to look at the progress on the car.

They were both pleasantly surprised.

I took some photos of the brakes after they were assembled with all new hardware. I've got them on my phone, but we have all seen brakes before. I'll post them if you want me too.

Looking forward to installing the chrome tips and tightening up the exhaust system.

Next step will be to wet sand the driver side front fender and paint it along with the lower grill surround. Then everything will be painted......

Talk to you all tomorrow.

Have a good night.

- - - Updated - - -

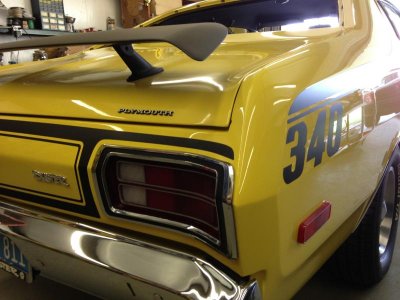
Here are a few pictures of the tail lights since they have been installed.

- - - Updated - - -

image.jpg

- - - Updated - - -

image.jpg
 

Attachments

  • image.jpg
    image.jpg
    56.1 KB · Views: 606
Ordered a few more parts during lunch

A few minutes ago I ordered a few decals and parts for the Bird. As soon as they come in I will post some photos.

In a few days I should have a complete new antennae assembly with fender bezel, a pair of 440+6 fender decals in reflective black, a small Road Runner medallion decal for the center of the steering wheel, and a pair of "air grabber" decals in reflective white for the top of the air grabber door.

Hopefully tomorrow when I get home I can finish up installing the chrome tips on the TTI exhaust system on the Duster.

I'll keep you all posted with progress.

Stay safe.....
 
Duster's looken' great !!, now get back to work on the RR...LOL...
 
I gotta say, I sure don't see any A-Bodies around my neck of the woods that are half as nice as that. Superb Job!
 
Damn that's nice, I've gotta quit looking at these almost done post (kinda depressing) haha. You really did a great job on it "two thumbs up".:headbang:
 
Thanks

Damn that's nice, I've gotta quit looking at these almost done post (kinda depressing) haha. You really did a great job on it "two thumbs up".:headbang:

Thanks again everyone. It's getting close, and I can't wait to get this one done so I can get cracking on the Bird.

When this happens I will be looking to you all for encouragement when I start getting burned out on something. I mean it's no fun burning off old under coating..... You know what I mean. But we all know that just as there is a start to something, there also has to be an end as well.

So please hang in there with me for a little while longer. I promised myself that I wouldn't work on the Bird until the Duster was done. This is a motivator to get it done and it seems to be working in my sick little twisted mind.... Lol

I'm really looking forward to starting work on my RR. You all have been great.

I plan on completing the TTI system on the Duster tomorrow. I'll post some photos of the chrome tips once they are installed.

Thanks.
 
So please hang in there with me for a little while longer. I promised myself that I wouldn't work on the Bird until the Duster was done. This is a motivator to get it done and it seems to be working in my sick little twisted mind.... Lol
You are not going to have a lack of folks chiming in brother .. with the quality of your build on the duster and your posts you'll have plenty of encouragement .. at least from me anyway. Looking forward to more posts on the yella car as well as your bird
 
well I for one don't know how much longer I can stand to look at that beautiful Duster......:poke::thumbsup:
 
Exhaust Tips Installed

Today I made another few good steps forward on the Duster.

I had to fix a caliper that had a broken off bleeder screw, that was caused when I dropped it taking it out of the box. I should have fixed it before it was installed....... Ooops!

Unfortunately TTI didn't make a nice set of factory looking tips for the A Body cars.

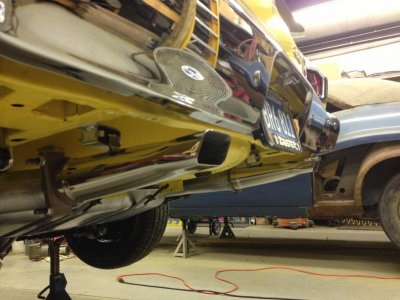
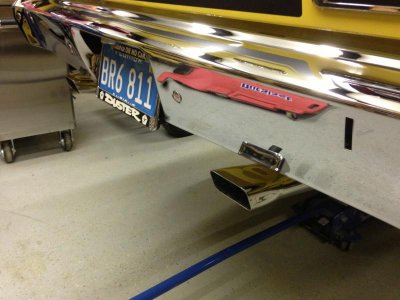
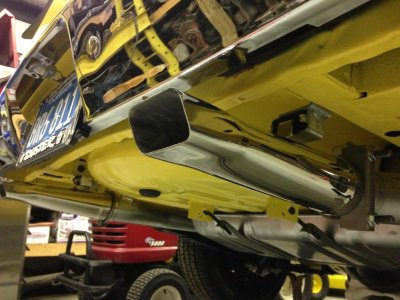
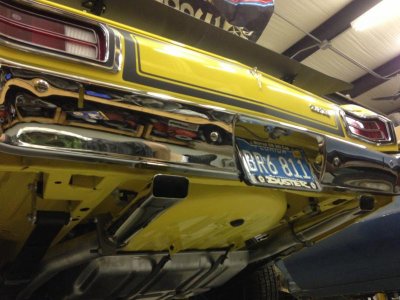
The 3" stainless tips that were made by Accurate Exhaust had to be modified to fit the TTI 3" tail pipes. The hangers on both the tail pipes and the tips were welded into position. Both hangers were not needed, so one had to be cut off.

So this prompted a lot of head scratching and careful measuring........ I couldn't just cut the tail pipe back because it had a "kick" in it to move it away from the leaf springs.

The flared flange had to be cut off the tips and the hanger had to be relocated into a different factory position. Then I had to cut off the turn down style tips on the existing TTI pipes.

Then I took the stainless exhaust tips to a muffler shop and had them expand them back to original size so they would slip over the existing pipe.

After all of this, I installed them. They fit very nice. Here is the end result................. I also included a photo of the AC gauges and vacuum pump in action.

- - - Updated - - -

image.jpgimage.jpgimage.jpgimage.jpgimage.jpg
 

Attachments

  • image.jpg
    image.jpg
    79.8 KB · Views: 614
Very nice! To be that close to being done is a great feeling....
 
Looks great I love these updates. Now just don't get any ideas about starting in on that Challenger before the bird!
 
Auto Transport Service
Back
Top