• When you click on links to various merchants on this site and make a purchase, this can result in this site earning a commission. Affiliate programs and affiliations include, but are not limited to, the eBay Partner Network.

71 Road Runner Restoration Started

Wish I had known about the T bars. My son cut mine off thinking there was no way to remove them. :BangHead:
 
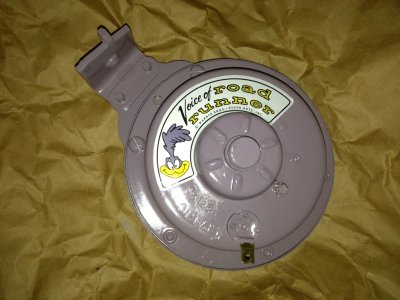
The Road Runner only has one horn, the purple "Voice of the RoadRunner" horn. Satellites and GTXs had two, thus the predrilled holes. Hope this helps!
 
Your Welcome!!!!

I'm glad I have been able to help out with this different little technique. You can do it from under the K frame or on top. Just be careful to make sure that the car is properly supported. Sometimes I also take the front wheels and put them under the car in addition to the floor jack and jack stands. You can never be too safe here.

It only takes one time to slip up and the results can be devastating. I hope I never have to remove another person from under a car that fell on them again...... I've done it a few times now. It's not pretty trust me....

BTW... You can make it Sam Adams, Becks or St Pauli Girl ......LOL

- - - Updated - - -

The Road Runner only has one horn, the purple "Voice of the RoadRunner" horn. Satellites and GTXs had two, thus the predrilled holes. Hope this helps!
Yes it does. You all helped me out with a question and provided photos too. That's one thing I really like here on FBBO.
One hand washes the other........ Thanks again to all who provided information!!!
 
Thanks for the step by step! Your goin right to town, good luck to you!!
 
Dash Removal

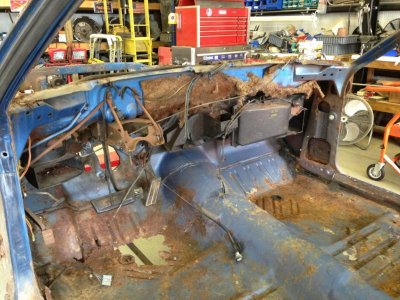
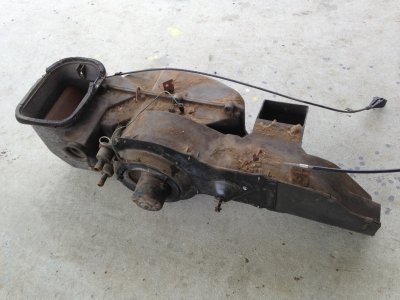
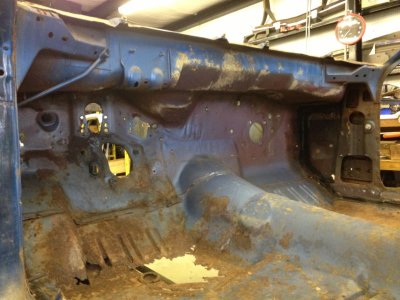
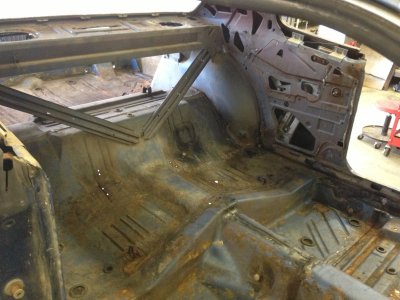
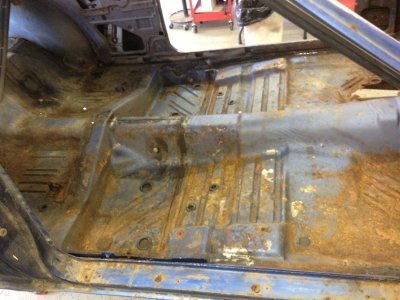
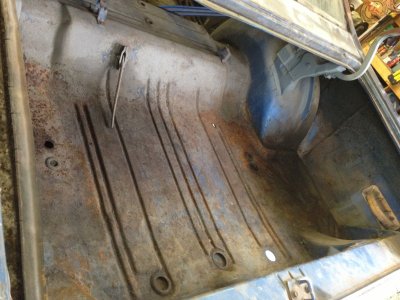
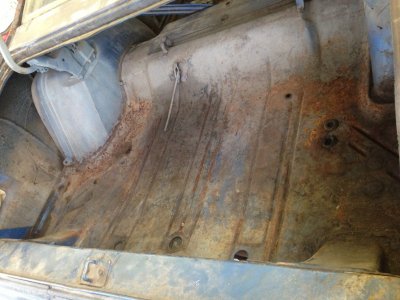
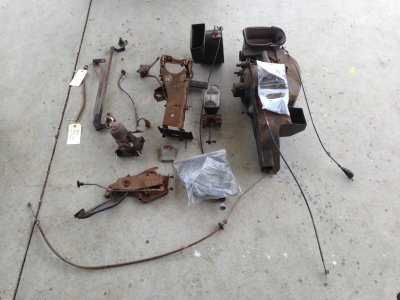
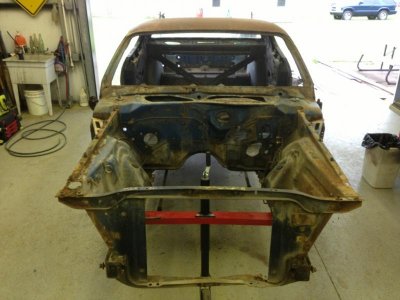
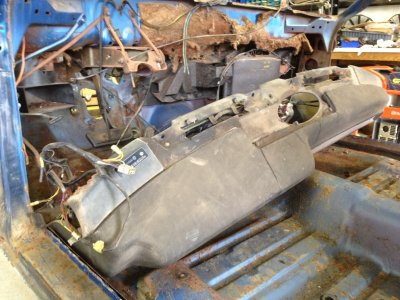
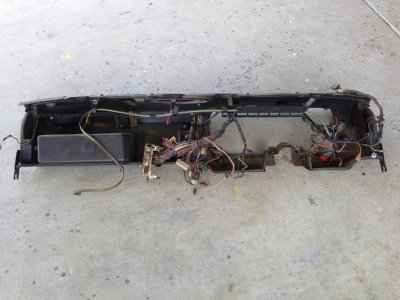
Today was spent removing everything from the firewall and interior section of the car. Then I dug out a lot of the old seam sealer and vacuumed everything out. There must have been about 50 pounds of dirt, sealer and loose rust hidden inside the car.

I will have to replace the cowling and firewall. I had a strong suspicion that I would, but after removing everything today, it confirmed what I was thinking.

Here are a few photos.......

- - - Updated - - -

IMG_2887.jpg

- - - Updated - - -

IMG_2265.jpg

- - - Updated - - -

IMG_7062.jpg

- - - Updated - - -

IMG_7144.jpg

- - - Updated - - -

IMG_9378.jpg

- - - Updated - - -

IMG_0413.jpgIMG_3961.jpg

- - - Updated - - -

IMG_2458.jpgIMG_2724.jpg

- - - Updated - - -

IMG_3218.jpg

- - - Updated - - -

I spent a lot of time taking a bunch of photos, along with "Bagging and Tagging".

This is how she looks tonight.........

- - - Updated - - -

IMG_3330.jpg

- - - Updated - - -

If things go as planned, I may attempt to put the Bird up on the rotisserie tomorrow. Then I can really start digging out undercoating and old seam sealer. The first thing I try to do when I place a car on the rotisserie is I give it a good bath with a pressure washer to clean away years of road dirt and dried on mud. The Bird will end up coming back down from its "Perch" when the metal replacement / repair begins.

This process may happen twice...........

- - - Updated - - -

The real condition of the car will show up after it has been blasted down to a bare metal shell. Time will tell....................
 
Way to go to town on this project! You're taking this thing apart almost as fast as it went together on the assembly line.

Looking forward to watching you work.
 
Wow, you caught up to and passed me! Any issues getting the brake booster off? I removed the 4 bolts. The right side (when looking at it from engine bay) is loose but, the left side will not budge.

Awesome job!
 
Wow, you caught up to and passed me! Any issues getting the brake booster off? I removed the 4 bolts. The right side (when looking at it from engine bay) is loose but, the left side will not budge.

Awesome job!
Thanks for the compliments. My car is a manual brake 11 inch Drum Brake car. (for now)

It doesn't have a power brake booster.

Start out by removing the steel brake lines from the master cylinder. You can leave the master cylinder bolted to the power brake booster. If you have removed it, that's OK too.

I always screw the bolts / nuts back in position when I remove them. It makes the reassembly process a whole lot easier and you don't have to worry about lost parts.

Your car should have 4 studs from the booster coming through the firewall. The nuts that you need to remove from the booster are inside the car. They also help to hold the brake pedal assembly in place on the firewall.

You will also have to remove the pedal bolt that connects the actual brake pedal to the rod coming through the firewall from the brake booster. This bolt has two different size heads and a rubber O ring on it. I think it's 11/16 " on one end and 3/4 " on the other.

Once these nuts / bolt are removed you should be able to pull the whole assembly out from the engine compartment side.

Then there are 2 more bolts that hold the firewall stiffener plate in position. I think the bolts also hold 2 wire loom clamps in place too.

Remove these two bolts and you can take the stiffener plate out if you want to. I have sometimes found some surface rust hidden on the firewall here.

I hope this helps.
 
Todays Progress, Parts Pictures

I didn't get the car mounted on the rotisserie as planned. Instead I pressure washed and stripped the K-Frame down. Now it's a lot easier to move around since nothing is attached to it.

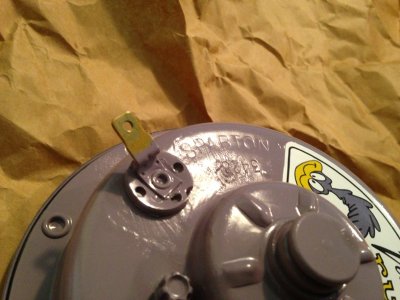
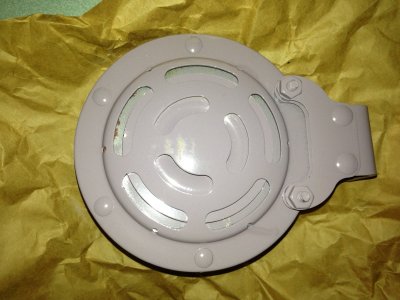
While I was working in the shop several packages arrived. The first was the NOS horn I mentioned earlier. It came in the Sparton Company manufacturing box.


Here are a few photos of it.

- - - Updated - - -

IMG_4387.jpgIMG_7195.jpgIMG_7762.jpg

- - - Updated - - -

Of course I had to test it out....................... Beep Beep !!!!

- - - Updated - - -

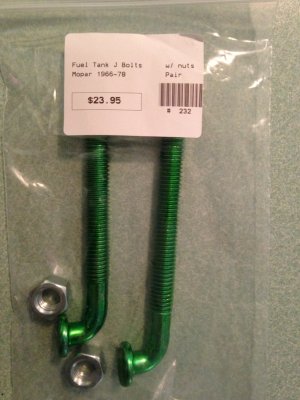
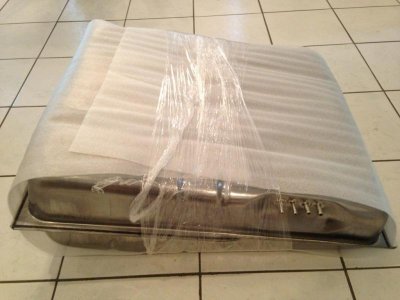
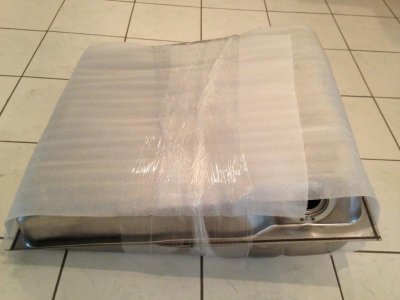
In the other box was the Spectra Premium gas tank. The green cad plated "J" bolts came in too..............

- - - Updated - - -

IMG_6730.jpgIMG_7516.jpgIMG_8475.jpg

- - - Updated - - -

Now I'm waiting on the stainless steel straps to arrive.

- - - Updated - - -

I did pressure wash part of the car. I removed most of the accumulated road dirt. Here is a before and after photo. Hope you can see what I'm talking about. The lighting wasn't the best.............

- - - Updated - - -

View attachment 142574

- - - Updated - - -

View attachment 142575

- - - Updated - - -

By accident I found out that my pressure washer can remove most of the undercoating. It takes about the same time as it would if you were to heat it up and scrape it off. I think the end result looks better too.

- - - Updated - - -

IMG_1757.jpg

- - - Updated - - -

If things go as planned, I will put the car on the rotisserie Saturday, so that I can start the cleaning process.

- - - Updated - - -

Here is how she looks now. More of the original B-5 Blue is evident. She is a little cleaner, but we have a long way to go....................
 

Attachments

  • IMG_0596.jpg
    IMG_0596.jpg
    183.5 KB · Views: 486
Wow, You sure are going to town fast with this bird! Looking good ill have to check back in a week, should be painted by then as fast as your progressing!! :)
 
Interesting idea using the pressure washer.

Is it a simple electric version, or gas powered?

It's a gas powered Husqvarna 3500 PSI unit. I was able to use it on the rear inside fender well too.

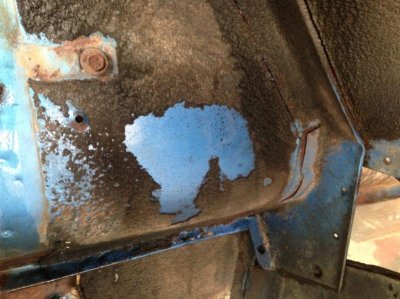
Here is a picture of a test spot showing the driver side rear frame rail and inner fender well. This is normally a spot where the undercoating is applied very heavy.

You can see it removed everything down to the paint.

This is a must before blasting the car unless you have an industrial / professional grade unit like Donny has.
Otherwise it takes forever trying to blast through undercoating.

Don't get me wrong. This is still a time consuming tedious process, and has to be done if you really want to find out what's lurking underneath.

(But it works pretty good)

If you don't have a pressure washer, you can normally find a place to rent one. Just make sure you get one that is powerful enough to do the job.

- - - Updated - - -

Wow, You sure are going to town fast with this bird! Looking good ill have to check back in a week, should be painted by then as fast as your progressing!! :)

Thanks!!! That sure would be nice having it painted in a week!!! I'm not that fast...... I will still be cleaning the underside of the car a week from now!!!!! LOL

The easy part is done now. They always come apart fairly quick. Now everything has to be gone through. That's where the time and $ comes in.
 

Attachments

  • image.jpg
    image.jpg
    110.4 KB · Views: 474
One more little bit of information. I was using the wide pattern tip holding the pressure tip fairly close to the metal. I'm going to experiment with the more narrow ones to see what works best. ....
 
You've really gotten into the bird since the duster is done now. Good tip with using the power washer. Can't wait to see what you do next on it.


That certainly looks like it did a hellavu job. Other than letting it sit out in the sun did you use any degreasers or anything under the hood prior to blasting it with the PW?

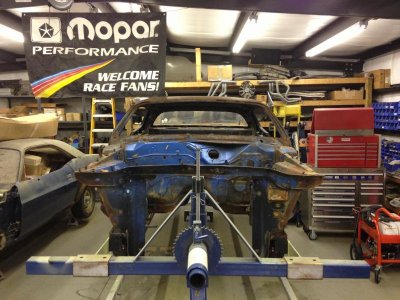
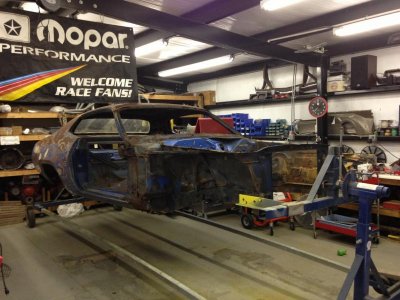
attachment.jpg


That certainly looks like it did a hellavu job. Other than letting it sit out in the sun did you use any degreasers or anything under the hood prior to blasting it with the PW?
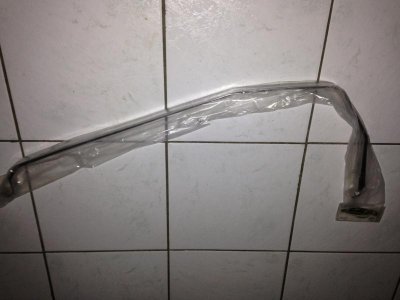


attachment.jpg


No just plain old water. No chemicals needed. After I'm done I sweep all the debris up and bag it for disposal.

- - - Updated - - -

I'm very careful with what I use in and around my shop. My 2 dogs are out with me most of the time and I worry about using something that would hurt them. So I keep things simple.

- - - Updated - - -

I didn't even let the car set out in the sun. I thought about it, but the water coming from the PW is cool so it probably wouldn't work.

- - - Updated - - -

Hopefully in the AM I can bolt the body shell on the rotisserie. Then I can remove the gas tank and the last final small bits and pieces.
The rotisserie allows me to get the every little nook and cranny. On the sheet metal areas that will be replaced I won't spend too much time on.

- - - Updated - - -

The wife told me the gas tank straps came in today.
 
Rotisserie Chicken!!!!

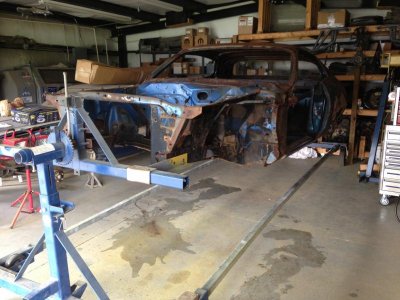
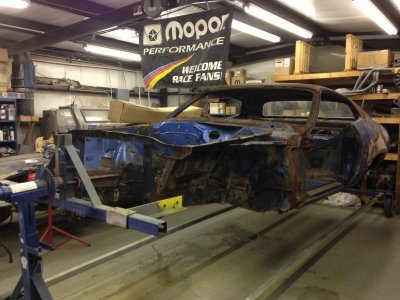
Just finished mounting the car on the rotisserie. Now everything is a whole lot easier to get to. Here are a few pictures.

- - - Updated - - -

image.jpg

- - - Updated - - -

image.jpg

- - - Updated - - -

image.jpg

- - - Updated - - -

image.jpg

- - - Updated - - -

And here is a photo of the new stainless steel gas tank straps.

- - - Updated - - -

image.jpg

- - - Updated - - -

It's been a good day.......
 
looks like its been a very good day! Love the MOPAR banner!!
 
Auto Transport Service
Back
Top