• When you click on links to various merchants on this site and make a purchase, this can result in this site earning a commission. Affiliate programs and affiliations include, but are not limited to, the eBay Partner Network.

71 Road Runner Restoration Started

Hey I've been following your post, great work. I have done several restorations, but never a mopar. I have a 69 roadrunner, the previous owner did some poor floor patches, so I am putting in a one piece amd, I am also putting the body on a rotisserie. Would you recommend to replace the floor pan before it goes on the rotisserie and then finish it underneath on the rotisserie. Or would it be ok to replace on the rotisserie, either way should I use supports in the door opening? As well I want a really nice clean finished job, I have a set of sub frame connectors, would you recommend to use them? Are they really needed? My goal it to have a similar finished product as your duster, it looks awesome.

Thank you for the compliments.

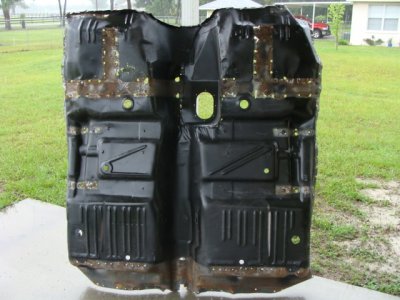
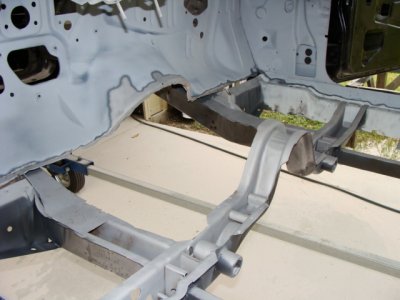
On my Duster I installed the sub frame connectors first. Then I mounted the body shell to the rotisserie and removed the entire front floor section. Then I installed an AMD one piece floor while it was on the rotisserie by spot welding and MIG in a few spots.

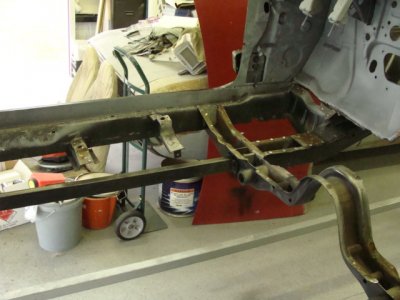
The sub frame connectors really stiffen the body up. On my Duster you could open and close the doors easily with one side lifted on a floor jack.

But honestly if you don't have a stout big block with a 4 speed or if your car hooks up really good and your NOT going to race the car, they are not really needed.

I have a Dick Landy built 440 going in my Lime Green 70 Challenger. The car will have a 4 speed. I will probably install connectors AND box in the spring hangers on this car.

I hope this helps.

- - - Updated - - -

Hey, you have the same stain on your left side rear floor pan as I do :D.

Are you talking about the grease stains on the bottom side????
Lol.....

- - - Updated - - -

As promised today I experimented a little with the different nozzles etc.

This is what I found out:

With the wide fan nozzle I was able to remove all of the undercoating on the front side of the cowling (where the emergency brake bolts against the firewall) in 10 minutes. The wide fan leaves a very clean undercoating free surface.

Then I went to the smallest nozzle. I was able to remove undercoating in an area of about 1 square foot in about 3 minutes. However the finished surface was not as smooth as it was with the wide fan. The pin point nozzle left behind a little residue of undercoating behind. 95% of the undercoating was gone.

- - - Updated - - -
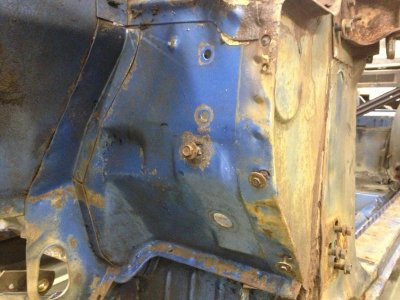
image.jpg

- - - Updated - - -

This is how the underside looks now...... There was hardly any undercoating here. It was mainly road dirt and dried clay.

- - - Updated - - -
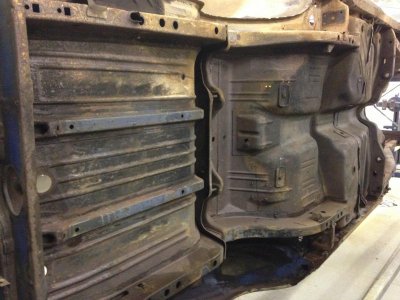
image.jpg

- - - Updated - - -

I cleaned a little over half of the driver side.

- - - Updated - - -
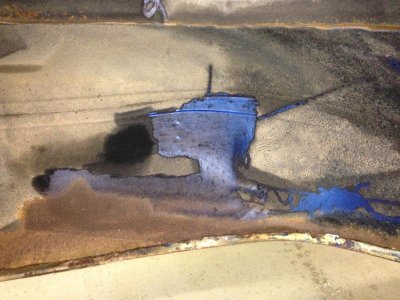
image.jpg

- - - Updated - - -
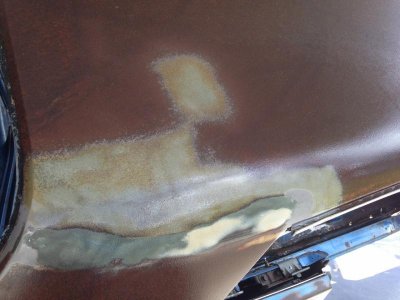
This is the inside area of the driver side rear quarter panel wheel well. This was a test to see how quick the pinpoint nozzle was. I was able to do this in a little over one minute. It still needs to be fine tuned. You can see the leftover undercoating residue on the metal if you look close. The areas that had undercoating are blue. The areas that did not have a surface rust brownish look.

- - - Updated - - -
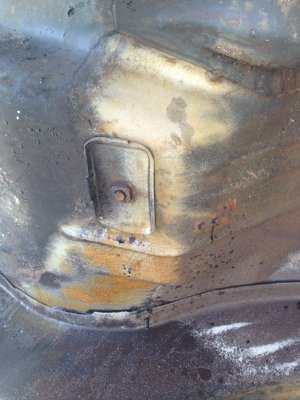
Hey I've been following your post, great work. I have done several restorations, but never a mopar. I have a 69 roadrunner, the previous owner did some poor floor patches, so I am putting in a one piece amd, I am also putting the body on a rotisserie. Would you recommend to replace the floor pan before it goes on the rotisserie and then finish it underneath on the rotisserie. Or would it be ok to replace on the rotisserie, either way should I use supports in the door opening? As well I want a really nice clean finished job, I have a set of sub frame connectors, would you recommend to use them? Are they really needed? My goal it to have a similar finished product as your duster, it looks awesome.

I just realized that I did not answer all of your questions. Sorry about that I was using my phone to post so I could add the photos I took today.....

As far as the frame connectors go: I'm not 100% sure if I would have attempted removing and installing the whole floor section while on the rotisserie if the car didn't have them installed, but it is a whole lot easier to get to everything that way. I have been debating that with the RR too since it will not have connectors........... If the rest of your body is good, I would say probably OK to do it. Sorry to sound like a politician here..........

I did not install door supports when I replaced the floor pan. I think they become more of an issue when you are changing out a cowling and / or quarter panels at the same time.

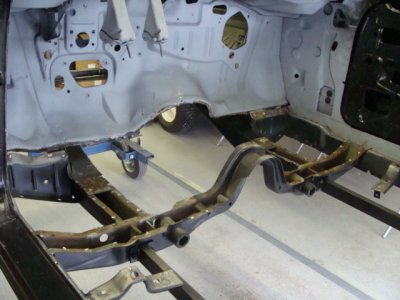
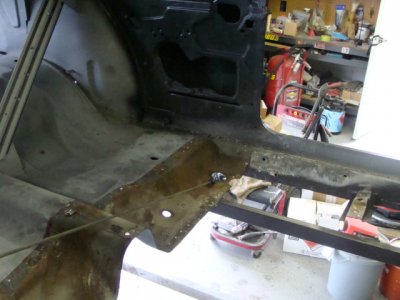
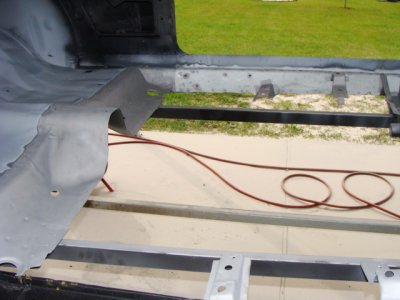
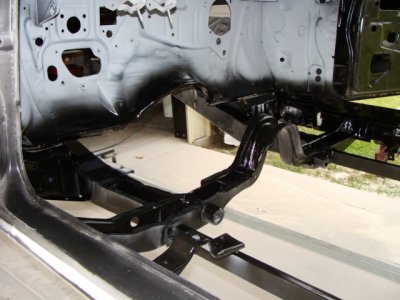
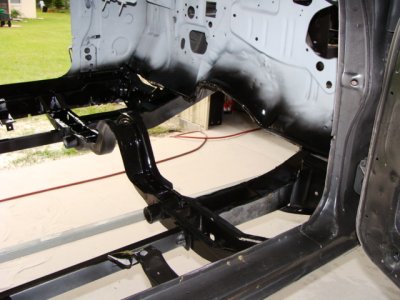
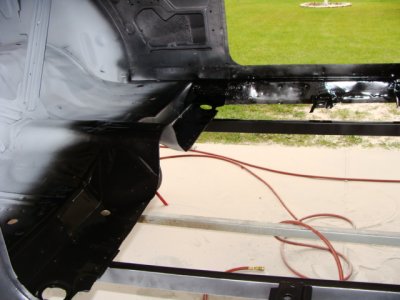
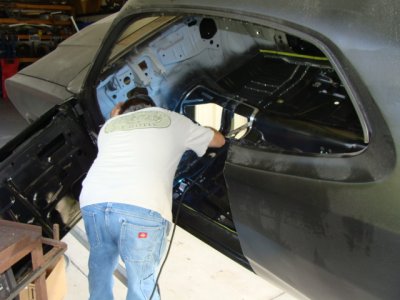
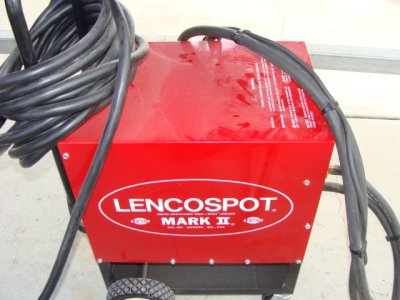
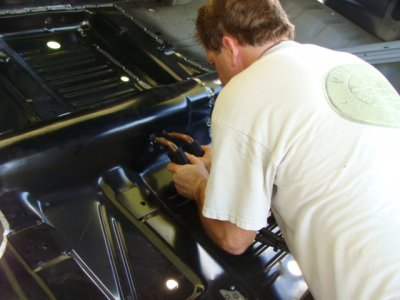
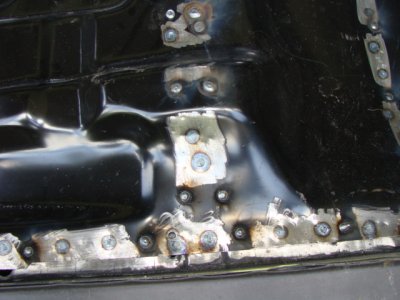
By using my buddies spot welder, I was able to duplicate the factory look. But it really didn't matter, because most of the spot welds were covered by seam sealer, and the rest were covered by carpet.4-26-09 Duster 070.jpg4-26-09 Duster 071.jpg4-26-09 Duster 072.jpg4-26-09 Duster 073.jpg

- - - Updated - - -
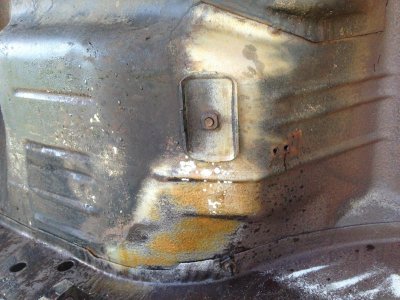
6-16-09 Duster 017.jpg6-16-09 Duster 020.jpg6-16-09 Duster 022.jpg6-16-09 Duster 023.jpg6-16-09 Duster 024.jpg

- - - Updated - - -
Duster 10-02-09 016.jpgDuster 10-02-09 017.jpgDuster 10-02-09 019.jpgDuster 10-02-09 021.jpg
 
I held the sheet metal tight against the frame rails using plain old self taping screws. Then we spot welded it in position and removed the screws. This was followed by MIG welding in the holes left by the screws. I had the car assembled for panel alignment. If you notice, the doors are in place and open. No twisting occurred because of the sub frame connectors.
 
Rear Window Removed

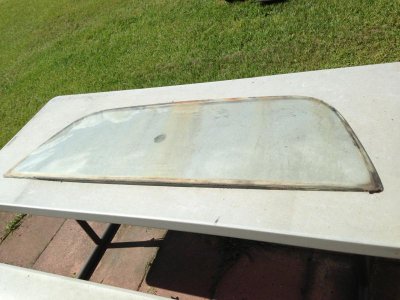
I just finished removing the back glass from Dirty Bird.

I am going to try out my idea with blasting so everything has to be removed from the car, especially the glass.

Its starting to look like this car will be an AMD poster child.....

Thats OK. At least it will be properly done.

- - - Updated - - -
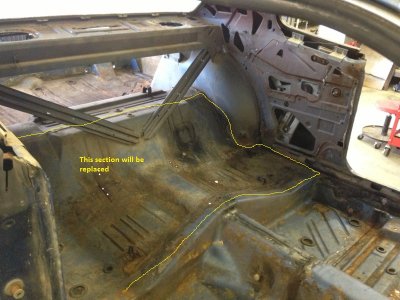
image.jpg

- - - Updated - - -

image.jpg
 
I see someone "improved" your package tray... looks just like mine :sad2:

Following your thread very closely.... its giving me the encouragement to get of my rear end in get back in the garage to work on my B5 71'
 
Words of Encouragement...................

I see someone "improved" your package tray... looks just like mine :sad2:

Following your thread very closely.... its giving me the encouragement to get of my rear end in get back in the garage to work on my B5 71'

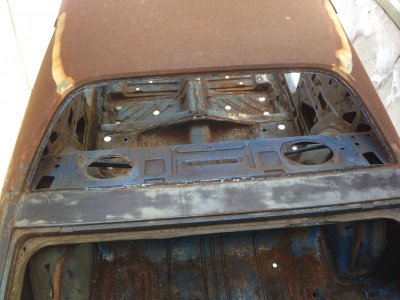
Thanks. I hope this thread helps you out. If you have any questions please feel free to ask. Yes someone improved the package tray. I was checking it out pretty closely today since the rear window is now out. It will require some surgery for sure, but as least it's not rusted out. (so there is hope).........

Now as Stacy David would say, "Get out in the shop and work on something !!!!!".................. LOL

- - - Updated - - -

Today was another experiment day to see what would work the best with removing the undercoating and surface rust. So again I used my trusty pressure washer.

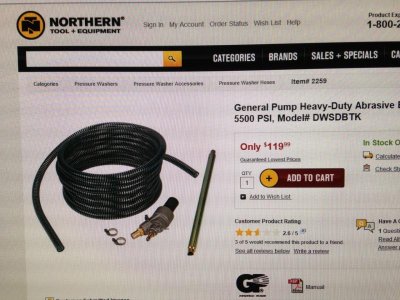
This time I used an attachment that allows you to siphon sand from a container and the pressure from the spray wand expels the media against the metal. I found a decent one from Northern Tool. It was delivered to my door for around $140 with the extra tip.

- - - Updated - - -

IMG_7661.jpg

- - - Updated - - -

It worked really good with removing undercoating and light surface rust. It had several disadvantages though. It made a big mess and went through the 5 gallon bucket of sand pretty quick. I was very happy with the results on the car.

- - - Updated - - -

IMG_9544.jpg

- - - Updated - - -

IMG_9515.jpg

- - - Updated - - -

One other drawback is the metal flash rusts very fast. This was not a problem after I sprayed a little Ospho on it.

- - - Updated - - -

IMG_3230.jpgIMG_9723.jpgIMG_3213.jpg

- - - Updated - - -

This is definitely a job for the summer time. You get soaked with water and sand...................... I wouldn't want to do it during the winter..............

- - - Updated - - -

So after the good results with the torsion bar cross member, I decided to try it out on the roof.........

- - - Updated - - -

IMG_5786.jpgIMG_3575.jpg

- - - Updated - - -

It blasted right through the body filler and exposed a previous repair where someone had added Dura glass and Bondo. It cleaned the factory lead filler up nice too.

- - - Updated - - -

Bottom line is this:

This tool works very good and it did not appear to warp the sheet metal on the roof. However, the sand consumption was pretty high and the blasting media could not be re-used. (Plus it made a big mess).

If you can find someone in your area to do the blasting for you, that's the way to go. It's labor intensive and dirty. What you see here is about 10 minutes worth of work and 50 pounds of sand. The roof took the longest time. The cross member was done in just a few minutes.
 
So now I have a dilemma........

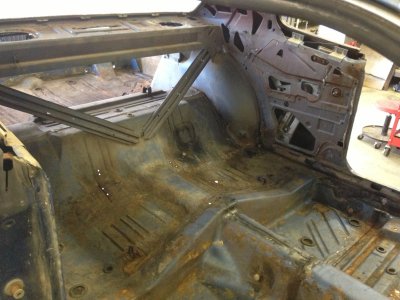
I found out that the floor pan under the rear seat is pretty bad. It looks like Swiss cheese in several spots. I was planning on replacing the front inner fender wells, lower radiator support, cowling and fire wall, front and rear floor pans, both rear quarter panels, Dutchman panel, trunk floor and trunk extensions.

AMD does not make the rear under seat floor pan for the 71-72 B Body cars yet. I don't know if they plan on offering it soon.

So I am done blasting and cleaning the car for now. There is no sense in cleaning metal that will be replaced later.

I will be using this new tool later in the restoration to make sure the frame rails etc. are rust free. But by then the car will be back off the rotisserie and on some sort of jig fixture. These areas will be a lot easier to access once the car is apart.

I plan on replacing one section at a time, probably starting with the floor pan under the rear seat first.
 
That is a dilemma hopefully a member is parting a suitable car for your panel
 
IMG_9250.jpg

- - - Updated - - -

It would be nice to get one from someone here. I still have the 72 Satellite, but it has a clear FL title and it is really too good to cut up for parts. I would rather sell it to help fund this project and see someone put her back on the road.

I wish this RR was half as good as the 72..........

- - - Updated - - -

IMG_8674.jpg

- - - Updated - - -

So if you have a good solid floor pan, preferably one from the South West, please send me a PM. Thanks
 
There is somebody selling the under seat floor pan on Moparts... IMO his price is reasonable... but he is South Dakota.

Which is why I haven't bought it yet :icon_mrgreen:
 
Thanks !!! I just sent him an email. Hopefully the shipping isn't too painful................ I'll let you know how it goes.
 
Great info on the power washing! I might give that a go myself. Could you post a pick of how your rotisserie is bolted to the rear bumper mounts? Is there any metal inside the trunk added for support? Thanks!
 
Your welcome!! Glad I could help. The power washing / blasting can get expensive pretty quickly. It goes through sand like crazy. One 50 pound bag lasted 10 minutes.

My car is bolted to the rotisserie on the rear by using the bottom two bumper bracket mounting bolts on each side. No additional reinforcement plates were used. I don't have any pictures on my phone, sorry.
 
There is somebody selling the under seat floor pan on Moparts... IMO his price is reasonable... but he is South Dakota.

Which is why I haven't bought it yet :icon_mrgreen:

I left several emails with this person and so far no reply. It might be simply because its the weekend and he hasn't checked his email.

But I have located another floor pan from a fellow FBBO member. It will probably take at least a few weeks or so to get one.

Thanks again for the tip.
 
The weekend is probably a good bet and its good to know you can get the right piece! Good luck..
 
You are correct Sir !!!!!

The weekend is probably a good bet and its good to know you can get the right piece! Good luck..

You were right Ron,:icon_cheers:

He contacted me today and said the under the seat pan was spoken for, but that the package tray was still available. So I asked him to send me some close ups of the package tray and let me know if the deal fell through about the under the seat pan.:yes:

I still have the other FBBO member here with one, (who replied as well) with another the under the seat pan. :icon_super:

I'm in no hurry, so hopefully something will work out. If I'm going to go through the trouble of replacing this part, I want the best that I can get.

Otherwise I could patch mine, (but I'd rather not).

Thanks again to everyone who has helped me with my parts quest !!!!!!
 
Auto Transport Service
Back
Top